Category Archives: Baking

Baking – Daniel Etherington’s bread experiements

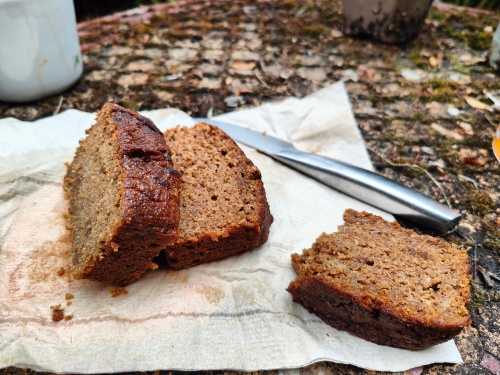
Banana malt loaf

Recently, I went hiking in the Lake District with my chums Alex (aka Mystic Mountain Al) and Dom. Among the provisions I took was a banana malt loaf.

I love a malty tea loaf, a Jamaican bun, things like that. Over the summer, I kept ending up with surplus ripe bananas after the kids went through phases of eating loads then stopping abruptly. So I thought I’d try a kind of hybrid malt loaf/banana loaf, something a little more wholesome than my usual white chocolate and banana cake. Not so much a treat as something you can eat for breakfast, elevenses, afternoon tea, or when climbing hills in the Lake District.

It did us proud fueling us up for Blencathra (peak in thick cloud) and England’s highest mountain, Scafell Pike (peak in thick cloud). The latter was particularly fun but also emotional, as my dad, Michael Etherington, mentioned it a lot over his lifetime.

He used to take us up Lake District hills and mountains when we were very young, as his parents lived there. This is me (chubby cheeks, purple coat) and my brother; I’m guessing it’s autumn 1974, which would make me four.

We discussed this recent trip with him while planning it. We reminisced about a great youth hostel circular we’d done in the Lakes back in 1997. He died in August, and all the while during this Lakes trip and subsequently I’ve had that confusing urge of the recently bereaved to send him quick messages, discuss our adventures with him, as a love of hiking was something he instilled in me. Messaging my mum, she said the Lake District was his favourite place. “He felt his happiest always in the Lakes,” she said.

I didn’t get any photos of cake with mountains in the background, but we did visit Castlerigg stone circle, near Keswick, where I took this photo of my dad on our 1997 jaunt. We’d already done a long day hike, and me, with the energy of a twenty-something, insisted we tack on a few more miles to visit the stones. In his sixties, he had sufficient energy for it too, despite an initial grumble. Indeed, he had a lot of energy even until recent years when arthritis compromised his lifelong physicality. We recreated the shot in memory of my dad.* I even wore his hat… though my head is clearly bigger than his.

Not only would he have liked discussing our walks in the Lakes, he would have liked this loaf as he was a fan of both cakes and over-ripe bananas.

Note, as you’re adding sticky syrups to the mix, ideally you need electronic scales. Just put your bowl on the scales and use the tare function!

Ingredients
180g butter, softened
80g dark soft brown sugar or dark muscovado
40g black treacle
50g malt syrup
2 eggs, beaten
1 tsp vanilla extract
180g plain flour (wholemeal if you have it)
3 tsp baking powder
1 tsp ground nutmeg
2 tsp cinnamon
2 tsp allspice
60g ground almonds
4-5 overripe bananas (approx 450g flesh), peeled and mashed
80g pecans (optional)

1. Preheat the oven to 160C
2. Line the base and sides of a 13x20cm loaf tin.
3. Beat the butter and sugar in a bowl until well combined and light. Beat in the syrups.
4. Gradually beat in the egg and vanilla.
5. Sieve together the flour, baking powder and spices then fold into mixture.
6. Fold in the mashed banana, along with the ground almonds. If using, fold in the pecans too. I think they’re a great addition, though the children reject the nuttiness – crazy kids.
7. Bake for 60 minutes, until a skewer inserted into the middle comes out clean. If it starts to brown too quickly, cover loosely with foil.
8. Leave to cool slightly, then remove and cool completely on rack.
9. Eat at will. Makes a great snack for a hiking holiday!

* Some may consider sitting on megaliths sacrilegious or irreverent. I discussed this with my friend Angeline Morrison, musician, historian, academic and lover of megaliths. As no one can honestly, genuinely know much about the religious beliefs of our neolithic forebears, we’ll never know if they would have objected. Certainly, for some of us, it just feels good to connect with these stones. And it was certainly important for me to feel connected to my dad. English Heritage may simply object due to the wear and tear factor. Apologies to anyone offended.

5 Comments

Filed under Baking, Cakes, Food misc, Travelling

Shrove Tuesday buns

Pancakes are all well and good, but there are other Shrove Tuesday foods in British tradition. Apparently. I was pleased to spot these in the book Cakes Regional and Traditional by Julie Duff.

They’re just my kind of thing – a yeasted sweet bun, with some spice and one of my favourite ingredients, ground almonds. You also slice them in half, remove some of the crumb, and mix that with cream, sugar and more ground almonds, using that as a filling. As such they’re a British cousin to Scandinavian semlor / semla or fastelavnsbolle or bollugadur (the Icelandic variation). I wonder what the historic connections are? Something to do with the Viking diaspora? One day I might learn how to be a proper food historian, though that would require being able to go to big libraries and re-learn how to research academically, something my childcare responsibilities preclude still. Never mind the plague dragging on. (It’s finally arrived in our house after two years of lucky dodges.)

Anyway, here’s a version of Duff’s recipe. One key fault with her original is the lack of a final prove. I left mine a little, but should have left them a lot longer – you can see they weren’t proved enough with all the cracking on the tops.

It is an amusingly old-fashioned recipe for these sourdough days. The book was published in 2003, but is still a real treasure trove. Even if many of the recipes used that trick of rushing the yeast at the start with the addition of a bit of sugar.

Dough
15g fresh yeast or 7g active dried yeast
5g caster sugar
75g tepid water
360g plain flour
6g mixed spice
50g caster sugar
50g ground almonds
2 medium eggs, lightly beaten. That is, about 110g beaten egg
140g whole milk, warmed slightly

Filling
75g single cream
115g ground almonds
50g caster sugar

Makes 12

1. Combine the yeast, 5g sugar and 75g water in a bowl and leave to activate and froth up.
2. In a large bowl, sieve together the flour and spice, then mix in the caster sugar and ground almonds.
3. Add the yeast mix, beaten egg and milk to the dry mix and bring to a dough.
4. Knead until smooth. It’s quite a sticky dough, so add a little more flour to make it more manageable, but not too much. Using the Dan Lepard method makes it easier – short knead, 10 minute rest, short knead, 10 minute rest, short knead, 10 minute rest. Final knead.
5. Form a ball and put in a clean, lightly oiled bowl. Cover and leave to prove until doubled in size. This will take a few hours, and will depend on the temperature. My heating has been broken, so it was a bit slow. (I don’t have a prover, proving drawer or airing cupboard.)
6. Weigh the dough. Mine was about 850g. Divide it into 12 pieces weighing about 70g each.
7. Roll these into smooth balls, then place on a baking sheet lined with parchment or silicon mats.
8. Cover again and leave to prove until doubled in size.
9. Preheat oven to 180C.
10. Glaze the buns with a little milk.


11. Bake for about 20 minutes, checking they’re not browning too much.
12. Cool completely on a wire rack.
13. While they’re cooling, make the filling by combining the cream, ground almonds and sugar.


14. When the buns are cool, split them in two, scoop a little of the crumb out (I find a grapefruit spoon useful for this), then crumble this into filling.
15. Spoon a blob of the filling back into the buns, sandwich them and serve.

Enjoy. Instead of pancakes. Or just before. To really be greedy on Shrove Tuesday even if you’ve no intention – or indeed concept – of fasting for Lent.

2 Comments

Filed under Baking, Cakes (yeasted), Feasts

Pandoro mark 1, Christmas 2021

Homemade pandoro

Happy Christmas 2021. I’m writing this on 27 December, which is only technically the second or third of The Twelve Days of Christmas (depending on how you count them). But like many, I’m already a bit worn out by it all. Consumerist Christmas starts in late October, primary school Christmas not long after, then many people have their decorations and trees up for advent. We tend to put our tree up around Santa Lucia, 13 December, but we have underfloor heating in our living room, so that’s total folly – it’s so desiccated now, if you so much as cause a slight breeze walking past, hundreds of needles fall. The other protracted part of Christmas is the baking – if you’re an obsessive baker like me.

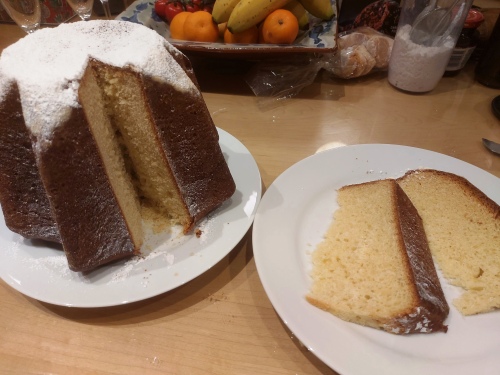
This year, I’ve done a Santa Lucia crown (during Advent, not technically Christmas), ricciarelli, ginger biscuits, a couple of chocolate salami, mince pies, game pies with a hot water pastry crust, genoise sponge for trifle, and other stuff I can’t remember. My biggest Christmas baking project this year, however, was that classic northern Italian Christmas cake, pandoro. Quite a lot of food considering the ongoing misery and frustration of Covid curtailed most of our plans. But we managed to eat most of it, with help from my parents, who we were at least able to see this year.

Making the pandoro was slightly bloody-minded. I find homemade bakes are almost always superior to palm-oil infused supermarket products, but the factory made pandoro I’ve bought over the years have been pretty good. Even the cheap one from Aldi. But I bought a pandoro tin last winter, so fancied trying it. I won’t give the recipe here, as I want to try other recipes (over the coming years) to compare. But it was an Italian one, where you started with a biga (a low hydration starter, made with just water, flour and a small amount of yeast).

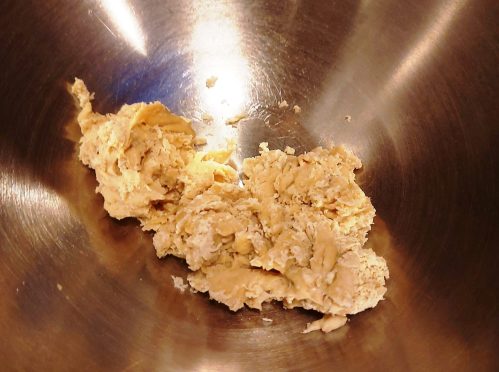
Pandoro biga

Then made two doughs, over two days. With each dough, you add more enrichment – some acacia honey infused with vanilla and zest, some butter, and eggs, lots of eggs.

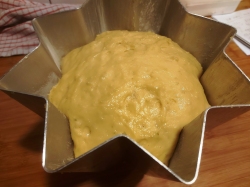
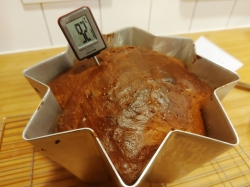
With this dough, most of the water came via eggs. One day I may do a hydration calculation as discussed in my previous post, but not now. Here are couple of pics of it in its nice eight-pointed star tin, before and after baking. Apparently, it needs to get to 92C to be fully baked.

Pandoro before baking

All I will say is that it was fun to make, and when eaten within a few days, was good. Though it staled much faster than the industrial ones, so we ended up toasting some – which is apparently non si fa, just not done, or at least according to Giorgio Locatelli writing in The Times. I was wondering if it would be good to use in another trifle, or for a zuccotto – an Italian dessert of Florentine origin that’s a bit like a semi-frozen trifle. But no, we’ve not got enough left now.

Homemade pandoro

3 Comments

Filed under Baking, Feasts

The hydration of enriched doughs

From that title, you’ll probably be able to tell if this post is for you. There’s no two ways about it: it’s one for bread geeks.

It was the feast day of Santa Lucia on 13 December, and I made my Santa Lucia crown, pictured above, with ravening children. This is an enriched dough, flavoured with saffron, made into a ring shape with two braids, and decorated with icing, sprinkles and candles. The sprinkles aren’t exactly traditional, but it’s what my kids like.

Making it, I felt my recipe still wasn’t quite right. The dough made for a delicious cake, like a super-brioche, but it was a bit soft and didn’t hold its shape well when braided and formed into the ring, or crown, shape. This got me wondering about the hydration of the dough.

Hydration and bakers’ percentages
Dough hydration is the proportion of water to flour, expressed as a percentage. So my standard loaf is made with 750g of water to 1000g of flour: that is, 75% water to 100% flour or 75% hydration (750 ÷ 1000 x 100 = 75). With the Santa Lucia crown, it’s 250g liquid (water and milk) to 500g flour, so I just kinda vaguely assumed it was about 50% hydration. But it’s obviously not as it’s so soft and sticky, due to the eggs and butter, and their water content.

Professional baking recipes use bakers’ percentages* along these lines for all the ingredients. This means giving the proportion of the different ingredients as a percentage of the flour (eg 6g salt to 1000g flour is 0.6% salt; 6 ÷ 1000 x 100). I used to include bakers’ percentages on some of my recipes (eg this challah recipe), and I thought I’d done a whole blog post about them, but I can’t find it, so I guess not. Maybe another day. If you really get into baking, and then really get into percentages and hydrations, you’ll be able to find all sorts of resources online, spreadsheets and calculators and whatnot.

Basic, real bread, is of course just water, flour, salt and yeast, so working out the hydration is easy. But how does the hydration work with enriched doughs? How do you work it out when the recipe includes not just flour and water (and yeast and salt) but also milk, butter and eggs? Working out the bakers’ percentage of milk in a recipe isn’t the same as knowing the percentage of water in that milk. So working out the hydration of the dough is another level of complexity. Read on.

Wondering about how my Santa Lucia crown dough handled also got me thinking how it compared with my brioche recipe, a quintessential enriched dough, and whether I could tweak the former so it’s more manageable like the latter. So here’s an attempt to compare both doughs: by doing their bakers’ percentages and working out the hydrations. I’ve probably lost readers who aren’t bread geeks by this point.

Fats, colloids and water percentages
So. Water is obviously 100% water. But what about milk? Vaguely remembering my O-level science, cow milk is a colloidal suspension of fat and protein molecules in water. Googling around, the consensus is that it’s 87% water.  This will vary with whether it’s full-fat or skimmed or whatever, but let’s go with 87%. Egg, meanwhile, is about 75% water.

It gets a little more complicated with butter, as there’s more variation. Most European butters are higher fat content, less water; indeed, EU law says they need to be more than 82% fat, and some are as much as 90%. I’ll admit I don’t buy posh butter, but both the supermarket brands of unsalted butter I have are 83% fat. Factoring in about 1% protein, let’s go with 16% water.

So:
Milk 87% water
Egg 75% water
Butter 16% water

Also, eggs. Eggs have shells. Domestic recipes don’t usually give egg in a weight, just “2 eggs”. But I know the eggs I use contain on average 55g of white and yolk.

Now, I hope I can handle the mathematics, as I’m a little out of practice.

Here’s my Santa Lucia crown ingredients (excluding glaze etc):
250g strong white bread flour
250g plain (all-purpose) flour
125g full-fat milk
125g water
6g active dried yeast
2 eggs, that is 110g egg
3g salt
50g butter, softened
120g caster sugar
A few sprigs of saffron, about 1g

Here’s a table. Column 1 is bakers’ percentage (as it’s half plain, half strong flour, the 100% total flour is divided in two), 2 the above ingredients in grams, 3 is the quantity of water in those ingredients in grams, and 4 is the percentage hydration. I worked out the figures in column 3 by dividing the wet ingredient by 100 then multiplying by the percentage water content discussed above. Eg the milk, 125 (g of milk) ÷ 100 x 87 (percentage of water in milk) = 21.8. Combining the figures in column 4 gives me the total hydration of the dough, ie the total water content of the recipe as a percentage of the flour (100%).

Ingredient 1 Percentage 2 Quantity (g) 3 Water (g) 4 Water %
White bread flour 50 250 0 0
Plain white flour 50 250 0 0
Milk 25 125 108.8 21.8
Water 25 125 125 25
Yeast (ADY) 1.2 6 0 0
Egg 22 110 82.5 16.5
Salt 0.6 3 0 0
Butter 10 50 8 1.6
Caster sugar 24 120 0 0
Saffron 0.2 1 0 0
Total 1040g 324.3g 64.9%

So I now know my Santa Lucia crown recipe is around 65% hydration. Alternatively I can work this out by totalling column 3, dividing this by 500g, the flour weight, and multiplying this by 100, giving 65%, give or take a decimal point. I just wanted to include column 4 so those percentages were writ large. It’s probably overkill… for the two people reading this post. This hydration isn’t that high, so I should be able to mould it better.

Moving on, here’s my brioche recipe.
90g full-fat milk, warmed
25g caster sugar
10g active dried yeast (or 15g fresh)
400g strong white bread flour*
5g fine salt
100g butter, softened
4 medium eggs (220g), beaten

Here’s another table:

Ingredient 1 Percentage 2 Quantity (g) 3 Water (g) 4 Water %
White bread flour 100 400 0 0
Milk 22.5 90 78.3 19.6
Yeast (ADY) 2.5 10 0 0
Egg 55 220 165 41.3
Salt 1.25 5 0 0
Butter 25 100 25 6.3
Caster sugar 6.25 25 0 0
Total 850g 268.3g 67.2

So the hydration here – either worked out by adding up the figures in column 4, or by 268.3 ÷ 400 x 100, is 67%, give or take a decimal point again. Surprisingly slightly more than the Santa Lucia recipe. Though they are somewhat different, with the brioche getting more of its liquid content from eggs and having more butter. I find this brioche dough easier to mould but that may well be as it has a higher butter content. I rest it in the fridge until the butter has firmed up more. Perhaps I will tweak my Santa Lucia crown recipe next year, and give it a rest in the fridge to firm up the butter. We can resume this fascinating discussion in a year. Here’s another pic of the Santa Lucia crown, cut open.


* Where you put the apostrophe is debatable. I like to think they’re the percentages of many bakers, not just one, hence bakers’ percentage instead of baker’s percentage. But I don’t suppose it matters much. Anyway, the reason professional bakers use this system is to scale up recipes but I’m not going into that here. The purpose of this post was to get my head around hydration of enriched doughs, and compare two recipes.


10 Comments

Filed under Baking, Cakes (yeasted), Discussion

Mannele or stutenkerl, little dough men for St Nicholas’s Eve, 5 December

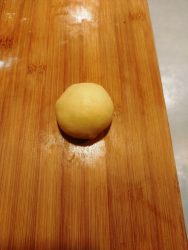
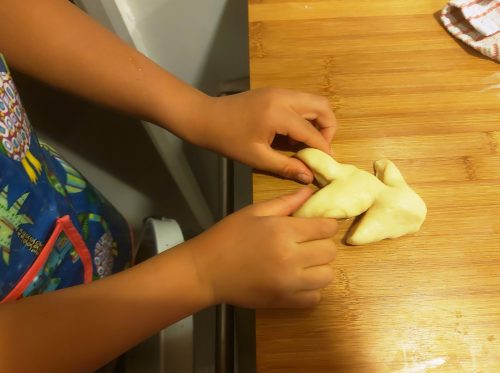
This is my first attempt at making these. They’re quite crude, but it was a fun project to do with my eight-year-old. I first heard about these as “mannele brioche”, little enriched dough buns from the Alsace baked for St Nicholas’s Eve, 5 December. Turns out they’re more widespread than that, existing with various names and variations throughout a wide band of central Europe from Luxembourg to Switzerland.

The most common name is stutenkerl, a German word made from combining stuten, rich dough, with kerl, a word for “lad” or “guy”. Another name used in other parts of Germany is weckmänner, with weck a type of long bread role and männer meaning man, small man or young man. An alternative translation seems to be watchman, with weck related to the English word wake, as in awake. Or something. I don’t speak German at all, and although my dad does, he wasn’t too sure either, so I’m blundering around online looking at other recipes and dictionaries. Any native German speakers reading this please do comment! I get the impression German is as full of regional dialects and historical slang as Italy (a country I know a little, and the first home of this blog), which is unsurprising, given how both are relatively modern countries created from unification of various states with their own cultures and linguistic histories.*

The word mannele, meanwhile, I assume is related to the word “mannequin”, which is just a Frenchification of the Dutch manikin, meaning a little man or dwarf.

As well as being part of the St Nicholas’s Day tradition in some areas (and can be known as Klausenmänner), they’re also made as part of celebrations for St Martin’s Day, Martinmas, 11 November, in others (and known as Martinsmänner). Either way, they’re enriched dough figures and any resemblance to St Martin or St Nicholas – either the 4th century saint of Greek descent or the jolly fat man in red from modern times – takes a fair amount of imagination. Instead, just see them as fun little edible figures, like a gingerbread men, and as such perfect for kids. Traditionally these would be left out as a snack for St Nicholas on the night of 5 December, and he’d leave gifts. Today, for many of us, all of these other traditions have been subsumed into the Coca-Cola Santa, who’s given a yucky supermarket-bought mince pie or whatever, on 24 December.

You can make them by using a gingerbread cookie cutter, or you can cut and shape a sausage of dough into a figure, or you can cut a template and cut them out with a knife. If you look at some of the professionally, or more expertly, made ones online, some have lovely details like scarves and boots, along with a pipe. Me and the boy made ours with the first two techniques, and they’re pretty basic. But there’s something quite atavistic about them. It’s easy to imagine dough being shaped into basic figures and used as votive offerings in ancient times so while we scoffed them like breakfast brioche, there was a nice sense of continuity, eschewing all the barbarity of modern consumerist Christmas.

1. Warm the milk to about body temperature (37-ish C).
2. Stir in a tablespoon of the sugar then sprinkle over the yeast and leave to froth up.
3. Put all the other ingredients in a large bowl, or the bowl of a mixer.
4. Pour in the yeasty milk, then bring together. It’ll be quite a damp mix as, although there’s not much actual liquid (milk), there is all that melted butter and eggs.
5. Either form a shaggy dough then turn out and knead by hand until smooth, or use a mixer with a dough hook.
6. To give the fats a chance to firm up a bit, put the dough in the fridge for an hour or so.
7. Take out of the fridge, then leave to prove until doubled in size.
8. Turn out the dough and knead briefly to distribute the gases.
9. The total dough weight is about 1040g. Divide this equally and shape into balls. I did 12 balls at 86g each. Or go for 10 at 104g for larger little men.
10. Preheat the oven to 180C.
11. Now, you shape them. You can roll the dough and use a cookie cutter, or draw a template and freestyle, or you can roll the balls into sausage shapes, then using a dough cutter, knife or even kitchen scissors, snip like this:

12. Doing it in a bit of a rush on Saturday evening with my eight-year-old son, we did the cookie cutter and sausage technique, just to try, as it was our first time making these.

13. Tweak out the limbs, shape the head a bit, then brush with milk and decorate with currants or raisins as you would a gingerbread man.


14. Place your little dough men on baking sheets lined with parchment or silicon.
15. Glaze with egg, or milk, or a mix.
16. Bake for about 20 minutes or until nicely golden brown.
17. Cool on a rack.
18. Enjoy, but remember to leave one for St Nicholas. Or indeed St Martin, if you do them then, though I’m not sure if he visits houses and gives gifts.

Oh, and here are some other St Nicholas day food I’ve covered on here: a British steamed pudding; speculaas from the Netherlands; and Polish honey cookies. Ergo, it’s not all about mince bloody pies at this time of year!


* Italy was unified in 1861. The German Empire was only formed in 1871. Never mind East and West Germany only re-unifying in 1990.

Leave a comment

Filed under Baking, Feasts, Recipes

Chocolate beetroot cake (vegan)

As my previous post patently indicated I’m not a vegan. But I am keen to keep building a repertoire of good plant-based bakes for when vegan friends visit, or just because reducing reliance on the environmentally problematic meat and dairy industry makes sense.

Not that consumer choices really make that much difference in the grand scheme of things. If only we had a political system where our elected representatives genuinely got on board and introduced the far-reaching environmental and energy policies we need, right now*. I’m deeply cynical that anything meaningful will come out of COP26. And deeply worried for the future. What a world we’ve created for our children.

In the meantime, as humanity continues to fail to galvanize in the face the climate emergency*, I’ll continue baking.

Anyway. In the same way carrots make for a nice, moist classic cake, beetroot does a great job of creating a moist, one-of-your-five-a-day, chocolate cake. I do chocolate beetroot muffins already, but this is another option. You can ice it with a (vegan) butter cream too. I had a little vegan margarine left so just added a layer of raspberry jam and choc butter cream in the middle, using some Chococo baking drops my mum had given us a while back.

I’ve had this recipe a while and originally used soya milk, but it’s a lot easier to get more vegan milk alternatives these days, and we always have oat milk. We prefer oat milk, and there are a couple of places in town now where you can get refills**.

400g vegan “milk”. I’ve used soy and oat.
30g white wine vinegar
200g vegetable oil
425g plain flour
75g cocoa powder
11/2 / 6g teaspoon bicarbonate of soda
1 / 4g teaspoon baking powder
Pinch of salt
180g caster sugar
About 2 medium beetroots, peeled and grated. That is, about 300g before peeling, 250g peeled.

1. Oil and line two 20cm sandwich tins. Alternatively, use one larger tin if you don’t want a layer cake, say 25cm round or bundt.
2. Preheat the oven to 180C.
3. In a large bowl, combine the oat milk, oil and vinegar.


4. Sieve together the flour, cocoa powder and raising agents.
5. Add the flour mix, pinch of salt, and grated beetroot to the bowl and stir until well combined, with no patches of dry flour.


6. Pour the batter into the tins and bake for about 40 minutes or until a skewer comes out clean.
7. Cool in the tin for 10 minutes then turn out and leave to cool on racks.
8. When cool, decorate how you like. As well as a filling, I dusted the top with cocoa and icing sugar. Previously I’ve done it and served it with a vegan chocolate custard made with soya milk, sugar, cornflour and cocoa.

It’s a pretty good cake. This particular one I made then fed to four kids after school. They ate it without batting an eyelid. We didn’t mention the beetroot. One thing I would say about a cake such as this compared to a non-vegan one is that it’s crumbly and not as rich. Butter and egg yolk give a fatty richness that I’m still working on finding with a vegan cake, plus they’re also better binders.

As I wrote this blog, I found out that the sister of my sister’s boyfriend in Sydney is an accomplished vegan baker called Lancey Morris. She has a page on her site about egg alternatives. I know about a lot of these things, it’s just learning how and when best to utilise them. I’ll be visiting Lancey’s site a lot in future I suspect.

* We galvanized to face Covid-19, producing a vaccine in record time. Even in the face of all the nonsense, lies, misinformation and false news (ie not news). The climate and environmental crisis (of which Covid is a factor, the result of our rapaciousness exposing us to more zoonotic organisms) is sadly accompanied by an even bigger barrage of lies and misinformation. But there’s some deeper psychology at work that seems to be stopping us from doing what we need to do. We’re a bizarre species, seemingly so determined to indulge in epic self-harm.
** Refills are expensive compared to just getting more in Tetra Paks from the supermarket. As with so many ethical food decisions, you pay more to do the right thing, which is a hard sell when so many people are suffering financially anyway. I did struggle with why oat milk refills are expensive – the producet itself mostly just oats and water, not expensive ingredients. But supermarkets have the economies of scale on their side, and sell diary milk as a loss leader – totally unrealistically price to keep customers loyal, but drive farmers into worse and worse practices trying to make a living themselves. Likewise they can offer Tetra Paks of oat milk, say, at a lower price than the small refill shops. Our agricultural and food supply chain is so riven with problems, even before Brexit and Covid made things even more difficult and expensive. Anyway, for us, avoiding some Tetra Paks at least means we’re using less wasteful packaging. It’s hard to even recycling Tetra Paks. Our local council doesn’t include them in kerbside recycling, and even if a carton recycling option is available to you, it’s a false economy. Tetra Paks and similar laminated cartons are made of such an awkward mix of foil, card and plastic, “recycling” them is arguably pointless. It’s highly energy inefficient to transport them to specialist recycling facilities then disassemble them. Even when they’re broken down, the resulting materials can’t all be recycled anyway. The Tetra Pak company does have environmental corporate social responsibility policies, but when its core product is so problematic, can such policies really compensate? Or is it just more corporate greenwash?

2 Comments

Filed under Baking, Cakes, Vegan

Chocolate chip yogurt ring cake, ciambellone

This is my take on Rachel Roddy’s chocolate chip and yogurt ring cake, which is her take on another recipe found on Nigella Lawson’s website, which is itself a version of a teatime cake made in many an Italian household, a ciambellone (big ring shape). Or indeed similar to a cake make in the Ukraine, and probably other places. All recipes have heritage, they ebb and flow between cooks and countries.

I love the ring shape, but must admit I hesitate before using my aluminium ring tin, which Rachel gave us when were living in Rome in 2013. I can be a bit slapdash greasing and flouring it, and fail to create a satisfactory non-stick. Then my cake sticks. Then I get cross. Luckily, it worked well this time – I brushed the tin with melted butter and oil, then floured it liberally.

Anyway, when eating this cake, we’ll think of Rachel, who is poised to publish her third recipe book, An A-Z of Pasta: Stories, Shapes, Sauces, Recipes. Hopefully I’ll get a copy soon, and try some of the recipes. We’re a pasta family, and I have made fresh pasta with the kids, but Rachel’s books should give us some great ideas for getting it right, and matching sauces well.

Rachel does her recipe using a 125ml yogurt pot, using it like American recipes use cups. I like grams. I grew up in the weird British 70s and 80s when we used grams and ounces and feet and metres…. in fact, we’ve still not made any firm decisions about metrication nationally. But I have. My parents’ factory, where I worked as a youth, did everything in millimetres, and I did a lot of hitchhiking in New Zealand, where how far I plodded down highways, how far I had to go, was in kilometres. Then we lived in Italy, which, despite being a country possibly even more tied to tradition that Britain, seemed to be able to cope with properly metricating.

This is a great recipe. Many cake recipes are prissy and can be a bit unreliable. But this is one of those ones that’s forgiving and easy – basically chuck everything in a mix, though I sieve the powdered ingredients together first to homogenise them. It also lends itself to changes – use vegetable oil or olive oil (Rachel does the latter, as, you know, olives grow in Italy, whilst here we grow a lot of rapeseed); use 100% plain flour, don’t bother with the cornflour; leave out the lemon zest or change it to orange; add cocoa; add nuts or fruit or whatever you like.

You may of course prefer doing it with a pot, in so, go back to Rachel’s version on The Guardian site. Go for it! But if, like me, you prefer baking when everything is in grams, you’ve come to the right place.

150g plain full-fat yogurt
130g vegetable oil (plus some for greasing)
3 eggs (about 175g of egg)
220g caster sugar
6g vanilla extract
zest of ½ unwaxed lemon (I’m a grams purist, but this much zest won’t even weight 1g)
100g chocolate chips (you can of course add more if you’re that way inclined)
175g plain flour
75g cornflour
8g baking powder
Icing sugar (to serve)

1. Prepare a tin – either a 22cm springform greased and lined, or a well greased and floured ring tin.


2. Preheat the oven to 180C.
3. Sieve together the flours and baking powder.
4. Beat together the wet stuff, zest and sugar, then add the chocolate chips.


5. Beat in the sieved flour until it’s all mixed into a loose batter.


6. Pour into the prepared tin.
7. Bake for 30-35 minutes until a skewer comes out clean. Note, if you’re using a round tin instead of a ring tin, it will take longer to bake, as the heat will take longer to penetrate the centre. So more like 45-50 minutes.


8. Cool in tin for 10 minutes then turn out to cool completely. Good luck with this bit if you struggle with aluminium ring tins like me.


9. Serve dusted with icing sugar, while browsing Rachel Roddy’s A-Z of Pasta.

Leave a comment

Filed under Baking, Cakes, Recipes

Wild garlic focaccia

Wild garlic focaccia

When I was a little kid in the 1970s, I was intrigued by the copy of Richard Mabey’s 1972 classic Food for Free on my parents’ bookshelves. But I also loved actual shopping with my mum. I remember walking down the high street of my home city, Winchester, her carrying a wicker basket and us visiting actual grocers, bakers, fishmongers and butchers. But Sainsbury’s had also arrived, and they were soon gone. Put out of business. Times changed.

I loved the supermarket too, fascinated by the variety and such things as hazelnut flavoured Mr Men yogurt. So we weren’t exactly food foragers, but my mum is knowledgeable about plants so could often identify things in hedgerows and woods on family walks. Like most people, we foraged blackberries, but while I did learn that rosehips had been used to make a vitamin-rich syrup during the privations of World War 2, for us at primary school they were more important for crushing up and sticking down the back of other kids’ shirts as itching powder.

Foraging, like baking, is of even more popular these days. And spring is when, among other things, the wild garlic appears. Wild garlic, like blackberries later in the year, is an entry level foraging plant, it’s easy to identify and can be plentiful. We met up with some old friends the other day, for our first pub garden get-together in who knows how long, then took the long way home afterwards. Dom took us to a favoured wild garlic patch, importantly away from the main dog toileting route. A strong garlic flavour is good. A dog wee flavour, not so much.

Wild garlic tends to grow in cool, shady places in deciduous woods and close to streams. Your nose may well help you find it. It’s so pungent, in principle it’s hard to confuse. Though it does grow alongside lords and ladies1 (Arum maculatum), whose young leaves can look similar at a glance but are a very different shape when inspected. And don’t smell of garlic. But they are also toxic, so take care.

Fresh wild garlic - washed

Food for bears
Wild garlic is a wonder. Even its Latin name is great – Allium ursinum, bear garlic. Do bears like it? They’re smart omnivores, so it wouldn’t surprise me. We hunted them to extinction in Britain though, so it’s not something I’ll ever see here. The common name I grew up with for wild garlic is ramsons, which apparently derives from the old English hramsa, and may be related to the Greek krómmyon, meaning onion.

Anyway. We got a lot on that jaunt with Dom and family. I say a lot, but it was actually only two small nappy disposal bags, which were buried at the bottom of our backpack (unused), a legacy of the kids’ younger days.

If you have a lot of wild garlic, you may well need to process it. Years ago, when we still had an airing cupboard, I dried it, but found it lost its flavour. Fresh, it makes a good pesto, whizzed up with nuts, oil, grated parmigiana and seasoning. It’s also good for a simple pasta, just roughly chopped, softened in olive oil and combined, perhaps with a squish of lemon juice. You can also use it to make the Middle Eastern coriander condiment zhoug (thanks to my friend Alex, owner of Middle Easten food business Kabak for that one). Another way to process it was suggested by Dom: wild garlic butter. Just chop the garlic leaves fine, then combine it with softened butter, form into a roll, then freeze in greaseproof paper. You can then cut slices off to cook with, using it in lieu of normal garlic in recipes.

Focaccia variations
This year, I had another thought – wild garlic focaccia. As with every idea, it’s already out there on the internet, but I just used my basic focaccia recipe and added some wild garlic whizzed up in a food processor.

What we know as focaccia in Britain is more specifically Genoese focaccia, a white, somewhat soft tray baked bread containing a decent amount of olive oil. They bake it with salt, olives or herbs like rosemary. I’ve asked one Italian friend if they eat Allium ursinum over there, and he says yes, but not often. Which surprises me, as they have a strong foraging culture there. Even our local market in Rome would sell a misticanza2 of mixed foraged greens – foraged weeds – including dandelion leaves and whatnot. In the 1960 film Two Women / La ciociara, starring Sophia Loren as a shopkeeper who flees WW2 Rome to her native village in the mountains with her daughter, there’s a scene where the villagers are foraging the fields for any misticanza, any greens they can eat to keep starvation at bay.

Anyway, here’s the recipe. Use the basic recipe – with whatever editions you like – at other times of the year when wild garlic isn’t available.

Makes one large, 1kg, loaf

Ingredients
360g water, tepid
6g active dried yeast or 12g fresh yeast
585g strong white bread flour
9g fine sea salt
60g extra virgin olive oil

For the wild garlic paste. (I’m not going to be my usual precise self for this bit, as it’s flexible.)
About 80g wild garlic, a nice big handful
A few glugs of extra virgin olive oil
Good pinch of coarse sea salt
Add some chili flakes if you like some heat

Plus some more extra virgin olive oil

Method
1. Put the water in a mixing bowl (or indeed the bowl of a mixer, if you prefer) and add the yeast. Leave it to froth up.
2. Add the flour, salt and olive oil and bring to a dough.
3. Knead until smooth, by hand or in a mixer.
4. Leave 10 minutes or so and give it another quick knead.
5. Leave half an hour, then stretch into a rectangle and fold into thirds.
6. Leave the dough to prove until doubled in size.
7. Stretch the dough out and put in an oiled baking tray. I use a rectangular enamel one that is 25x35cm, 5cm deep.
8. Leave the dough to rest and prove a bit more, for about 15 minutes.
9. Make the wild garlic paste in a food processor – just squash the leaves in, with a few glugs of extra virgin olive oil and a good pinch coarse sea salt. Whizz it up to a coarse paste.
10. Smear the paste all over the dough, pushing in your fingertips to give the bread its distinctive cratered surface and disperse the garlic.
11. Cover and leave to prove one last time, until doubled in size.


12. Preheat your oven to 220C.
13. Give the bread another drizzle of olive oil then bake for around 20 minutes, until golden.
14. Remove from the oven and drizzle with a bit more olive oil, so the bread is nice and moist.
15. Cool in the tin for 10-20 minutes then remove. Eat warm or later on. All that oil means it stays soft well for a few days.

Like many parents, I struggle to get anything green into my kids’ diets. I’m somewhat baffled by the seemingly innate resistance to any brassicas for example. It’s purple sprouting broccoli season in England now, and that veg is such a delight – sweet, and you’d think child-friendly with its small, tender heads. But no. The kids did, however, love this bread. The big one (increasingly big this year) absolutely scovered3 the stuff.

Wild garlic focaccia

1 Just look at the Wikipedia page for all the wonderful common names for this lily. I grew up calling it lords-and-ladies or cuckoo pint, but there are numerous other names.
2 In Oretta Zanini de Vita’s book The Food of Rome and Lazio, she lists “Arugula [rocket], wild chicory, rampion, salad burnet, wood sorrel, borage, wild endive, poppy greens and other bitter greens” for Misticanza Romana.
3 Our family portmanteau word that derives from “scoffed” and “hoovered”.

1 Comment

Filed under Baking, Recipes

Horse, grain, stone, bread

 The Waterers' Shire team at work

Obviously, I love bread, but what particularly excites me is making bread with a story. So when I got an email from British grains and pulses seller Hodmedod’s1 mentioning Flour by Horsepower – flour ground from grain grown with heavy horses – I was sold. Heavy horses are just awesome creatures. And I love to think of that food narrative: field, heavy horse, grain, millstone, flour, bread.

Anyone who knows me in person will at some point have been regaled with reminiscences of my experiences in New Zealand-Aotearoa. On my first visit, in 1990, I ended up living at Newton Livery, a small farm owned by Stephen McGrath in the stunning, sand-fly infested Buller Gorge. Stephen, who died in 2020, was something of a legend, a formidable figure with blacksmith’s shoulders and big beard. He influenced numerous young travellers like myself, introducing us to his idiosyncratic lifestyle – which hinged around his love of heavy (or draft) horses, specifically Clydesdales.

Heavy horsepower
The Clydesdale breed was favoured for export to New Zealand in the late 19th century and prevails there, though for those of us living in England, we’re more likely to encounter Shires. For example, before the plague, here in Lewes, East Sussex, local heritage brewery Harvey’s had a Shire-drawn dray delivering beer around town one day a week2. Both Clydes and Shire are absolutely magnificent breeds, which can weigh up to a metric tonne3 and have extraordinary energy, pulling power and charm. In some ways, I wish I’d been able to maintain more contact with them over the years. So buying the Flour by Horsepower was one way I could feel some contact, however vicariously. Specifically the Shires of Fiona and Jonathan Water, who grow the grain using the horses at their farm Higher Biddacott.

Not only was the flour made from grain grown on a farm worked with Shires, that farm is in north Devon, another place that’s been significant in my life. I had an aunt in Barnstaple, but more importantly I spent 20 years visiting my parents in the area, and Fran and I even got married in Pyworthy, near Holsworthy, a mere 25 miles (40km) as the crow flies from Higher Biddacott. I do wish I’d heard about it sooner, so I could have visited when life took me to that part of the world more frequently. As well as growing grain, owners Jonathan and Fiona Waterer have a B&B and run courses, where you can learn to drive heavy horses.

They’ve farmed at the 40 hectare (100 acre) Higher Biddacott since 1996. Fiona says, “We farm organically and are moving towards regenerative agriculture all with our horses.” Jonathan is a life-long heavy horseman, Fiona saying, “he has worked horses since the age of 10 on his father’s farm. He finished school, went to agricultural college and then ranched out in Alberta, Canada. He returned to Exmoor in 1982 to a small hill farm. In 1996 we moved to Higher Biddacott and on both farms he has used horses. They are his passion and he trains many horses for other people as well.”

The Waterer Shire horses

Flour with history and flavour
I’ve used a lot of different flour in my time, including heritage and local varieties (eg here and here). But with my connections to Devon and heavy horses, I’m really pleased to have discovered Flour by Horsepower, stoneground from the Waterers’ grain at Shipton Mill.

This year, the Waterers’ wholemeal flour is available in two types, made with Squareheads Master or French landrace wheat. We’re likely to see different varieties from them in future now they’ve established a relationship with Hodmedod’s. “We have just finished tilling our Spring wheat and oats,” says Fiona. “We also have some winter wheat in the ground. We have YQ [Yield/Quality4], Mulika and Wild Farm grain varieties of wheat.” All of which lend themselves to organic and regenerative practices.

For my first bake with Flour by Horsepower, I used the Squareheads Master. “We’re very excited about the flavour,” says Fiona. “I use it 100 per cent for a savoury pastry as the ancient grains are not as strong as modern wheats.” That is, they’re lower in protein that what we in Britain mostly use for bread-making these days. I will do some pastry at some point as I’ve got a great recipe from my other Buller Gorge mentor, Nadia Jowsey, but first I made bread.

Squareheads Master is a grain that was developed in the 1860s, from selective breeding of landrace varieties. As such, at the time it was revolutionary for its higher yields. From our modern point of view, however, after the 20th century’s intensification and heavy, frequently toxic industrialisation of agriculture, it is a heritage grain. And clearly one that lends itself well to being farmed with horses in the green fields of north Devon.

When I lived in Newton Livery,  I wasn’t there at the right time for ploughing, tilling and sowing, but did see the horse-drawn reaper-binder in action at harvest time. Until it broke. Stephen could fix anything, but couldn’t get it fixed it time in the weather window we had for harvesting his field of oats, so we did it by hand. Luckily it was a small field, as it was hard work – humans simply do not have even a fraction of the agricultural horsepower of actual horses and a lot of favours were called in to get enough manpower. I wish I’d taken some photos, but suspect I was a bit busy. If and when the plague passes, and we’re back in Devon, maybe one day I’ll see the Waterers bringing in their harvest by horse power. Seeing massive draft horses doing the job they were bred for is a real treat.

Sandwiches in the March sun
Anyway, we just had sandwiches for lunch using my bread made with 50% Flour by Horsepower Squareheads Master flour and 50% Stoates strong white bread, all stoneground, all quality. I used my usual basic bread recipe, leaving the preferment or sponge for several hours to help the flavours develop. I then did a few of my usual, toast-for-the-family tin loaves and one round loaf given a final prove in cane banneton. Cos cobs are cute.

The resulting bread is very good. It’s wholesome and tasty – real grains, milled with stone, result in flour that has a flavour you cannot find with industrially farmed and roller milled grain flours. The crust, with its extra caramelisation and Maillard reaction, is wonderfully nutty, so it’s no surprise Fiona was excited. Perfect for a sandwich lunch in the garden on a warm spring day. Eating the sandwich, I could almost see those Shires steadily working their way across the north Devon landscape.


Footnotes
1 Hodmedod’s are great. They sell all sorts of British grown pulses, grains and flours, including such surprises as British chickpeas and quinoa: did you know they could be grown here? At a time when Britain has isolated itself from the EU, our reliance on China for everything from electronics to tinned beans is questionable, and climate change means that industrialised monoculture agriculture becomes unreliable, the work of Hodmedod’s and its suppliers is essential, finding landrace and locally viable alternatives to internationally sourced foods that will add to British food security, and the sustainability of the jawdroppingly wasteful food production industry.
2 I loved seeing the Harvey’s dray, but it was a bit of a tourist attraction as the Shire team itself wasn’t especially local, but specially brought in. And yet, drays for urban delivery of beer make absolute sense – they use very little fuel (when they’re local), they don’t belch out fumes when stopping and starting, they can pull very efficiently up hills. I’d love to see more, but these days people get so angry about anything that impinges on their perceived rights as a motorist. When I worked for an art magazine in Sunderland in the mid-1990s, local brewery Vaux (which brewed from 1837 until it closed down in 1999; the brand was relaunched in 2019) did indeed still use a dray to supply nearby pubs. Makes me realise how old I am – half a century. I even have memories of being woken by a horse-drawn rag and bone cart in Leeds in the early 90s. Rag and bone men are long gone.
3 1000kg = 158 stone = 2200 lb = just shy of 1 imperial or long ton.
4 YQ, Yield/Quantity or Yield and Quantity, is the popular name for a recently developed crop, bred at Wakelyns Agroforestry by Professor Martin Wolfe and the Organic Research Centre. Hodmedod’s already sell YQ flour and grain and has an informative blurb. There’s also a good discussion of its significance here.

2 Comments

Filed under Baking, Discussion, Flour & grain

Fran’s Herman cake

Herman friendship cake

Just to be clear: this was Fran’s project. But as I’m enjoying eating it, she’s given me permission to cover it.

For those who’ve never encountered it, Herman cake, or friendship cake, is a type of apple cake that features a starter not unlike a sourdough. The principle is that you feed up the starter, then split it and pass containers of sludge onto your friends for them to then follow the recipe, and in turn pass sludge onto their friends.

Fran was given it by our friend Martina, another parent at our kids’ school. Seeing as I’m the avid baker of the household, I’m somewhat bemused she didn’t offer it to me. But as I was in thick of home-schooling our five year old and seven year old at that point, nurturing a pot of seething yeasts and lactobacilli as well was possibly a bridge too far for me.

The Herman cake starter isn’t strictly a sourdough. Or not necessarily. I’ve seen recipes online where people create the starter not by awaiting the gentle cascade of natural yeasts from the atmosphere but by making a batter with flour, milk, sugar, water and commercial yeast. Over time, however, this mix is fed (with more flour and sugar) and will take on naturally occurring yeasts and bacteria, and will give off that beery smell familiar to those who cultivate stricter natural leavens.

This type of cake is inspired by an older Amish tradition, Amish friendship bread, which itself would have originally used a true natural sourdough starter. Indeed, all breads and leavened baked goods did before the controlled cultivation and commercial sale of baker’s yeast, Saccharomyces cerevisiae, in the second half of the 19th century following the Louis Pasteur’s advances in the understanding of microbiology.

A few notes:
1. Don’t refrigerate the starter. Just keep the sludge in a bowl, covered loosely with a clean cloth, at room temperature.
2. The final cake ingredients do include baking powder, which seems odd considering you’re using a sourdough-like starter – ie a leaven. But the result is delicious, so I’m not quibbling.
3. The recipe suggests cooking apples, but Fran used desert apples and they worked well. (Gala I believe.)
4. The original recipe also included raisins, but cooked raisins are a sure way to ruin a cake. They’re the devil’s work, like sultanas in the curries we used to have at primary school in the 1970s. Of course, if you like dried fruits in cakes, go ahead and add some.
5. You can add a streusel topping. My mum used to make us a streusel cake when I was a kid, so I’ve taken that element from her old Katie Stewart recipe.
6. It’s quite a big cake. Fran made it in a 23x23cm square tin. I can’t see any reason why you can’t bake it in a round tin, bundt tin or deep roasting pan, depending on what you’ve got at your disposal.
7. I would love to know how the microbiology of a Herman starter differs from that of a classic sourdough (which of course varies a lot too). There is a Herman Project underway looking at the microbial characteristics of different sourdoughs. It’s discussed here, but the link from this MIT page is dead, so I don’t know if it looks at these cake starters.
8. When Fran divided up the Herman starter, each quarter weighed around 300g.
9. I’ve no idea why it’s called Herman. Apparently, “Herman” is an affectionate name for any sourdough starter, though I’ve not heard that before. Presumably in America. Though again, I’ve no idea why that particular name was chosen.

Herman cake starter

So, assuming a friend passes you a container of sludge, here’s the recipe.

Starter
1. The day you receive the sludge is day 1. Stir each day and on day 4 add 140g plain flour, 200g caster sugar and 225g of full-fat milk.
2. Stir each day on days 5 to 9, then add 140g plain flour, 200g caster sugar and 225g of full-fat milk on day 9.
3. Weigh the mixture then divide into four equal portions. Give three containers of sludge away to friends.
4. Keep your quarter for one more day, then you’re ready to make the cake on day 10.

Cake ingredients

300g Herman starter
225g caster sugar
300g plain flour
12g baking powder
3g fine sea salt
155g cooking oil (sunflower or vegetable [ie rapeseed, aka canola] good)
2 medium eggs (ie around 115g, without shells)
10g vanilla essence
2 medium apples, cut into chunks
12g ground cinnamon

Optional streusel topping
50g self-raising flour
100g soft brown sugar
50g butter, melted

1. Grease a 23cm square tin and line with baking parchment.
2. Preheat your oven to 170C.


3. Simply combine all the ingredients and pour into the prepared tin.
4. To make the optional streusel, combine the flour and sugar in a small bowl and mix through the melted butter with a fork. Sprinkle this onto the cake batter.
5. Bake for around an hour, until a skewer comes out clean (-ish). If it’s not baked enough but the top is browning, cover with foil and keep baking.
6. Cool on a wire rack.
7. Enjoy. Or not if you’re a five year old who refuses to eat the cooked apple.

11 Comments

Filed under Baking, Cakes, Cakes (yeasted)