Category Archives: Cakes (yeasted)

Shrove Tuesday buns

Pancakes are all well and good, but there are other Shrove Tuesday foods in British tradition. Apparently. I was pleased to spot these in the book Cakes Regional and Traditional by Julie Duff.

They’re just my kind of thing – a yeasted sweet bun, with some spice and one of my favourite ingredients, ground almonds. You also slice them in half, remove some of the crumb, and mix that with cream, sugar and more ground almonds, using that as a filling. As such they’re a British cousin to Scandinavian semlor / semla or fastelavnsbolle or bollugadur (the Icelandic variation). I wonder what the historic connections are? Something to do with the Viking diaspora? One day I might learn how to be a proper food historian, though that would require being able to go to big libraries and re-learn how to research academically, something my childcare responsibilities preclude still. Never mind the plague dragging on. (It’s finally arrived in our house after two years of lucky dodges.)

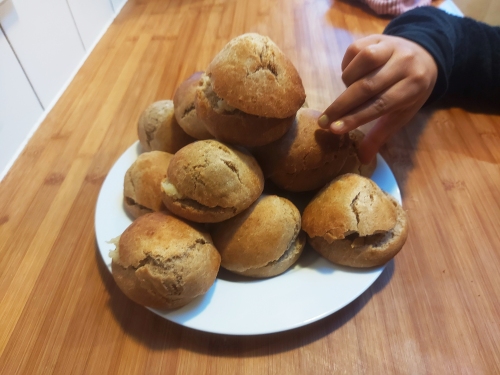
Anyway, here’s a version of Duff’s recipe. One key fault with her original is the lack of a final prove. I left mine a little, but should have left them a lot longer – you can see they weren’t proved enough with all the cracking on the tops.

It is an amusingly old-fashioned recipe for these sourdough days. The book was published in 2003, but is still a real treasure trove. Even if many of the recipes used that trick of rushing the yeast at the start with the addition of a bit of sugar.

Dough
15g fresh yeast or 7g active dried yeast
5g caster sugar
75g tepid water
360g plain flour
6g mixed spice
50g caster sugar
50g ground almonds
2 medium eggs, lightly beaten. That is, about 110g beaten egg
140g whole milk, warmed slightly

Filling
75g single cream
115g ground almonds
50g caster sugar

Makes 12

1. Combine the yeast, 5g sugar and 75g water in a bowl and leave to activate and froth up.
2. In a large bowl, sieve together the flour and spice, then mix in the caster sugar and ground almonds.
3. Add the yeast mix, beaten egg and milk to the dry mix and bring to a dough.
4. Knead until smooth. It’s quite a sticky dough, so add a little more flour to make it more manageable, but not too much. Using the Dan Lepard method makes it easier – short knead, 10 minute rest, short knead, 10 minute rest, short knead, 10 minute rest. Final knead.
5. Form a ball and put in a clean, lightly oiled bowl. Cover and leave to prove until doubled in size. This will take a few hours, and will depend on the temperature. My heating has been broken, so it was a bit slow. (I don’t have a prover, proving drawer or airing cupboard.)
6. Weigh the dough. Mine was about 850g. Divide it into 12 pieces weighing about 70g each.
7. Roll these into smooth balls, then place on a baking sheet lined with parchment or silicon mats.
8. Cover again and leave to prove until doubled in size.
9. Preheat oven to 180C.
10. Glaze the buns with a little milk.


11. Bake for about 20 minutes, checking they’re not browning too much.
12. Cool completely on a wire rack.
13. While they’re cooling, make the filling by combining the cream, ground almonds and sugar.


14. When the buns are cool, split them in two, scoop a little of the crumb out (I find a grapefruit spoon useful for this), then crumble this into filling.
15. Spoon a blob of the filling back into the buns, sandwich them and serve.

Enjoy. Instead of pancakes. Or just before. To really be greedy on Shrove Tuesday even if you’ve no intention – or indeed concept – of fasting for Lent.

2 Comments

Filed under Baking, Cakes (yeasted), Feasts

The hydration of enriched doughs

From that title, you’ll probably be able to tell if this post is for you. There’s no two ways about it: it’s one for bread geeks.

It was the feast day of Santa Lucia on 13 December, and I made my Santa Lucia crown, pictured above, with ravening children. This is an enriched dough, flavoured with saffron, made into a ring shape with two braids, and decorated with icing, sprinkles and candles. The sprinkles aren’t exactly traditional, but it’s what my kids like.

Making it, I felt my recipe still wasn’t quite right. The dough made for a delicious cake, like a super-brioche, but it was a bit soft and didn’t hold its shape well when braided and formed into the ring, or crown, shape. This got me wondering about the hydration of the dough.

Hydration and bakers’ percentages
Dough hydration is the proportion of water to flour, expressed as a percentage. So my standard loaf is made with 750g of water to 1000g of flour: that is, 75% water to 100% flour or 75% hydration (750 ÷ 1000 x 100 = 75). With the Santa Lucia crown, it’s 250g liquid (water and milk) to 500g flour, so I just kinda vaguely assumed it was about 50% hydration. But it’s obviously not as it’s so soft and sticky, due to the eggs and butter, and their water content.

Professional baking recipes use bakers’ percentages* along these lines for all the ingredients. This means giving the proportion of the different ingredients as a percentage of the flour (eg 6g salt to 1000g flour is 0.6% salt; 6 ÷ 1000 x 100). I used to include bakers’ percentages on some of my recipes (eg this challah recipe), and I thought I’d done a whole blog post about them, but I can’t find it, so I guess not. Maybe another day. If you really get into baking, and then really get into percentages and hydrations, you’ll be able to find all sorts of resources online, spreadsheets and calculators and whatnot.

Basic, real bread, is of course just water, flour, salt and yeast, so working out the hydration is easy. But how does the hydration work with enriched doughs? How do you work it out when the recipe includes not just flour and water (and yeast and salt) but also milk, butter and eggs? Working out the bakers’ percentage of milk in a recipe isn’t the same as knowing the percentage of water in that milk. So working out the hydration of the dough is another level of complexity. Read on.

Wondering about how my Santa Lucia crown dough handled also got me thinking how it compared with my brioche recipe, a quintessential enriched dough, and whether I could tweak the former so it’s more manageable like the latter. So here’s an attempt to compare both doughs: by doing their bakers’ percentages and working out the hydrations. I’ve probably lost readers who aren’t bread geeks by this point.

Fats, colloids and water percentages
So. Water is obviously 100% water. But what about milk? Vaguely remembering my O-level science, cow milk is a colloidal suspension of fat and protein molecules in water. Googling around, the consensus is that it’s 87% water.  This will vary with whether it’s full-fat or skimmed or whatever, but let’s go with 87%. Egg, meanwhile, is about 75% water.

It gets a little more complicated with butter, as there’s more variation. Most European butters are higher fat content, less water; indeed, EU law says they need to be more than 82% fat, and some are as much as 90%. I’ll admit I don’t buy posh butter, but both the supermarket brands of unsalted butter I have are 83% fat. Factoring in about 1% protein, let’s go with 16% water.

So:
Milk 87% water
Egg 75% water
Butter 16% water

Also, eggs. Eggs have shells. Domestic recipes don’t usually give egg in a weight, just “2 eggs”. But I know the eggs I use contain on average 55g of white and yolk.

Now, I hope I can handle the mathematics, as I’m a little out of practice.

Here’s my Santa Lucia crown ingredients (excluding glaze etc):
250g strong white bread flour
250g plain (all-purpose) flour
125g full-fat milk
125g water
6g active dried yeast
2 eggs, that is 110g egg
3g salt
50g butter, softened
120g caster sugar
A few sprigs of saffron, about 1g

Here’s a table. Column 1 is bakers’ percentage (as it’s half plain, half strong flour, the 100% total flour is divided in two), 2 the above ingredients in grams, 3 is the quantity of water in those ingredients in grams, and 4 is the percentage hydration. I worked out the figures in column 3 by dividing the wet ingredient by 100 then multiplying by the percentage water content discussed above. Eg the milk, 125 (g of milk) ÷ 100 x 87 (percentage of water in milk) = 21.8. Combining the figures in column 4 gives me the total hydration of the dough, ie the total water content of the recipe as a percentage of the flour (100%).

Ingredient 1 Percentage 2 Quantity (g) 3 Water (g) 4 Water %
White bread flour 50 250 0 0
Plain white flour 50 250 0 0
Milk 25 125 108.8 21.8
Water 25 125 125 25
Yeast (ADY) 1.2 6 0 0
Egg 22 110 82.5 16.5
Salt 0.6 3 0 0
Butter 10 50 8 1.6
Caster sugar 24 120 0 0
Saffron 0.2 1 0 0
Total 1040g 324.3g 64.9%

So I now know my Santa Lucia crown recipe is around 65% hydration. Alternatively I can work this out by totalling column 3, dividing this by 500g, the flour weight, and multiplying this by 100, giving 65%, give or take a decimal point. I just wanted to include column 4 so those percentages were writ large. It’s probably overkill… for the two people reading this post. This hydration isn’t that high, so I should be able to mould it better.

Moving on, here’s my brioche recipe.
90g full-fat milk, warmed
25g caster sugar
10g active dried yeast (or 15g fresh)
400g strong white bread flour*
5g fine salt
100g butter, softened
4 medium eggs (220g), beaten

Here’s another table:

Ingredient 1 Percentage 2 Quantity (g) 3 Water (g) 4 Water %
White bread flour 100 400 0 0
Milk 22.5 90 78.3 19.6
Yeast (ADY) 2.5 10 0 0
Egg 55 220 165 41.3
Salt 1.25 5 0 0
Butter 25 100 25 6.3
Caster sugar 6.25 25 0 0
Total 850g 268.3g 67.2

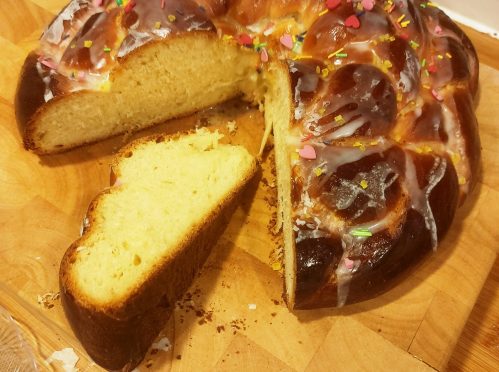
So the hydration here – either worked out by adding up the figures in column 4, or by 268.3 ÷ 400 x 100, is 67%, give or take a decimal point again. Surprisingly slightly more than the Santa Lucia recipe. Though they are somewhat different, with the brioche getting more of its liquid content from eggs and having more butter. I find this brioche dough easier to mould but that may well be as it has a higher butter content. I rest it in the fridge until the butter has firmed up more. Perhaps I will tweak my Santa Lucia crown recipe next year, and give it a rest in the fridge to firm up the butter. We can resume this fascinating discussion in a year. Here’s another pic of the Santa Lucia crown, cut open.


* Where you put the apostrophe is debatable. I like to think they’re the percentages of many bakers, not just one, hence bakers’ percentage instead of baker’s percentage. But I don’t suppose it matters much. Anyway, the reason professional bakers use this system is to scale up recipes but I’m not going into that here. The purpose of this post was to get my head around hydration of enriched doughs, and compare two recipes.


10 Comments

Filed under Baking, Cakes (yeasted), Discussion

Fran’s Herman cake

Herman friendship cake

Just to be clear: this was Fran’s project. But as I’m enjoying eating it, she’s given me permission to cover it.

For those who’ve never encountered it, Herman cake, or friendship cake, is a type of apple cake that features a starter not unlike a sourdough. The principle is that you feed up the starter, then split it and pass containers of sludge onto your friends for them to then follow the recipe, and in turn pass sludge onto their friends.

Fran was given it by our friend Martina, another parent at our kids’ school. Seeing as I’m the avid baker of the household, I’m somewhat bemused she didn’t offer it to me. But as I was in thick of home-schooling our five year old and seven year old at that point, nurturing a pot of seething yeasts and lactobacilli as well was possibly a bridge too far for me.

The Herman cake starter isn’t strictly a sourdough. Or not necessarily. I’ve seen recipes online where people create the starter not by awaiting the gentle cascade of natural yeasts from the atmosphere but by making a batter with flour, milk, sugar, water and commercial yeast. Over time, however, this mix is fed (with more flour and sugar) and will take on naturally occurring yeasts and bacteria, and will give off that beery smell familiar to those who cultivate stricter natural leavens.

This type of cake is inspired by an older Amish tradition, Amish friendship bread, which itself would have originally used a true natural sourdough starter. Indeed, all breads and leavened baked goods did before the controlled cultivation and commercial sale of baker’s yeast, Saccharomyces cerevisiae, in the second half of the 19th century following the Louis Pasteur’s advances in the understanding of microbiology.

A few notes:
1. Don’t refrigerate the starter. Just keep the sludge in a bowl, covered loosely with a clean cloth, at room temperature.
2. The final cake ingredients do include baking powder, which seems odd considering you’re using a sourdough-like starter – ie a leaven. But the result is delicious, so I’m not quibbling.
3. The recipe suggests cooking apples, but Fran used desert apples and they worked well. (Gala I believe.)
4. The original recipe also included raisins, but cooked raisins are a sure way to ruin a cake. They’re the devil’s work, like sultanas in the curries we used to have at primary school in the 1970s. Of course, if you like dried fruits in cakes, go ahead and add some.
5. You can add a streusel topping. My mum used to make us a streusel cake when I was a kid, so I’ve taken that element from her old Katie Stewart recipe.
6. It’s quite a big cake. Fran made it in a 23x23cm square tin. I can’t see any reason why you can’t bake it in a round tin, bundt tin or deep roasting pan, depending on what you’ve got at your disposal.
7. I would love to know how the microbiology of a Herman starter differs from that of a classic sourdough (which of course varies a lot too). There is a Herman Project underway looking at the microbial characteristics of different sourdoughs. It’s discussed here, but the link from this MIT page is dead, so I don’t know if it looks at these cake starters.
8. When Fran divided up the Herman starter, each quarter weighed around 300g.
9. I’ve no idea why it’s called Herman. Apparently, “Herman” is an affectionate name for any sourdough starter, though I’ve not heard that before. Presumably in America. Though again, I’ve no idea why that particular name was chosen.

Herman cake starter

So, assuming a friend passes you a container of sludge, here’s the recipe.

Starter
1. The day you receive the sludge is day 1. Stir each day and on day 4 add 140g plain flour, 200g caster sugar and 225g of full-fat milk.
2. Stir each day on days 5 to 9, then add 140g plain flour, 200g caster sugar and 225g of full-fat milk on day 9.
3. Weigh the mixture then divide into four equal portions. Give three containers of sludge away to friends.
4. Keep your quarter for one more day, then you’re ready to make the cake on day 10.

Cake ingredients

300g Herman starter
225g caster sugar
300g plain flour
12g baking powder
3g fine sea salt
155g cooking oil (sunflower or vegetable [ie rapeseed, aka canola] good)
2 medium eggs (ie around 115g, without shells)
10g vanilla essence
2 medium apples, cut into chunks
12g ground cinnamon

Optional streusel topping
50g self-raising flour
100g soft brown sugar
50g butter, melted

1. Grease a 23cm square tin and line with baking parchment.
2. Preheat your oven to 170C.


3. Simply combine all the ingredients and pour into the prepared tin.
4. To make the optional streusel, combine the flour and sugar in a small bowl and mix through the melted butter with a fork. Sprinkle this onto the cake batter.
5. Bake for around an hour, until a skewer comes out clean (-ish). If it’s not baked enough but the top is browning, cover with foil and keep baking.
6. Cool on a wire rack.
7. Enjoy. Or not if you’re a five year old who refuses to eat the cooked apple.

11 Comments

Filed under Baking, Cakes, Cakes (yeasted)

Vital wheat gluten and sticky cinnamon rolls

Of the many food fads that have come and gone in my lifetime, one that particularly bemused me is when people took against gluten. Obviously I’m a baker and love bread, so I love gluten and what is does for us. What riled me was the sense that many people didn’t even know what gluten was. What is gluten? It’s protein. Or more specifically, two proteins: gliadins and glutenins. How bad is wheat protein?

If you have coeliac disease*, your body cannot handle gluten, so obviously it needs to be avoided, but for most of the rest of the population, it represents the protein component of bread, the staff of life. Derived (usually) from wheat grain it’s what gives bread its structure, while the main part of the grain, the starch, the carbohydrates, provide the bulk, the energy.

When I first encountered seitan in health food shops in Rome, it was around the time the anti-gluten fad was at its height. Seitan is another high-protein meat-alternative alongside the soy bean-based tofu and tempeh, but is made from wheat – specifically wheat that has been processed to remove the starch, leaving mostly the gluten. In its dried, powdered form, this is called vital wheat gluten.

Although I’ve eaten a fair amount of seitan, somehow I’ve managed to miss baking with vital wheat gluten. With another lockdown in England now, and the schools closed again, we need treats to get us through, especially as this lockdown comes at the hardest time of year – the dank, grey months after Christmas. So I wanted to make some cinnamon rolls.

The recipe is from the 1993 baking classic The Bread Book by Linda Collister and Anthony Blake. They got it from a Kansas champion baker called Viola Unruh and it includes an optional tablespoon and a half of vital wheat gluten. Intrigued, I bought some online, something that wasn’t really an option back in 1993. I’m glad I did. I work with a lot of different doughs, and working this it didn’t feel particularly different to other relatively low hydration, enriched doughs. But the resulting buns had a chewy, moist crumb, not at all crumbly, indeed like the sort of crumb achieved by professional bakers in commercial products.

I plan to experiment with vital wheat gluten more: I’ve just used some in my standard, feed-the-family bread and it seems moister, and I plan to add a tablespoon next time I do brioche. In the meantime, here’s the sticky cinnamon rolls recipe. I’ve revised it slightly, ie standardising all weights in grams and adapting the method slightly. What I haven’t changed is the addition of a cream/muscovado sugar mixture to the tin when you’ve nearly finished baking to add a totally over-the-top sticky sauce to the finished bun. Oh boy. A long way from healthy.

Makes 15 buns

7g active dried yeast or 15g fresh yeast**
115g water, warm
5g caster sugar
4g fine sea salt
50g unsalted butter, diced
50g caster sugar
280g water, hot (around 65C)
680g strong white bread flour
15g vital wheat gluten
1 egg, beaten, around 45g

Filling
85g unsalted butter, softened
85g muscovado sugar – light or dark. I used a mix
12g cinnamon, or to taste

Caramel topping
200g muscovado sugar. I used light muscovado
115g double cream

1. Grease a roasting tin, around 30 x 22cm, and line with parchment. You’ll also need a lightly greased baking sheet, preferably one without a lip.
2. Activate the yeast by adding to the 115g water with the 5g of caster sugar. Leave to froth up.
3. Put the 50g of diced butter, 50g of caster sugar and 4g salt in a mixing bowl, or the bowl of a mixer if you’re using one. Pour over the 280g of hot water and stir, until the butter has melted.
4. Add 230g of the flour to the mixing bowl along with the vital wheat gluten and beat to combine.
5. Add the yeast mix and beaten egg and beat to combine.
6. Cover and rest for 10 minutes.
7. Add the remaining 550g of flour and bring to a dough, either in a mixer or by hand. As it’s fairly low hydration, you’ll achieve a fairly manageable soft, smooth dough that’s not particularly sticky.
8. Grease a clean mixing bowl, put the dough in and leave to rest. After about an hour, give it a stretch and fold.
9. Cover again and leave to prove. After about an hour, give it another stretch and fold.
10. Cover again then leave to prove until doubled in size.
11. Meanwhile, make the filling by creaming together the 85g of softened butter, with the 85g of muscovado sugar and the cinnamon.
12. Turn out the dough and stretch it into a rectangle, using a rolling pin if you prefer, about 35x50cm.


13. Spread the cinnamon filling over the dough rectangle, then roll it up from the long side.
14. Measure the length of your sausage (fnar) and divide it into 15. Mine came to 15 slices at about 6m each. Cut these pieces.


15. Put the slices, in a 3×5 grid, in the prepared roasting tin.
16. Cover and leave for a final prove, until doubled in size. This will depend on the temperature, but should take around an hour or so.


17. Preheat your oven to 180C.
18. Put the rolls in the oven and bake for around 30 minutes.
19. Meanwhile, make the caramel topping by mixing the cream and muscovado.

20. When the rolls are baked and a nice golden brown, take them out of the oven and turn them out (and over) onto the lightly greased baking sheet.
21. Pour the caramel into the roasting tin, then return the rolls to it –with the tops on the bottom so they’re sitting in the caramel.
22. Bake for another 10 minutes.
23. Allow the rolls to cool for a few minutes, then remove from the roasting tin and allow to cool.

24. To serve, pull them apart and have a cloth ready to wipe any messy children. They’re lovely warm, but also last well as they’re so rich and slathered with sugar and dairy.

So good. So badly photographed….

* Or significant gluten sensitivity health issues.
** If you can source it in sensible quantities. I prefer using fresh, and used to be able to get it – lievito di birra – in small blocks in supermarkets in Italy. It’s not sold in convenient small blocks in British supermarkets. It’s not sold in Britain supermarkets at all, or at least not in my experience. I used to get it from a health food shop, but they do it in bigger lumps now and I don’t like to waste it. So I’ve resorted to active dried yeast (ADY) again. I talk about yeast types here.

7 Comments

Filed under Baking, Breads, Cakes (yeasted), Flour & grain

Santa Lucia crown

Santa Lucia crown

The feast day of Santa Lucia,  St Lucy, is celebrated on 13 December. Her name derives from the Latin lux, as in “Fiat lux!” – “Let there be light!”. We also have a cat called Lux. She’s not divine in any way, she’s a needy, bony scrag, but we still love her.

Lucia was supposedly born into a wealthy family in Syracuse, Sicily, in 283AD, a time when the Roman Empire was still officially devoted to Zeus, Apollo and co. Christianity only won out a century later. The Emperor Diocletian was old-school, and she was killed during his reign, in 304AD. Medieval accounts of her death are grim, and involve her eyes being gouged out before she was burned at the stake. She remains the patron saint of the blind. As well as salesmen, oddly.

The facts are, of course, uncertain, but her veneration spread to Rome by the 6th century, and had even reached Britain by the 8th century. Today, she’s mostly celebrated on her home island and in Sweden. Her namesake role as a bringer of light was particularly important in the mid-winter gloom and her feast day may previously have been celebrated on the solstice, the shortest day of the year: now 21 December and more bound up in Christmas itself.*.

Santa Lucia crown cut in half

Anyway, this is based on another recipe from Cooking with the Saints by Ernst Schuegraf, “The Most Unique Catholic Cookbook Ever!”. It’s purportedly based on a traditional Swedish bake, but I can’t guarantee that. I’ve made Swedish inspired Santa Lucia buns before, which feature a similar enriched dough with saffron. And in the book Scandinavian Baking, Trine Hahnemann has a saffron bread recipe and recounts a Swedish legend about a man being woken by beautiful singing on the long, solstice night, 13 December 1764. It was St Lucia, bringing light, food and wine, and adding herself to the pantheon of Swedish annual traditions.

125g water
125g full-fat milk
A few sprigs of saffron
6g active dried yeast
250g plain (all-purpose) flour
250g strong white bread flour
2 eggs
120g caster sugar
50g butter, softened
3g salt

Plus
1 extra egg to glaze
100g icing sugar
30g milk, possibly more
3g vanilla essence
Candied fruit, lightly toasted flaked almonds, nibbed sugar or sprinkles to decorate

1. Combine the milk and water, warm slightly, add the saffron and leave to infuse for at least 20 minutes, even overnight.
2. Warm the liquid again then add the yeast and leave to froth up.
3. In a large bowl, combine the flours, sugar, salt, softened butter and two of the eggs.
4. Add the yeast mix and bring everything together to form a rough dough.
5. Turn out onto a lightly greased surface and knead to combine and create a smooth dough.
6. Form the dough into a ball and put in a clean, lightly oiled bowl.
7. Leave to prove until doubled in size. This will depend on the temperature. I don’t have a prover or warm cupboard, and our kitchen was about 19C; the doubling took a couple of hours.
8. The total dough should be about 1030g. Cut off a piece weighing about 350g, leaving the other at about 680g. Form these into balls, rest them for 10 minutes or so.
9. Stretch the balls slightly then slice each one into three equal sized pieces.
10. Roll the small pieces into snakes around 40cm long, and the larger ones into snakes about 80cm long.
11. Braid the three longer pieces, then form into a circle, pinching the ends together. Put this circle on a greased baking sheet.
12. Braid the three smaller pieces and go through the same process. Put this smaller circle on top of the larger circle.
13. Cover with a clean cloth then leave to prove again until doubled in size.
14. Preheat the oven to 190C.
15. Whisk the final egg, then brush over the dough to glaze.
16. Bake for about 15 minutes then turn down to 180C. Keep an eye on this bake as the glaze can brown then burn easily. If it does, cover with foil. Bake for another half hour or so.
17. Cool on a wire rack.
18. Sieve the icing sugar, then add the milk (adding more as necessary) to create a basic icing.
19. Drizzle the icing over the crown and decorate as you wish – you could use glace cherries, I suppose, but they’re the Devil’s work. The kids like sprinkles, so I’m using vermicelli and nibbed sugar.
20. Serve the crown with birthday candles for Lux, Lucy, Lucia, light.

Enjoy in the pre-Christmas mayhem of Advent, close to the solstice.

St Lucia crown baked

* I’m talking about the northern hemisphere of course. The shift from the old Julian calendar to the new Gregorian calendar involved removing between 10 and 13 days, depending on when the transition took place. Strongly Catholic countries like Italy, Spain, Portugal, France and Poland made the switch in 1582. Britain, Canada and most of the US didn’t until 1752.

5 Comments

Filed under Baking, Breads, Cakes (yeasted), Feasts, Recipes

Orange honey buns

This is a slight adaptation of a recipe by Valentine Warner, from his book What to Eat Now, published in 2008. I believe I saw him making it on telly, and had a flurry of using the recipe back then. It was forgotten for a few years, but for some reason popped up in my memory. Possibly because, well, it’s for yeasted buns that are soaked in a citrus syrup, and I’m just loving citrus syrup soaked goodies (see also this).

The result is a bit like a rum baba; he recipe does include booze in his recipe, but I’ve left it out. Beacuse A) we don’t generally stock orange-flavoured liqueur and B) my bambini are the main recipients of these treats and I’m not sure they’re ready for the hard stuff.

It’s a yeasted mix – though it’s more like a cake batter than a dough. You don’t need to worry about kneading it at all. The original recipe involves easy mix yeast, just thrown in and mixed up. I don’t really use easy mix yeast, so I’ve adapted it slightly to be made with active dried yeast or fresh yeast. I also doubled the quantities, making about 18 buns. It’s nice to make them in heart-shaped silicone moulds but if you don’t have such things, normal 12 hole muffin tins are fine too.

6g active dried yeast or 12g fresh yeast
30g caster sugar
60g warm water or milk
300g plain flour
4g fine sea salt
5 eggs, lightly beaten, about 250g
150g butter, melted and cooled a bit

For the syrup
500g sugar (caster or granulated or mix)
250g freshly squeezed orange juice
250g water
Zest of one orange, in long strips
100g honey
2g orange-flower water (optional, to taste)

1. Grease the wells of a couple of 12 hole muffin trays or similar.
2. Activate the yeast in the water (or milk) with the caster sugar then mix in a large bowl with the flour and salt.
3. Beat in the beaten egg and butter.
4. Mix until smooth then cover and rest for about 15 minutes.
5. Divide the dough into the muffin tins, filling about 1/3rd.
6. Cover and leave to prove unit double in size. In a warm place, this may take about an hour. In a cool place, longer.
7. Preheat the oven to 220C.
8. Bake the buns for 12-15 minutes, or until well risen and pale golden-brown.

9. Remove from the tin and set aside to cool on a wire rack.
10. While the buns are cooking make the syrup. Heat the sugar, juice, water and rind in a pan over a low heat, stirring well. When the sugar has dissolved, increase the heat and boil for five minutes or so, until it thickens and becomes slightly syrupy.
11. Reduce the heat and dissolve in the honey. Remove from the heat and add the orange-flower water, if using.
12. Set aside until cooled slightly.

13. Put the buns in a bowl or deep plate and pour over the syrup.
14. Enjoy. Lick sticky fingers. Wipe messy children.

Leave a comment

Filed under Baking, Cakes (yeasted), Recipes

The sheer indulgent excess that is monkey bread

Monkey bread

In my time as a baker and sugar addict, I’ve made or consumed a vast number of rich concoctions and enriched doughs, from multinational doughnut variations to chocolate babkas. But nothing was quite as indulgent as monkey bread, something I’d not heard of until a few weeks back when a recipe by Jane Hornby popped up in a BBC Good Food newsletter.

Monkey bread is basically made with an enriched dough, with balls or chunks dipped in more butter, sugar and spices, and arranged in a ring shaped tin for baking. It is a kind of sticky, cinnamony, buttery, pull-apart, tear-and-share bread that clearly has its origins in traditional sweet, spiced buns and breads of Germany, Scandinavia, the Netherlands, and even Britain (eg the Chelsea bun). Those traditions crossed the Atlantic with migrants who settled in America, where they changed, evolved – and had gallons of butter and tons of sugar thrown at them.

The oldest print version of monkey bread is from 1945, and by ZaSu Pitts1, an American actress with a career that spanned the silent and early sound eras. While much of Europe was suffering from rationing, American was producing monkey bread. Goshy.

No one knows where it gets its name, but it’s either because it supposedly resembles the monkey puzzle tree, or because it’s like something monkeys would get in a frenzy over pulling apart. The latter seems more likely to me, as we – four adults, four little monkeys (aged 1 to 11) – ate it together, falling on it with simian fervour.

There are savoury versions or versions with dried fruit, but this one is based on Hornby’s – cinnamon, sugar, butter, some roasted pecans – and it seems closer to the classic US type. My bundt tin wasn’t quite big enough, the whole thing was absurd, and I can’t really imagine being able to justify making it too often, but it’s a pretty awesome thing to have in one’s repertoire.

Recipe

Dough
200g full-fat milk
85g unsalted butter
12g active dried yeast (or 20g fresh yeast)
50g caster sugar
2 eggs (that is, about 110g of egg)
550g strong white flour
6g fine sea salt

Assembly
125g unsalted butter
12g cinnamon
4g powdered ginger
2g grated nutmeg
225g light muscovado or light soft brown sugar2
140g pecans, toasted and roughly chopped

Icing
100g icing sugar
3g vanilla essence
15g milk
5g cinnamon
30g unsalted butter, melted

Method
1. You need a bundt pan or similar ring-shaped tin, ideally 30cm in diameter.
2. To make the dough, first melt the butter and warm the milk slightly. I did this in a microwave. Stir in the caster sugar, scatter in the yeast, and leave it a few minutes to get going.
3. Put the flour and salt in a large bowl, then pour in the yeast mix. Of course, you can do this in a mixer. If you have a mixer, combine and mix and skip to 8.
4. Beat the eggs together then pour in too.
5. Bring together to form a sticky dough.
6. Turn out and knead to combine and homogenise.
7. Form a ball, then leave to rest again, covered, for another ten minutes.
8. Give it another knead, then cover and rest again. Repeat this once or twice more until you have a nice smooth dough.
9. In a clean, lightly oiled bowl, cover and leave to rest again, until the dough has doubled in size.
10. Prepare the bundt tin by melting the 125g of butter then using some of it to brush the inside of the tin.
11. Mix the sugar and spices, then sprinkle some of this into the buttered tin. Add a handful of the roasted, chopped pecans.
12. When the dough has proved, you need to divide it into pieces. Hornby’s recipe said 65, I went for 50 as that seemed a tad excessive. The total dough weighed about 1060g, so I divided it into pieces each weighing about 21g.

Balls of dough for monkey bread

13. Roll these into balls. You don’t really need to, but I fancied it, just cos, to maintain the technique, which involves cupping your hand over them, and rolling them on a lightly oiled worktop. If you get proficient, you can do one in each hand. Ta da.
14. Leave the balls under a cloth as you work so they don’t dry out.
15. Put the rest of the melted butter in a flat-bottomed bowl or container, and the rest of the sugar and spice mix in another.

Assembling monkey bread

16. Roll the balls, in batches, in the butter, shake off any excess, then roll them in the sugar and spice mix. Place them in the tin.
17. Form a layer, sprinkle with more pecans, and keep going until the tin is full and balls all used up.

Monkey bread, before final prove

18. Cover again, then leave to prove one last time, until bulging and springy to the touch. Push a finger in and the dough should slowly re-expand.

Monkey bread, after final prove

19. Heat the oven to 180C, then bake the bread for about 40 minutes. Turn the oven down a bit, or cover with foil, if it’s over-browning before this time.

Monkey bread, baked
20. Leave to cool in the tin, then turn out when still warm but not hot.
21. Whisk together the ingredients for the icing then drizzle over.
22. Eat with for breakfast, with a morning coffee, as afternoon tea, or even as a dessert – which is what we did.

Good. Excessive. Indulgent. But good.

Monkey bread

Footnotes
1. More about her here. Her recipe, and more about monkey bread, can be found here.
2. I find these sugars behave pretty similarly in baking, though muscovado sugars were originally those of lower quality, and have higher molasses content.

13 Comments

Filed under Baking, Breads, Cakes (yeasted), Recipes

Pangiallo, primitive cakes and winter festivals

Pangiallo

Pangiallo is a cake I encountered in Rome, and indeed one of the last posts I wrote before leaving there in October 2013 mentioned it. But I’ve only recently started to make it, and discovered a quite a lot variation in recipes. Which might seem quite surprising, until you consider it’s a cake that purportedly has roots in Ancient Rome.

Pangiallo, or pancialle, is a Roman, or Lazio, cousin to panforte, “hard bread”, the better-known dense fruit and nut cake of Sienna, and panpepato (“pepper bread”). All three can be arguably be classified as “primitive cakes”. It’s easy to imagine the first cakes were compressed discs of nuts, seeds and dried fruit bound and sweetened with honey.  Although food historians suggest pangiallo’s origins are ancient Roman, and panforte is comparatively recent, possibly from the 13th century, people have probably been making these kinds of things for millennia.

Spice trails
There’s debate about what spices the ancient Romans had, but they almost certainly used cardamom, cloves, coriander, black pepper, ginger and nutmeg, and possibly cinnamon too. Such spices, many of which arrived in Europe via the Silk Road, maintained a role as important for feast day foods through the “Dark” and Middle Ages. As they had travelled so far they were expensive, so were used only for special foods on special days.

Britain, of course, has a very similar tradition of rich, spiced fruit cakes for midwinter celebrations in the form of our Christmas cake and Christmas pudding. Their characteristics have similarly ancient origins, though spices were even more scarce and valuable in northern Europe, compared to Italy. Ports such as Genoa and notably Venice were the western extremes of the maritime Silk Route, the dropping-off points for such valuable cargo; spices still had a long way to go before they reached Britain.

Pangiallo spice mix

Festival of light
Today, Pangiallo is eaten to celebrate the feast day of Santa Lucia, St Lucy, and also for Christmas. Both of these Christian feasts are associated with older winter solstice celebrations. The ancient Romans had Saturnalia, when the ancestor of pangiallo may well have been eaten. When Rome took Christianity as its official religion, many of the pagan festivals were Christianised too, and the consumption of special spiced cakes continued.

The calendar change of 1582 has confused things somewhat as St Lucy’s Day is now celebrated on 13 December in the Gregorian calendar, with Christmas Day closer to the solstice of 21-22 December. In the earlier, Julian calendar, however, St Lucy’s Day would have been closer to the solstice, the day when the night is at its longest. To dispel the darkness, it’s a festival of light, and indeed the very names Lucy and Lucia derive from lux, lucis, the Latin for light.

One Roman blogger suggests the yellow, saffron-tinted glaze of pangiallo is symbolic, looking forward to the new light of spring. The only problem with this theory is that pangiallo doesn’t always feature a yellow glaze. Many versions don’t seem yellow at all, but instead more brown from the dried fruits, caramelised sugar and honey, and even cocoa and chocolate.

Testing times
At the weekend I made the version in Rachel’s book Five Quarter’s: Recipes and Notes from a Kitchen in Rome. It’s closer to the version by the blogger mentioned above and does feature a rich glaze, coloured with saffron and egg yolks. Although they all contain flour, Rachel’s version is not leavened, with yeast or chemicals. So I was intrigued when I read the recipe in Oretta Zanini de Vita’s The Food of Rome and Lazio. Hers features a yeasted bread dough. That said, the dough only forms about 20 per cent of the total mass: which is predominantly raisins. Her original recipe is huge, with “1.8kg (about 4lb) zibibbo (seed raisins)”, with the whole formed into a loaf and proved for 12 hours.

For my testing process, I can’t really do such enormous bakes, so I halved the recipe and tweaked it. Hers included pine nuts too, for example; I love them, but they’re so expensive and the ones in the shops here have all travelled from China, which seems crazy. I’ve also favoured the disc-shaped form. Half quantities still produced four cakes, each scaled with 400g of dough. So I’ve halved it again here.

Pangiallo ingredients

5g fresh yeast, or 4g active dry yeast
50g plain flour
50g strong white flour
35g caster sugar
100g water, warm
20g olive oil
2g fine sea salt
250g seedless raisins
100g dried figs, quartered
120g whole or blanched almonds
20g candied peel
Spices: a mixture of ground cinnamon, coriander, black pepper, nutmeg, cardamom to total about 8g, to taste

1. Dissolve the sugar in the water.
2. Make a preferment with some of this sugar-water, the yeast and about 25g of the flour.
3. Leave to get bubbly.
4. Put the rest of the flour in a roomy bowl.
5. Add the preferment, the rest of the sugar water, the olive oil and salt.

Pangiallo mixture
6. Form a dough, adding more water if necessary, then turn out onto a lightly oiled surface and knead until smooth.
7. Rest 10 minutes, then add the spices, nuts, raisins and peel.
8. Combine. I can’t really say “knead” as it’s all fruit and nuts. It’s more a case of getting your hands in there and squishing it all together.
9. Cover and rest again, for about 6 hours.
10. Form the desire shapes. I recommend a couple of equal balls.
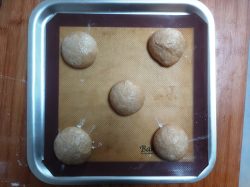
11. Put the balls onto baking sheets lined with parchment or silicone, and squash them down into discs, about 25mm high. If it’s too sticky, flour your hands a bit as you form the discs.
12. Cover and leave again, for about 4-6 hours. Less if it’s warm, more if it’s cold.
13. Heat the oven to 180C .

Unbaked pangiallo
14. Make a batter with 15g flour, 15g water, 15g oil and 15g sugar. De Vita’s glaze wasn’t coloured yellow, but if you want to, you can add some saffron to the (warm) water and leave it to infuse for half an hour or so. Or cheat and sprinkle in a little turmeric, a spice that’s only mildly flavoured and is more used for colouring.

Unbaked pangiallo, with saffron glaze
15. Brush the glaze onto the loaves.
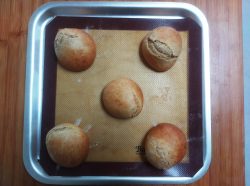
16. Bake for about 30 minutes, until coloured, but without burning too many raisins.

Pangiallo, baked
17. Allow to firm up on the trays for 20 minutes or so, then transfer to wire racks to cool completely.

Two pangialli

Comparisons
Considering pangiallo is defined by spices, raisins, figs and nuts, the two recipes I tried this week are remarkably different. De Vita sweetens hers only with the fruit and some sugar. Rachel’s uses honey.

I’m struggling a bit at the moment as I keep wondering about vegan stuff for my stall, and honey is a ahem sticking point. Many vegans are staunchly anti-honey. I love the stuff, and beekeeping friends have explained to me it’s a more symbiotic relationship with the bees, not the wholly exploitative one Donald Watson suggested in his 1944 edicts on the founding of the Vegan Society.

Anyway, Rachel’s (on the left in pic above), which uses mixed nuts and more candied peel alongside the honey, has a more pleasing texture. She describes it as like a “soft, chewy, heavily spiced nougat with a whisper of cake”. Which is spot on. De Vita’s, on the other hand, is surprisingly bready, considering the yeasted dough forms such a small proportion of the whole. It’s like a dense, more traditional, fruit cake, even one we’d recognise here in Britain. It’s good, but not as good. So I’m going with honey, more peel, more varied nuts. No yeast. And possibly even egg yolks in the glaze. Though whether it really needs to be quite so yellow is something I’m still undecided about. I need another research trip to Rome!
11 Comments

Filed under Baking, Breads, Cakes, Cakes (yeasted), Discussion, Feasts

Michette di Liguria: sweet buns, strange legend

Michetta, michette di liguria, Dolceacqua

After a slice of my torta di Santiago, a friend of my brother’s asked if I knew of any cakes that are traditionally eaten for the Christian feast day of the Assumption of Mary, celebrated on 15 August. I didn’t.

My native England has lost so much of its traditional festival foods, and I hadn’t encountered any Assumption baked goods while living in Italy. So some research was undertaken. The Feast Day Cookbook suggested veal cutlets and shrimps in béchamel. Neither of which satisfies the cake remit. Digging around more though, I came across a sweet bun from Liguria, northwest Italy. Specifically they’re from the town of Dolceacqua.

They’re called michette. Michetta is a term that’s more commonly used in Italy to refer to a type of hollow bread roll, originating from Lombardia; I knew it in Rome as a rosetta. The Dolceacqua michetta is a little different though: it’s a small, enriched bun. It also comes with such a striking, disturbing folkloric origin story.

Once upon a time…
Here’s the story, or an interpretation thereof based on me plodding through various Italian sources and a couple in bad English.

In the 14th century, a Dolceacqua baker had a beautiful 19-year-old daughter called Lucrezia. She was set to marry a young lad called Basso. Unfortunately, Marquis Doria, the ruler of Dolceacqua, enjoyed his droit de seigneur, or lus primae noctis: the supposed right of the feudal ruler to claim peasant brides on their wedding nights. With claim basically meaning rape. Remember the scene in Braveheart? (Fictitious. Apparently droit de seigneur is fictitious too, or at least historians agree there’s no conclusive evidence for it happening in the Middle Ages in Europe.)

Understandably, Lucrezia and Basso were not happy about this and tried to hide. Doria, however, had had his eye on Lucrezia and tracked her down, taking her back to his castle. Desperate, she tried to throw herself from the window of a castle tower. The Marquis stopped her, and to subdue her, locked her in a hot, damp dungeon. She remained steadfast though, and died there of hunger and thirst.

Hearing of the death of the popular girl, the locals had had enough and approached the castle. Basso was able to sneak in and, at knife point, forced the Marquis to abolish the lus primae noctis.

To celebrate – and commemorate – local bakers like Lucrezia’s dad started to make a small, sweet bun – michette.

I’m a bit confused at this point, but some of the sources say the bun was supposed to resemble female genitals – it was like an offering to the feudal lord, an alternative to the rape. It’s the sort of thing that sounds like it has its origins in older, even weirder, stories, but I’m not sure. Some of the source even had quotes in Ligurian language, which really threw me.

Anyway, the day after the Marquis relented was the Feast of the Assumption, which in Dolceacqua also became the Festa della michetta. Since then, “the word ‘michetta’ is still used to define the virginity and the female womb”, apparently. I suspect locals could explain it all better.

Not many sweet buns come with such heavy historical and cultural associations though. Take the Chelsea bun – it’s a sweet bun, which was first made in Chelsea. That’s its story.

Michetta, michette di liguria, Dolceacqua

Shapes and notes
The most common shape for the michette seems to be a small elliptical bun. Then on this video (at 1.00 minute) you can see a baker making a version with snakes of dough rolled into three ball shapes. I’ve given instructions for forms. I’ve also read of the existence of a cross form, the crocetta, but I haven’t done these.

Note, this is a very yeasty dough – it’s not a nice healthy long fermentation bread, it’s an indulgent, feast-day bun. Even if you can buy them all year round now in Dolceacqua. It’s also a very rich dough – as befitting a feast-day sweet – containing sugar, eggs, butter and olive oil.

Butter in doughs can be problematic if it gets too warm, it’ll become greasy and ooze. If your dough is getting too greasy, cool it off in the fridge, to firm up the butter a bit.

Also note that Italians may well make the dough volcano-style, that is with the flour piled up on the work surface, a crater in the middle and the liquid ingredients added. I do this for pasta, but I find it easier to use a bowl for bread doughs, as it’s more familiar and gives me a better sense of how it’s feeling.

Recipe
500g flour – 300g strong white, 200g white plain (all-purpose)
40g fresh yeast (or 25g active dried yeast)
100g water, tepid + about 80g more
100g unsalted butter, not warm
2 eggs (about 100g, without shells), lightly beaten
120g caster sugar
2g fine sea salt
Zest of one lemon
40g extra virgin olive oil
Water
Extra caster sugar

1. Mix the yeast with about 100g of the water.
2. Put the flour in a bowl and rub in the butter until it resembles fine breadcrumbs.
3. Stir in the sugar, salt and lemon zest.
4. Add the yeast mix, eggs and oil.
5. Bring to a dough. Add more water if it feels tight. I ended up adding about 80g more, so about 180g total.
6. Turn out the dough and knead. You want it quite moist and sticky – but manageable. Don’t overwork it, or the butter will get to oily. The best way to handle this is a few more short kneads over half an hour.
7. Clean out the bowl, oil it slightly, then put the dough back in and cover. Leave 10 minutes then give it a short knead. Return to bowl, cover, leave 10 minutes then give it another short knead.

Michetta dough, first proveMichetta dough, first prove, doubled

8. Put the ball of dough back in the bowl, cover and leave to prove until doubled in volume. As there’s so much yeast in this mix, it’ll be quite quick, especially if the room temperature is warm.
9. Turn out the dough onto a lightly floured surface and gently deflate to redistribute the gases.
10. Divide the dough into pieces, scaled at 60g if you’re being accurate.

Michetta dough, scaled at 60gMichetta dough, form balls

11. Form the pieces into balls.
12. Form the balls into the final shapes, as mentioned above, there seem to be two variables. For the basic buns, they’re small ellipses, so just squash and stretch the ball slightly. For the longer form, roll out the ball slightly, then using the karate chop side of your hand, roll slightly to make two indentations all around the circumference of the cylinder (see pic below).
13. Place the michette on baking sheets and allow to prove up again.
14. Preheat the oven to 200C.
15. Bake for about 12 minutes, until lightly browned.

Michette - two shapesMichette, baked, caster sugar

16. While still warm, brush the top with water and sprinkle with (or roll in) caster sugar.

Enjoy as a breakfast bun or for afternoon tea.

9 Comments

Filed under Baking, Cakes (yeasted), Feasts, Recipes

Kubaneh – Yemeni Jewish breakfast bread

Kubaneh

The latest addition to my cookbook library is Honey & Co’s The Baking Book, by Sarit Packer and Itomar Srulovich. It has the same UK publisher as my friend Rachel’s Five Quarters (which boasts a couple of my recipes), so I went along to the launch event a few weeks ago, bought a copy, got it signed and have been trying out the recipes since.

I love enriched doughs, so I was drawn to the recipe for kubaneh. Sarit’s family has Egyptian and Yemeni connections, and this bread is from the latter culture, specifically it’s a Yemenite-Jewish Sabbath breakfast bread. Reading more about it now, it’s traditionally baked overnight in a sealed tin. While Sarit’s version bakes for a fairly long time, it’s not overnight.

Some versions include whole eggs, and can be eaten as more savoury affair, with tomatoes or a tomato dip, or skhug, Yemeni hot sauce*. This one is sweeter. It’s rich in butter (or smen/semneh fermented sheep or goat milk butter; or margarine, depending on your dietary restrictions and inclinations and shopping options) and drizzled with honey, which caramelises together slightly.

Why haven’t I heard of this before?! Just my kind of thing.

Notes
I’ve tweaked the process slightly and given the ingredients in a more consistent format, so as to also include bakers’ percentages (below).

It’s a fairly moist dough – the original recipe says 300-350ml water, but I split the difference at 325ml: 325g. That works out at about 65% hydration, so quite wet and sticky. Check out my post on handling sticky doughs.

For this baking vessel, they use a “traditional lidded aluminium pot” but say you can also use a 20cm fixed bottom round cake tin, with a “lid” made of foil.

I used fresh yeast. You could use 10g active dry/granular yeast instead. If you only have instant/powdered yeast, you don’t need to mix it with liquid first – just combine it with the flour.

The dough
60g light soft brown sugar
15g fresh yeast
325g water, at about body temperature
250g strong white bread flour
250g plain (all-purpose) white flour
6g fine salt

Plus
Vegetable oil
Unsalted butter, softened (or margarine or smen, if you can get it. Very unlikely here in England!)
Runny honey

Here is it in bakers’ percentages (rounded):

Ingredient Quantity Percentage
Light soft brown sugar 60g 12%
Fresh yeast 15g 3%
Water 325g 65%
Strong white flour 250g 50%
Plain white flour 250g 50%
Salt 6g 2.5%

1. Mix together the water, sugar and yeast. Stir to dissolve the yeast.
2. Weigh out the flours into a large bowl and add the salt.
3. Add the yeast mixture to the flour and bring together a dough. I don’t have a mixer, so my instructions are for doing it by hand. If you do, just mix until well combined and smooth.

Kubaneh shaggy doughKubaneh - kneading doughKubaneh - smooth dough
4. Turn out the shaggy mixture onto a lightly oiled work surface and knead. I used the Dan Lepard technique of not kneading too much, then returning the dough to the bowl, cleaned and oiled, leaving for 10 minutes, then kneading briefly again. Repeat this twice more, then return to the cleaned, lightly oiled bowl.
5. Cover with plastic or a clean, damp tea towel and leave to prove for a couple of hours, or until doubled in size. The time will depend on the ambient temperature. It’s about 20C in my kitchen on a mild English summer’s day, and it took about two and a half hours.

Kubaneh dough - proved
6. While it’s proving, liberally grease the cake tin with butter, and grease the underside of the foil lid too. If you have a lidded pot, grease that similarly.

Kubaneh dough - slapped around
7. Sarit describes the next step as “the strange bit” – you moisten your hands then “flip the dough about in the bowl to knock it back”. Do it three times, keeping your hands moist.

Kubaneh dough - pieces
8. Oil a tray, then divide the dough up into eight pieces and place them on the tray. The dough weighs 900g, so eight pieces at around 112g.
9. Oil your hands a bit then take each piece, stretch it slightly, and put a blob of butter in the middle. I used pieces at about 10g, half a walnut size.
10. Smear the butter a bit then wrap the dough around it to form rough balls.

Kubaneh dough pieces in tin
11. Put the balls in the prepared tin, one in the middle, the rest equally spaced around it.
12. Put some more flecks of butter on top, drizzle with honey then cover and prove again until the dough “almost reaches the top” – too high and it’ll “overflow when baked.” I drizzled a bit more honey and added a bit more butter before baking.

Kubaneh dough ready for baking
13. Preheat the oven to 220C.
14. Put the tin, with its lid, in the oven and bake for half an hour.
15. Reduce the heat to 200C and continue baking for another half an hour.
16. Reduce the heat again to 180C and continue baking for another half an hour.
17. Turn the oven off and leave in the oven “for at least an hour”.
18. It’s best served warm, so if you’re an insomniac and have been doing this all night, or proved it overnight in the fridge and baked it early, enjoy it thus.

It’s surprisingly soft and chewy, and if you’re lucky, you’ll get nice caramelised bits. I won’t be doing it every week, but it’s a great addition to my enriched breads & breakfast bakes armoury. It’s also reminiscent of English lardy cakes, particularly the fruit-free versions from my part of the country, Hampshire and Sussex. Though obviously the fats used are a bit different for that gentile bake.

It’s also got me thinking about that most indulgent of fatty-sugary-doughy caramelised concoctions, the Breton kouign amann, which is more a pastry than a bread. Still, I might have to revisit that soon.

* Aka zhug, zehug; the Honey & Co The Baking Book also has a recipe for this, to accompany their lahooh, Yemeni pancakes.

5 Comments

Filed under Baking, Breads, Cakes (yeasted), Recipes