Tag Archives: recipe

Pizza to feed the family

pizza

This is the pizza I make for family and friends. It’s rolled out, thin and crispy, and baked in my puny electric oven on baking sheets. I find this approach more convenient to make over the course of a family Saturday, starting with a sponge (aka preferment) in the morning before swimming lessons, making a dough around midday, then bulk fermenting for about four hours.

Much as I’ve enjoyed the certified Vera Pizza Napoletana – “real Neapolitan pizza”– in Naples, I don’t really feel the need to try and emulate the Neapolitan style pizza, with its wide crust (cornicione). And if I’m honest, I always preferred the thinner crust, no-nonsense Roman-style ones we used to eat in places like Ai Marmi on Viale Trastevere and da Remo in Testaccio anyway. This dough does work opened by hand, slid off a peel onto a baking stone, if you favour the round, pseudo-Neapolitan style, but I prefer to roll, bake four at a time, then sit and eat with my family.

Variation on a theme
Pizza is ubiquitous. It’s Italy’s most successful export. And as anyone who’s eaten pizza in various corners of the world will know, it’s changed a lot in its travels*. Even within Italy, and within the diverse regions, and the provinces within those regions, pizza has enormous variety, not just familiar Neapolitan and Roman. It’s fat, thin, doughy, crunchy, round, square, long (alla pala), stuffed (farcita, or scaccia from Sicilian) or sandwiched (pizzòlo, also Sicilian) or pasty-like (calzone) or pie-like (rustica etc), tray-baked (like Palermo’s sfincione), fried (fritta; they loved fried in Naples). Flatbreads have infinite variety. Populations move, cultures hybridise, and the human experience is constantly in flux. The weather changes (now more than ever), ingredients change, processes change. Food, like language, is always changing.

During our time in Rome we also encountered the great Gabriele Bonci, star Roman pizzaiolo. His original hole in the wall pizza place, Pizzarium, located behind the Vatican, doesn’t have a fixed menu, it varies constantly with what’s available. Our very last visit there before moving back to England from Rome, Fran had a pizza with mortadella and Brussels sprouts. Who’d have thought Italians even had sprouts, let alone put them on their pizza? It was inspiring and a long way from the sort of thing that would achieve certification from the Associazione Verace Pizza Napoletana – and all the more exciting for it.

Sauce and toppings
This post is principally about my pizza dough. For tomato sauce, I often use a very simple one made with a tin of tomatoes, with a dash of dried oregano, black pepper and salt. Sometimes I add a bit of garlic or pinch of chilli. Then I use a stick blender to puree it. Other times, I’ll make a sauce with garlic, basil, a pinch of chilli, salt and pepper in a pan with lots of olive oil, warm that up then add a tin of tomatoes, cook that down, then put the whole lot through a mouli (food mill) to get out any fibrous bits. This is my son’s preferred pasta sauce.

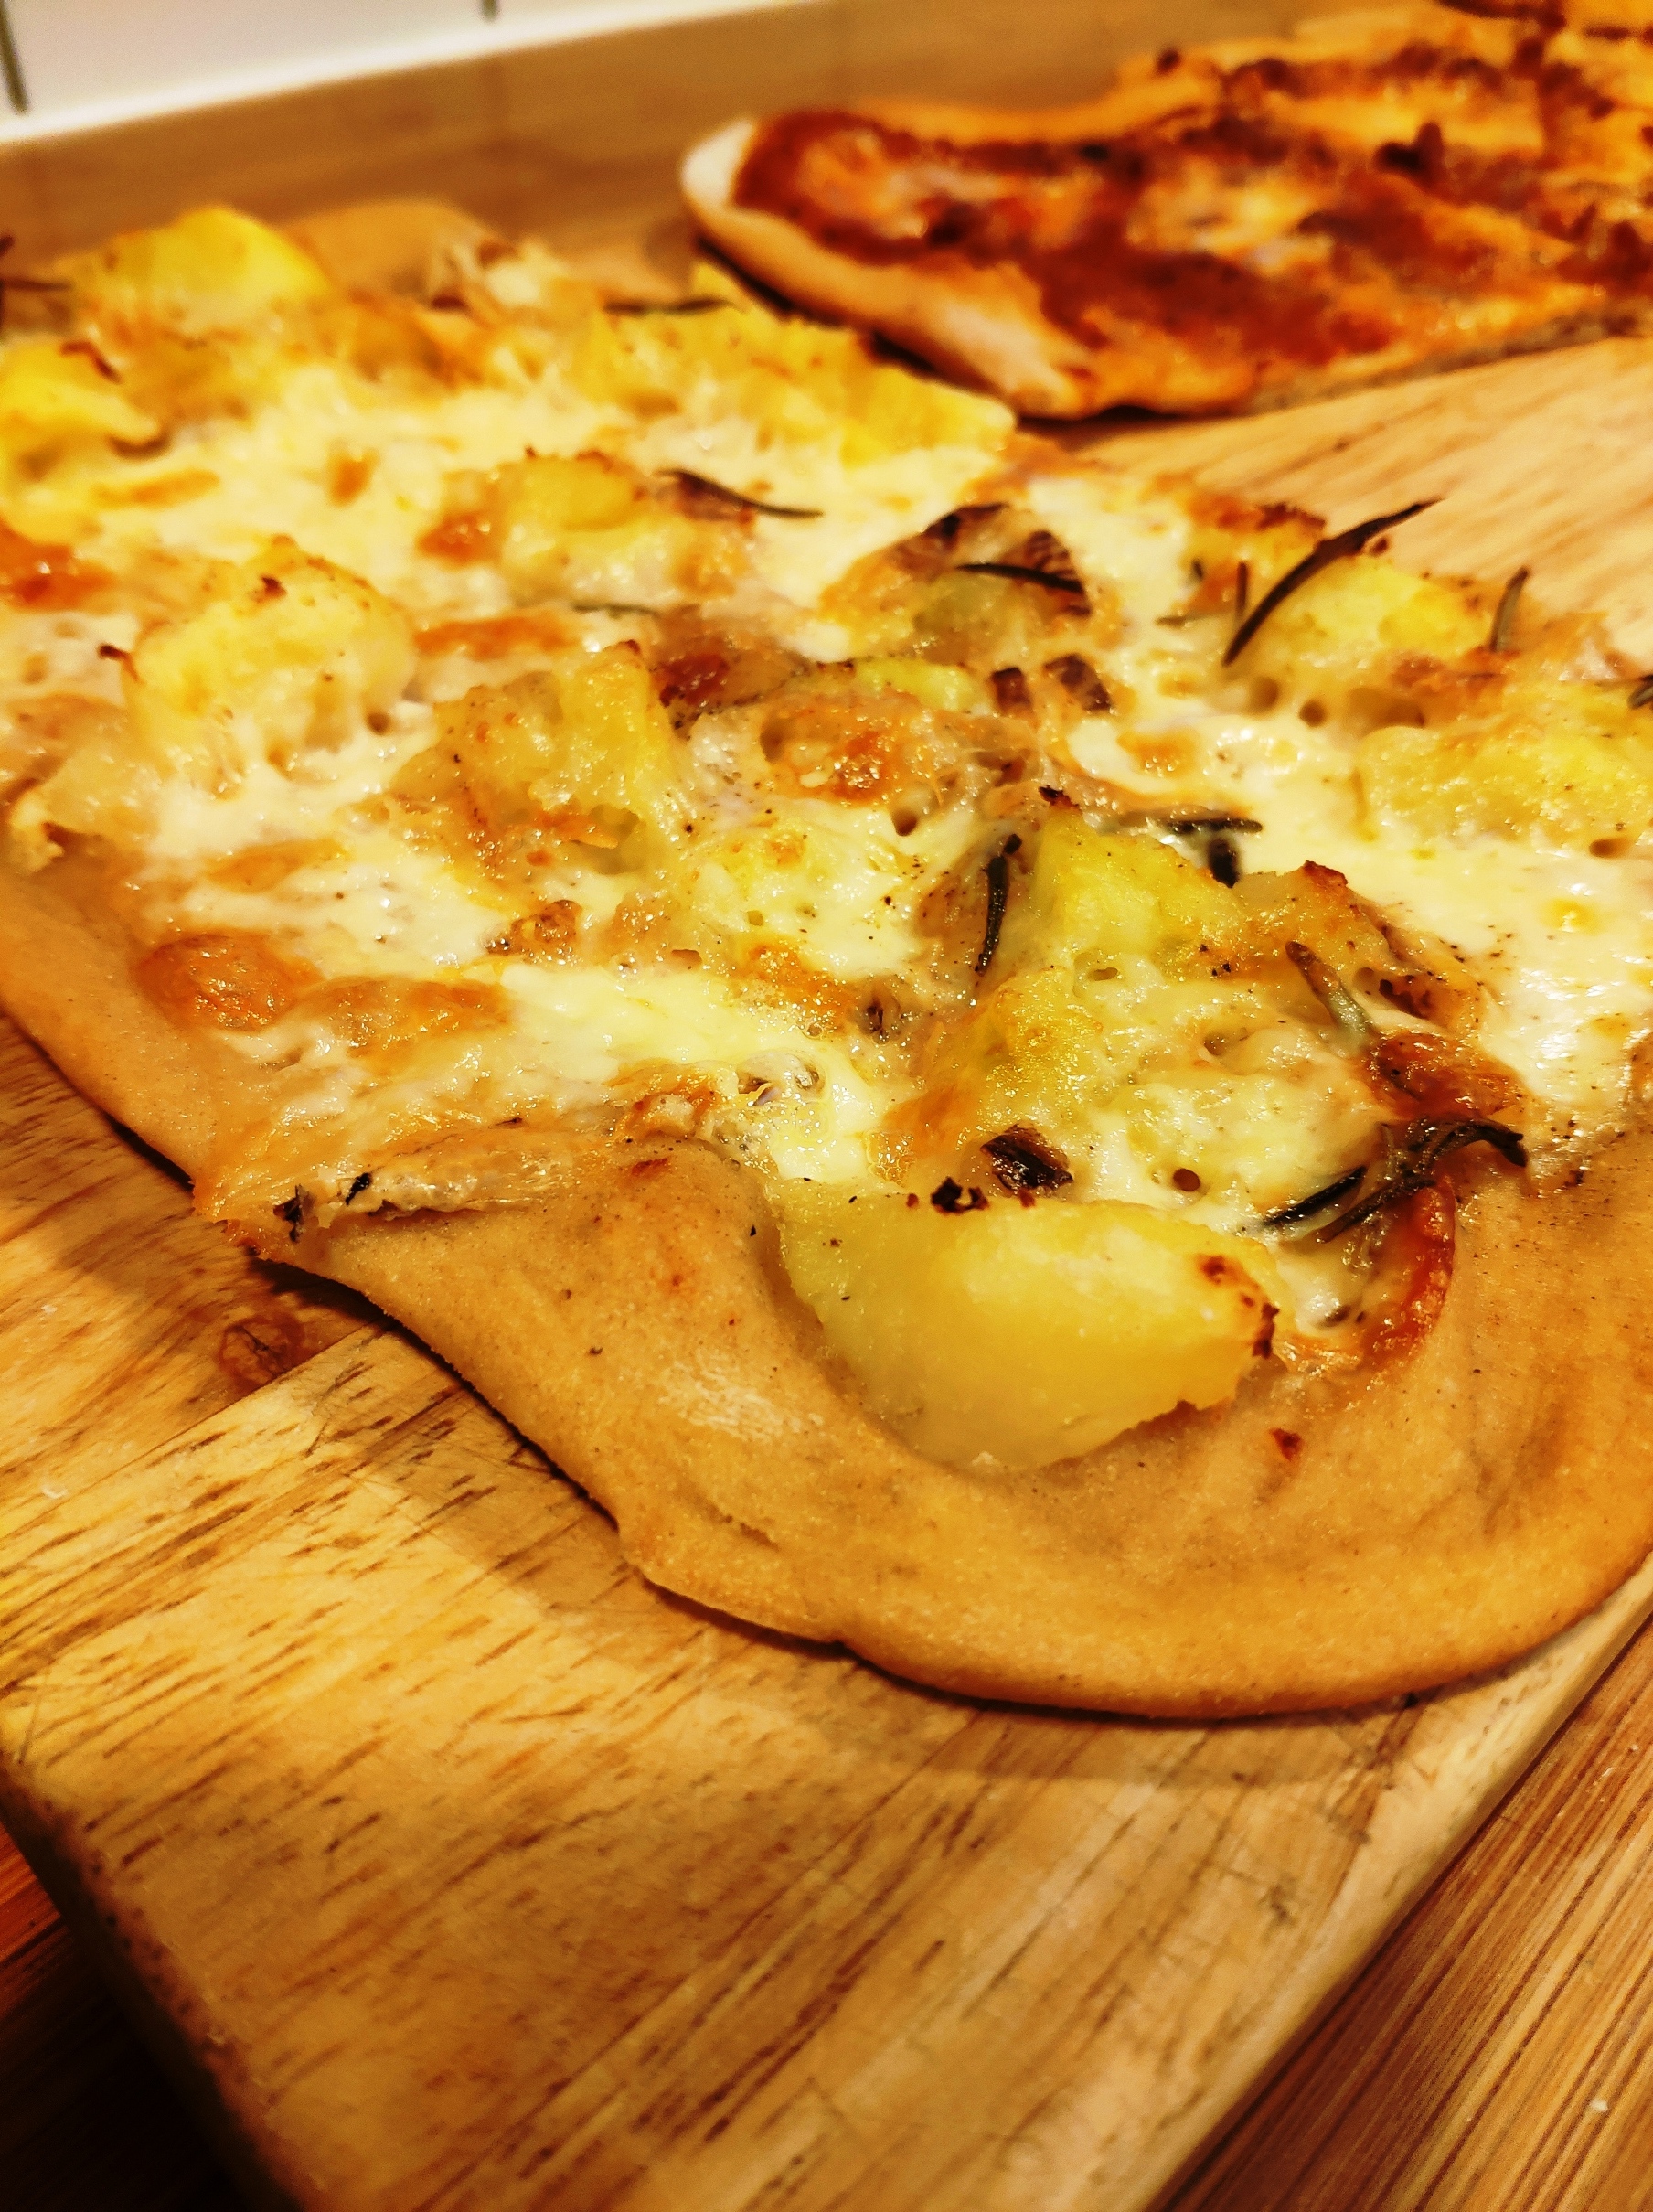
As for toppings – just go for it. Whatever you prefer. This time round I had some local leeks from market for one, roasted first. For another, I bought some taleggio, which I used on a pizza bianca (white – no tomato sauce) with some boiled potato, a good drizzle of olive oil and some sprigs of rosemary from the garden. For my bacon-loving wife, we had some quality pancetta from Beals, renowned charcuterie (or salumi, in Italian) made locally from mangalitza pigs.

My favourite is usually aubergine, sliced longways about 5mm thick, roasted with olive oil and salt and pepper, then add to a pizza rossa (red – tomato sauce), with salty black olives and pecorino – it’s an offshoot of what the Italians would call “alla Norma”, a pasta sauce from Catania in Sicily. We didn’t do that this time. Another one I like is broccoli – cooked to tender, then gently fried in olive oil with garlic and chilli.

My pizza dough recipe
Anyway, this is my pizza dough recipe. Not a whiff of “authenticity”!

It is a 66% hydration dough – ie the weight of water is 66% of the weight of the flour (400g/600g). That means it’s pretty easy to handle, not too sticky.

I use a blend of flours. I find this gives the best extensibility and doesn’t shrink back in on itself. For the light spelt flour, I either use Sharpham Park or Stoates, British, stoneground. You may have a local variation.

Makes 4 pizzas

400g water
4g active dried yeast (or 8g fresh yeast)
600g flour – 200g strong white, 200g plain (all-purpose), 200g light spelt
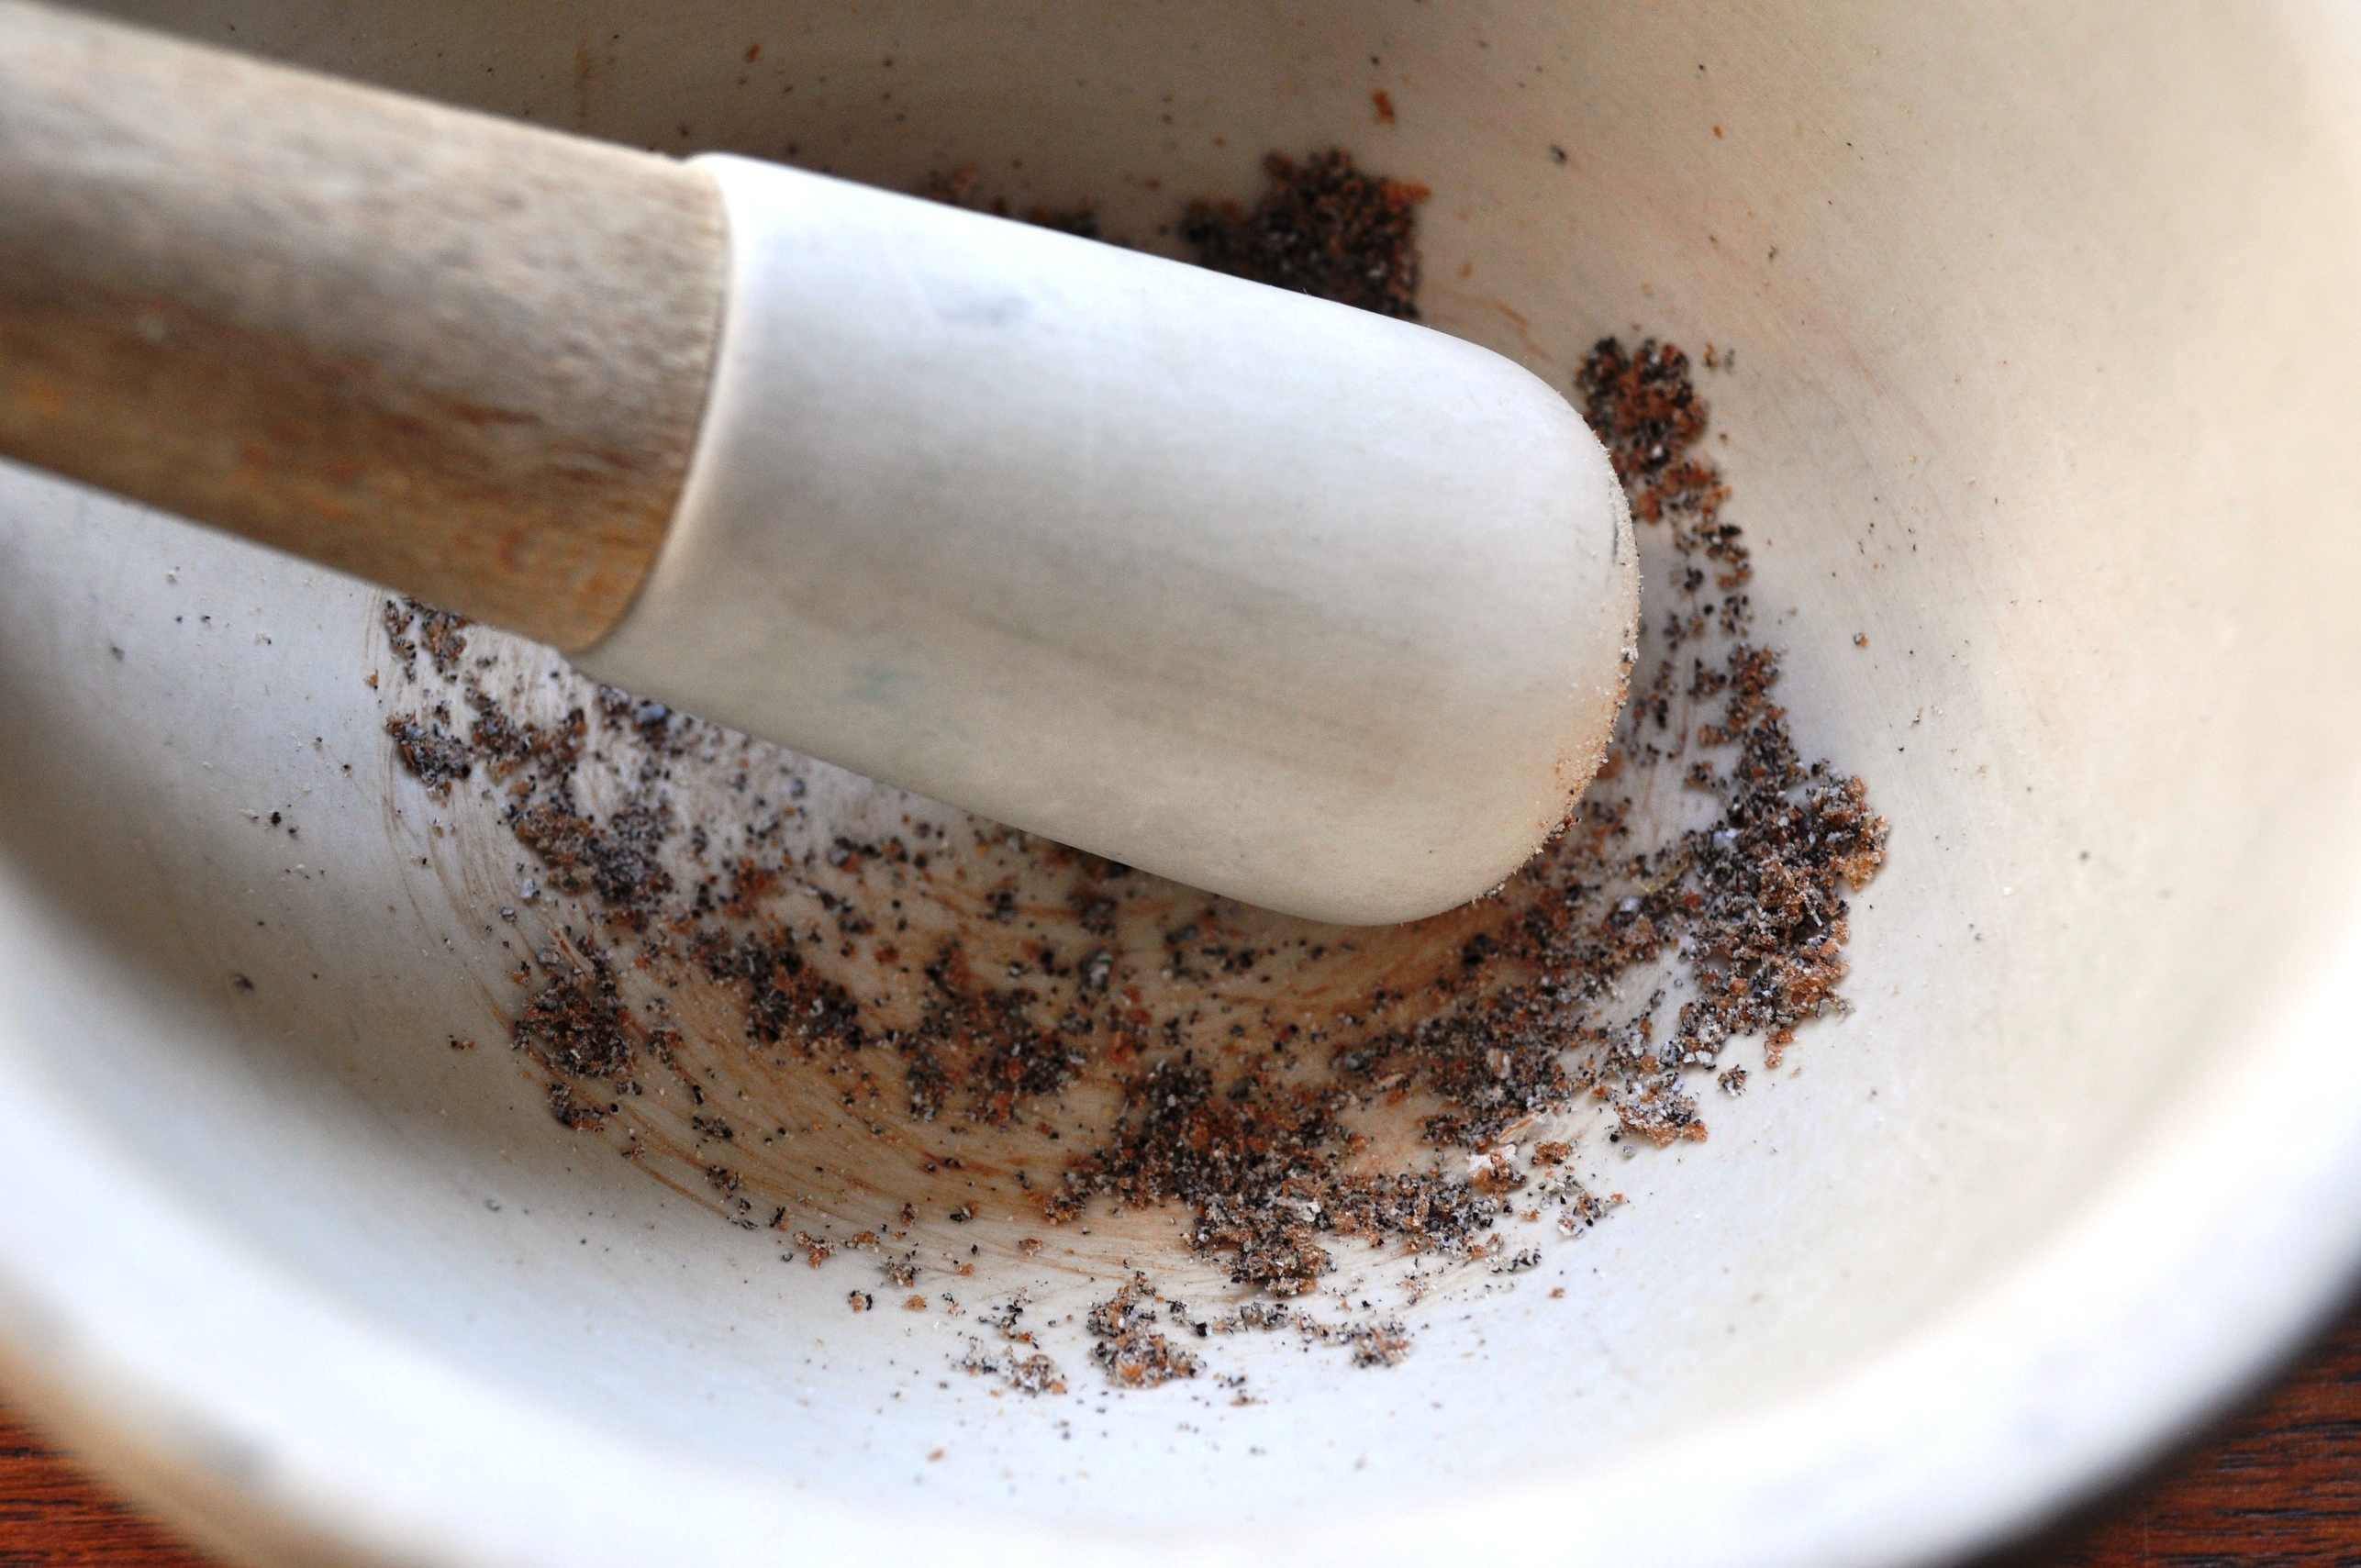
6g fine sea salt
20g extra virgin olive oil (approximately)
Extra oil for oiling worktop and drizzling

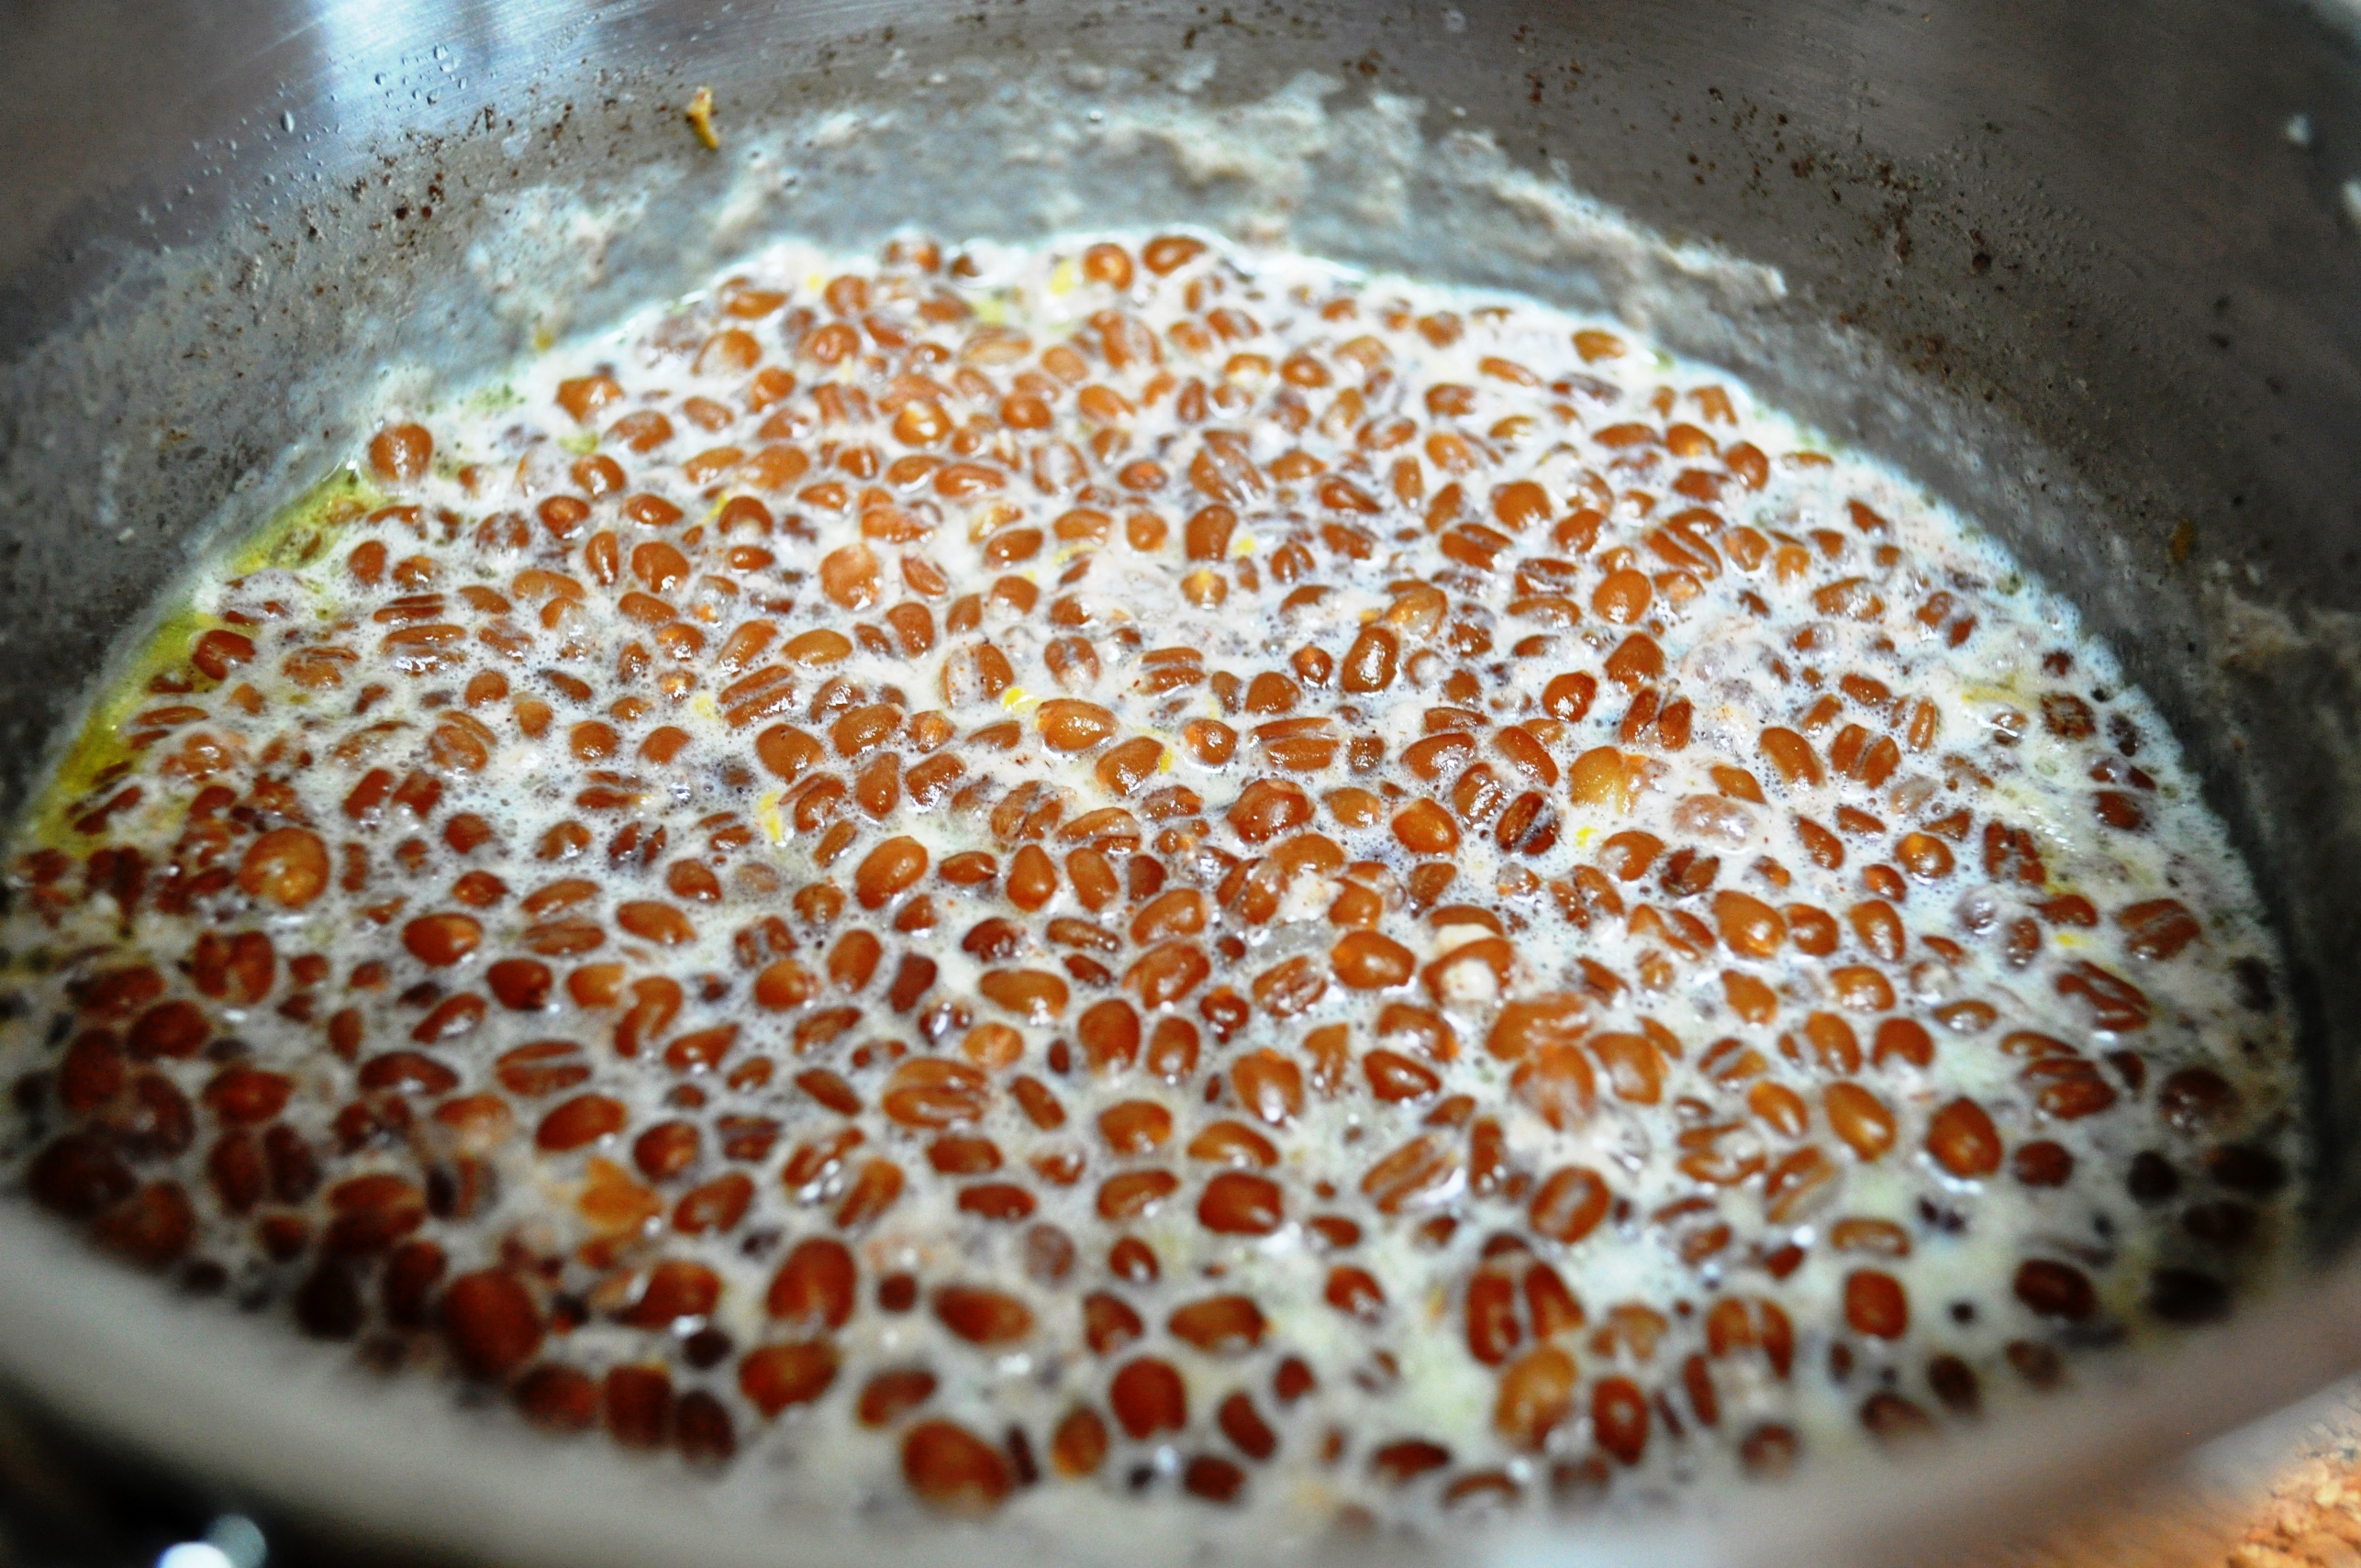
1. Warm the water, add the yeast. Allow to froth.
2. Add about half the flour, mix well to combine, then cover. Allow this sponge or preferment to get nice and bubbly. Depending on the temperature in your kitchen, this can take anything from half an hour to a few hours. Leaving it gives us enough time to swimming lessons and back.

Pizza sponge

3. Pour in a few good glugs of olive oil, around 20g, and combine.

Pizza sponge with olive oil

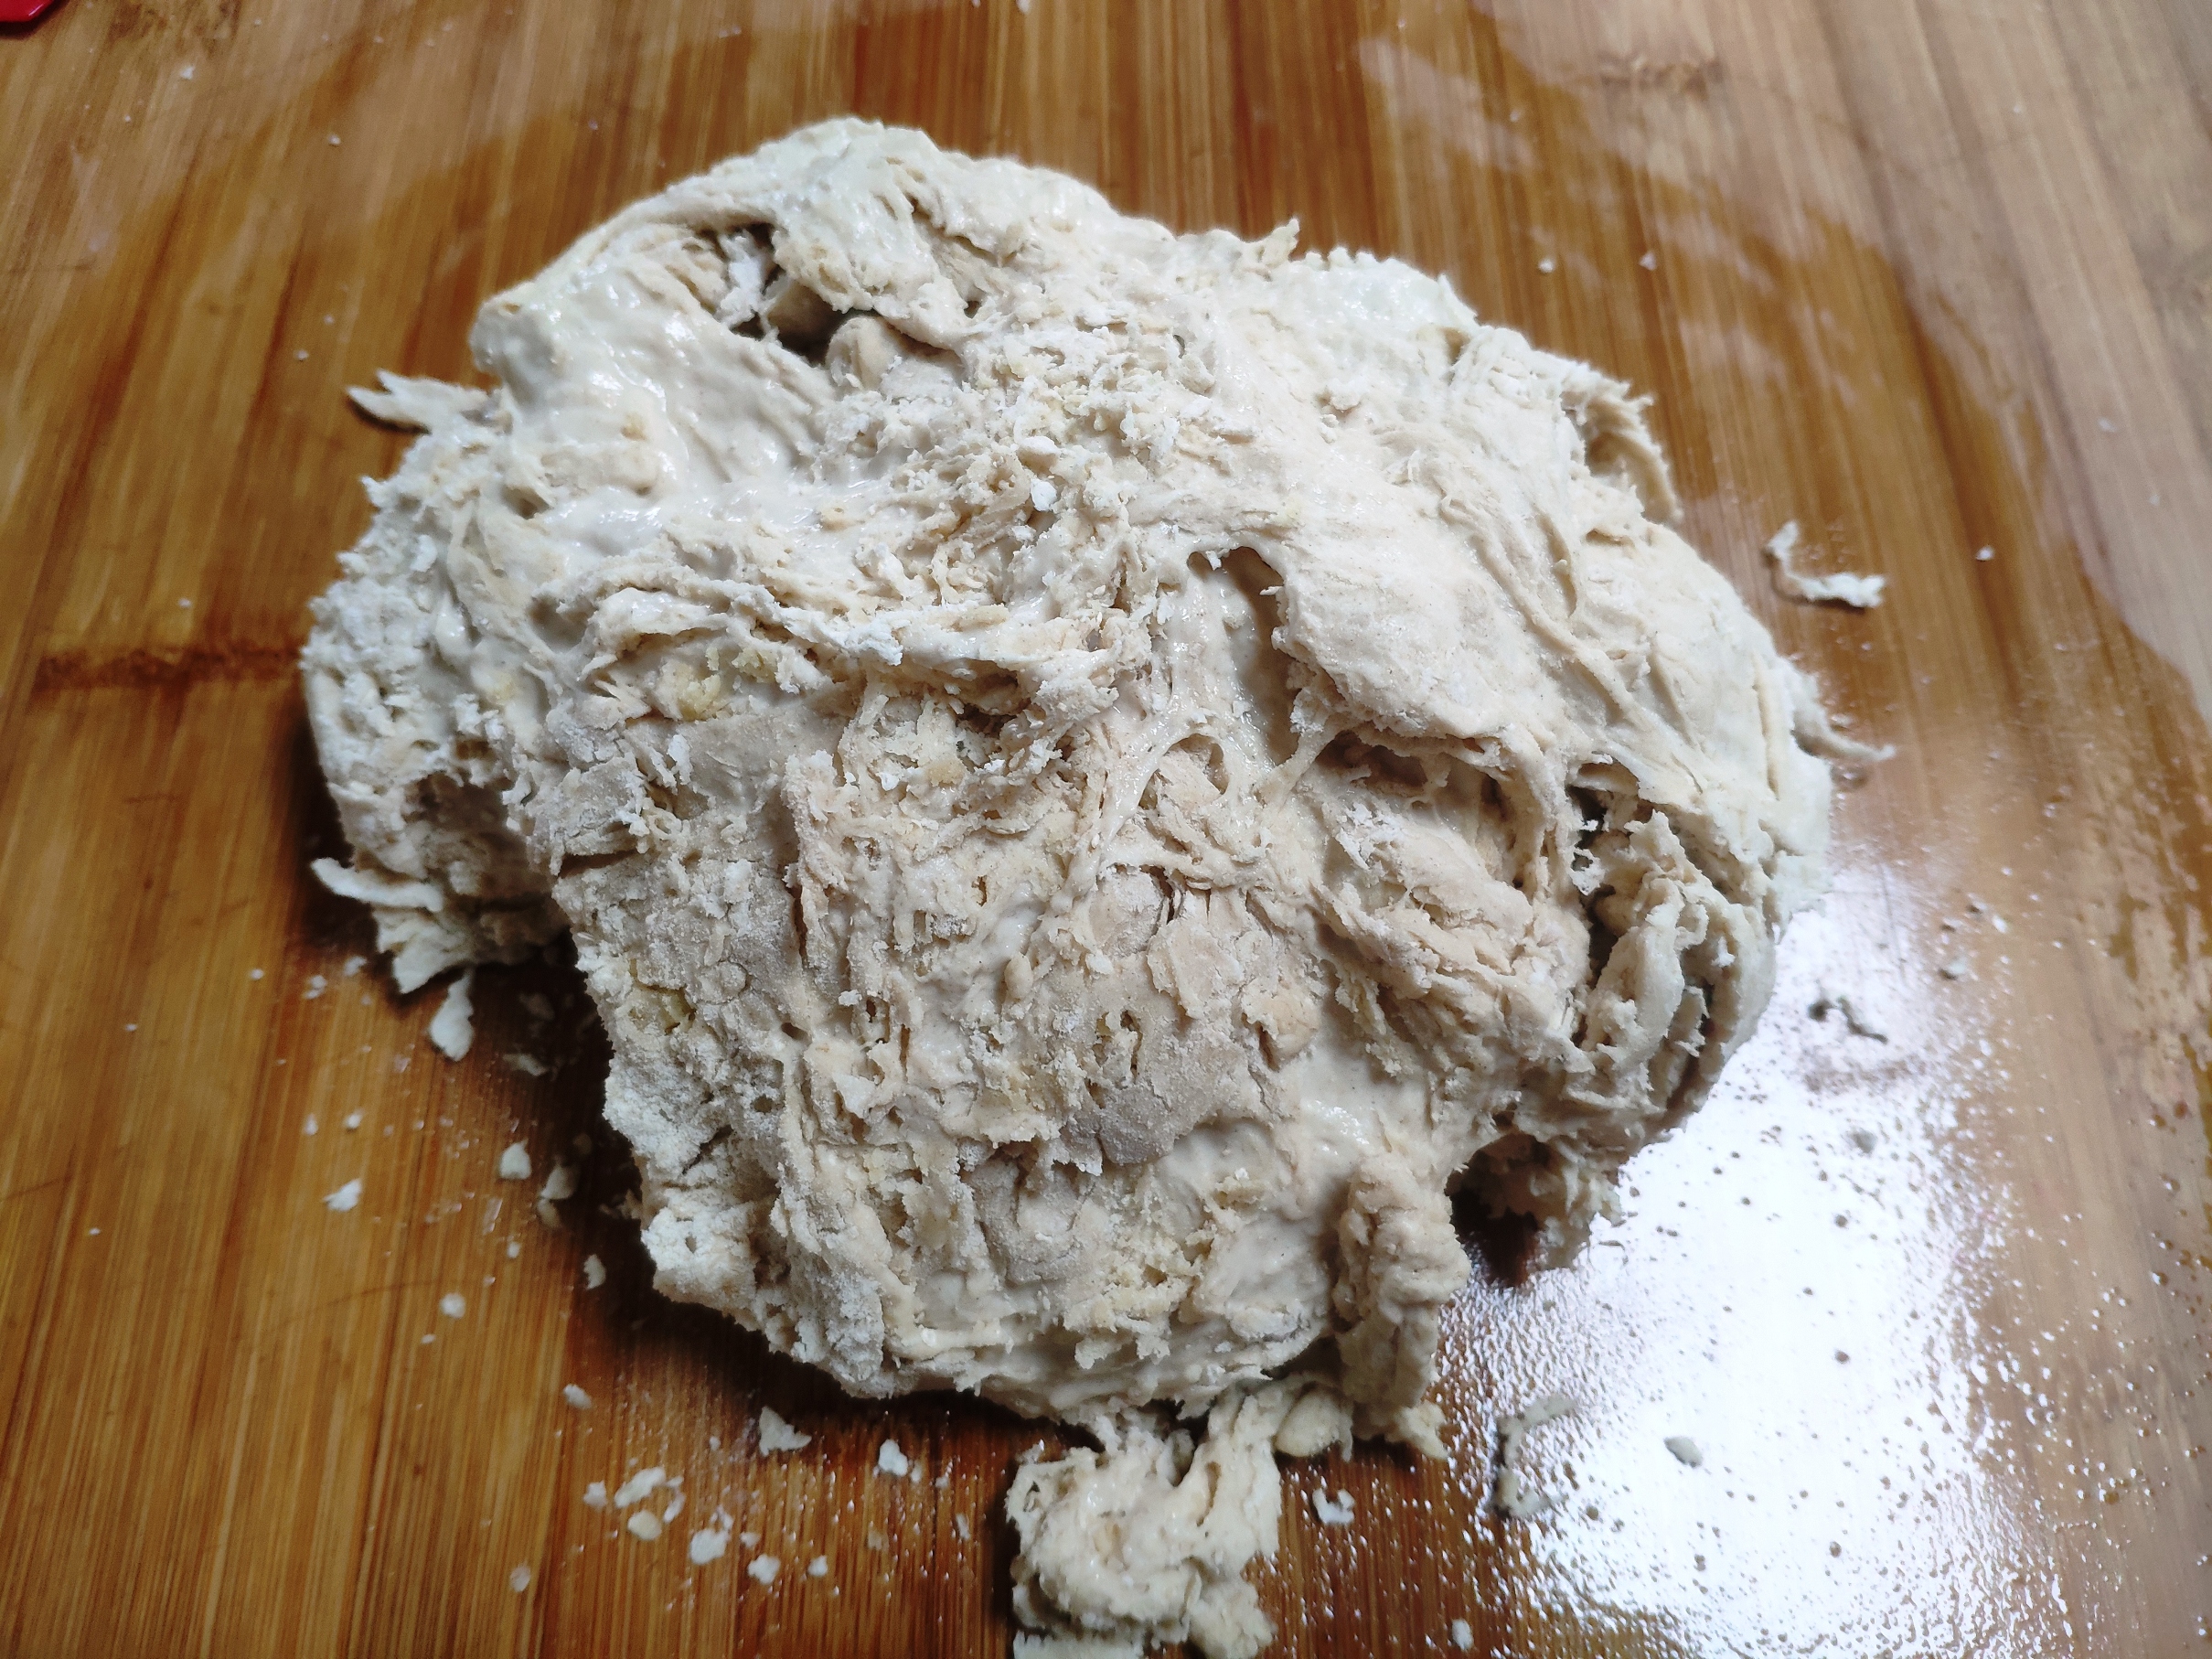
4. Add the salt and the rest of the flour and mix well. You can do this with a mixer with a dough hook if you have one.
5. If you don’t have a mixer, turn out the shaggy mass** onto a lightly oiled work surface and knead to bring together.

6. Form into a rough ball then put in a lightly oiled bowl, cover (shower caps are great for this) and rest for about 10 minutes.

2020-03-07 12.40.09

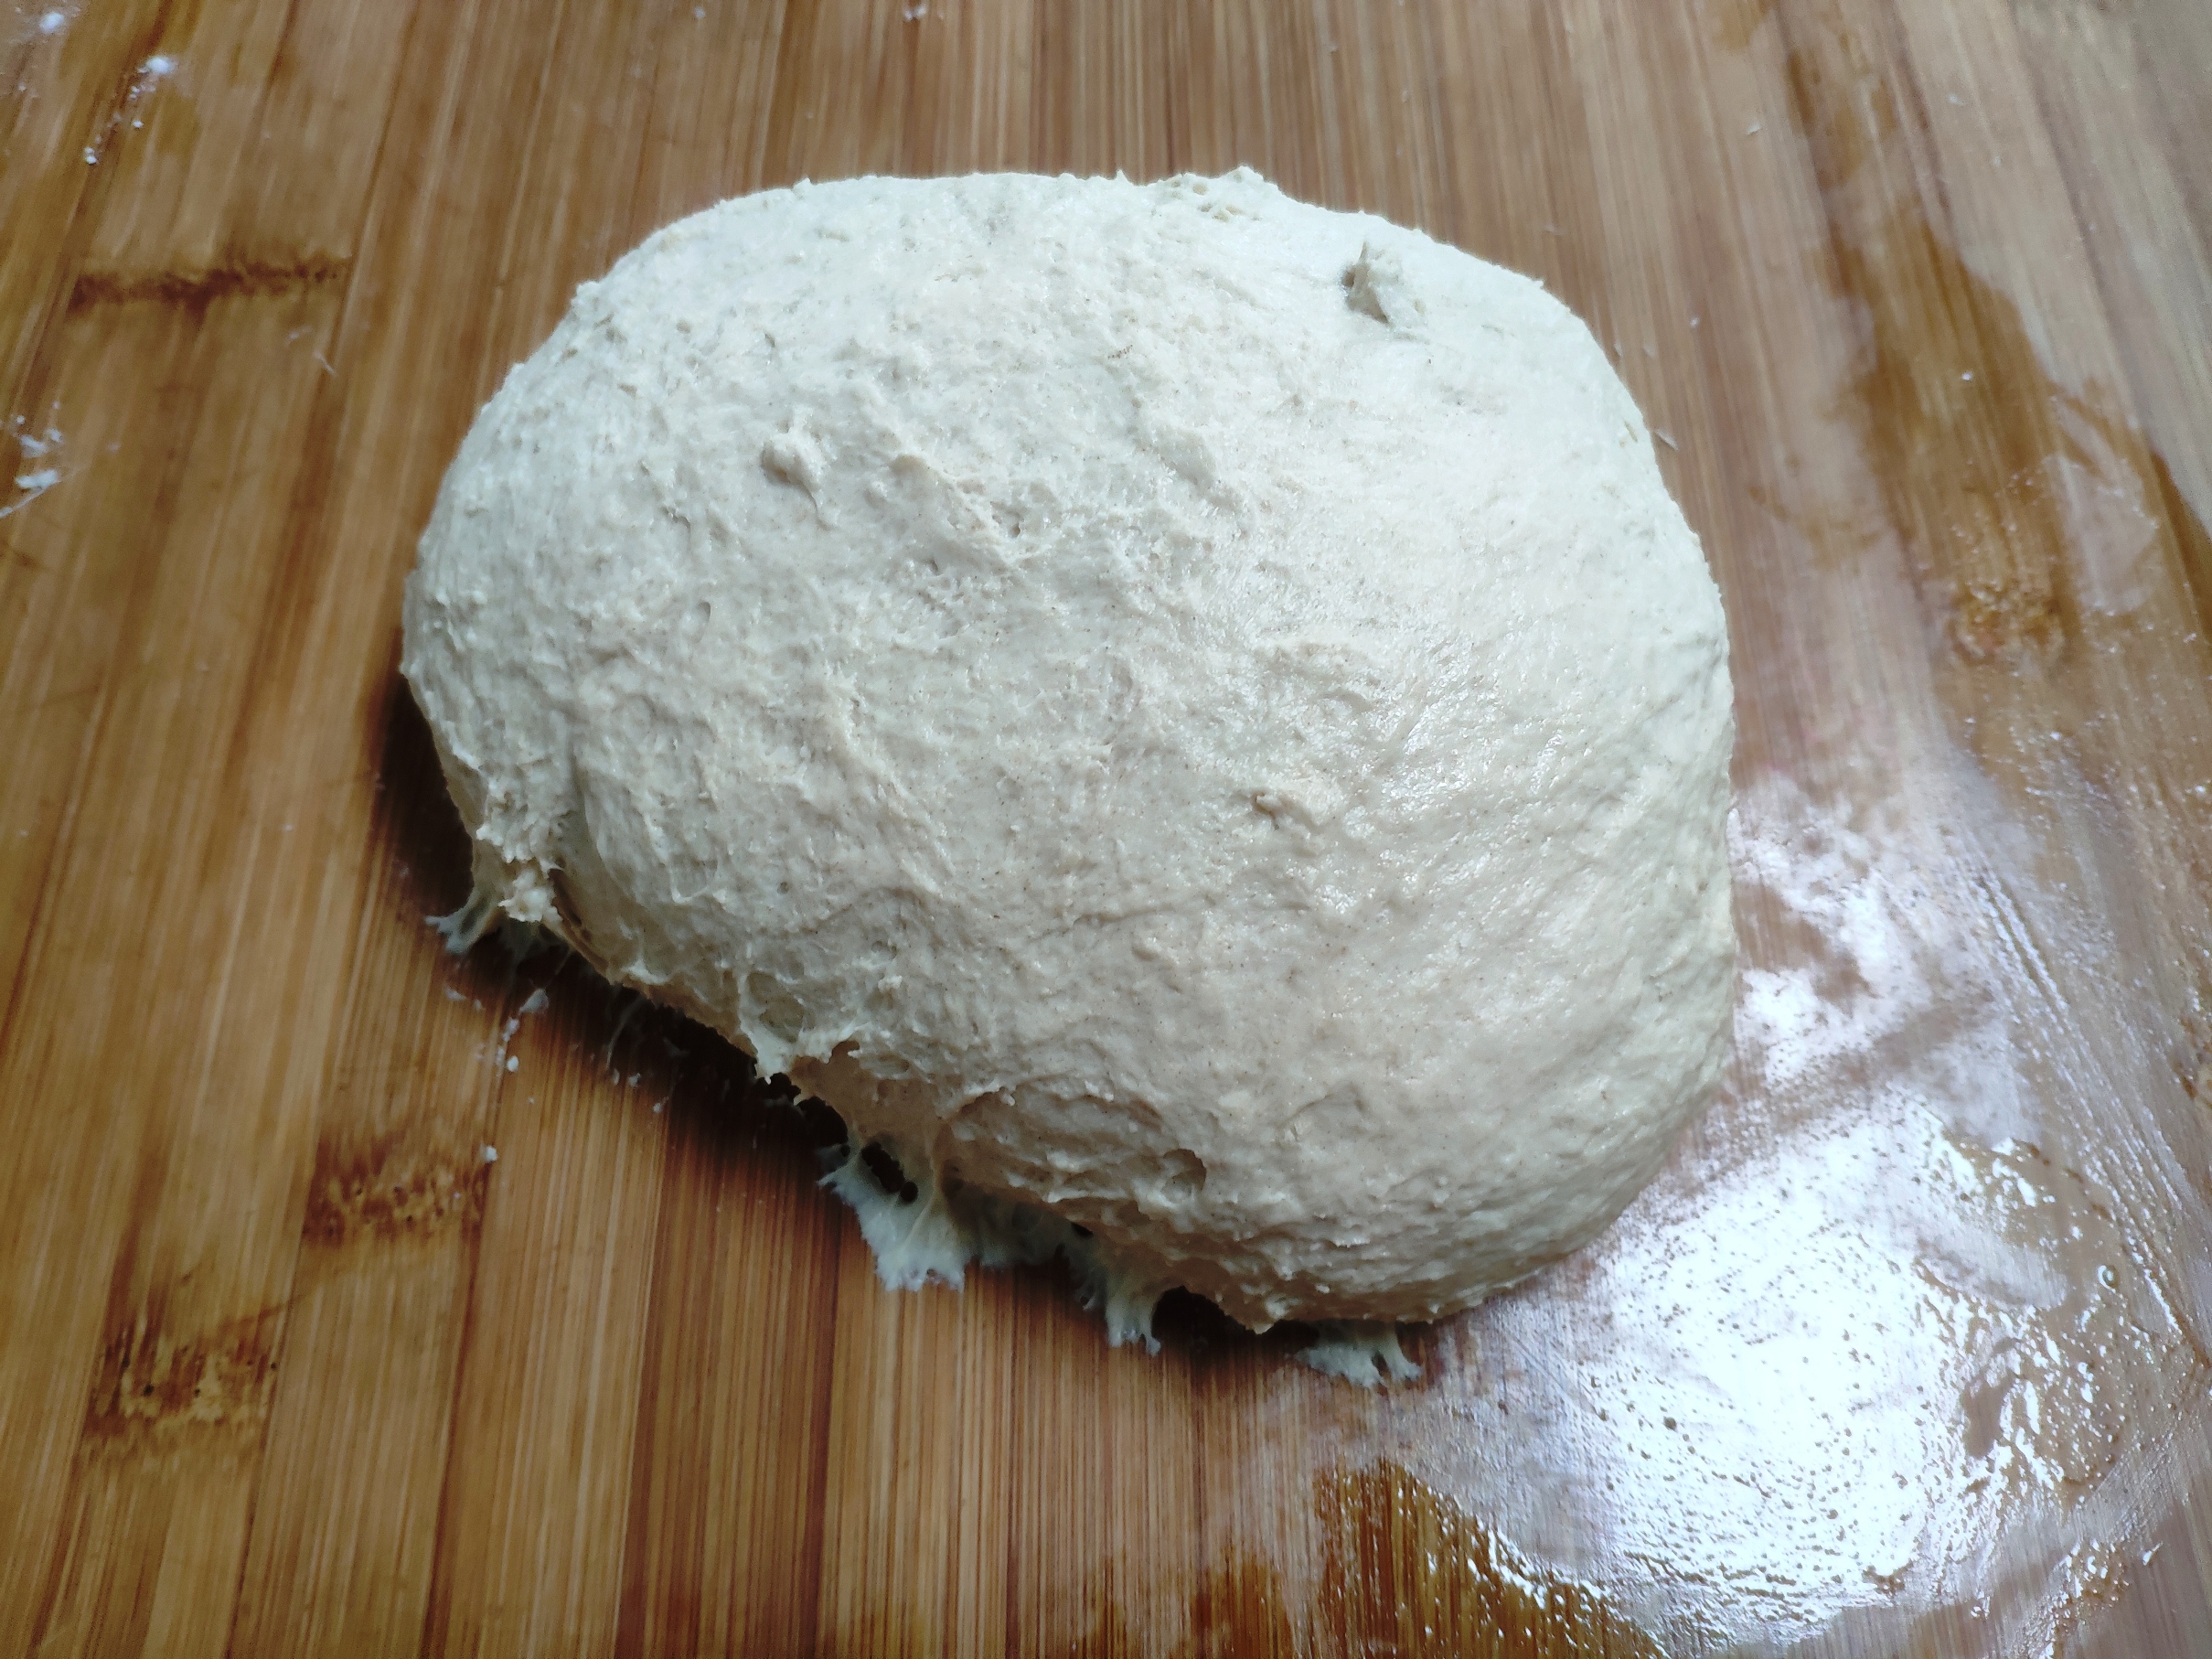
7. Turn out and knead briefly. It should be smoother now, and easier to form into a neat ball.
8. Turn out and give it another brief knead. Rest for another 10 minutes.
9. Give it another knead then return to the bowl, cover and rest.
10. Give it a nice long fermentation. You can give it a stretch and fold if you like. This is a good process for helping the dough structure. Simply turn out the dough onto the lightly oiled work surface, stretch out a rough rectangle, fold one third in, then the other third. (Check out my old post on pizza bianca for more details or this technique.) If it’s rising too fast and you want to delay things, you can also put it, covered, in the fridge.
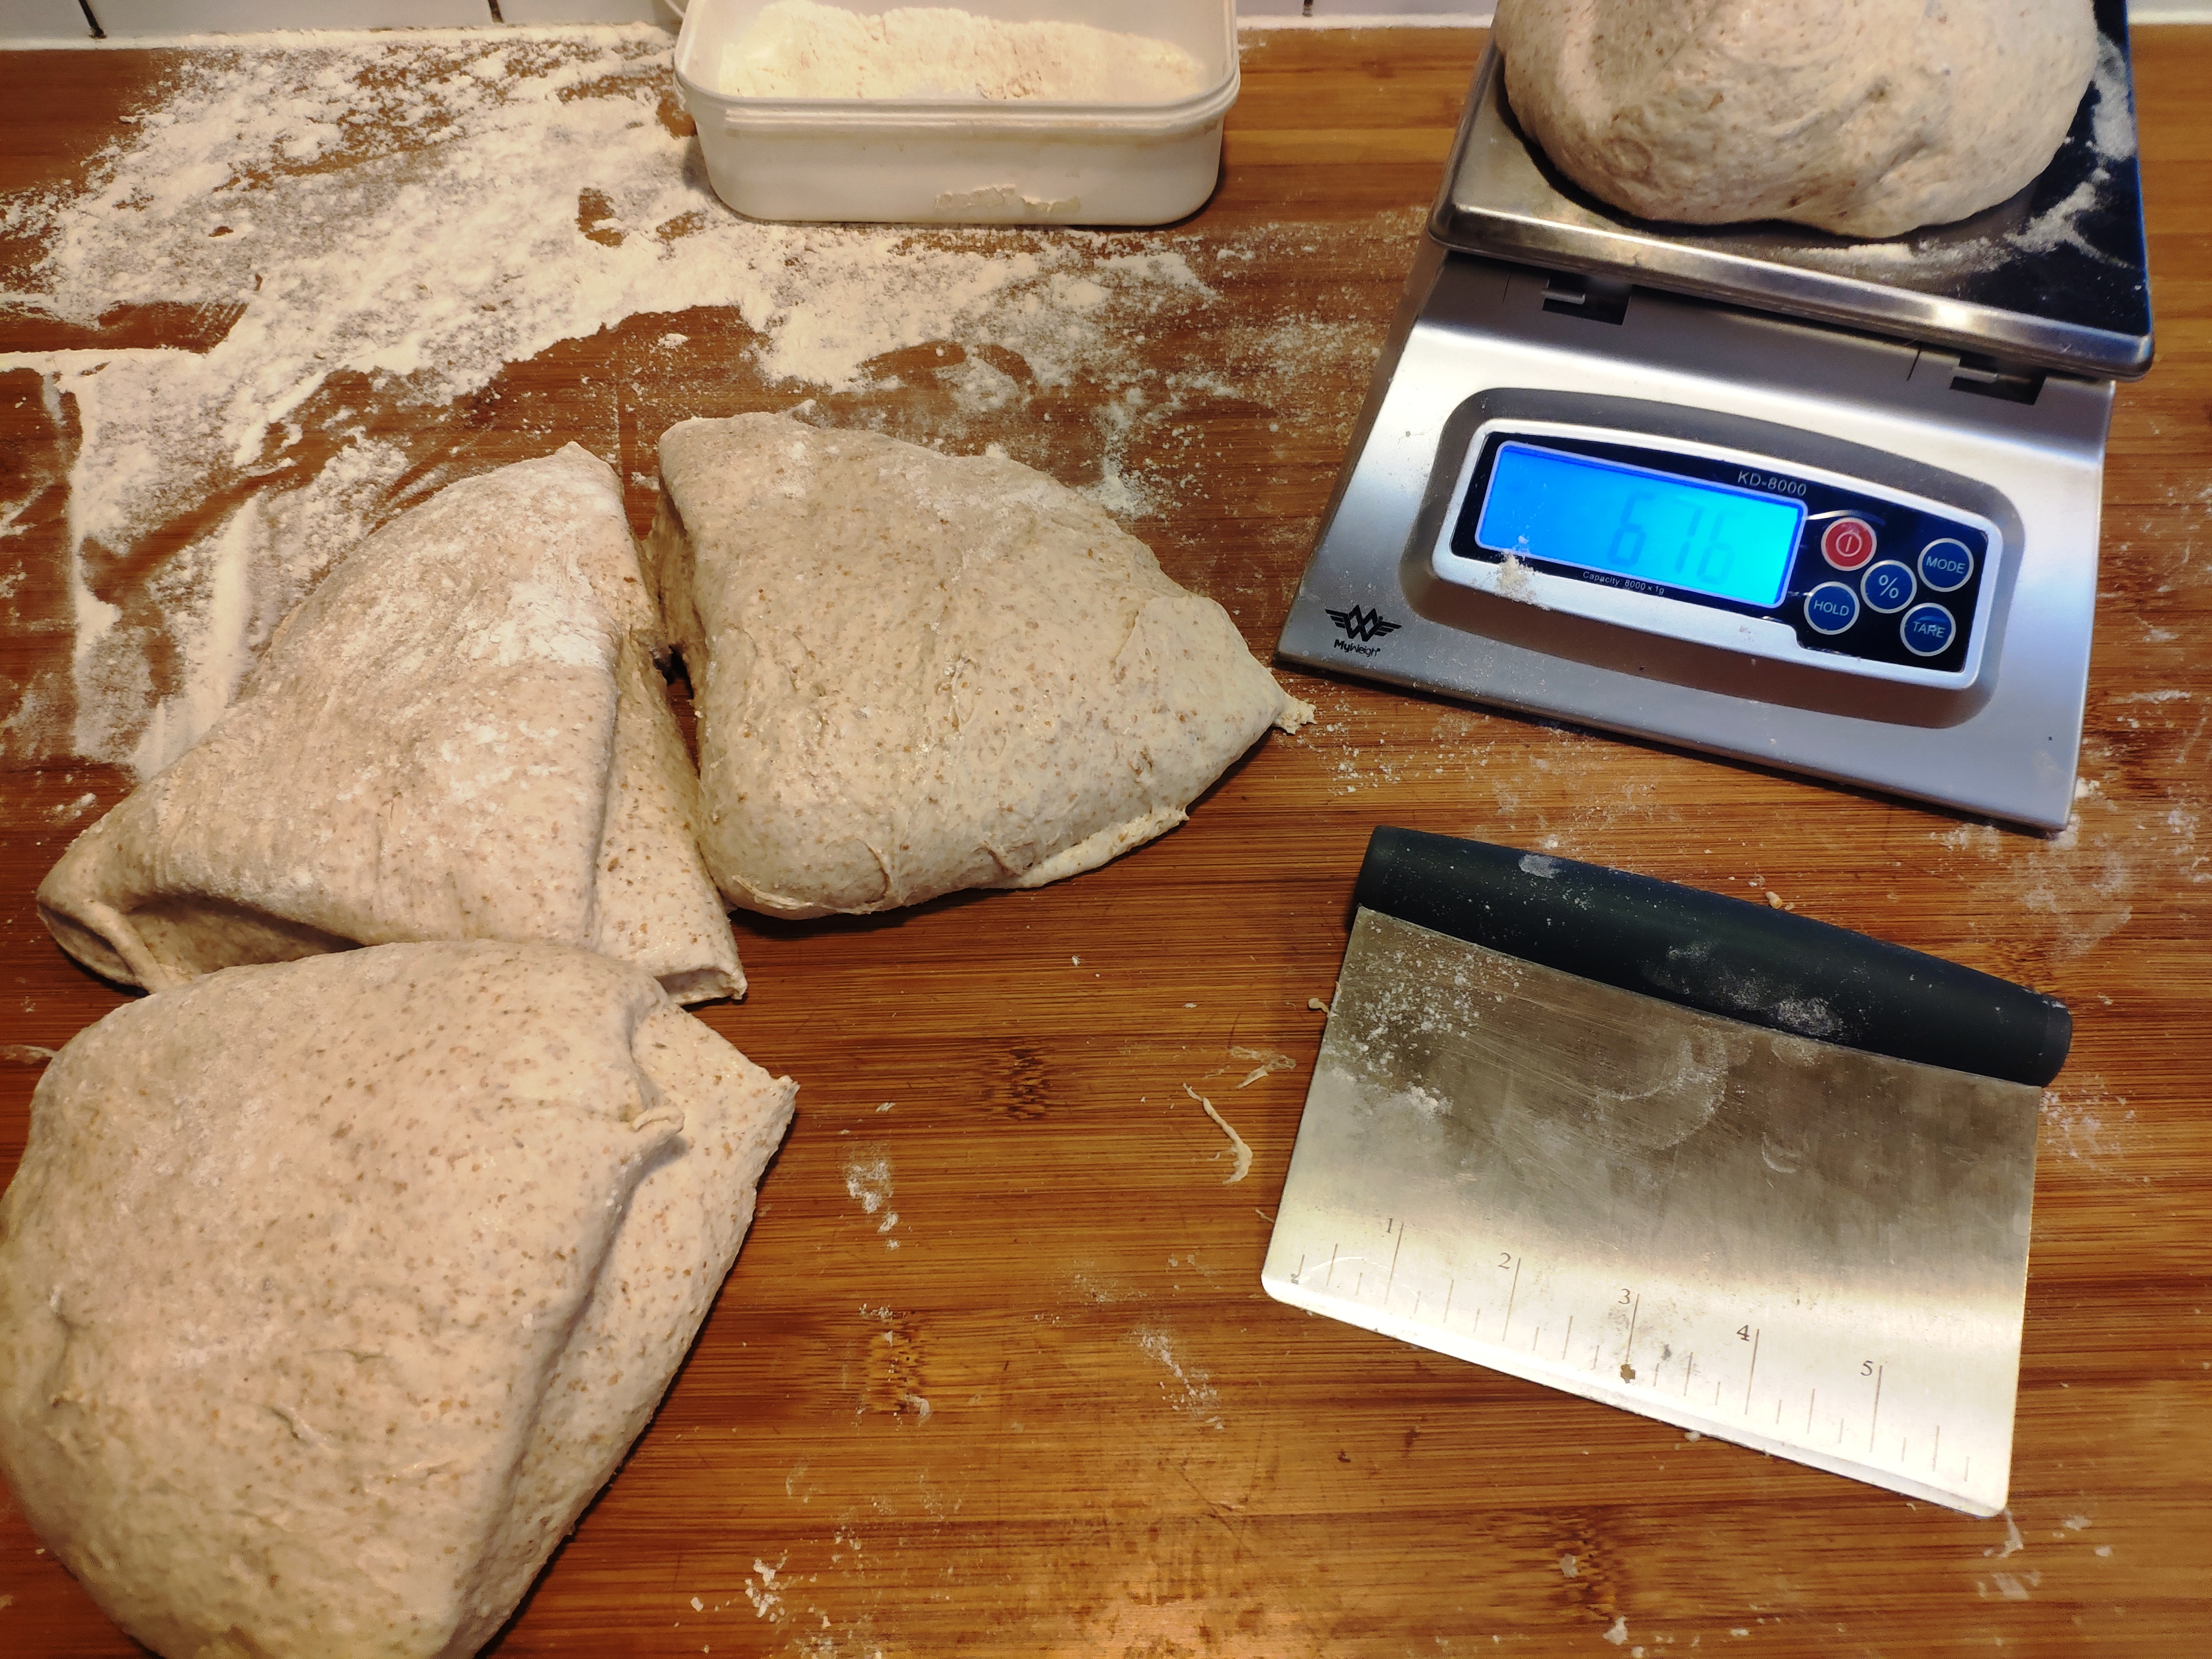
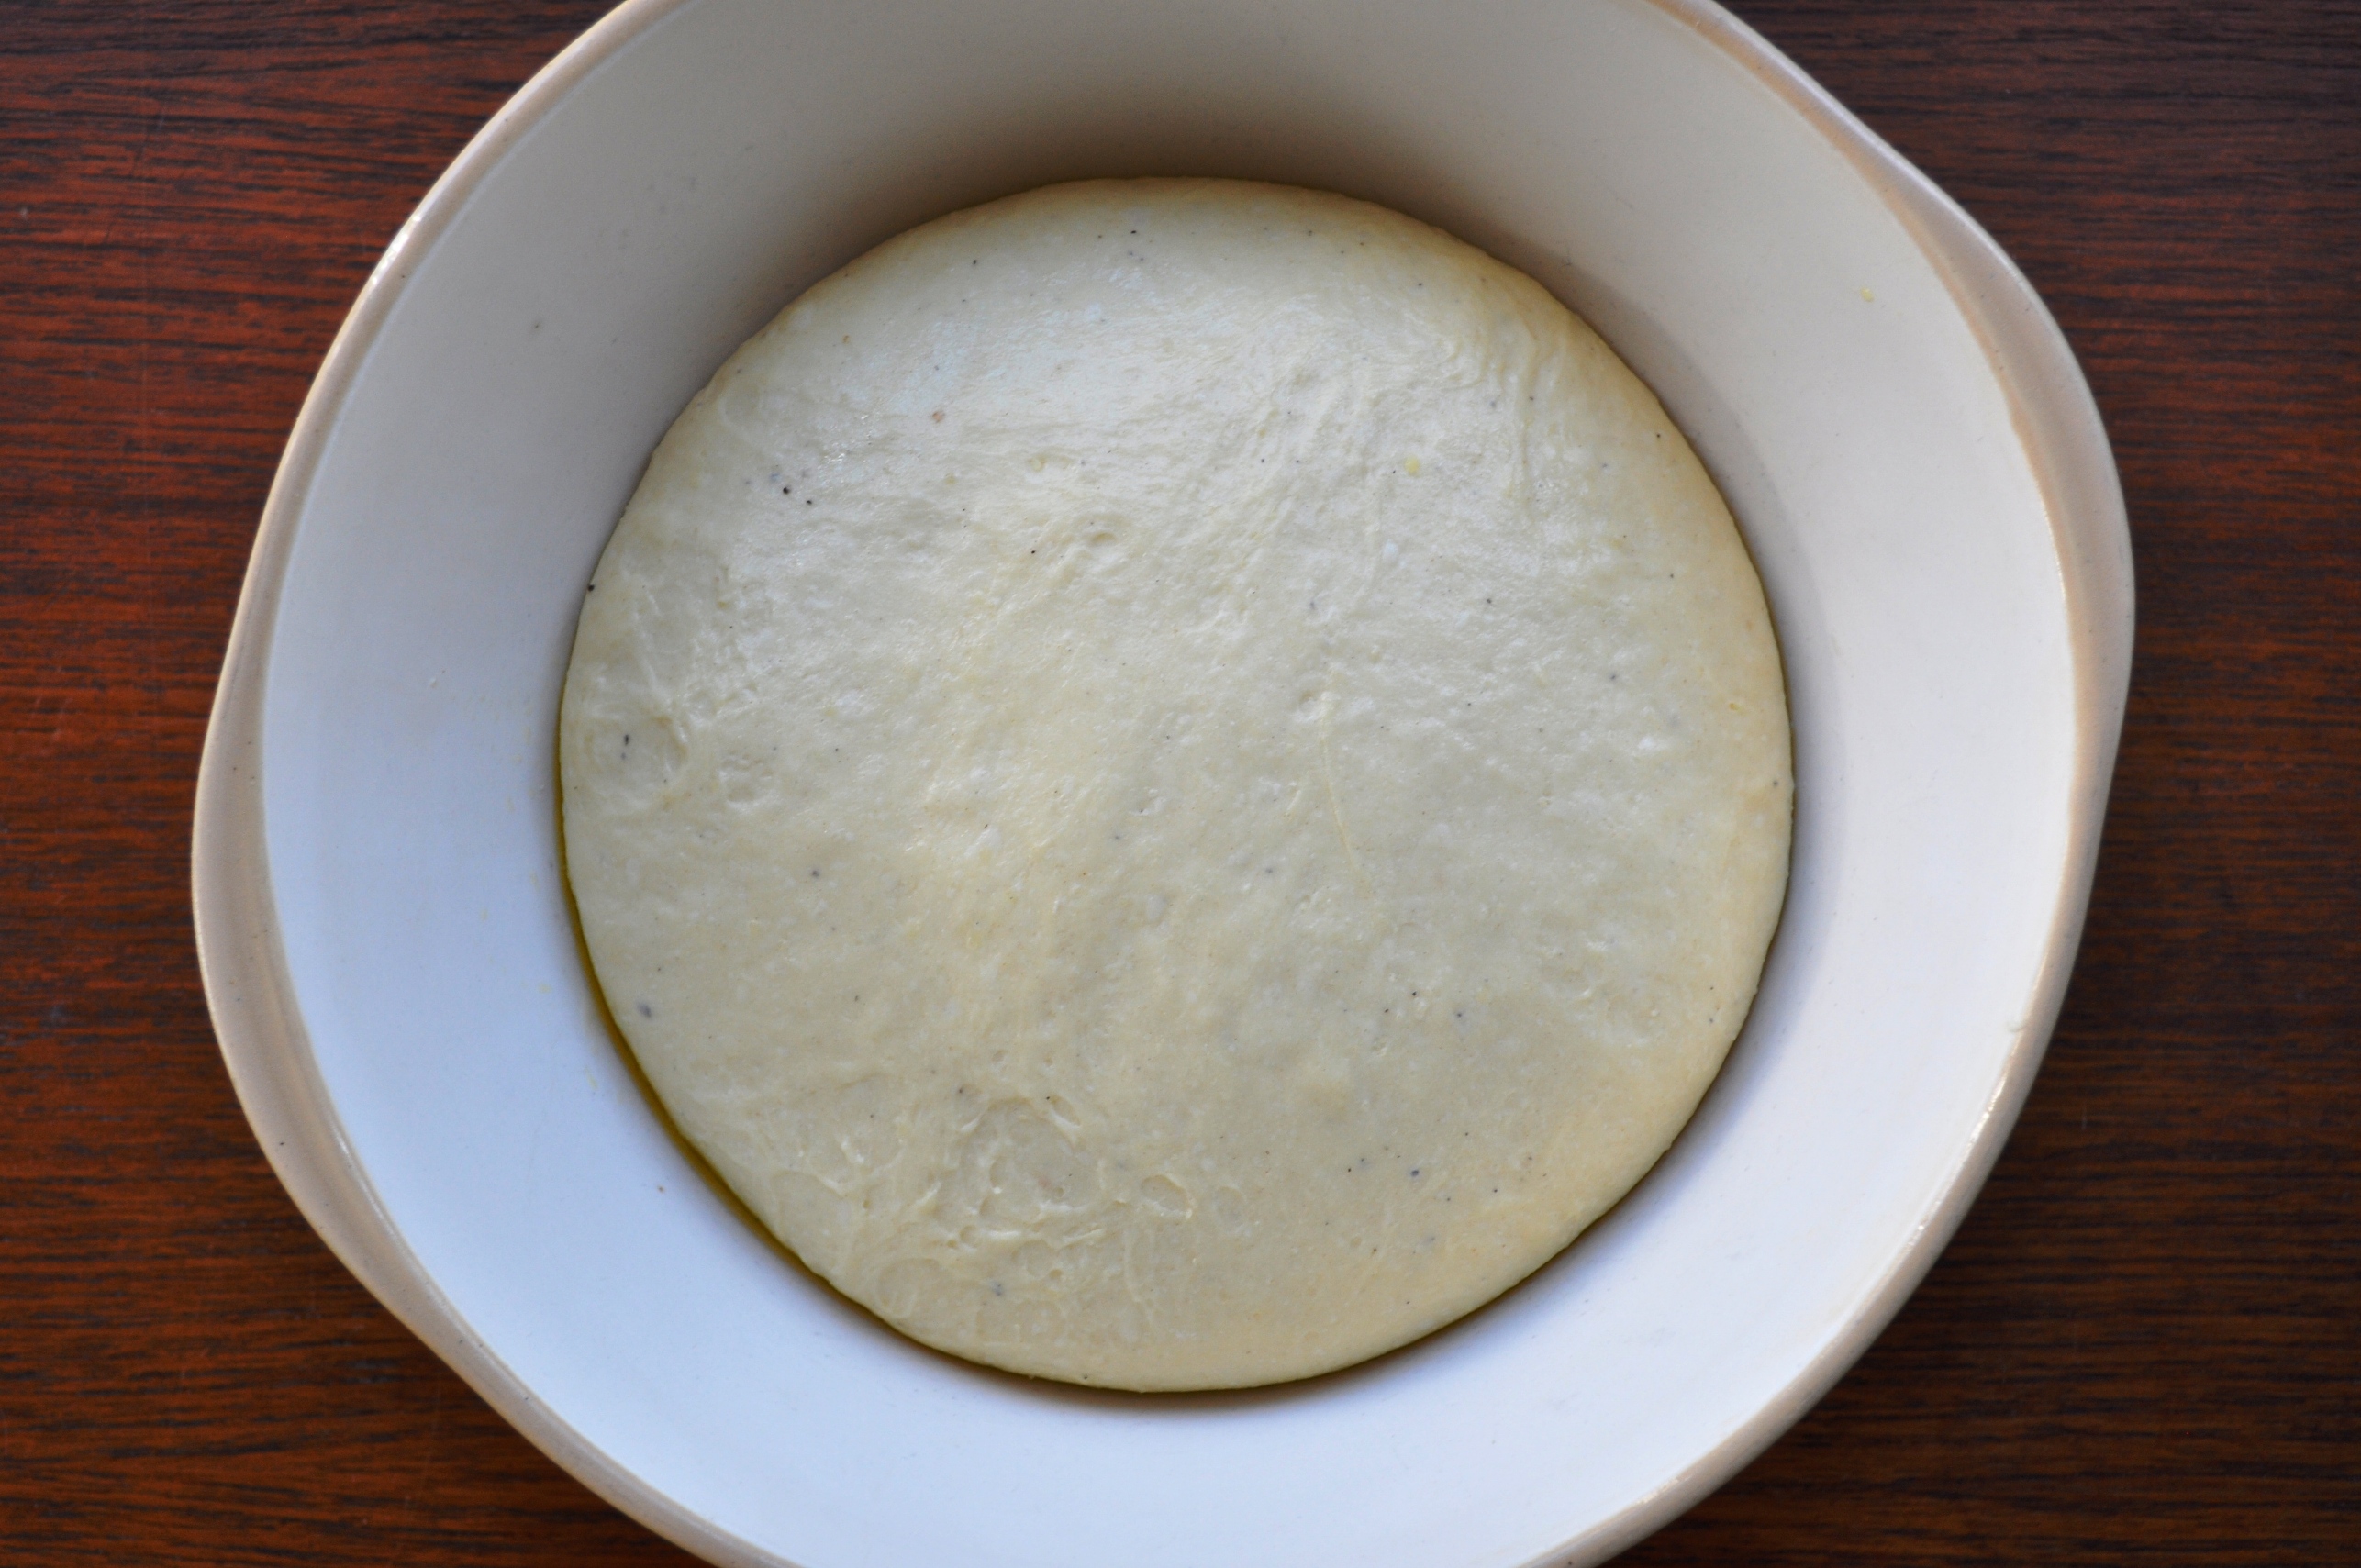
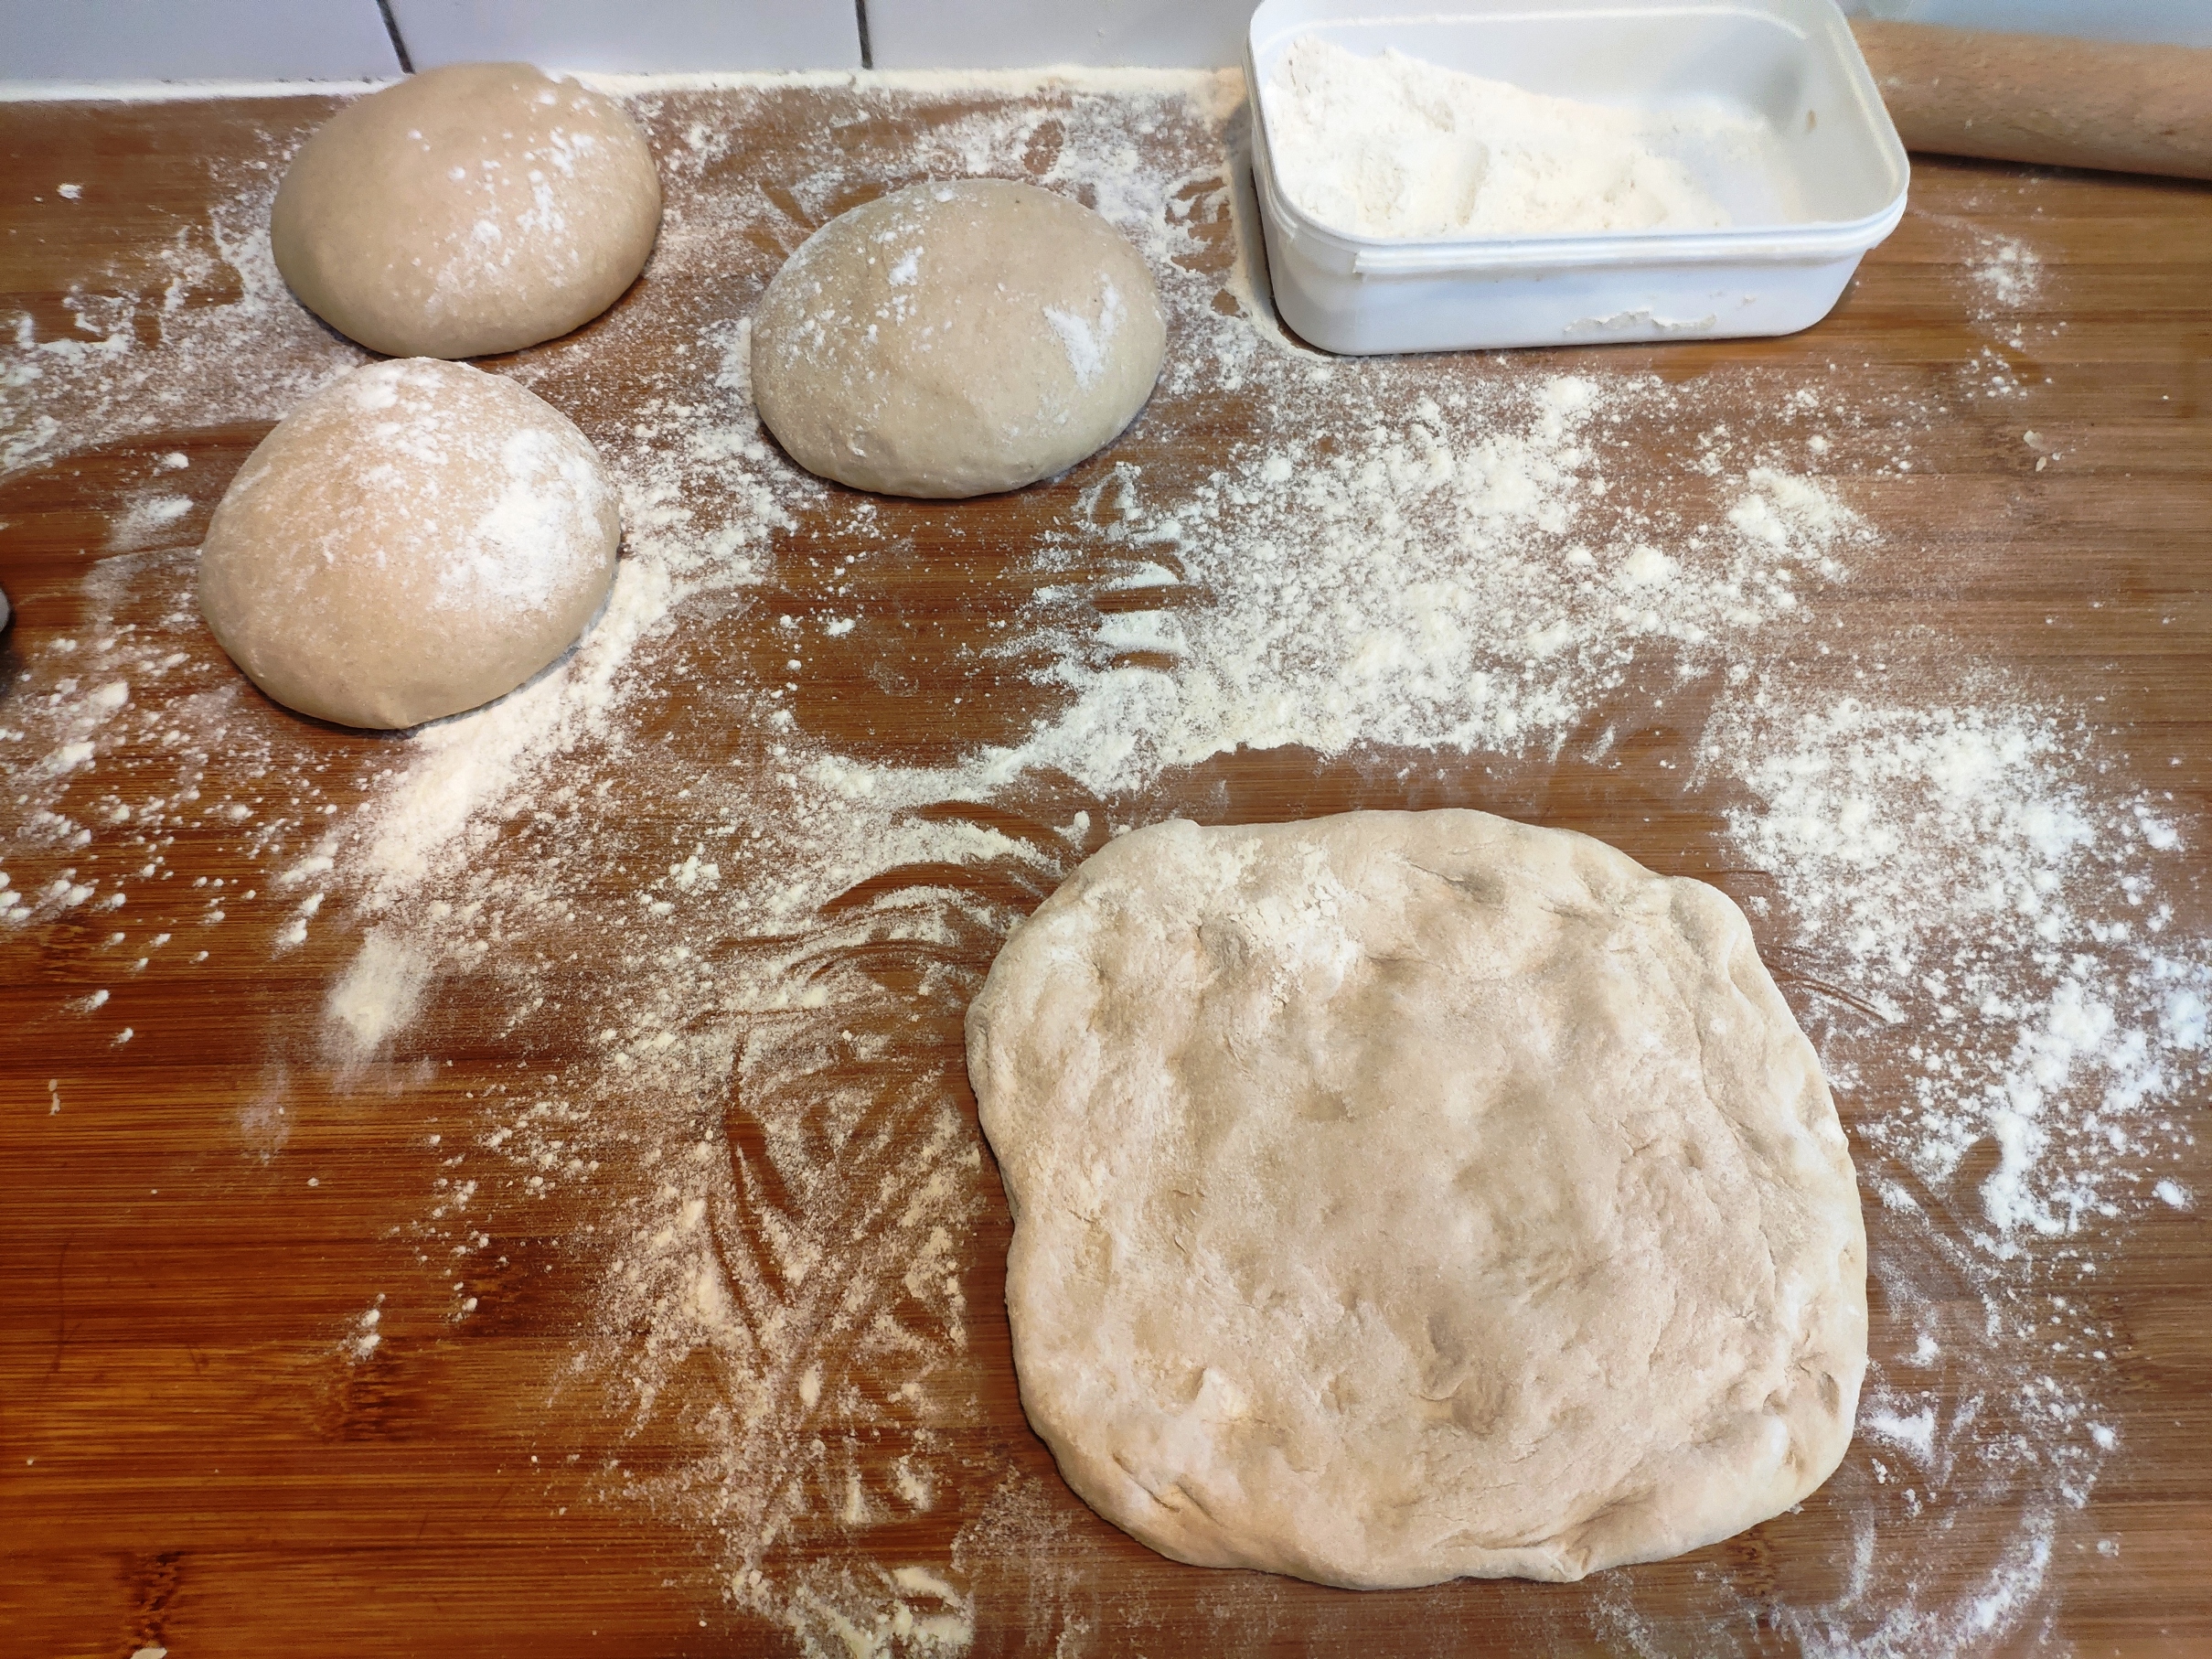
11. When the dough has doubled in size, turn it out. It should weight just over 1kg.
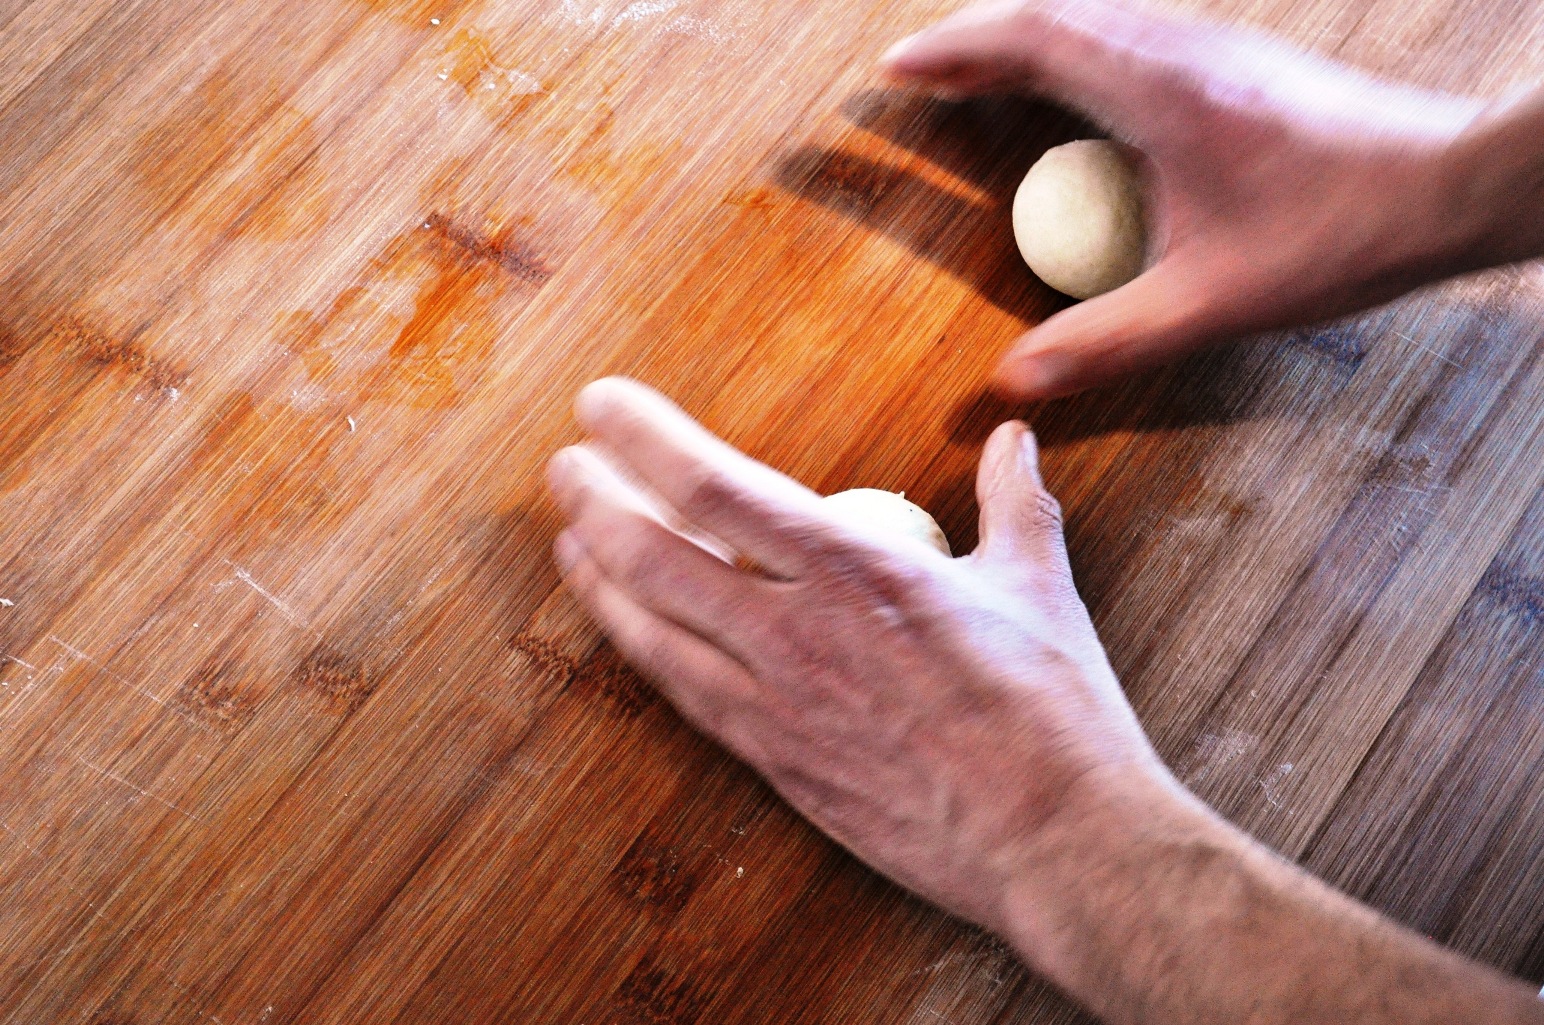
12. Divide up the dough into four pieces, scaled at just over 250g each.

Shaping pizza dough into balls. Bottom two cut off the main lump, top left is tucked, top right is shaped.

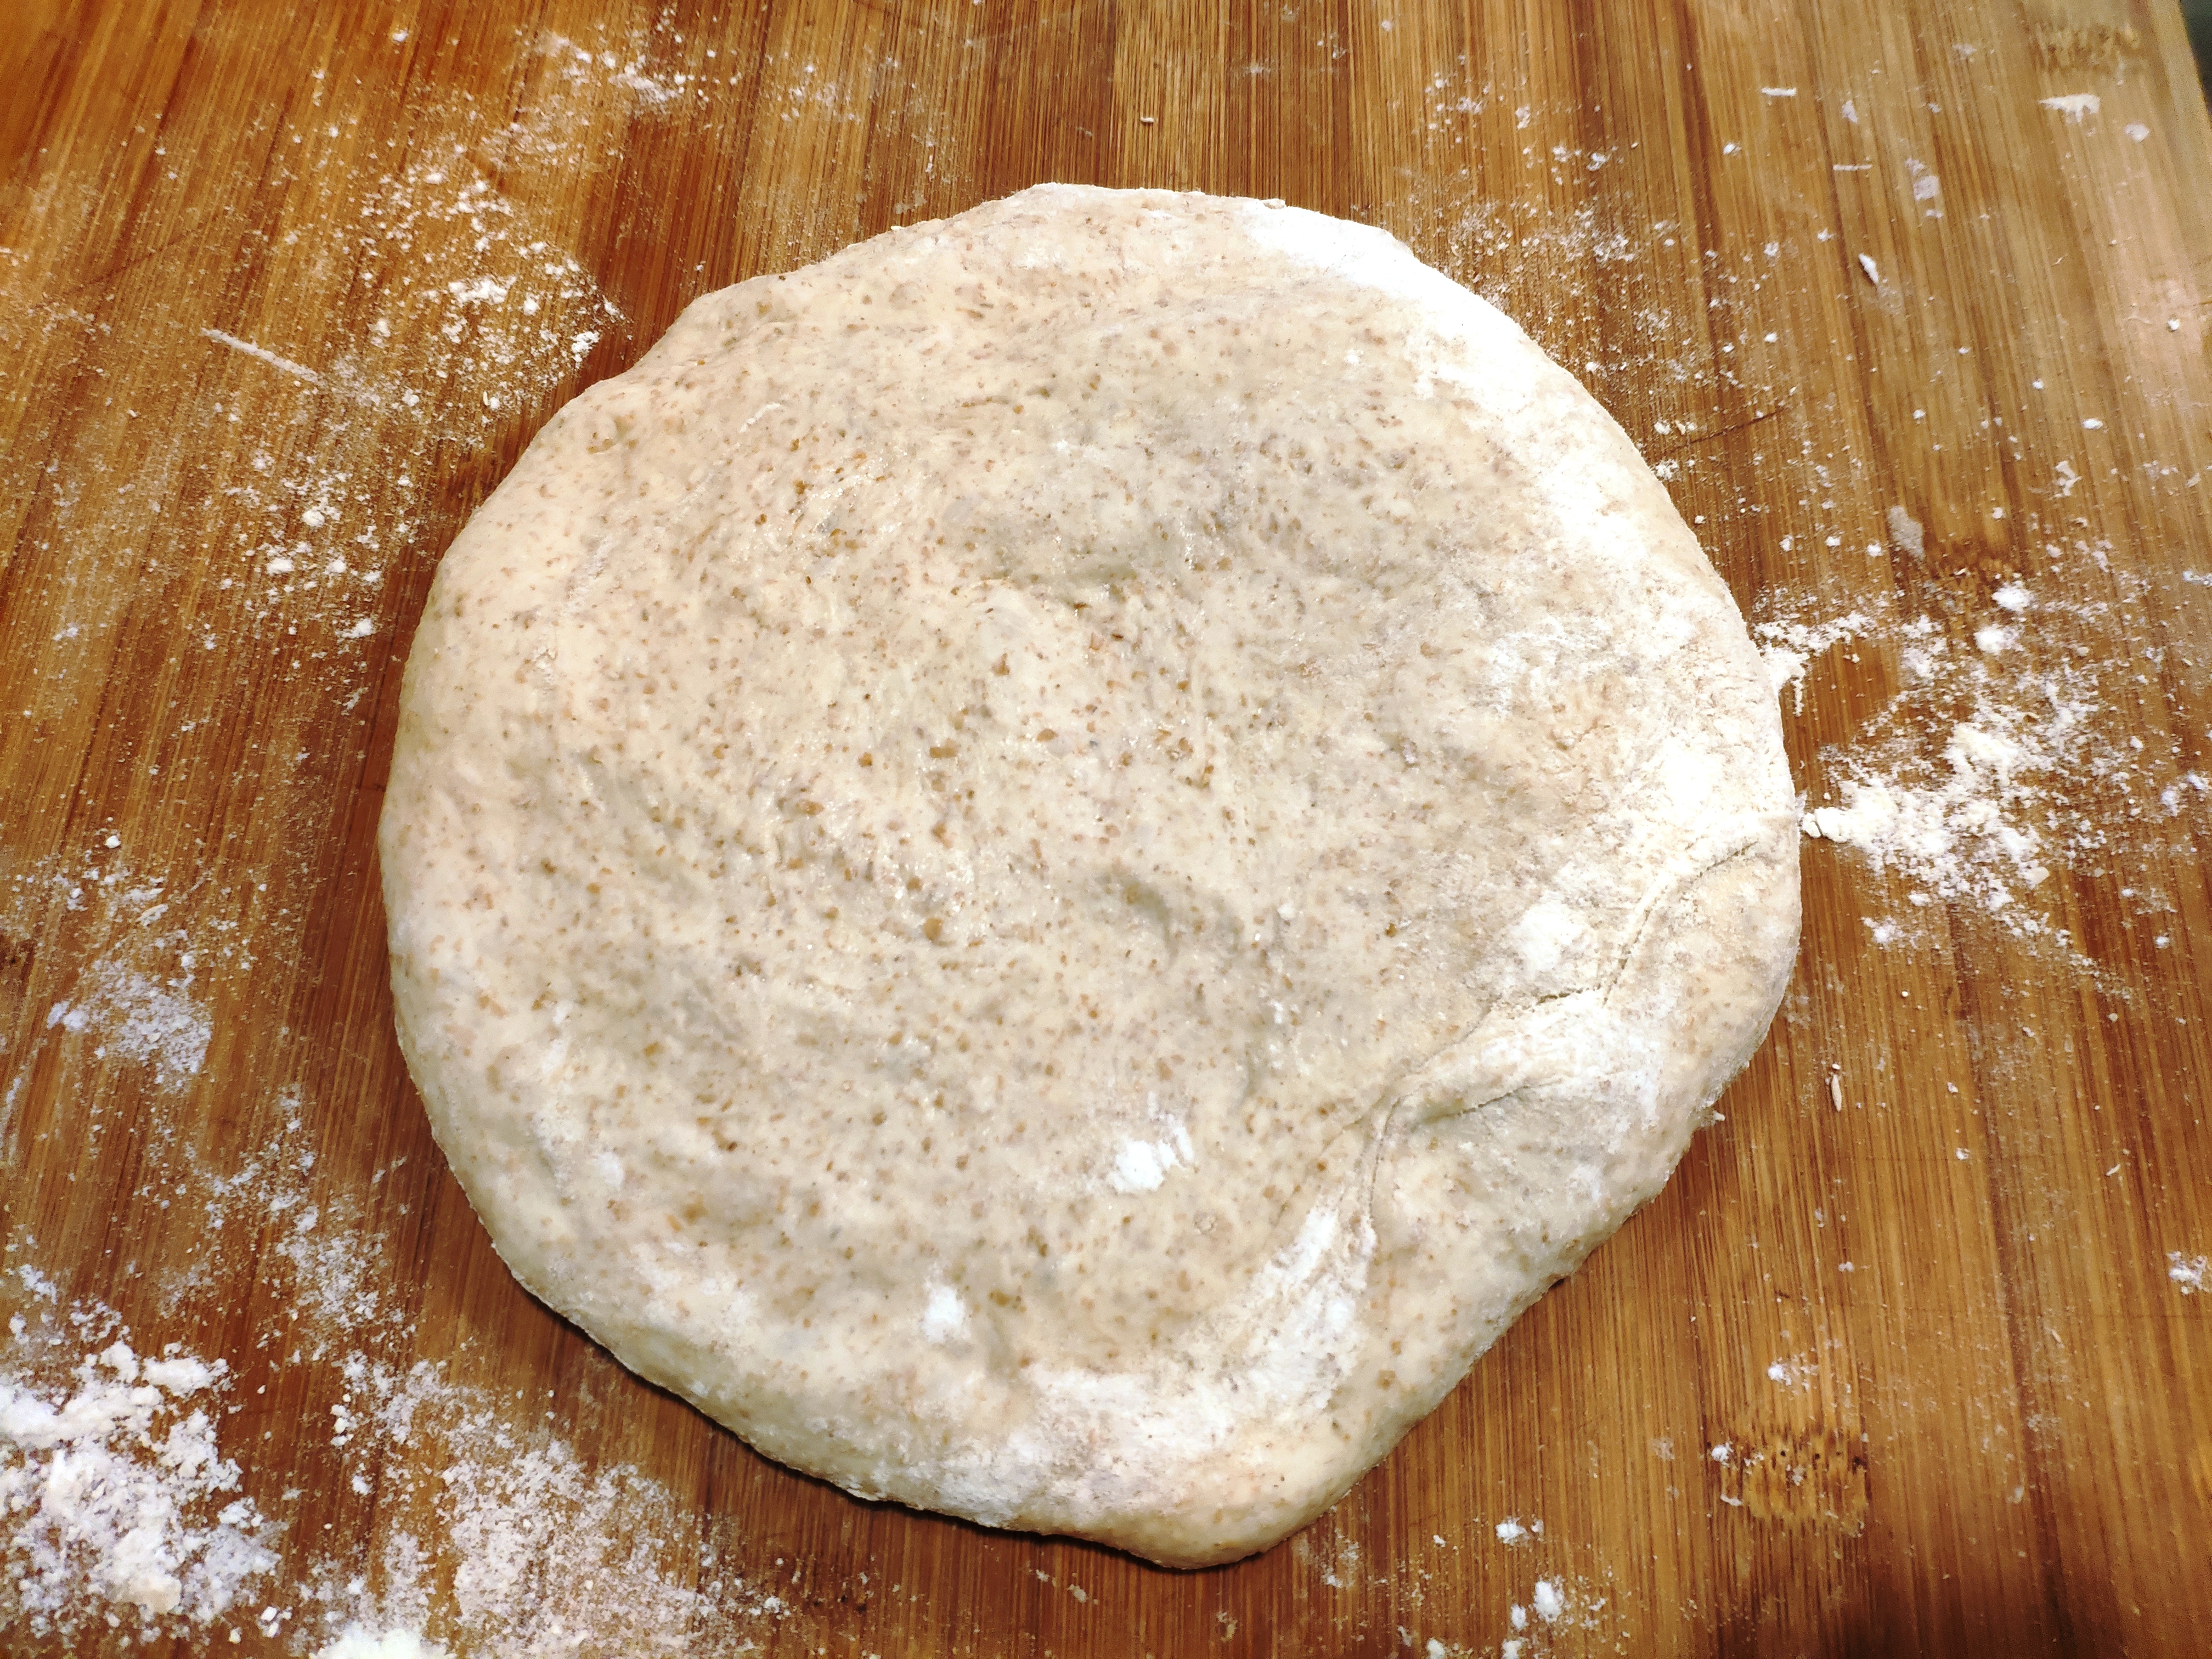
13. Tuck any rough pieces underneath then shape into a ball, ideally by cupping in your hand and making circular motions.
14. On a liberally floured area, leave the balls to rest, covered. Alternatively, you can put the balls in a container, cover it with a lid and leave somewhere cool if you need some more time.
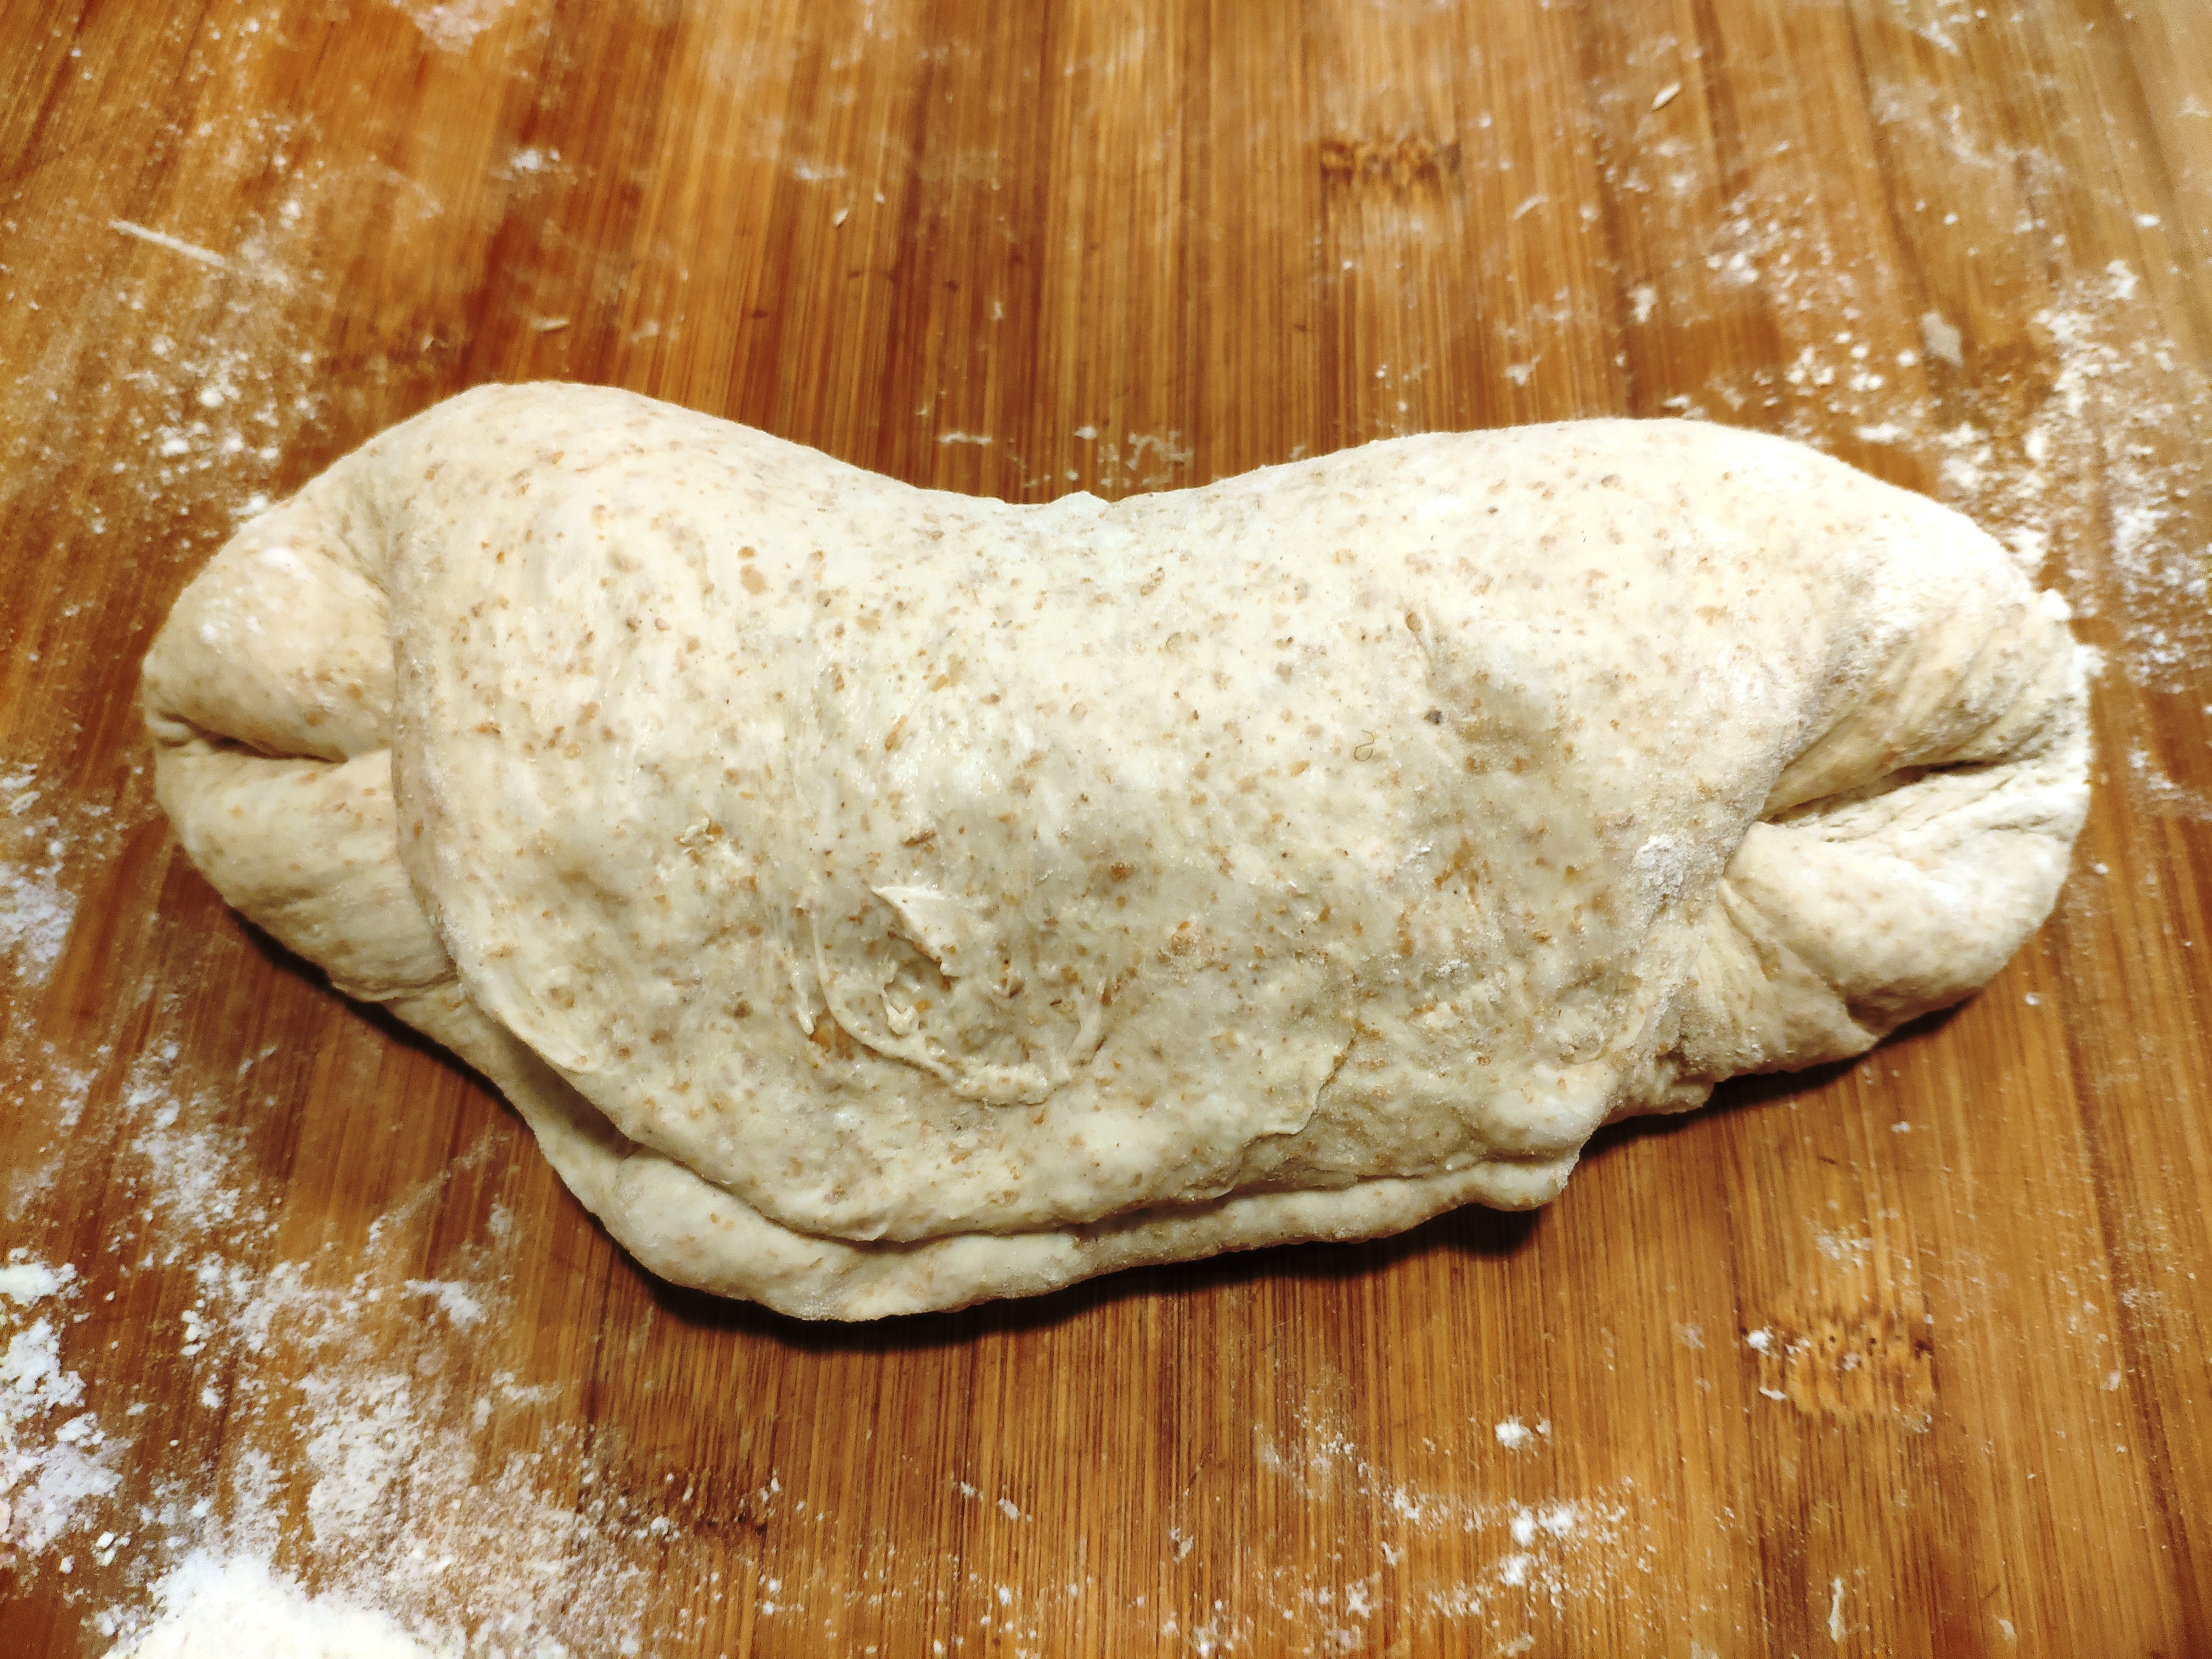
15. I give my pizzas a final prove for about half an hour once I’ve stretched then out, but this is optional. Again, it’s about what fits in with your household routine.
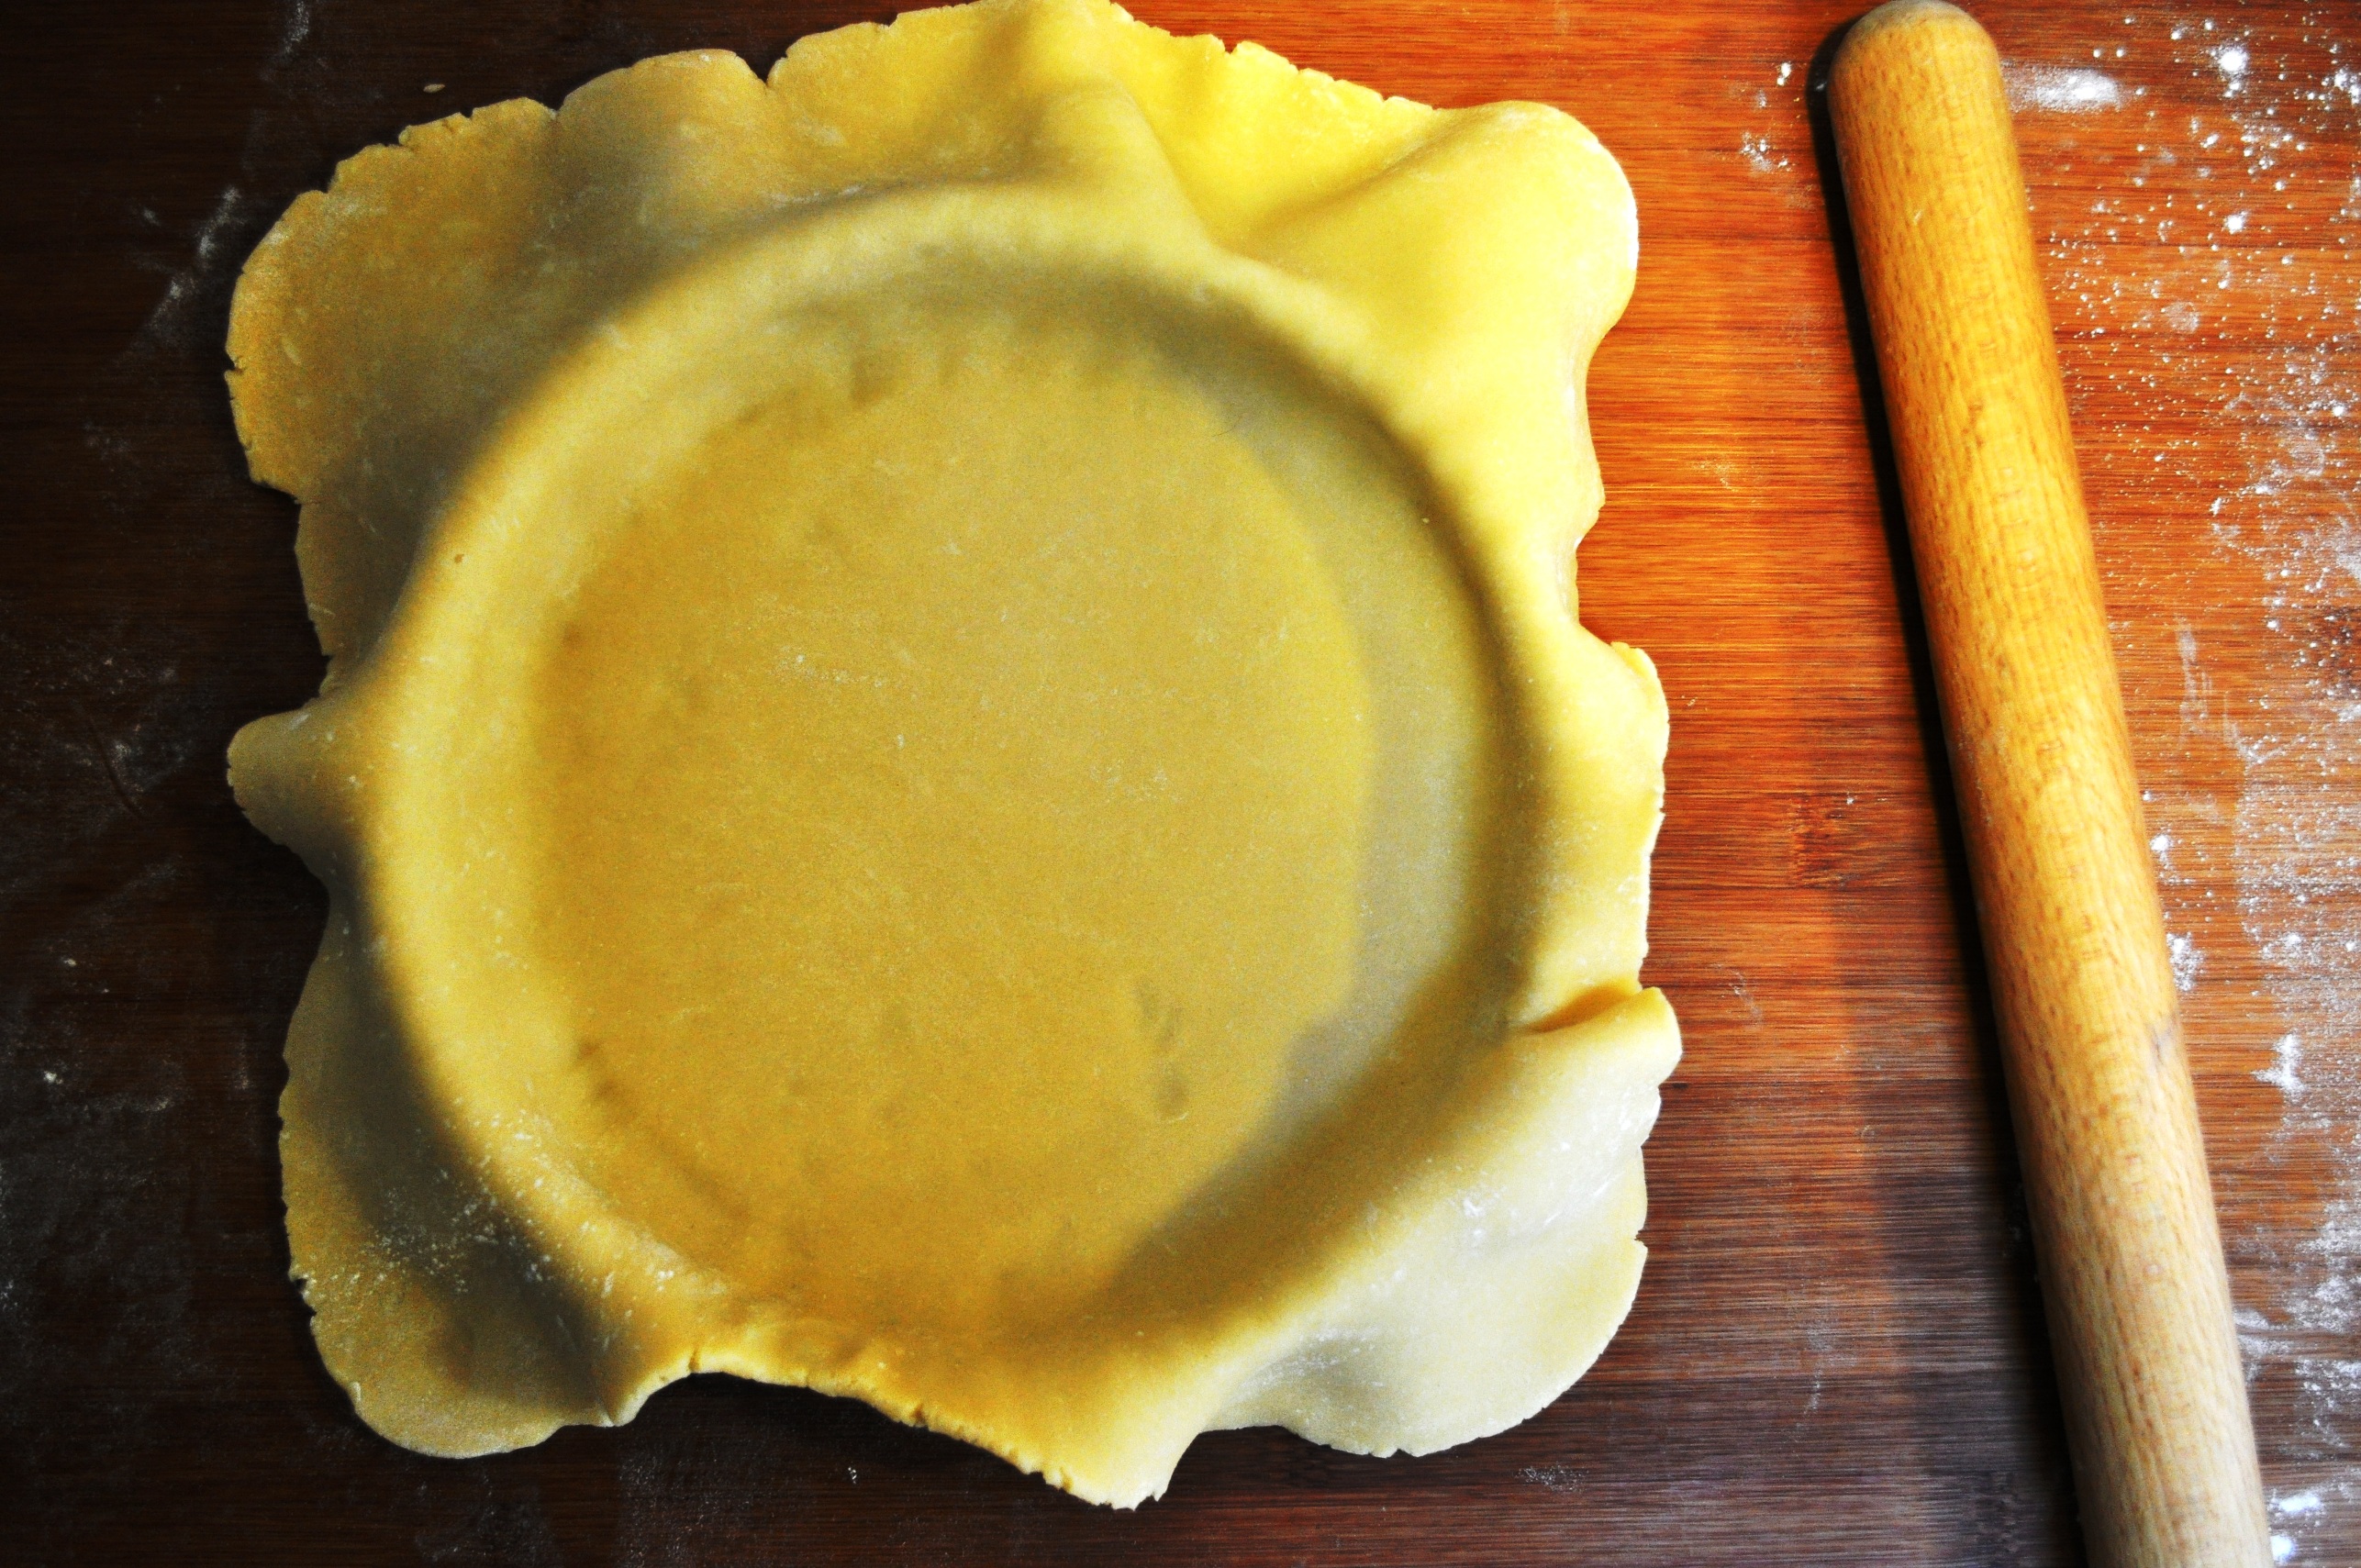
16. On a floured worktop, squash a ball of dough down with the heel of your hand, then flatten out. Roll out to a size that fits your baking sheets – mine are 30cm square. (If you prefer round, go for it. If you prefer using a peel and sliding your pizzas onto a pizza stone, go for it. This dough works well for that too.)

Shaping pizza dough

Rolled out pizza dough

17. Preheat your oven. Mine says it’s 220C on the dial, but it doesn’t really muster much more than 210C.

Pizza dough on baking sheet

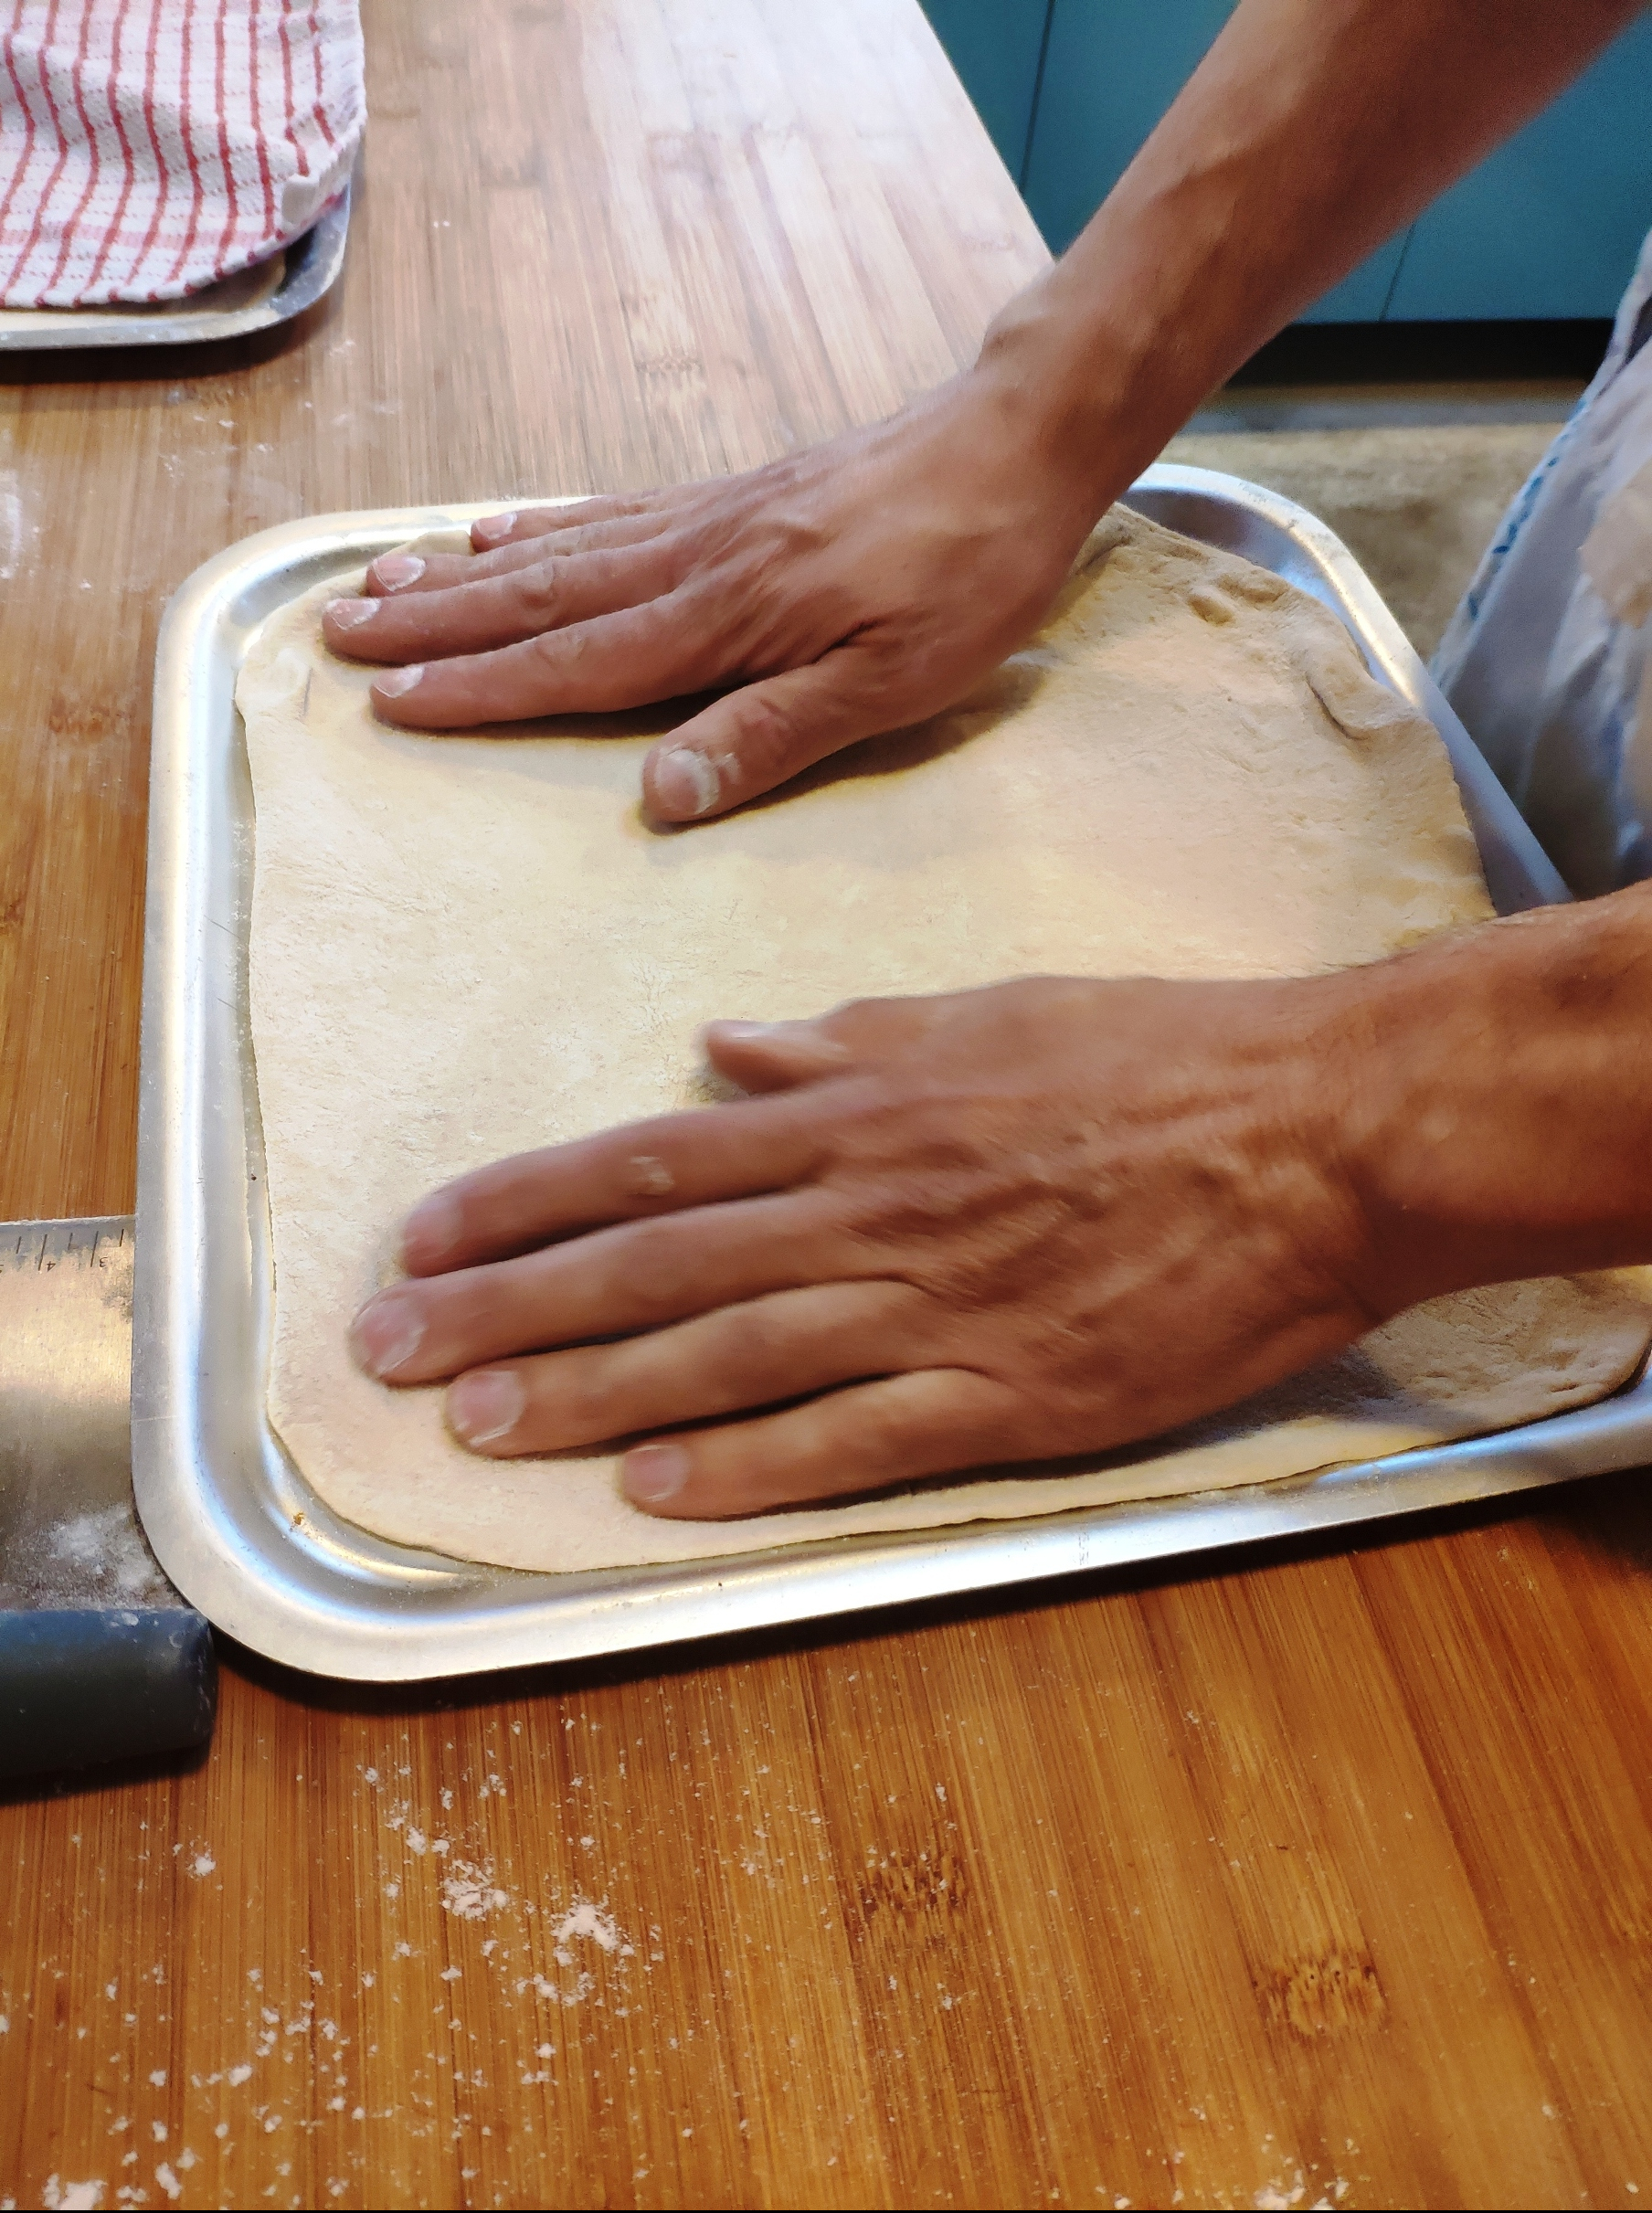
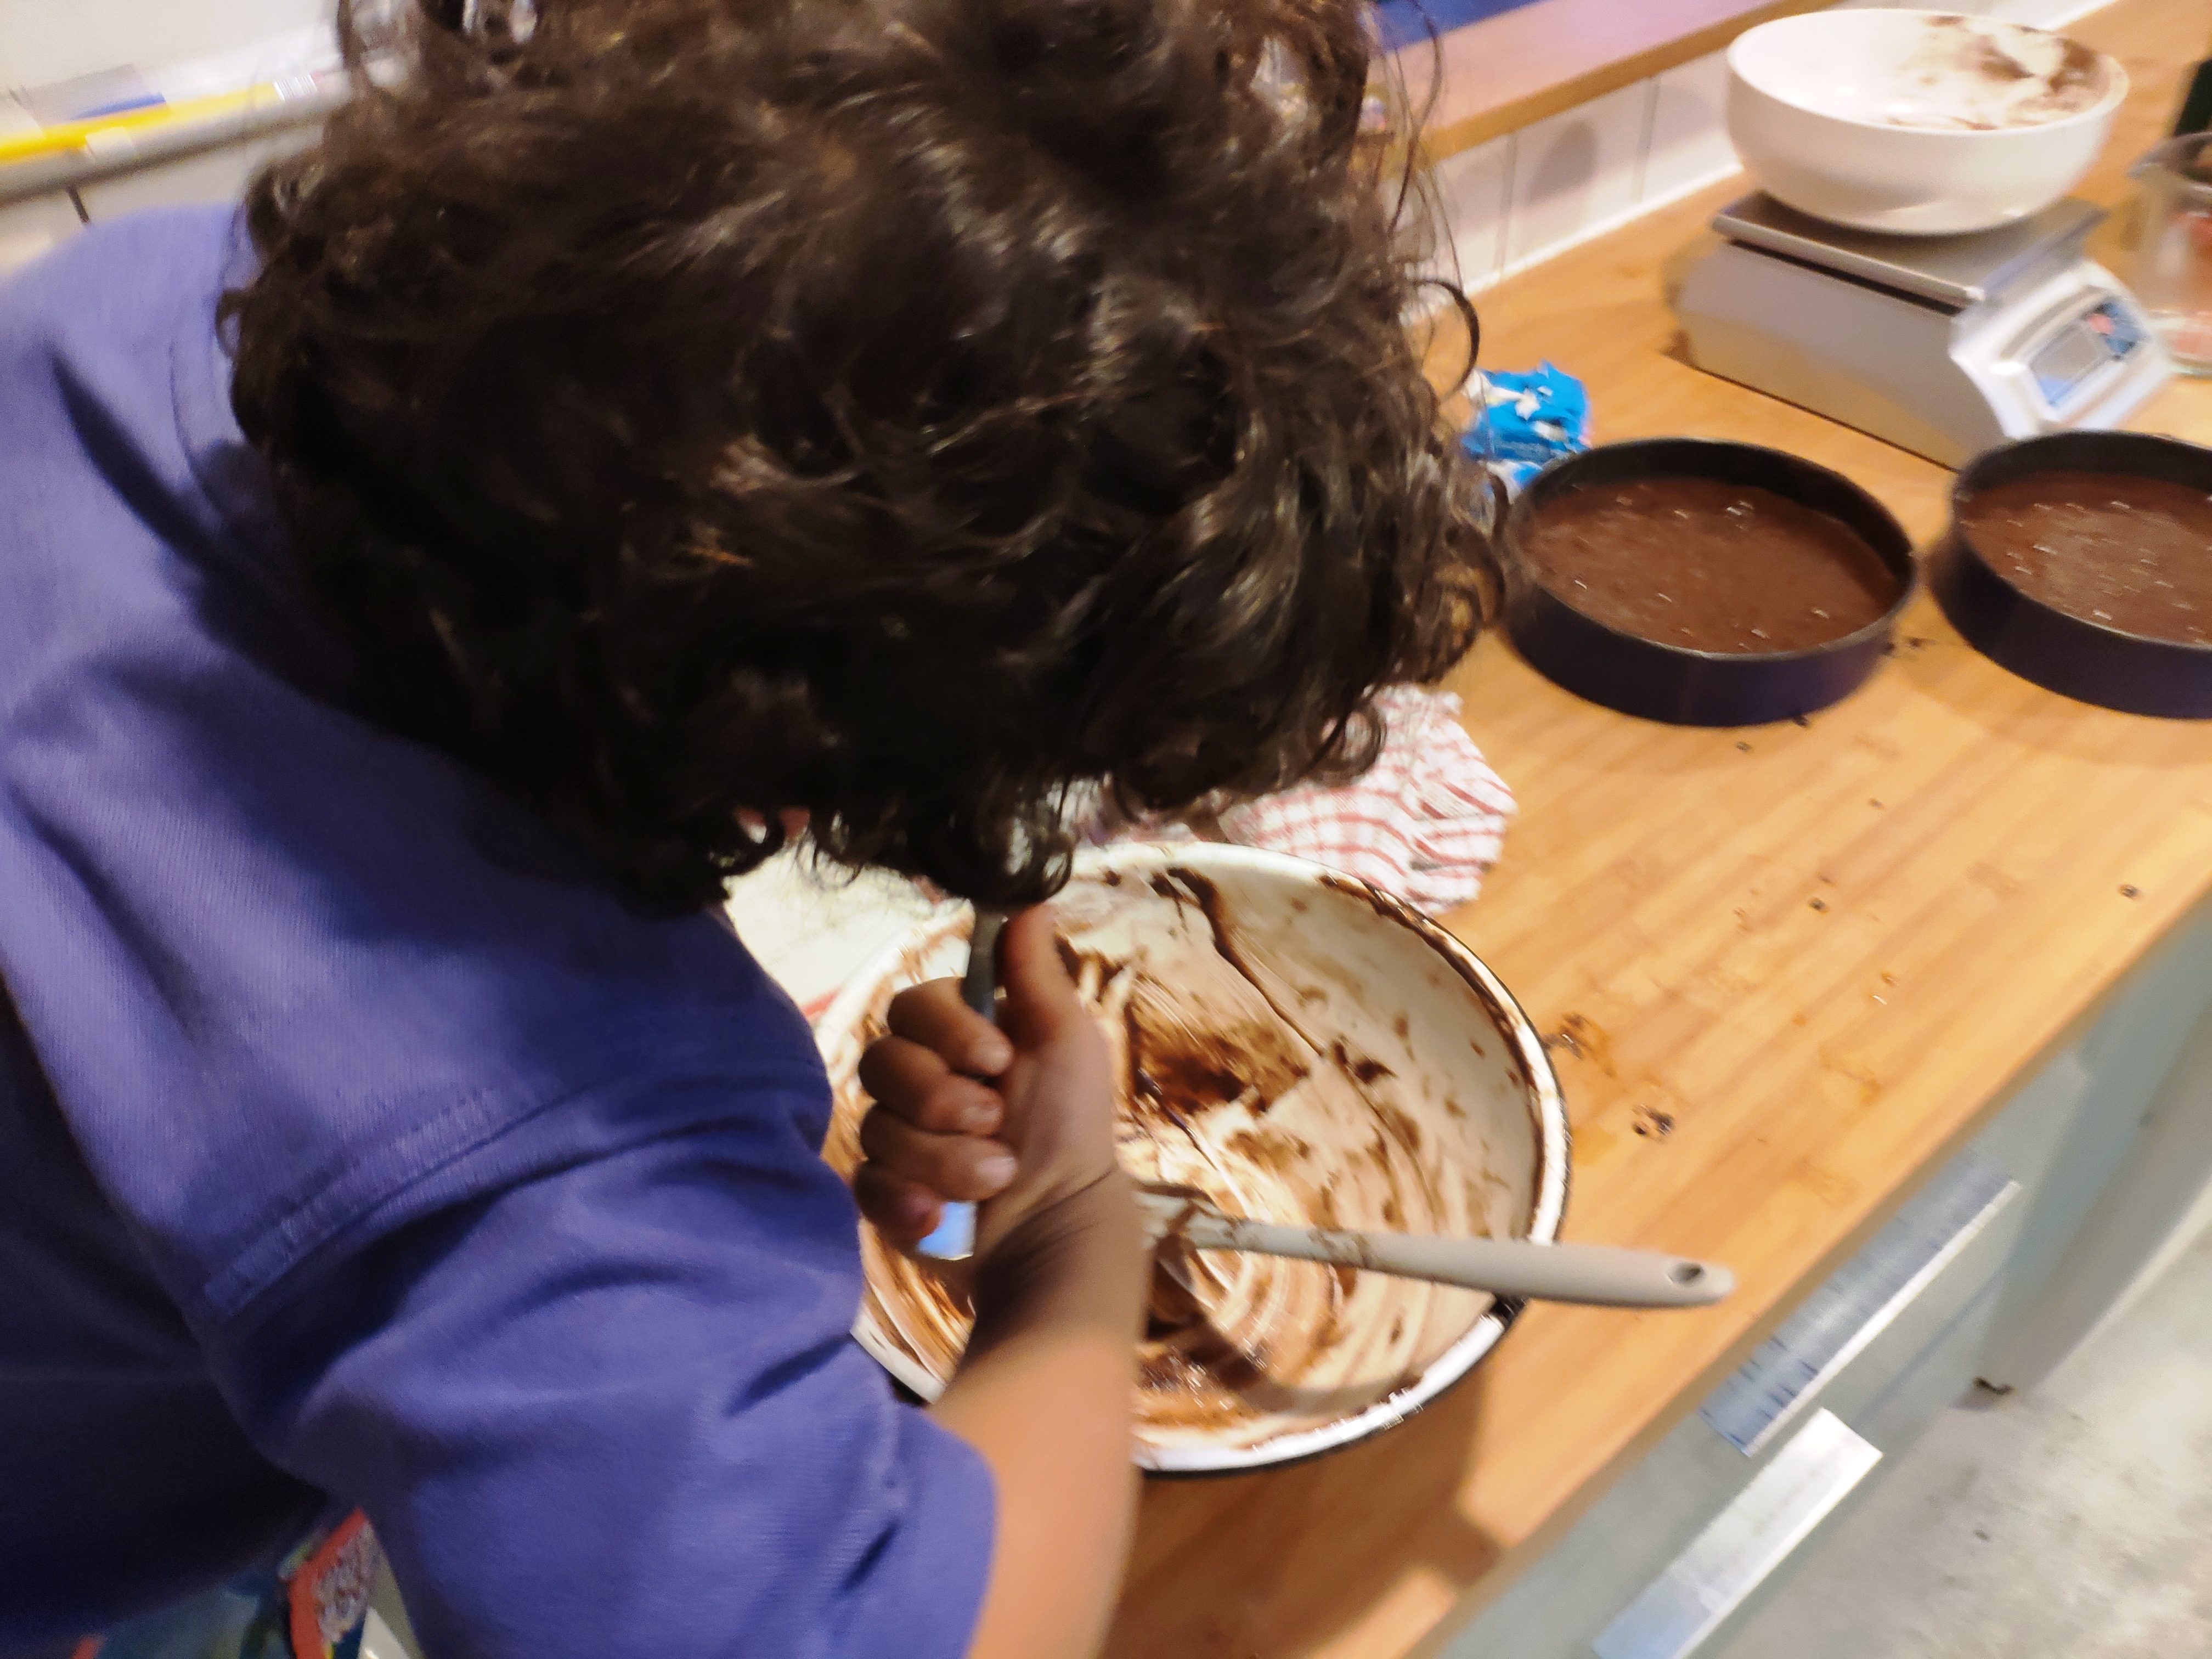
18. Top your pizzas, helped and/or hindered by children.

2020-03-07 17.28.53

19. Put in the oven for about 8 minutes, then swap around on the shelves and bake for another 8 minutes or so. Your oven will be different to mine, but you obviously want nice bubbly cheese and some colour on the crust.

2020-03-07 17.46.52

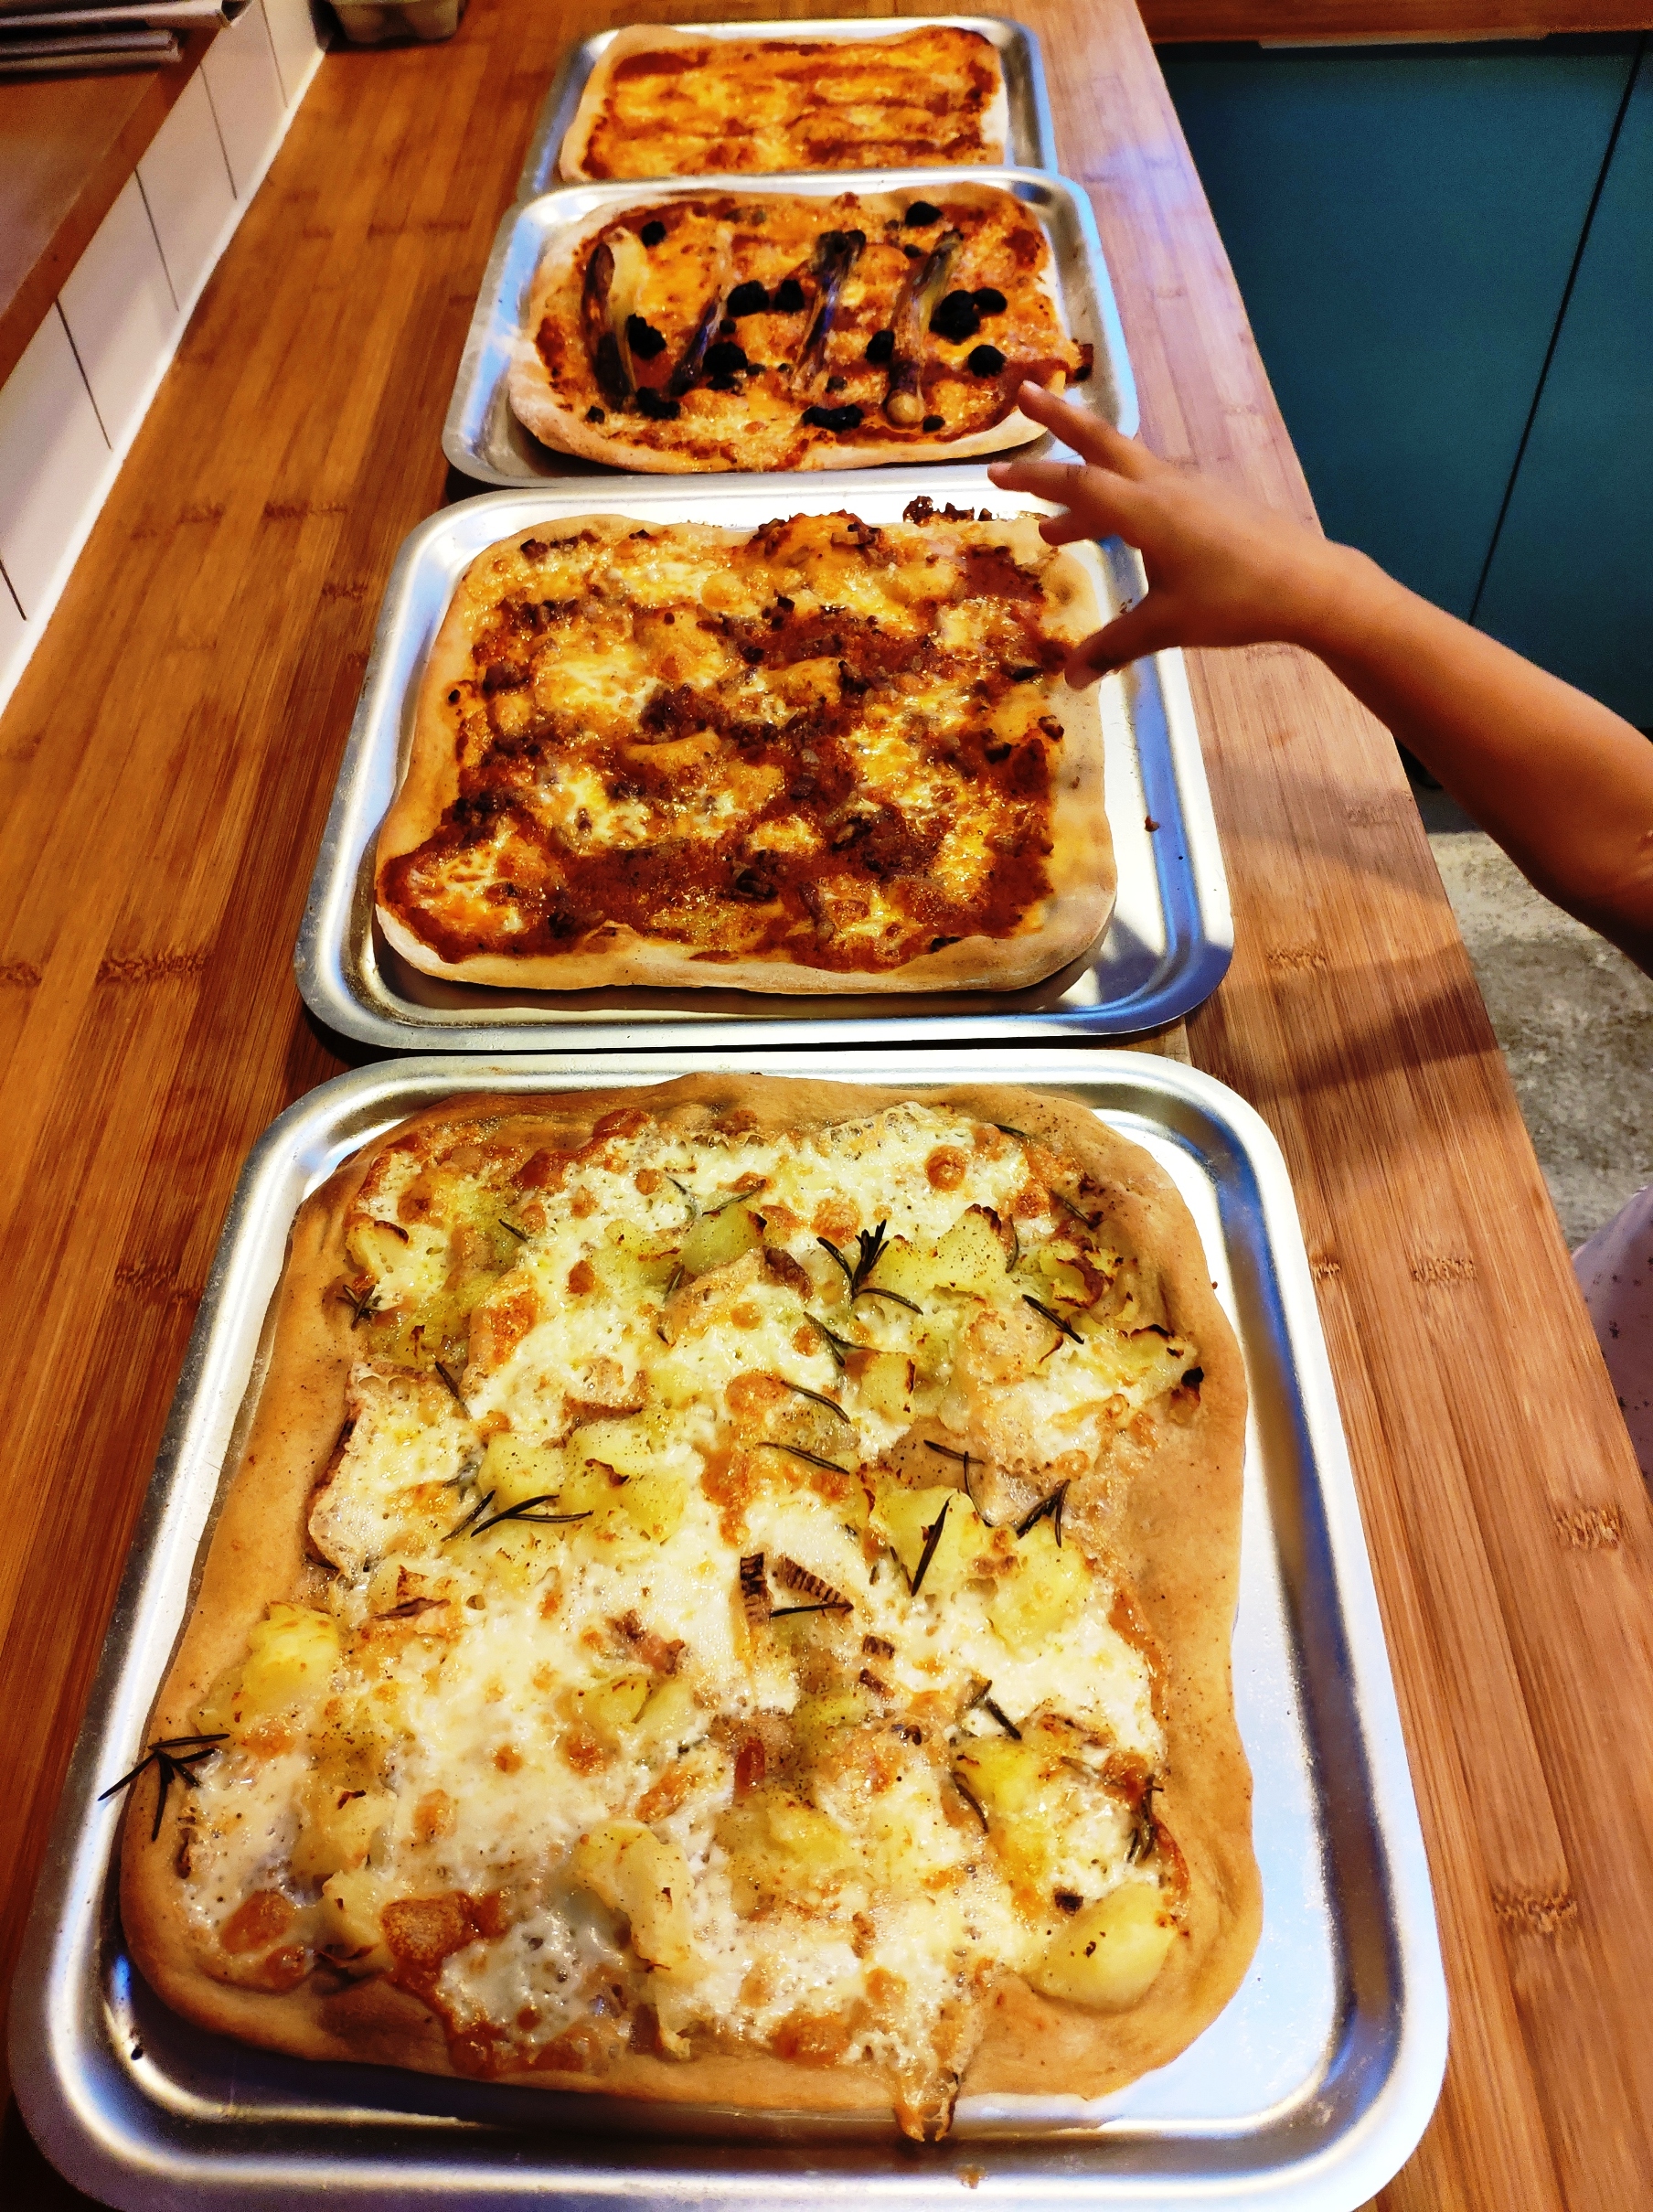
20. Turn out onto boards, slice and dig in.

If we’ve got any leftovers, I’ll happily blast them in the oven again for a few minutes then eat them Sunday evening – the one evening when the kids are allowed food in front of the telly in our house. I love a slice cold too.

* What are your most memorable, weird and wonderful pizza experiences? Whitebait pizza in Hokitika, South Island, New Zealand is one of mine. And the abovementioned sprouts.
** This is a Dan Lepard turn of phrase.

11 Comments

Filed under Breads, Discussion, Flour & grain, Pizza, Recipes

I really want the chocolate cake

We love books and reading. We love chocolate cake. So the past few years, a couple of children’s books have been particularly popular in our house: Chocolate Cake by Michael Rosen with illustrations by Kevin Waldron, and I Really Want the Cake by Simon Philip with illustrations by Lucia Gaggiotti.

Both are wonderfully illustrated, lyrical tales of children’s uncontrollable desire to eat chocolate cake. I say “children’s” as the protagonists in both books are kids, but I can relate. In fact, in our household it’s the boys who are particularly ardent about all things chocolate. I Really Want the Cake includes a recipe on its final page and T asked to make it. So we did.

Baking with kids
Now, as any parent of young children knows, there’s a fine balance to be had in teaching kids to cook and bake. I love to encourage it, but conversely it can make for a lot of mess, and realistically, the kids’ role is often more about stirring – often with a separate bowl to keep them occupied. T is now old enough to read the recipes though, so we’ve reached a new stage – where he can weigh things out, reading the figures on the scales. That’s not to say the main preoccupation isn’t still rushing to get to the point where he can lick the spoons and bowl, but we’re making progress.

The recipe is for a chocolate cake made with cooking oil instead of butter. This arguably makes it slightly more child friendly as it’s a big mix-up job, not a cream together one. Though you do have to melt some chocolate over a double boiler, which is a job for the parent, or at least one that involves close supervision. It’s iced with a simple buttercream icing. This part was tricky as the cake is quite crumbly, and the icing quite firm so the results here aren’t exactly professional – but hey, sprinkles!

I’ve tweaked this a tad. Reduced the sugar etc.

Cake batter
230g plain flour
1 1/2 tsp baking powder
1 1/2 tsp baking soda
80g cocoa powder
300g caster sugar
1 tsp vanilla essence
2 eggs
250g full-fat milk
125g vegetable oil
50g chocolate, melted

Icing
150g unsalted butter, softened
20g cocoa powder
300g icing sugar

Method
1. Grease and line two 20cm round sandwich cake tins.
2. Preheat the oven to 180C.
3. Sieve together the flour, raising agents and cocoa into a mixing bowl. Stir in the caster sugar.
4. Melt the chocolate in a bowl over simmering water.
5. Add the eggs, oil, vanilla essence and milk to the dry mix and stir to combine.
6. Add the melted chocolate, and stir till all nicely combined, with no dry lumps.


7. Divide the batter equally into the tins. Allow your child to lick the bowl and spatula.


8. Bake for around 30 minutes, until a skewer or knife tip comes out clean.
9. Turn out and cool on a wire rack.
10. While the cakes are cooling, make the icing. Soften the butter (in a warm place or with a quick nuke in a microwave), then sieve in the icing sugar and cocoa. Mix well. Icing sugar is such a fine powder it can spray everywhere, so use a large bowl and a careful child!
11. Spread the icing between and on top of the cakes. If you’re feeling ambitious and can hold your children at bay, you could even smear it all over the sides but we didn’t get that far as T was poised with pots of sprinkles.

You really got the cake!

If, like us, you like reading and cakes, I highly recommend both these books. Gaggiotti’s illustration especially capture the energy of lively children, something we are gifted with, likewise Rosen’s verse captures the singlemindedness of children, something we see a lot of in our house. Support your local library, or support your local bookshop!

5 Comments

Filed under Cakes, Recipes

How to make a basic loaf of bread

Over the years, friends have asked what my basic bread recipe is. As the simple daily bread – that keeps the kids in sandwiches and toast – I just never got round to it, with my flurries of interest in feast day recipes and almond concoctions and whatnot.

So here it is.

This will seem like quite an involved recipe, but I just want to share lots of tips, which I hope will be helpful for any baking newbies who find this post.

Kit
The first thing I’d say for anyone embarking on their first bread-making experience is: get a flexible plastic dough scraper. The dough scraper is the most essential piece of equipment for handling dough: it helps you scrape it out of the bowl, it helps you scrape it off the work surface, it helps you pick it up and move it around, it helps you tidy up.

As you may be able to see from my photos, I use one from Bakery Bits. I’ve used it for years. I’ve had a few smaller ones, but I prefer the shape and size of this one with my average sized hands. It’s a cheap bit of kit, so invest and see how it feels for you.

The other bit of kit I’d recommend is electronic scales. Sure you can use cups and weights and whatnot, but electronic scales just make life easier, they’re great for scaling up and the tare function will become invaluable.

You also need tins. They’re pretty easy to come by. Manufacturers seem obsessed with giving everything a nonstick finish these days, but I prefer plain steel. Oil it a bit before using and it’ll season nicely to the point where loaves rarely if ever stick.

Stickiness
My basic bread recipe is what’s known as 75% hydration in bakers’ percentages. You don’t really need to get into all that, but it simply means that for every 75g of water, there’s 100g of flour, ie the wet ingredient as a percentage of the dry. A good rule of thumb is 750g of water to 1000g (1kg) of flour. This makes a slightly sticky dough. If that scares you, just reduce the water to about 70% – ie 700g water to 1000g flour.

As we get through a lot of toast, I tend to scale up the quantities so I can make four small loaves (in 1lb or 450g tins) or a couple of large ones (in 2lb or 900g tin). I bake about once a week, and freeze some of the loaves. Some bakers may have reasons to dislike frozen and defrosted bread but for a tin loaf like this it seems absolutely fine. This recipe also works well for freeform loafs but I prefer the tin form these days as it’s easier to process, there’s less fiddling about, which I’ve found particularly useful during the past few years of refereeing parenting small children.

Flour
For the flour, I tend to use a mixture of strong white bread flour, strong wholemeal bread flour and some spelt* flour. You can change the quantities – use all white for example. Using all wholemeal is possible, but it can make for a denser, crumblier loaf, and it may also require a bit more water as the higher bran content of wholemeal seems to make it more absorbent.

Yeast
As for yeast, I used to use fresh yeast, but it’s harder to come by in practical quantities now where I live, so I’m using active dried yeast, ADY, the granular type that you activate in tepid water. I don’t tend to use the powder easy-blend yeast, which you can just stir through the flour, as I enjoy the frothiness of ADY or fresh added to warm water.

Sponge or pre-ferment
My preferred technique, described here, involves making a sponge or pre-ferment – a mixture of all the water and around half the flour. Technically this helps gives the yeast a good start as it can get to work feeding on the sugars in the flour, but in practical terms it can help with timings too.

The sponge can be seen as an easy alternative to a sourdough starter. It won’t have the character you get with wild yeast colonies, but it will help make a tastier bread, and it also means you can use less yeast and do a longer fermentation, which may well mean the bread is more digestible too. The biggest problem with supermarket and industrialised bread is that it rushes the fermentation. I’ve talked about this a lot on here before, but the Chorleywood process, developed in Britain after the Second World War to speed up bread production, has got to a point where the dough has a very short fermentation, less than an hour. I won’t get into it now, but there’s evidence to suggest this rushed fermentation is the key reason a lot of people feel bloated eating modern, industrial bread, or feel they can’t eat bread or wheat.

Kneading
I still knead by hand, despite my recent acquisition of a cheap Aldi mixer. Handling the dough is just so fundamental to the pleasure of making bread. It’s primal. And probably qualifies as quite good stress relief. In short it’s a great activity to help deal with the madness of modern life. I follow a technique described by Australian master baker Dan Lepard in The Handmade Loaf. This was the book that really got me into bread-making a decade or so back. It’s a technique that shows you don’t have to be slavish to one big long knead, you can do short kneads at intervals.

Ingredients
Makes four small loaves or two big ones.

1050g water, tepid
5g active dried yeast (or 10g fresh yeast, crumbled)
1450g bread flour
5g fine sea salt

Method
1. In a large bowl, sprinkle the yeast into the warm water and leave to froth up.
2. Add about half of the flour to the yeasty water and mix well. This is the sponge or pre-ferment. Cover it with a plastic bag, which you can reuse over and over, or even a shower cap. I have a nice floral one. You can leave it for half an hour, or a couple of hours if that’s more convenient for you. You’ll get a nice bubbly sludge. How active it is will depend on various factors, but notably the health of your yeast and the warmth of your room.


3. Combine the salt with the rest of the flour then add to the sponge. I use a silicone spatula to mix it well in the bowl initially.


4. Turn the rough dough out onto your work surface, scraping out the bowl with your dough scraper. I have bamboo worktops which I oil a little first with vegetable or sunflower oil to make it easier to handle the dough, stop it sticking as much.


5. You can oil or wet your hands a bit if you like, but just keep that plastic dough scraper to hand and some flour as the dough is quite sticky. Don’t be tempted to keep adding more loads of flour to make the dough easier to handle as it’ll make the resulting bread drier and denser. Just get stuck in, enjoy the feel, and knead away, pulling and folding. The dough will come together more as the protein structure develops, but don’t agonise. Knead for say five minutes, then scrape the dough off your hands and, using a little bit of flour, rub your hands together as if you’re washing your hands with a bar of soap as this will help remove the remaining dough.


6. Gently but firmly form the dough into a slightly rough ball and put in a clean, lightly oiled large bowl. I tend to use a bigger bowl than for the sponge stage as this is quite a lot of dough and will get quite big as it proves. Cover with the plastic bag.


7. Leave for 10 minutes or so, giving it a chance to rest. You should find it a easier to handle now. Turn out again onto your lightly oiled worktop and give the dough another short knead. Form a ball, put back in the bowl, and cover.
8. Repeat this process a couple more times, every ten minutes or so, then cover and leave for half an hour.
9. Turn the dough out again and you can now try giving it a stretch and fold. This is just another form of kneading. It’s good for trapping some more air in the dough, but it’s also about lining up the protein strands, the gluten orientation. It’s also a method that’s handy with wetter, higher hydration doughs like ciabatta. Just stretch the dough out, then fold in one end, then the other, as in these handy pics.


10. Return to the bowl, cover and leave for its long prove, its “bulk fermentation”. How long this takes will depend on the temperature. My kitchen is about 18-19C. I tend to leave the dough for at least four hours. You can even put it in the fridge overnight or while you’re out. It’s all about finding a technique that fits in with your life and routine.


11. Leave the dough until it’s doubled in size. This is a nice simple rule of thumb. You should see some nice big bubbles of CO2 produced by the yeast.
12. Using your scraper, turn out the dough onto a lightly floured worktop. Give it a gentle knead. This is called “knocking back”, but that sounds so violent. All you’re doing is regulating the structure, reducing any of the bigger gas bubbles to produce a more even crumb in the resulting loaf. This is important for basic sandwich and toast breads, but some breads, like ciabatta and artisan sourdoughs want nice big holes. But that’s another story.


13. Lightly flour the worktop then give the dough another rest, covered with a cloth, then after about 10 minutes weigh it. The total dough weight here is about 2450g. To make four small loaves in 1lb/450g tins, divided it into four pieces each weighing about 612g. Form these pieces into balls by folding the edges to the centre, then chafing by cupping your hands underneath slightly and rotating. This tightens up the ball; if you’re making a boule, you need it tighter so it holds its shape when baked freeform but as we’re doing tin loaves you don’t need to agonise.
14. Place the balls on a more liberally floured area of worktop, cover and leave to rest for another 10 minutes or so.


15. Now, you want to shape them into tube-ish shapes to put in the tins. There are various techniques to do this, but the one that stuck with me is, again, from Dan L. Flatten the balls into discs. Imagine four quarters, and stretch out one quarter, then fold the end into the middle of the circle. Repeat with all four quarters.
16. Now you’ll have a rough diamond shape. Fold one point into the middle, then another, so the points meet. Now fold in half again and use the heel of your hand to seal the join. You can then fold the ends in and drop this into the loaf tin, with the folds underneath.
17. Repeat with all the balls, then cover and leave to prove. Again, this isn’t an exact science but I tend to go for doubled in size again. You can also use a poke test – if you gently push in your fingertip, the dough should spring back slowly, meaning the protein structure is holding the gas nicely. If it springs back too quickly, it’s under-proved, if it slumps, it may well be over-proved, so give it another knead, and repeat the process from step 13.


18. At the end of this final prove, heat your oven to 220C.
19. Slash the top of the loaves with a sharp serrated knife or special tool called a lame or grignette (if you feel like another little investment). Put the loaves in and bake for 20 minutes, then turn the oven down to 200C and bake for another 20 minutes.
20. Turn the loaves out. You can tap the bottom and listen for a slightly hollow knock, and this give some indication they’re done, but with loaves this size, the 20/20 minute bake should be fine. If in doubt, put the loaves back in, without their tins, for another 5-10 minutes. “Under-prove and over-bake” is a rule of thumb from my old teacher Leslie Gadd**.
21. Cool the loaves on a wire rack. Resist the urge to cut them while hot. Sure the smell is amazing, but essentially they’re still baking. If you try to cut them while hot, you’ll mangle the crumb and it can get all gummy. It can be OK with buns and it’s best with (“English”) muffins, steaming and smeared with butter, but not with tin loaves. When they’ve cooled completely, the steam will have all escaped and the crumb will have firmed up. The flavour will be better too. So just enjoy that aroma and have some patience!
22. When cooled, store in a bread bin in a paper or cloth bag, and freeze any extra loaves.
23. Enjoy! When it’s fresh, my kids demand “soft bread”, after a day or two we go for toast.

Drop me a line with any questions!

* Spelt is just another, older variety of wheat – Triticum spelta, as opposed to the more common bread wheat, Triticum aestivum. There are quite a lot of species of wheat, the Triticum genus of the Poaceae or Graminea, or grass, family.
** Leslie was teaching at the National Bakery School at London South Bank University when I did a baking diploma there back in 2010. He now seems to be operating out of Grantham, Lincolnshire, as Lovely Loaves.

Leave a comment

Filed under Baking, Breads, Recipes

Madeira cake

Madeira cake with clotted cream

A while back, I just had one of those urges – very specific, for something somewhat old-fashioned. Madeira cake. It’s one of those English cakes the Victorians, or possibly even the Georgians, would have tucked into, accompanied by a glass of Madeira. Madeira is a fortified wine from the Portuguese island archipelago of the same name, located in the Atlantic 880-odd km west of the Moroccan coast. The cake itself isn’t from Madeira.

Madeira cake is a basic concoction, not unlike pound cake: dense and satisfying. Checking my cookbooks, I found several different recipes. It’s amazing how something so simple can have so much variation. A unifying feature seems to be some lemon flavour in the form of zest in the batter and sometimes candied peel or zest added on top too, part-way through baking. Except that when I checked Mrs Beeton, she had none of this. No flavouring whatsoever – not even the inclusion of ground almonds, which several recipes use.

Mary Berry Madeira cakeJane Grigson Madeira cake

I tried several. Mary Berry’s, which has almonds, was good. I found it a bit dry, but possibly I over-baked a tad. The recipe in Jane Grigson English Food was basic and reliable. The recipe in Leith’s Book of Baking by Prue Leith and Caroline Waldegrave was pleasingly crumbly and unusually had a pinch of cinnamon. I’ve not seen this elsewhere, and Leith and Waldegrave give no preamble, so the rationale for the spice will remain a mystery. Perhaps it was just a whim on their part.

Leith Madeira cakeDuff Madeira cake

I also tried a few more recipes from Cakes Regional and Traditional by Julie Duff, which worked well, but was particularly nice as I had such good eggs with bright orange yolks, and The Sainsbury Book of Home Baking by Carole Handslip. This was no-nonsense and fine. Plus, it was a trip down memory lane as the book, published in 1980, was one of those I used in my mum’s kitchen in my childhood. I also used another book from my mum: Geraldine Holt’s Cake Store, published in 1983. The cake was also tasty but the mixture wasn’t enough for the 18cm tin she recommended. It’s important that this cake has some verticality, rather than being too flat. It’s a tall cake not a disc.

Books

Having done all that important research, here’s my version. I’m not claiming it’s the perfect Madeira cake but it suits my requirements for flavour, ingredients and shape.

210g butter, softened
180g caster sugar
Zest of 1 lemon
3 large eggs
225g plain flour
7g baking powder
110g ground almonds
90g milk
Pinch salt

1. Grease and line an 18cm tin.
2. Preheat the oven to 170C.
3. Beat together the butter and sugar until light.
4. Beat the eggs then add slowly to the creamed mix, combining all. If it starts to curdle, add a dash of flour.
5. Add the lemon zest.
6. Sieve the flour and baking powder into the mixture.
7. Add the ground almonds and pinch of salt and fold to combine.
8. Add the milk. If the mixture is too stiff, add a little more until it’s quite soft.
9. Put the mixture in the tin and bake for about an hour, until a skewer comes out clean. If the cake is starting to brown but the interior isn’t baked, cover with foil and leave in the oven a bit longer.
10. Cool on a wire rack.

Madeira cake in tin

I doubt many people drink it with Madeira wine these days. We certainly don’t. I’ve never even tasted the stuff, though we were just finishing off some pleasant Portuguese Vinho Verde when we had this one, eaten as dessert for Sunday lunch, accompanied by that ambrosial West Country delight, clotted cream. It’s also great, more modestly, with a cuppa.

7 Comments

Filed under Baking, Cakes, Recipes

Michette di Liguria: sweet buns, strange legend

Michetta, michette di liguria, Dolceacqua

After a slice of my torta di Santiago, a friend of my brother’s asked if I knew of any cakes that are traditionally eaten for the Christian feast day of the Assumption of Mary, celebrated on 15 August. I didn’t.

My native England has lost so much of its traditional festival foods, and I hadn’t encountered any Assumption baked goods while living in Italy. So some research was undertaken. The Feast Day Cookbook suggested veal cutlets and shrimps in béchamel. Neither of which satisfies the cake remit. Digging around more though, I came across a sweet bun from Liguria, northwest Italy. Specifically they’re from the town of Dolceacqua.

They’re called michette. Michetta is a term that’s more commonly used in Italy to refer to a type of hollow bread roll, originating from Lombardia; I knew it in Rome as a rosetta. The Dolceacqua michetta is a little different though: it’s a small, enriched bun. It also comes with such a striking, disturbing folkloric origin story.

Once upon a time…
Here’s the story, or an interpretation thereof based on me plodding through various Italian sources and a couple in bad English.

In the 14th century, a Dolceacqua baker had a beautiful 19-year-old daughter called Lucrezia. She was set to marry a young lad called Basso. Unfortunately, Marquis Doria, the ruler of Dolceacqua, enjoyed his droit de seigneur, or lus primae noctis: the supposed right of the feudal ruler to claim peasant brides on their wedding nights. With claim basically meaning rape. Remember the scene in Braveheart? (Fictitious. Apparently droit de seigneur is fictitious too, or at least historians agree there’s no conclusive evidence for it happening in the Middle Ages in Europe.)

Understandably, Lucrezia and Basso were not happy about this and tried to hide. Doria, however, had had his eye on Lucrezia and tracked her down, taking her back to his castle. Desperate, she tried to throw herself from the window of a castle tower. The Marquis stopped her, and to subdue her, locked her in a hot, damp dungeon. She remained steadfast though, and died there of hunger and thirst.

Hearing of the death of the popular girl, the locals had had enough and approached the castle. Basso was able to sneak in and, at knife point, forced the Marquis to abolish the lus primae noctis.

To celebrate – and commemorate – local bakers like Lucrezia’s dad started to make a small, sweet bun – michette.

I’m a bit confused at this point, but some of the sources say the bun was supposed to resemble female genitals – it was like an offering to the feudal lord, an alternative to the rape. It’s the sort of thing that sounds like it has its origins in older, even weirder, stories, but I’m not sure. Some of the source even had quotes in Ligurian language, which really threw me.

Anyway, the day after the Marquis relented was the Feast of the Assumption, which in Dolceacqua also became the Festa della michetta. Since then, “the word ‘michetta’ is still used to define the virginity and the female womb”, apparently. I suspect locals could explain it all better.

Not many sweet buns come with such heavy historical and cultural associations though. Take the Chelsea bun – it’s a sweet bun, which was first made in Chelsea. That’s its story.

Michetta, michette di liguria, Dolceacqua

Shapes and notes
The most common shape for the michette seems to be a small elliptical bun. Then on this video (at 1.00 minute) you can see a baker making a version with snakes of dough rolled into three ball shapes. I’ve given instructions for forms. I’ve also read of the existence of a cross form, the crocetta, but I haven’t done these.

Note, this is a very yeasty dough – it’s not a nice healthy long fermentation bread, it’s an indulgent, feast-day bun. Even if you can buy them all year round now in Dolceacqua. It’s also a very rich dough – as befitting a feast-day sweet – containing sugar, eggs, butter and olive oil.

Butter in doughs can be problematic if it gets too warm, it’ll become greasy and ooze. If your dough is getting too greasy, cool it off in the fridge, to firm up the butter a bit.

Also note that Italians may well make the dough volcano-style, that is with the flour piled up on the work surface, a crater in the middle and the liquid ingredients added. I do this for pasta, but I find it easier to use a bowl for bread doughs, as it’s more familiar and gives me a better sense of how it’s feeling.

Recipe
500g flour – 300g strong white, 200g white plain (all-purpose)
40g fresh yeast (or 25g active dried yeast)
100g water, tepid + about 80g more
100g unsalted butter, not warm
2 eggs (about 100g, without shells), lightly beaten
120g caster sugar
2g fine sea salt
Zest of one lemon
40g extra virgin olive oil
Water
Extra caster sugar

1. Mix the yeast with about 100g of the water.
2. Put the flour in a bowl and rub in the butter until it resembles fine breadcrumbs.
3. Stir in the sugar, salt and lemon zest.
4. Add the yeast mix, eggs and oil.
5. Bring to a dough. Add more water if it feels tight. I ended up adding about 80g more, so about 180g total.
6. Turn out the dough and knead. You want it quite moist and sticky – but manageable. Don’t overwork it, or the butter will get to oily. The best way to handle this is a few more short kneads over half an hour.
7. Clean out the bowl, oil it slightly, then put the dough back in and cover. Leave 10 minutes then give it a short knead. Return to bowl, cover, leave 10 minutes then give it another short knead.

Michetta dough, first proveMichetta dough, first prove, doubled

8. Put the ball of dough back in the bowl, cover and leave to prove until doubled in volume. As there’s so much yeast in this mix, it’ll be quite quick, especially if the room temperature is warm.
9. Turn out the dough onto a lightly floured surface and gently deflate to redistribute the gases.
10. Divide the dough into pieces, scaled at 60g if you’re being accurate.

Michetta dough, scaled at 60gMichetta dough, form balls

11. Form the pieces into balls.
12. Form the balls into the final shapes, as mentioned above, there seem to be two variables. For the basic buns, they’re small ellipses, so just squash and stretch the ball slightly. For the longer form, roll out the ball slightly, then using the karate chop side of your hand, roll slightly to make two indentations all around the circumference of the cylinder (see pic below).
13. Place the michette on baking sheets and allow to prove up again.
14. Preheat the oven to 200C.
15. Bake for about 12 minutes, until lightly browned.

Michette - two shapesMichette, baked, caster sugar

16. While still warm, brush the top with water and sprinkle with (or roll in) caster sugar.

Enjoy as a breakfast bun or for afternoon tea.

9 Comments

Filed under Baking, Cakes (yeasted), Feasts, Recipes

Pastiera Napoletana – Neopolitan grain and ricotta Easter tart

Blur

“On sale now – and only in this season – is a pagan springtime cake, pastiera Napolitana, made with soft grains of all kinds, removed from their husks months before ripe, and cooked with orange blossoms. There is a description of it by one of the Latin authors.”

Norman Lewis includes this description in his entry for 28 February in his book Naples ’44. Lewis was a sergeant in the British Army Intelligence Corps and kept a diary of life in the war-torn city. It’s hugely evocative – largely of the privations of impoverished Neapolitans, but it also includes rich records of Naples’s seasonal traditions, including its unique foods.

Pastiera slice

I first encountered pastiera when we visited the city in June 2013, and was drawn in by the cute olde style packaging of a bakery that specialised in this special pastry. Although that bakery seemed to sell it all year round, pastiera is more specifically associated with Easter. Though its origins – as Lewis says – are pagan, ancient Roman. It may have been eaten as part of celebrations of the goddess Ceres (Demeter to the Greeks) who oversaw agriculture, grain and fertility.

Or something like that. The modern pastiera is likely decidedly different to the ancient Romans’ concoction, though both probably featured eggs and grains, symbolic foodstuffs for pagans and Christians alike.

The other important ingredient is ricotta. In England the stuff you get is a dense, slightly characterless cow milk blob rammed into plastic tubs. In Roma – ah, the ricotta of Roma! Fresh stuff is sold every day in the city, curdy delicacies that sit, plump and proud, in little baskets in the displays of market stalls, cheese shops and alimentari. Some are made with sheep milk (the classic), some cow milk, some a mixture.

I do wish I’d made this back in Rome, so I could have at least tasted the difference. I suspect made with real, fresh ricotta it would have been a somewhat different proposition.

Anyway, it’s about time I tried making one!

Pastry

300g plain, all-purpose or low-protein 00 flour
140g unsalted butter, cold
100g icing sugar
2 eggs

1. Sieve the flour.
2. Cut the butter into cubes.
3. Lightly beat the eggs.
3. Put the flour in a food processor, add the butter and blitz quickly until it resembles crumbs. Then add the icing sugar and blitz quickly again to combine. Alternatively, rub the fat into the flour by hand until it resembles crumbs then sieve in the icing sugar and mix.
4. Add the egg a little at a time, until the dough comes together. Again, you can do this in the processor or by hand. You may not need to use all the egg; you don’t want the pastry too damp.
5. Briefly knead the dough until it’s smooth. Don’t do it too much.
6. Wrap in plastic and leave to rest in the fridge.

Ricotta mix

Filling

The grain is the most distinctive ingredient here. You can usually get whole wheat grains from health food shops, and they will need simmering in water. Some may need soaking before cooking – follow the instructions on the packet. Make sure you could them enough as undercooked grain, like undercooked pulses, isn’t great for your digestion. You may be able to source pre-cooked grain in a can. Once cooked, drain, reserving the cooking water – it’s great for bread making.

Pastiera is also called pastiera di grano, with grano meaning grain in Italian, but it’s also used as a synonym for wheat. If you prefer, you could use another type of grain – such as one of the older varieties of wheat like spelt, einkorn or emmer. You could even use barley or oats. Or a mixture, as Lewis mentions.

300g wheat grains (cooked weight)
350g milk
30g unsalted butter
1 lemon, zest
1 orange, zest
1/2 teaspoon cinnamon
1 tsp vanilla essence
500g ricotta
250g caster sugar
2 whole eggs (about 120g beaten weight)
1 egg yolk (about 20g)
100g candied peel [ideally orange and cedrocitron, but latter not common in UK]
2-3 tbsp orange blossom water – optional, to taste

Uncooked wheat grainCooked wheat grain

1. Firstly, cook the wheat grains. Or open the can…

Wheat with milkWheat with milk 2
2. Combine the cooked grain, the milk, the butter, the zest, the cinnamon, the vanilla in a saucepan, cook gently for another 30 minutes or so. Again, you don’t want to turn it into a porridge, so keep an eye on it, as you would a stove-top rice pudding.
3. Blend the ricotta with the eggs, egg yolk and sugar.

Add grain to ricotta mixAdd peel to ricotta mix
4. Add the grain mixture to the ricotta mixture, then stir in the peel and orange blossom water, to taste. This stuff can be quite pungent, so go easy.
5. Grease a 25cm pie or flan dish or even a spring-form cake tin then line it with the pastry.

Pastry casePastry case, pricked
6. Prick the bottom with a fork and trim the edge roughly. We’ll tidy it in a mo.
7. Pour the filling into the pastry case. (Mine was a bit full – but I only had a 24cm tin. Hence I suggest using a 25cm tin.)
Pastry strips

8. Gather up the pastry offcuts, roll out again, and cut strips about 15 wide. If you have a pastry wheel with a serrated edge, this looks cute, but it doesn’t matter if you don’t.

Trim edges
9. Create a criss-cross pattern on top of the filling with the pastry strips, with the pieces of pastry set at an angle so you get diamonds, not squares. Tidy the edges.
10. Preheat the oven to 180C.

Baked
11. Bake the pastiera for about 1 hour and a quarter, keeping an eye on it. If it starts to brown too much, cover with foil and turn the heat down to 160C. It should be firm and set, if not, leave in the oven for another 15 or so minutes.
12. Allow to cool completely, then dust with icing sugar and serve at room temperature.

Happy Easter!

Pastiera cut

12 Comments

Filed under Baking, Pastry, Pies & tarts, Puddings & desserts, Recipes

Shrove Tuesday Scandinavian cardamom buns: fastelavnsbolle or semlor

Semlor, semla, fastelavnsbolle

I’ve never been to a Scandinavian country, but that doesn’t stop me enjoying their baked goods from afar.

I’ve had my eye on these cardamom flavoured buns filled with almond paste and cream for a while, but as the Christian Shrovetide, the three days before the pre-Easter fast of Lent, only comes round once a year, now’s my chance to make them. Yes, yes, I know I made some seriously sugary carby Italian Carnival treats yesterday, but it’s a busy time of year for indulgent foods. Indeed, Shrovetide is all about the indulgent foods, even giving Christmas a run for its money.

In Britain, the remnants of this tradition are our pancakes, with the secular name for Shrove Tuesday Pancake Day*. We used to have a tradition to eat slices of bacon – collops – on the Monday before Lent, but this seems to be all-but forgotten now. It’s all about the fatty, rich foods though, as commemorated in the more common international name for Shrove Tuesday: Mardi Gras, Fat Tuesday, Fettisdag in Swedish. The Danish and Norwegian name, meanwhile, is Fastelavn, which comes from older German and means “fast-evening”.

Versions of these buns are eaten throughout Scandinavia and adjacent areas, and go under various names: according to Wikipedia these are “semla or fastlagsbulle (Swedish), laskiaispulla (Finnish), vastlakukkel (Estonian) or fastelavnsbolle (Danish and Norwegian)”, with semlor the plural of semla, from semila, the Latin for flour (and related to the English and Italian grain-related words semolina, semolino, semola). Another Swedish name is fettisdagsbullar. So either “Fast-evening buns” or “Fat Tuesday buns”.

A common version of the bun these days involves filling it with almond paste and whipped cream. The almond paste form was first recorded in 1883, the cream supposedly came as a ration-busting celebration in Sweden after the First World War. In our modern world of more-is-more, both are combined.

Eaten without a filling, and instead sprinkled with cinnamon and served in a bowl of warm milk, they’re known as hetvägg. King Adolf Fredrik of Sweden purportedly died in 1771 after eating 14 but that may be one of those myths perpetuated by the internet. Not reading Swedish, I can’t confirm or deny it.

Almond paste

It’s very easy to make almond paste, marzipan or mandelmassa, but if you are intimidated it’s easy to buy too.

175g ground almonds
175g icing sugar (aka confectioner’s sugar, powdered sugar)
1 egg

1. Beat the egg slightly and combine with the ground almonds in a bowl.
2. Add half the sugar and bring together – either with a spatula or wooden spoon or by getting your hands in there – and form a sticky dough.
3. Sieve the rest of the icing sugar onto your work surface then turn out the dough, and bring together, incorporating the sugar.
4. Wrap in plastic and leave in your fridge until it’s needed. (Well-wrapped, homemade marzipan will last for a few weeks in the fridge.)

Dough and buns
1 tsp cardamom
75g butter, melted
300g milk
20g fresh yeast (or 12g ADY or 10g instant)
500g plain/all-purpose flour
1 medium egg, lightly beaten
50g caster sugar
5g fine salt

Semlor ingredients

1 extra egg, for glazing

Ground cardamom

1. Crack open a few green cardamom pods and grind the seeds to a powder in a pestle or mortar or spice grinder.
2. Combine the melted butter and milk, warmed to about body temperature.
3. Add the yeast to the milk and allow to sit and activate for a few minutes.
4. Put most of the flour, the sugar, the salt, the cardamom and the egg in a mixing bowl, then add the yeasty milk mix.

Dough, mixingDough, sticky
5. Stir to combine and bring together the dough. It will be pretty moist. (Say your beaten egg weighs 58g, along with the milk and melted butter that’s 433g of liquid, to 500g flour – ie about 87% hydration, though the butter will firm up somewhat.)
6. Put the rest of the flour on your work surface and turn out the dough. Bring it together and knead, trying not to add too much more flour – you want to keep it nice and moist, so the resulting crumb is light.
7. I gave mine a Dan Lepard style knead – that is, brought it together, formed a ball, let it rest, covered in a clean bowl, for 10 minutes then gave it another short knead. Then I repeated this 10 minute rest, short knead process twice more.

Dough close up
8. When you have a nice smooth dough, put it back in a clean bowl, cover, then leave to double in size. This will take an hour or two at room temperature (about 18C).

Dough pre first riseDough after first rise

ScalingForm balls
9. The resulting dough weighs 1kg, more or less. To make 18 medium sized buns, divide this into pieces scaled at 55g. You can go bigger or smaller – up to you!

Forming balls 1Forming balls 2

Forming balls 3Forming balls 3
10. Form these pieces into neat balls. I do mine two at a time, rolling them inside cupped hands. This technique works best if your surface isn’t floury, so the dough sticks just slightly. Even better if your surface is stainless steel or marble. As mine is bamboo, I oil it slightly first, which also works well for wood work surfaces.

Balls, final proveBalls, egg washed
11. Put the balls on lined baking sheets, leaving enough space for them to expand, then give them their final prove, again until about doubled in size.
12. Preheat your oven to 220C (I use an interior thermometer as you can rarely trust the temperature on the knob).

Buns, baked
13. When the buns are proved, brush them with beaten egg then bake for about 12 minutes, until risen and golden.
14. Cool on a wire rack, covered with a clean cloth.

Filling
200g marzipan
Crumbs from the buns
100g milk (QB – you may not need it all)

500ml cream, whipped

Buns, splitBuns, hollowed out

1. When the buns are cool, slice off the tops and scrape out some of the crumb with a fork or even a grapefruit spoon if you have such a thing. (I’ve got the remaining single one from a childhood set.) Put the crumbs in a bowl.

Marzipan, grated
2. Finely grate the marzipan then add to the crumbs.

Making the almond fillingMaking the almond filling 2
3. Add enough milk to form a thick paste by squishing it all together with a fork or spoon.

Buns, hollowed out 2Buns, filled
4. Put a blob of the paste in the cavities inside the buns.

All creamed
5. Pipe a layer of the cream on top of the paste, then put the lid back on. I only had a 250ml pot of cream, some of which I’d already eaten with another cake, so it’ll be much better with the 500ml I mention here. Shoddy. Sorry. But I wanted to get this post done today rather than rush off to the shop again.

To serve
Dust with icing sugar.
Enjoy. But don’t try eating 14.

Semlor, semla, fastelavnsbolle close-up

Personally, I’m not too fussed about calories and all that. As well as using the default human form of transport (brisk walking) or cycling when many modern slobs use their car, I also have a general principle that diet is about balance. So obviously I don’t just eat the stuff I write about on this blog. My weight naturally seems to wander about between 80 and 85kg. That said, during out building work last year, when we didn’t have a kitchen and I couldn’t bake, I was 80kg; now I’m 85kg. Methinks a few more brisk walks up our local hill are in order. Or some Lenten fasting. Hm.

13 Comments

Filed under Baking, Feasts, Recipes

Christmas biscotti

Christmas biscotti

So I wanted to create an all-purpose biscotti recipe, an equivalent to this eminently useful customised cookie recipe where you just make a basic dough then chuck in whatever else you feel like. The plan was to have a recipe that I could adapt to utilise some Christmas flavours, some spices, some peel – and use up some pistachios that were sitting in storage while we didn’t have a kitchen during our 12 weeks-became-24 weeks building project.

Here’s the Christmas version. I’ll post the all-purpose version when I’ve tried a few more variables.

3 cardamom pods
3 cloves
nutmeg
1/2 tsp cinnamon
250g plain flour
200g sugar (caster or granulated)
1 tsp baking powder
(30g raw cacao powder, optional – I just had some)
pinch salt
3 medium eggs, beaten (QB, see below)
100g pistachio nuts
85g candied peel

1. Preheat the oven to 180C.
2. Line some baking sheets with parchment.
Christmas biscotti, spices

3. Prepare the spices: crack open the cardamom pods and take out the seeds then grind them up, along with the cloves. I use a mini electric grinder, but you could use a pestle and mortar (can’t find mine). Mix these spices with the cinnamon and a few grates of fresh nutmeg. Again, the spice mix is up to you really – all these spices are wonderfully evocative of mid-winter feasting to me, but if you don’t like or don’t have cardamom, for example, don’t worry.
4. Sieve together the flour, cacao powder if using, baking powder and spices and add the salt.
5. Make a dough by adding the beaten egg, a little at a time. You may not need to use it all. For example, my 3 medium eggs produced 170g of beaten egg, but I only needed 160g to make a dough that was malleable, not too dry, not too sticky. That’s QB – which is found in Italian recipes, is short for quanto basta, and means, “how much is enough”. In this case 160g was enough.

Christmas biscotti, dough
6. Add the nuts and peel and combine. Don’t knead it, it’s not bread, mix it just enough to homogenise.

Christmas biscotti, logs, unbaked
7. Form the dough into three slightly flattened logs, about 40-50mm wide, and place these on the baking sheets, sufficiently spaced for some spread.
8. Bake for about 20-25 minutes. You want the logs baked but not dried out, not still gooey. If they’re too gooey inside still, they’re hard to slice for the next stage and the second bake.

Christmas biscotti, logs, baked
9. Allow the logs to cool slightly then, with a serrated bread knife, slice, on a slight angle, into pieces about 10mm thick.
10. Return the biscuits to the baking sheets and bake again, for about 10-15 minutes. Take them out, turn them over, then bake again, to crisp up.

Christmas biscotti, sliced
11. Cool on a wire rack.

As they’re baked twice – biscotto literally means “twice baked” in Italian, from the Latin – they’ll be crisp and hard. They keep well in an airtight container and are suitable for dipping in a glass of desert wine, or a digestivo, or a hot drink if you’re being abstemious. It’s the season for abstemiousness right?

1 Comment

Filed under Baking, Biscuits, cookies, Recipes

Pizza cresciuta di Pasqua… Sort of.

Pizza cresciuta di Pasqua, sliced

You could say pizza cresciuta is an Easter (Pasqua*) equivalent of the traditional north Italian Christmas cake panettone. Pizza cresciuta is one the many distinctive Italian baked products I saw during our two years in Rome. I mentioned it last year in a round-up of Easter baked goods and baking, saying that the verb crescere means “to rise”, as in the word crescendo. I also mentioned that the word pizza means a lot more than just a topped dough disc in Italy. So this is a “risen pizza” (it’s also called pizza ricresciuta – “re-risen pizza”). I believe a cresciuta is also term for what we’d call a sponge or pre-ferment – yeast, water and some of the recipe’s flour mixed ahead of time to get the leavening going nicely. It’s a term that’s also applied, in Naples I think, for a yeasted batter. Anyone with more knowledge about this, please do comment!

In shape the pizza cresciuta di Pasqua I saw in Rome was more like a tall round cake – that is, like panettone. Except when it’s savoury. Looking at recipes online, most of them are an enriched dough with some spices, but there are even recipes online in Italian for cheesy versions.

As the ones I’d seen in Rome were always sweet, I wanted to try that this Easter. Though I’ll say now that this is one of those experiments that didn’t really quite exactly work. Blogging it anyway, as a record. If I do try to perfect it, I don’t think it’ll be until next Easter.

A lot of the recipes I found used spices – notably anise seed and cinnamon. Most of them also used some liquor, notably spiced or herbal liquers like Alchermes (aka Alkermes) and Strega. One recipe I saw even contained 100ml each of rum, vermouth, alchermes, cognac, and cointreau! But I thought this much strong liquor was sure to bugger things up with the yeast (I note now that that recipe uses “lievito paneangeli” – I think this is a kind of vanilla flavoured baking powder).

I couldn’t hope to get Alchermes and Strega, but was able to source a bottle of the latter from TwentyOne Wines in Brighton (thanks Philip, who opened up for me during his Easter holiday last week). I was also finally able to track down some aniseed – something I’ve not been able to source in smalltown Lewes, and really want for several other Italian recipes, notably aniseed-flavoured ciambelline al vino (ring biscuits often eaten with a digestivo after dinner).

So here’s my recipe. Tweaked slightly from the weekend’s effort, but to really work I think it’ll need more tweaking. If you do have a try yourself, or have a better recipe, again, please let me know.

Some ingredients

Liqueur
50g Strega
2 t aniseed

Sponge / pre-ferment, or cresciuta
100g strong white flour
100g water
10g fresh yeast

Dough
250g strong white flour
300g plain, all-purpose or type ‘0’ flour
6g salt
Zest of one lemon
Zest of one orange
1 t cinnamon
1/2 t nutmeg
5 medium eggs
2 t vanilla
300g caster sugar (seems a lot but vabé)
50g lard
50g butter

Aniseed in Strega

1. Put the aniseed in the liqeur and leave to macerate for at least 4 hours, preferably overnight.
2. Make a sponge with the yeast, the water and 100g of the the strong white flour.

Lively sponge
3. Leave the sponge to ferment, covered, in a cool, draft-free place overnight.
4. Lightly beat together the eggs, vanilla, zests, sugar, booze and other spices.
6. Melt together the lard and butter then allow to cool.
7. Add the melted fat to the egg and liqeur mix.
5. Put the rest of the flour in a large bowl, along with the salt, then add the wet mixture.

Slightly strange sticky pizza cresciuta dough action shot
6. Make a dough – a nice soft, wet, tricky-to-handle dough.
8. Give the dough three short kneads every 10 minutes over half an hour or so, forming a ball, returning it to the bowl and covering between each knead. (This is the very handy Dan Lepard method.)
9. After the final knead, put the ball back in the bowl, cover again, then leave to prove until doubled in size.
10. Form a ball and allow to rest for 10 minutes.
11. Tighten up the ball, then put it in a tall, deep tin (it could be an old food tin, which is what I did when I made panettone, though note – not one with plastic lining), or in a paper panettone case. I used the latter, which are available from Bakery Bits.
12. Leave to prove up again. Ideally you want it to double in size and feel nicely inflated. Hm. See discussion below.
13. Preheat the oven to 220C (200C fan oven).
14. Brush the top of the dough beaten egg. I didn’t bother as, frankly, my dough didn’t look great.
15. Bake the pizza for about 20 minutes, then turn down the oven by 20C.
16. Test to see if it’s done with a knock on the bottom. Hm. See discussion below.
17. Allow to cool completely on a wire rack.

Pizza cresciuta di Pasqua. Sort of.

Eat for your Easter Sunday breakfast. In Rome, the pizza cresciuta is eaten for Easter Sunday breakfast with corallina salami. We had this one for breakfast, even though I was disappointed with the results. And couldn’t get corallina.

I knew it was going wrong when the dough seemed sluggish for the final prove. There was some (very irregular) oven spring, but I knew it was going even wronger when I first took it out of the oven – it just felt hefty, not light like a panettone. I had the oven set too low originally, and it baked too slowly, and ended up both dense and thick-crusted.

Easter Sunday breakfast - Pizza cresciuta di Pasqua

The taste was interesting though, thanks to the Strega, which features saffron, mint and fennel among its many ingredients, and the aniseed. Though I do wonder about the Strega. Certainly yeast produces alcohol alongside CO2 when it’s active in the dough, but not too much alcohol, or the presence of strong alcohol retards the action. Scratching my head about this today, I found one comment at Delia Online (here) that says “Baker’s yeast is tolerant to alcohol to about 3%. That’s 3% C2H5OH [ethanol] by mass. Brandy is about 40% C2H5OH.” I’m not sure my 50g Strega could really retard the yeast quite so much, but clearly something was awry. My proving times were quite possibly problematic too. And  I suspect all that sugar might have been a factor in affecting the activity of the yeast too.

Anyway, next time I try it, I might adapt my attempt at panettone a few years ago, which was much more successful, and go easier on the strong liquor too. Fun experiment anyway even if the result is slighty heavy duty. We had a load more for Easter Monday breakfast earlier, and it was pretty good toasted.


* While the English word for Easter comes from the name of a pagan goddesses – the Anglo-Saxon Ēostre – the Italian word relates to the word Passover, which comes from Pesach and the Hebrew pesah and pasah.


4 Comments

Filed under Baking, Other food, Pizza, Recipes, Rome

Pizza bianca – the quintessential Roman street food

Pizza bianca, sliced

Pizza bianca is ubiquitous in Rome. Although Romans don’t by and large like eating on the move, chances are you will see people wandering along clutching bready packages and chances are, they’ll be folded pieces of pizza bianca, either plain or filled (farcita).

Pizza bianca – “white pizza” – is effectively plain pizza, simply sprinkled with coarse salt. It can be fairly thin, or it can be fairly puffy – more akin to what we’d called focaccia in the UK. There are fine lines between different types of flat bread, but what we call focaccia (literally “hearth bread”, from the word focus – Latin for hearth) is probably more akin specifically to the focaccia Genovese. Usage of the words “pizza” and “focaccia” vary a lot around Italy; for example, in our local Sardinian restaurant here in Rome, they serve discs of crisp flatbread that they call… focaccia.

This is my second attempt at pizza bianca. I made some in February 2012, but my oven has such fierce bottom heat, I struggled to get the top golden without over-baking the bottom.

Pizza bianca

Plus, well, as pizza bianca can be found in every bakery and pizza takeaway place in Rome, it seemed almost silly to persist in trying to master it. Except recently, when we’d decided to leave, it seemed I really ought to. Then last week I stopped by Rachel’s place while she was making it, and it galvanised me to revisit the document that’s been sitting on the my desktop the past few month called “Pizza bianca recipes”.

The most important factors
Pizza bianca is made with a fairly basic white bread dough, but there are several important things to consider:
You want a a nice moist dough.
You want to give it some folds.
You have to give it time to ferment.
You need to be gentle with it.
And ideally you want decent extensibility, as with any pizza dough.

Mine fell down slightly on the final factor: perhaps an autolyse process at the start would help, but this didn’t seem to be traditional. Or I could have tried to increase the hydration.

Rachel used the recipe from Gabriele Bonci’s book (so far only available in Italian), which was 70% hydration (ie 700g water to 1kg flour), but last December we saw this recipe in the window of Bonci’s bakery in Prati. Ninety flippin’ percent hydration and two days of leavening. I was just discussing the challenge of high,70%+ hydration ciabatta dough yesterday with Jeremy; that’s tricky enough. I’d love to see Bonci handling his 90% dough.

Recipe in the window of Bonci bakery, Dec 2012

Otherwise my first effort was okay; I would have liked to get a nicer golden colour on top, but couldn’t manage that with my pesky oven…. which will only be my pesky oven for another 10 days, before we leave our home of the last two years and head back to Blighty, then on to a bit of a trip to see friends and family in the US and NZ. So all very bittersweet. Yay to visiting friends and family in the US and NZ, boo to leaving Roma friends and infuriating, wonderful Roma.

Variation and experimentation
As usual with my recipes, I’m experimenting as I go along. You can just make this with commercial yeast, but I did a mixture of fresh yeast and my leaven/sourdough. If you don’t use leaven, increase the yeast to 12g.

A note on the flour too. All the Italian recipes that I’ve seen specify using a grano tenero flour – that is “soft grain”, not a high protein wheat flour. I used Mulino Marino’s organic 0 grano tenero. (00, 0 etc refer to the fineness of the milling; see here for more discussion of Italian flour terminology). This is now available in the UK, but frankly, it’s always better to use local produce as food transportation is a massive contributor to climate change. So see if you can find a medium protein (12-13%) fairly fine flour from your most local mill.

Some recipes also use other ingredients like milk, sugar and even “strutto di maiale” (lard), but at its purest pizza bianca is just flour, water, yeast, salt. And olive oil. But then, what’s any Italian food without some olive oil?* Though the oil here is a classic qb element.

Pizza bianca recipe

The recipe
So here’s my recipe. It makes quite a lot – two fairly large, squarish pizzas – so you’ll need some room in your fridge. Or do half quantities.

The process seems quite convoluted, but mostly it’s about time and gentleness.

1000g flour
700g water
5g fresh yeast (or 3g active dried yeast)
50g white leaven (100% hydration)
20g fine sea salt
30g extra virgin olive oil… or qb.

1. Combine the water, yeast and leaven.
2. Put the flour and salt in a bowl and mix together quickly.
3. Pour the liquid into the flour and mix, along with a sloosh of olive oil. Use your hands or a rubber spatula.

Pizza bianca
4. Turn the rough dough out onto a work surface and knead. Try to stretch the dough and fold it over, to incorporate air.

Pizza bianca recipe, kneading sticky dough
5. It will be sticky. Don’t keep adding more flour. When you’ve got it nicely combined, clean off your hands with some flour, rubbing it between your fingers like soap.

Pizza bianca recipe
6. Put the ball of dough in a bowl, cover with film or a cloth or a shower cap and leave to rest at room temperature.
7. Put a drop of olive oil on the work surface and rub. This won’t stop it sticking, but it can help a little…

Pizza bianca recipe
8. Turn out the dough, and stretch it to form a rough rectangle. Be gentle.

Pizza bianca, folding

9. This next bit is important. It’s called stretching and folding, and it’s a gentle way of redistributing the gases building up in the dough and helping develop the structure, aligning the proteins, while avoiding any of that old-school British violent mistreatment of the dough.

Pizz bianca, folding
10. Once you have a rough rectangle, fold one third inwards, then fold over the opposite end, to form a kind of envelope. A dough scraper, or tarocco (“tarot card”), is essential here.
Pizza bianca recipe

11. Fold this envelope in half again in the centre of the long rectangle, to make a more cube-type shape (sorry, no photo). Put it back in the bowl and cover again.
12. Repeat this process two or three more times at 20 minute intervals.
13. Clean your bowl, or use a fresh container, oil it, then put the dough back. Cover with film or a lid, and put it in the fridge.
14. Leave the dough to quietly, slowly ferment for about 20-24 hours.
15. Remove the dough from the fridge.
16. Depending on how big you want your pizzas to be, divide up the dough. I’ve got an oven sheet that’s 40x40cm (about 16”), so I did divided the dough in two.

Pizza bianca recipe
17. Give the dough another gentle fold, form a loose ball, then leave to rest again, bringing it back to room temperature.
18. Preheat your oven – ideally about 250C, or as hot as it’ll go. Baking any pizza, the hotter the oven, the better. (A good wood-fired oven can top 500C.)

Pizza bianca recipe
19. Take your ball of dough and gently extend it into a square or rectangle to fill your baking sheet or pan. Do this gently, as you want to retain the nice gassy structure. You can either do this on a flour or oiled work surface and transfer it, or it directly on your baking sheet/pan. The more you push your fingers into the dough, the thinner your pizza will be.
20. Drizzle with a bit more olive oil. You can also sprinkle it with coarse sea salt before baking.
21. Then bake for about 12-18 minutes. You want a nice golden finish, something that eludes me…

Pizza bianca
22. Once it’s baked you, drizzle with a bit more oil, so it’ll be absorbed while the pizza is still warm. If you didn’t sprinkle it with salt beforehand, you can do it now instead.

Pizza bianca, and porchetta

The results
The result should be a delicious salty, slightly crunchy bread with an open, irregular structure.

You can vary it by adding olives or rosemary beforehand, but this really is entering focaccia territory, and a true Roman pizza bianca is plain.

We split ours open and filled it with porchetta, a speciality from the Rome area that’s a rolled pork roast with layers of stuffing made with garlic, rosemary and other herbs and has, ideally, some serious crackling to boot.

I’m not a meataholic like Fran,  but this made for a cracking sarnie. We served finger-food sized pieces last night at our farewell-please-take-our-stuff-while-drinking-Italian-craft-beer party. Boy oh boy, what a great selection of beers we had.

Pizza bianca with porchetta

* Of course, this was a flippant comment. Reading about Marcella Hazan, who died 29 Sept 2013, I feel quite dumb to have even made this off-hand comment, as, of course, some things are better fried in butter or types of vegetable oil, even in Italian cuisine. Frying fritti, for example, in extra virgin olive oil would be a total waste, plus, inversely, EV olive oil can be just too strong a taste for more delicate dishes.

18 Comments

Filed under Breads, Pizza