Tag Archives: loaf

How to make a basic loaf of bread

Over the years, friends have asked what my basic bread recipe is. As the simple daily bread – that keeps the kids in sandwiches and toast – I just never got round to it, with my flurries of interest in feast day recipes and almond concoctions and whatnot.

So here it is.

This will seem like quite an involved recipe, but I just want to share lots of tips, which I hope will be helpful for any baking newbies who find this post.

Kit
The first thing I’d say for anyone embarking on their first bread-making experience is: get a flexible plastic dough scraper. The dough scraper is the most essential piece of equipment for handling dough: it helps you scrape it out of the bowl, it helps you scrape it off the work surface, it helps you pick it up and move it around, it helps you tidy up.

As you may be able to see from my photos, I use one from Bakery Bits. I’ve used it for years. I’ve had a few smaller ones, but I prefer the shape and size of this one with my average sized hands. It’s a cheap bit of kit, so invest and see how it feels for you.

The other bit of kit I’d recommend is electronic scales. Sure you can use cups and weights and whatnot, but electronic scales just make life easier, they’re great for scaling up and the tare function will become invaluable.

You also need tins. They’re pretty easy to come by. Manufacturers seem obsessed with giving everything a nonstick finish these days, but I prefer plain steel. Oil it a bit before using and it’ll season nicely to the point where loaves rarely if ever stick.

Stickiness
My basic bread recipe is what’s known as 75% hydration in bakers’ percentages. You don’t really need to get into all that, but it simply means that for every 75g of water, there’s 100g of flour, ie the wet ingredient as a percentage of the dry. A good rule of thumb is 750g of water to 1000g (1kg) of flour. This makes a slightly sticky dough. If that scares you, just reduce the water to about 70% – ie 700g water to 1000g flour.

As we get through a lot of toast, I tend to scale up the quantities so I can make four small loaves (in 1lb or 450g tins) or a couple of large ones (in 2lb or 900g tin). I bake about once a week, and freeze some of the loaves. Some bakers may have reasons to dislike frozen and defrosted bread but for a tin loaf like this it seems absolutely fine. This recipe also works well for freeform loafs but I prefer the tin form these days as it’s easier to process, there’s less fiddling about, which I’ve found particularly useful during the past few years of refereeing parenting small children.

Flour
For the flour, I tend to use a mixture of strong white bread flour, strong wholemeal bread flour and some spelt* flour. You can change the quantities – use all white for example. Using all wholemeal is possible, but it can make for a denser, crumblier loaf, and it may also require a bit more water as the higher bran content of wholemeal seems to make it more absorbent.

Yeast
As for yeast, I used to use fresh yeast, but it’s harder to come by in practical quantities now where I live, so I’m using active dried yeast, ADY, the granular type that you activate in tepid water. I don’t tend to use the powder easy-blend yeast, which you can just stir through the flour, as I enjoy the frothiness of ADY or fresh added to warm water.

Sponge or pre-ferment
My preferred technique, described here, involves making a sponge or pre-ferment – a mixture of all the water and around half the flour. Technically this helps gives the yeast a good start as it can get to work feeding on the sugars in the flour, but in practical terms it can help with timings too.

The sponge can be seen as an easy alternative to a sourdough starter. It won’t have the character you get with wild yeast colonies, but it will help make a tastier bread, and it also means you can use less yeast and do a longer fermentation, which may well mean the bread is more digestible too. The biggest problem with supermarket and industrialised bread is that it rushes the fermentation. I’ve talked about this a lot on here before, but the Chorleywood process, developed in Britain after the Second World War to speed up bread production, has got to a point where the dough has a very short fermentation, less than an hour. I won’t get into it now, but there’s evidence to suggest this rushed fermentation is the key reason a lot of people feel bloated eating modern, industrial bread, or feel they can’t eat bread or wheat.

Kneading
I still knead by hand, despite my recent acquisition of a cheap Aldi mixer. Handling the dough is just so fundamental to the pleasure of making bread. It’s primal. And probably qualifies as quite good stress relief. In short it’s a great activity to help deal with the madness of modern life. I follow a technique described by Australian master baker Dan Lepard in The Handmade Loaf. This was the book that really got me into bread-making a decade or so back. It’s a technique that shows you don’t have to be slavish to one big long knead, you can do short kneads at intervals.

Ingredients
Makes four small loaves or two big ones.

1050g water, tepid
5g active dried yeast (or 10g fresh yeast, crumbled)
1450g bread flour
5g fine sea salt

Method
1. In a large bowl, sprinkle the yeast into the warm water and leave to froth up.
2. Add about half of the flour to the yeasty water and mix well. This is the sponge or pre-ferment. Cover it with a plastic bag, which you can reuse over and over, or even a shower cap. I have a nice floral one. You can leave it for half an hour, or a couple of hours if that’s more convenient for you. You’ll get a nice bubbly sludge. How active it is will depend on various factors, but notably the health of your yeast and the warmth of your room.


3. Combine the salt with the rest of the flour then add to the sponge. I use a silicone spatula to mix it well in the bowl initially.


4. Turn the rough dough out onto your work surface, scraping out the bowl with your dough scraper. I have bamboo worktops which I oil a little first with vegetable or sunflower oil to make it easier to handle the dough, stop it sticking as much.


5. You can oil or wet your hands a bit if you like, but just keep that plastic dough scraper to hand and some flour as the dough is quite sticky. Don’t be tempted to keep adding more loads of flour to make the dough easier to handle as it’ll make the resulting bread drier and denser. Just get stuck in, enjoy the feel, and knead away, pulling and folding. The dough will come together more as the protein structure develops, but don’t agonise. Knead for say five minutes, then scrape the dough off your hands and, using a little bit of flour, rub your hands together as if you’re washing your hands with a bar of soap as this will help remove the remaining dough.


6. Gently but firmly form the dough into a slightly rough ball and put in a clean, lightly oiled large bowl. I tend to use a bigger bowl than for the sponge stage as this is quite a lot of dough and will get quite big as it proves. Cover with the plastic bag.


7. Leave for 10 minutes or so, giving it a chance to rest. You should find it a easier to handle now. Turn out again onto your lightly oiled worktop and give the dough another short knead. Form a ball, put back in the bowl, and cover.
8. Repeat this process a couple more times, every ten minutes or so, then cover and leave for half an hour.
9. Turn the dough out again and you can now try giving it a stretch and fold. This is just another form of kneading. It’s good for trapping some more air in the dough, but it’s also about lining up the protein strands, the gluten orientation. It’s also a method that’s handy with wetter, higher hydration doughs like ciabatta. Just stretch the dough out, then fold in one end, then the other, as in these handy pics.


10. Return to the bowl, cover and leave for its long prove, its “bulk fermentation”. How long this takes will depend on the temperature. My kitchen is about 18-19C. I tend to leave the dough for at least four hours. You can even put it in the fridge overnight or while you’re out. It’s all about finding a technique that fits in with your life and routine.


11. Leave the dough until it’s doubled in size. This is a nice simple rule of thumb. You should see some nice big bubbles of CO2 produced by the yeast.
12. Using your scraper, turn out the dough onto a lightly floured worktop. Give it a gentle knead. This is called “knocking back”, but that sounds so violent. All you’re doing is regulating the structure, reducing any of the bigger gas bubbles to produce a more even crumb in the resulting loaf. This is important for basic sandwich and toast breads, but some breads, like ciabatta and artisan sourdoughs want nice big holes. But that’s another story.


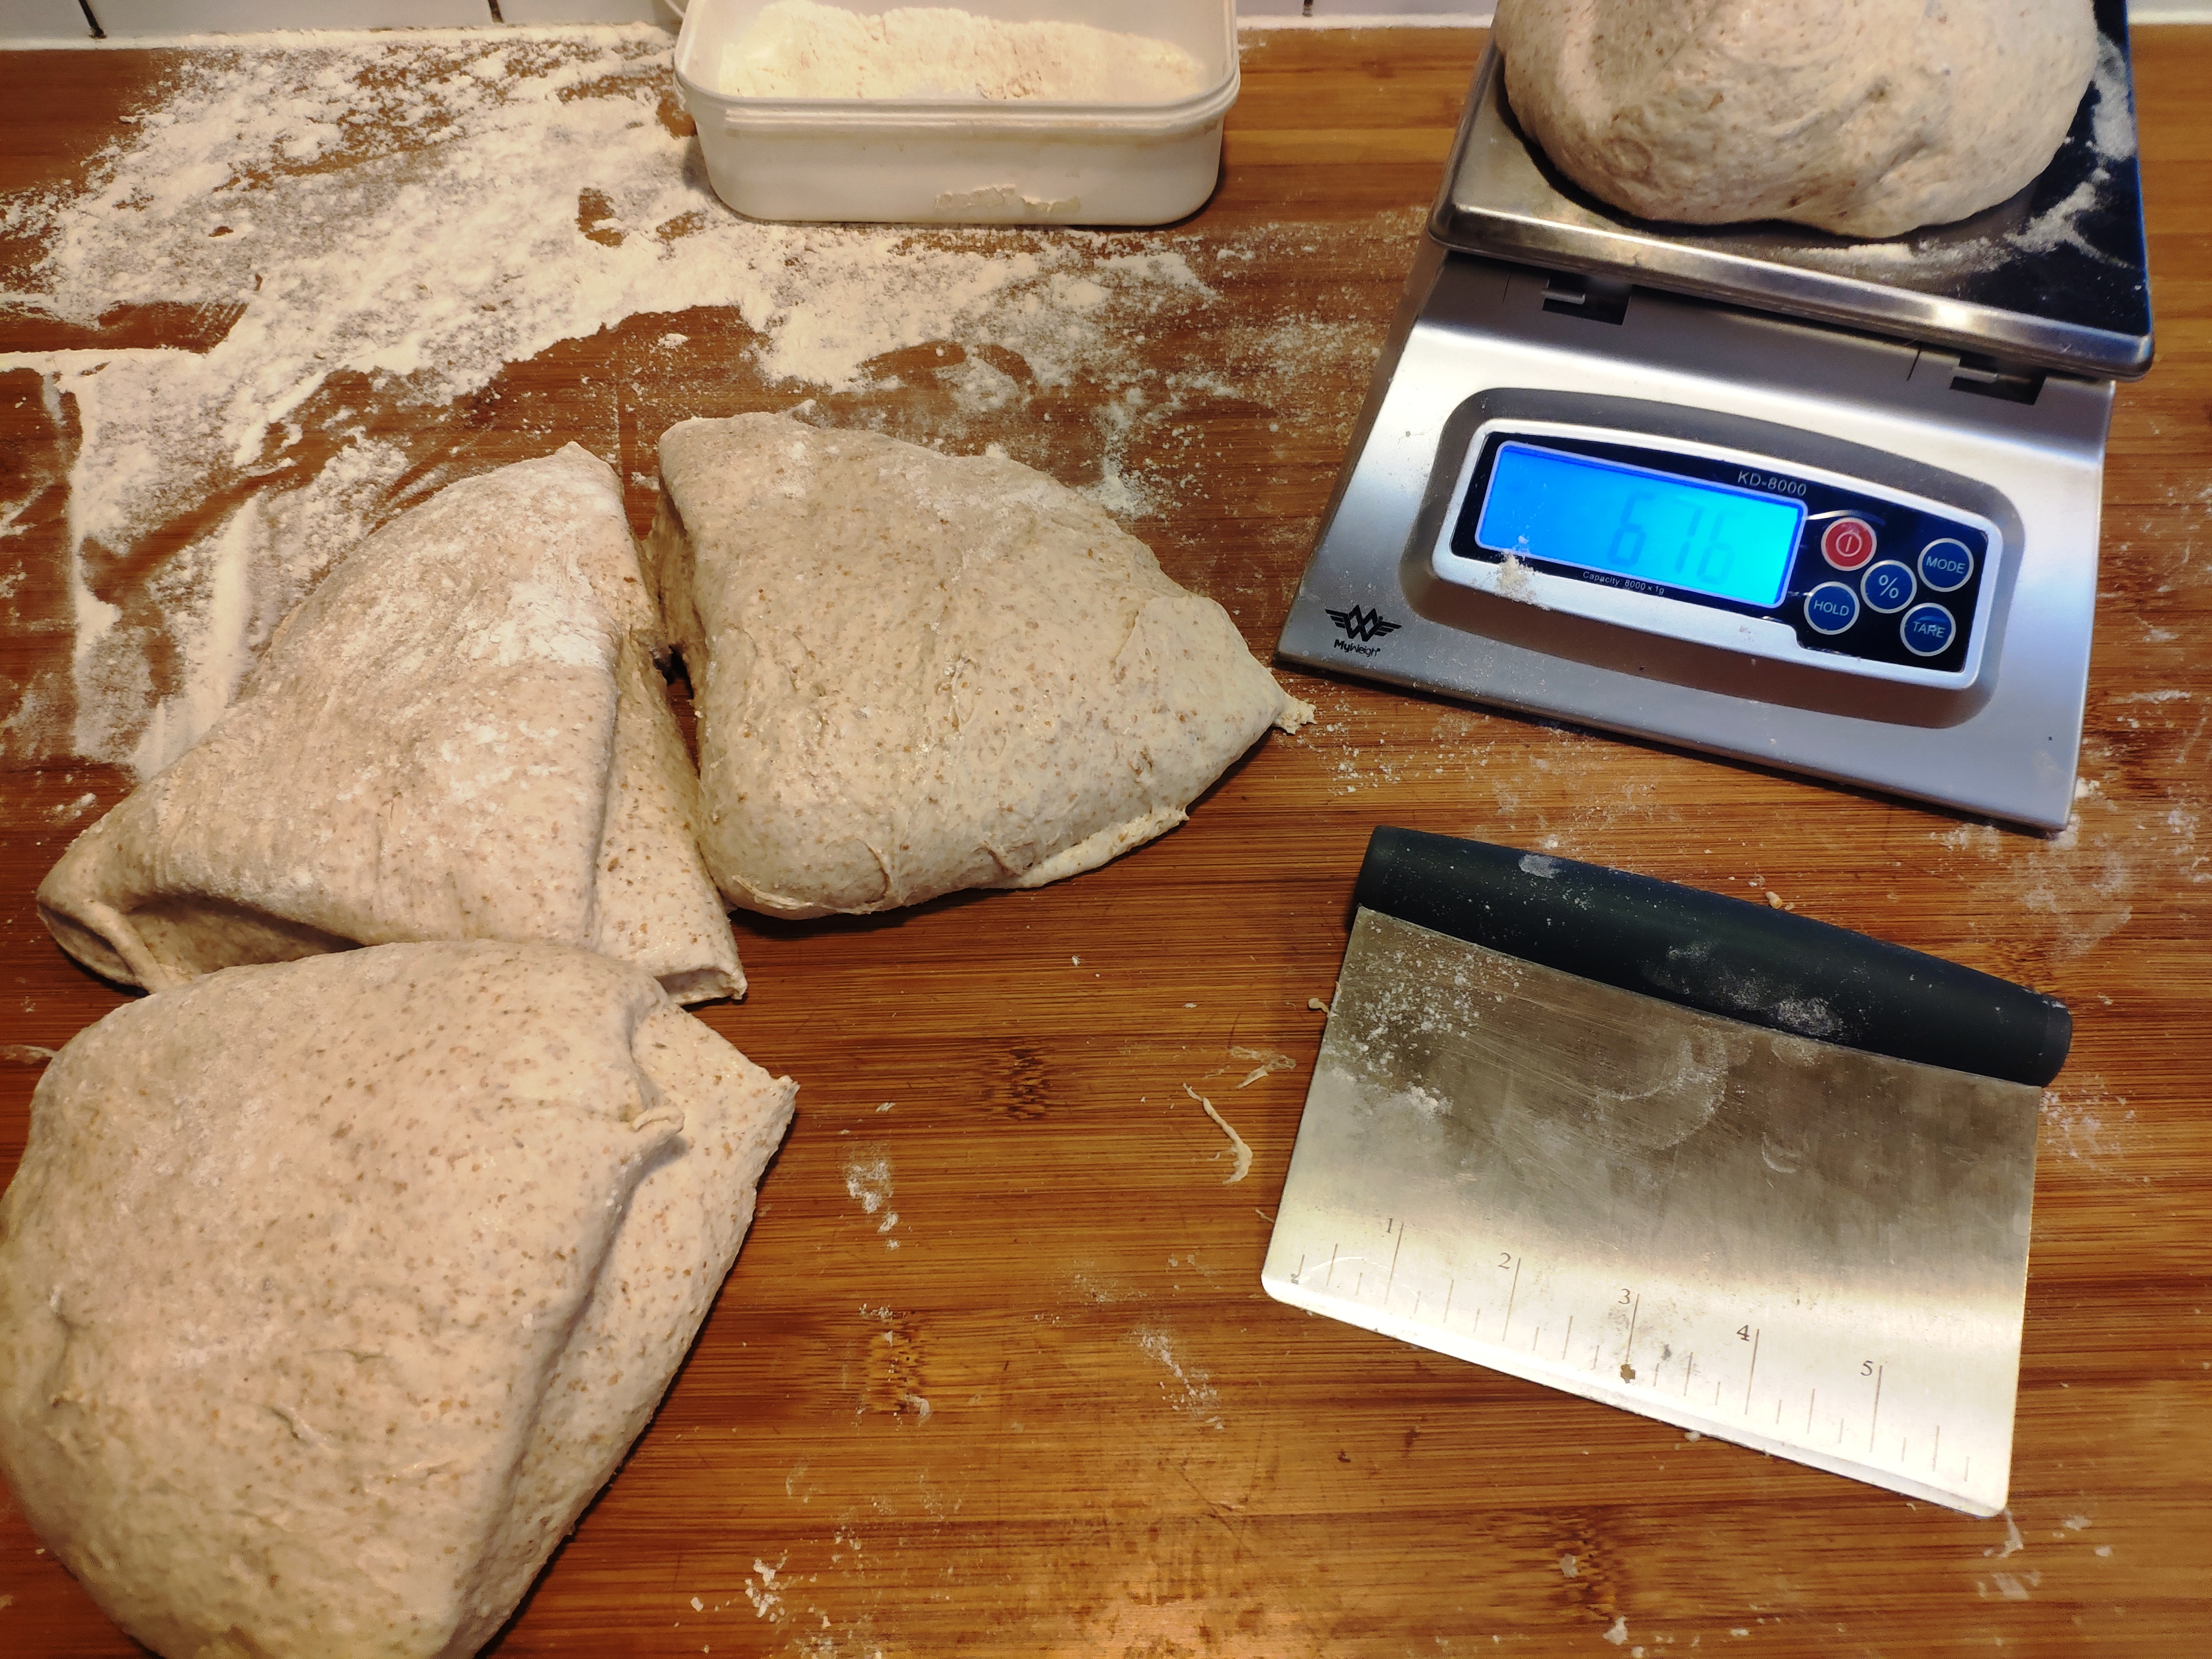
13. Lightly flour the worktop then give the dough another rest, covered with a cloth, then after about 10 minutes weigh it. The total dough weight here is about 2450g. To make four small loaves in 1lb/450g tins, divided it into four pieces each weighing about 612g. Form these pieces into balls by folding the edges to the centre, then chafing by cupping your hands underneath slightly and rotating. This tightens up the ball; if you’re making a boule, you need it tighter so it holds its shape when baked freeform but as we’re doing tin loaves you don’t need to agonise.
14. Place the balls on a more liberally floured area of worktop, cover and leave to rest for another 10 minutes or so.


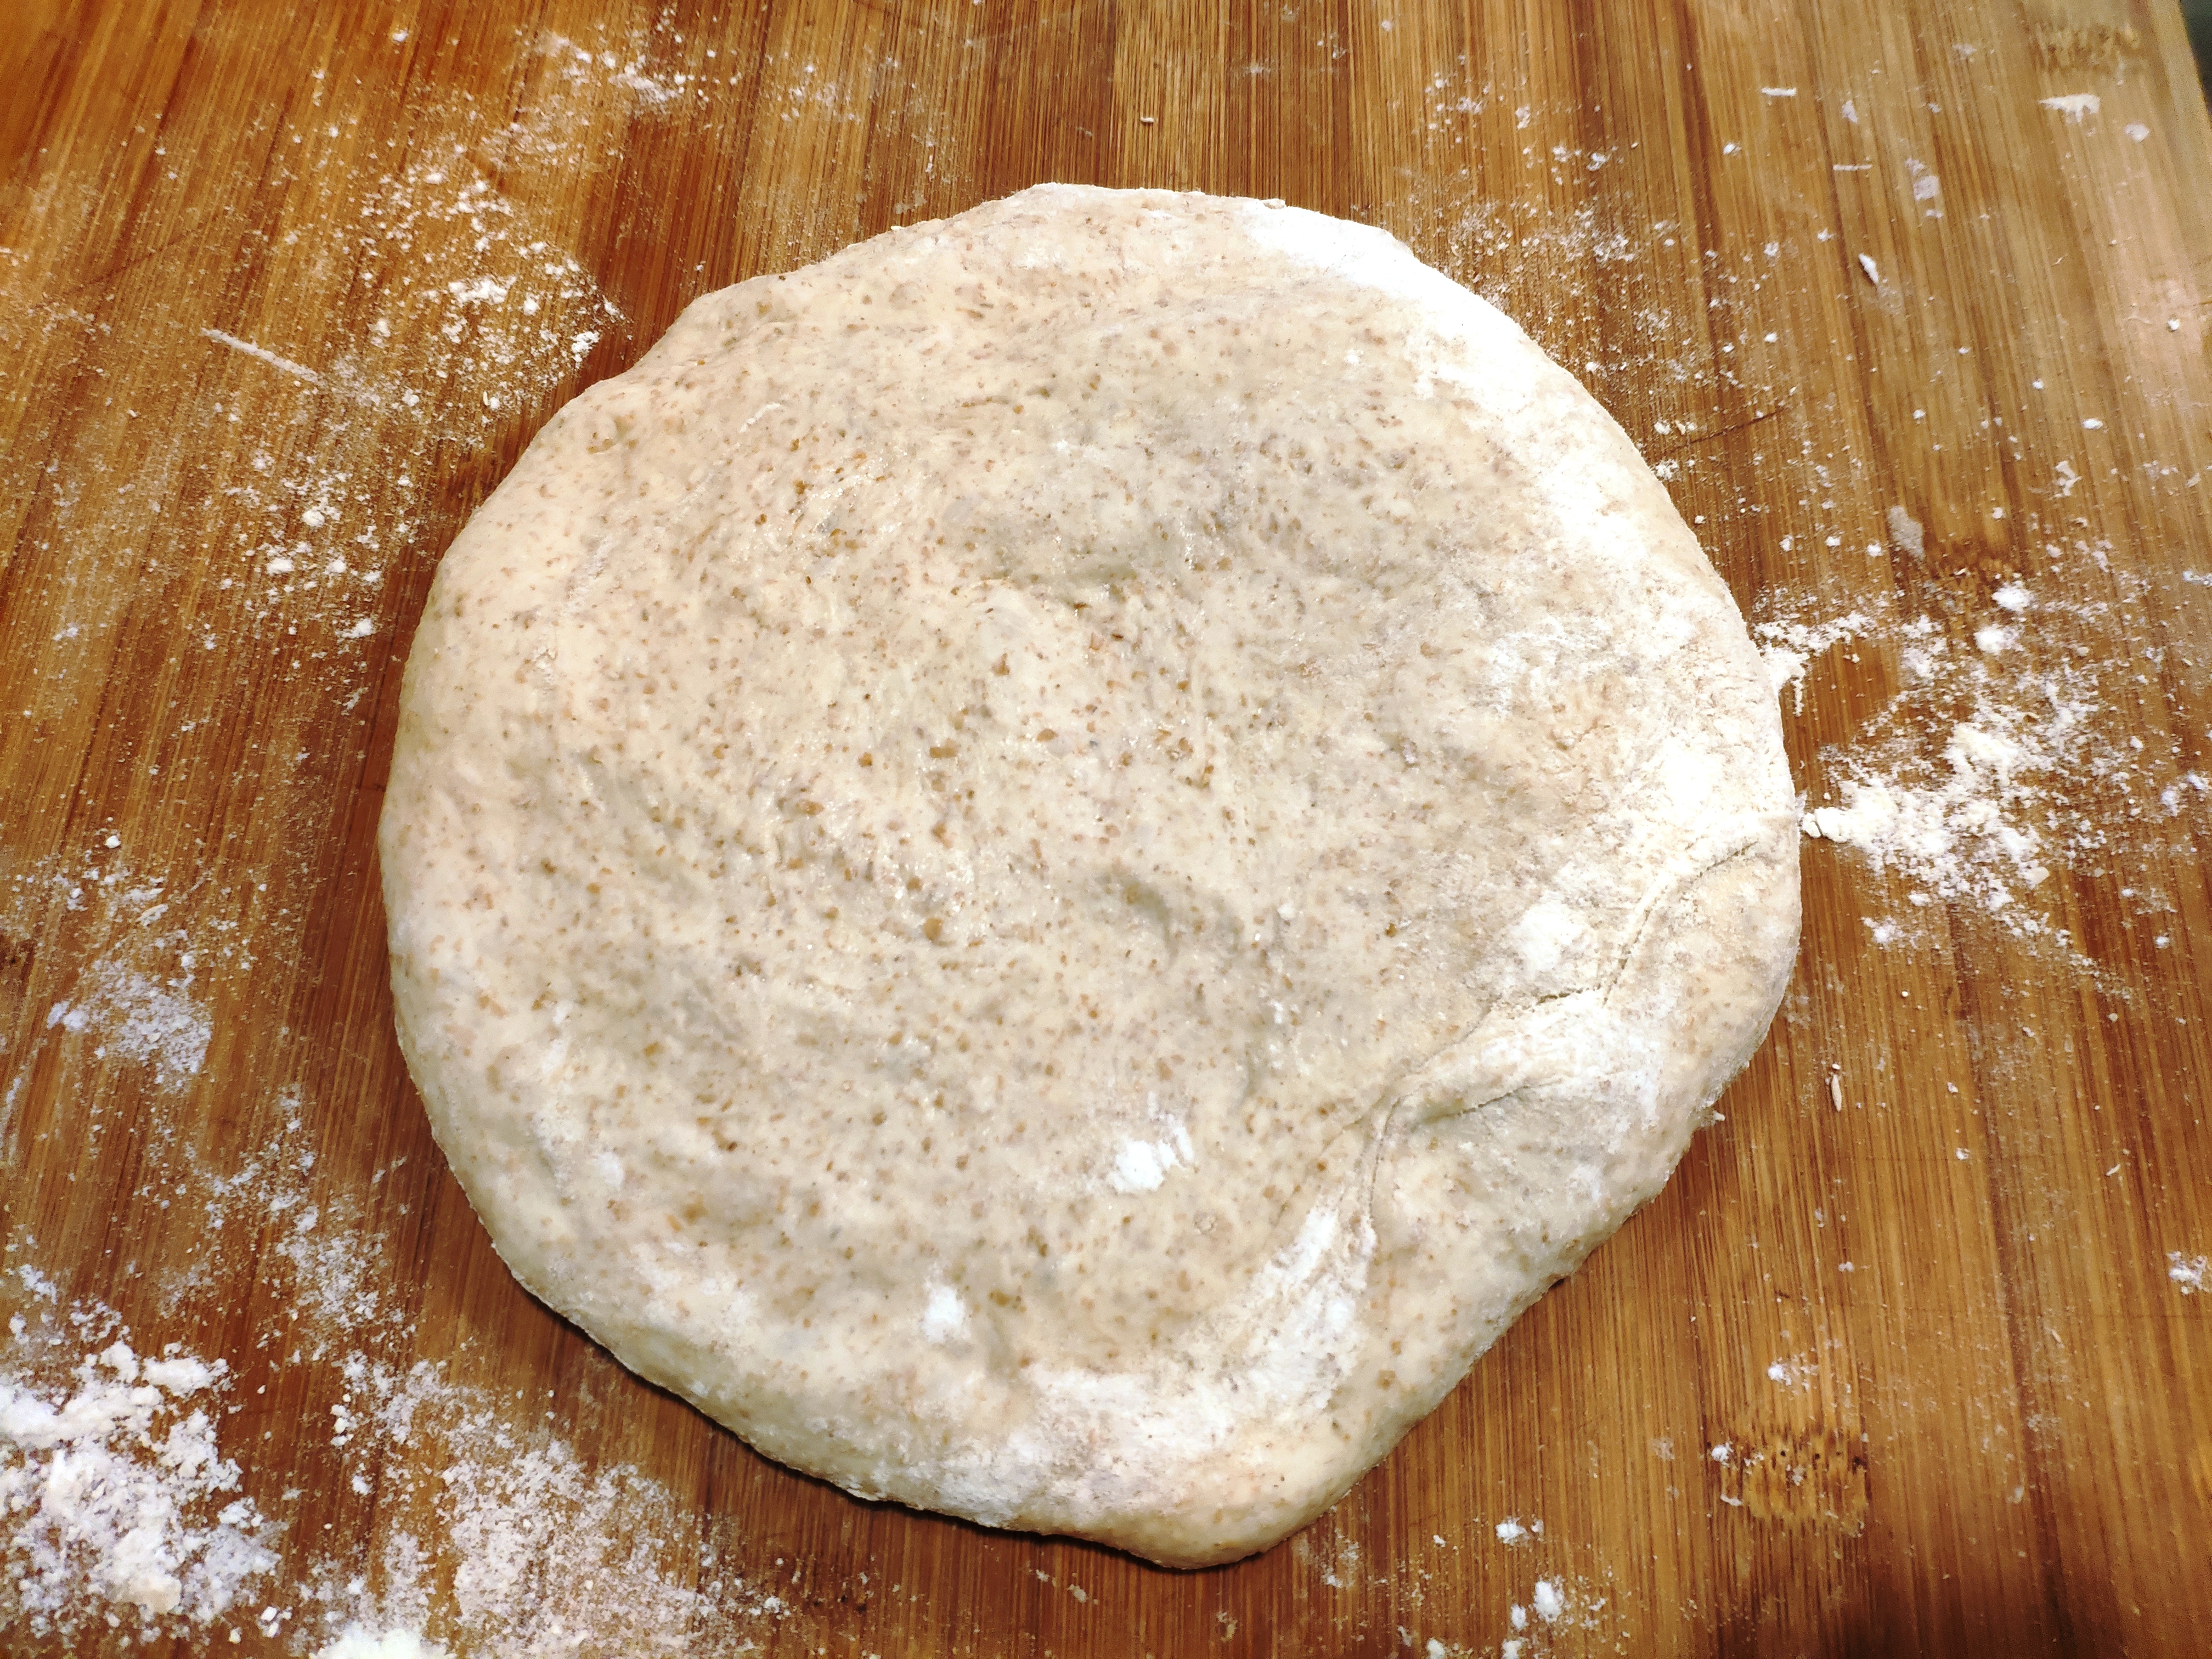
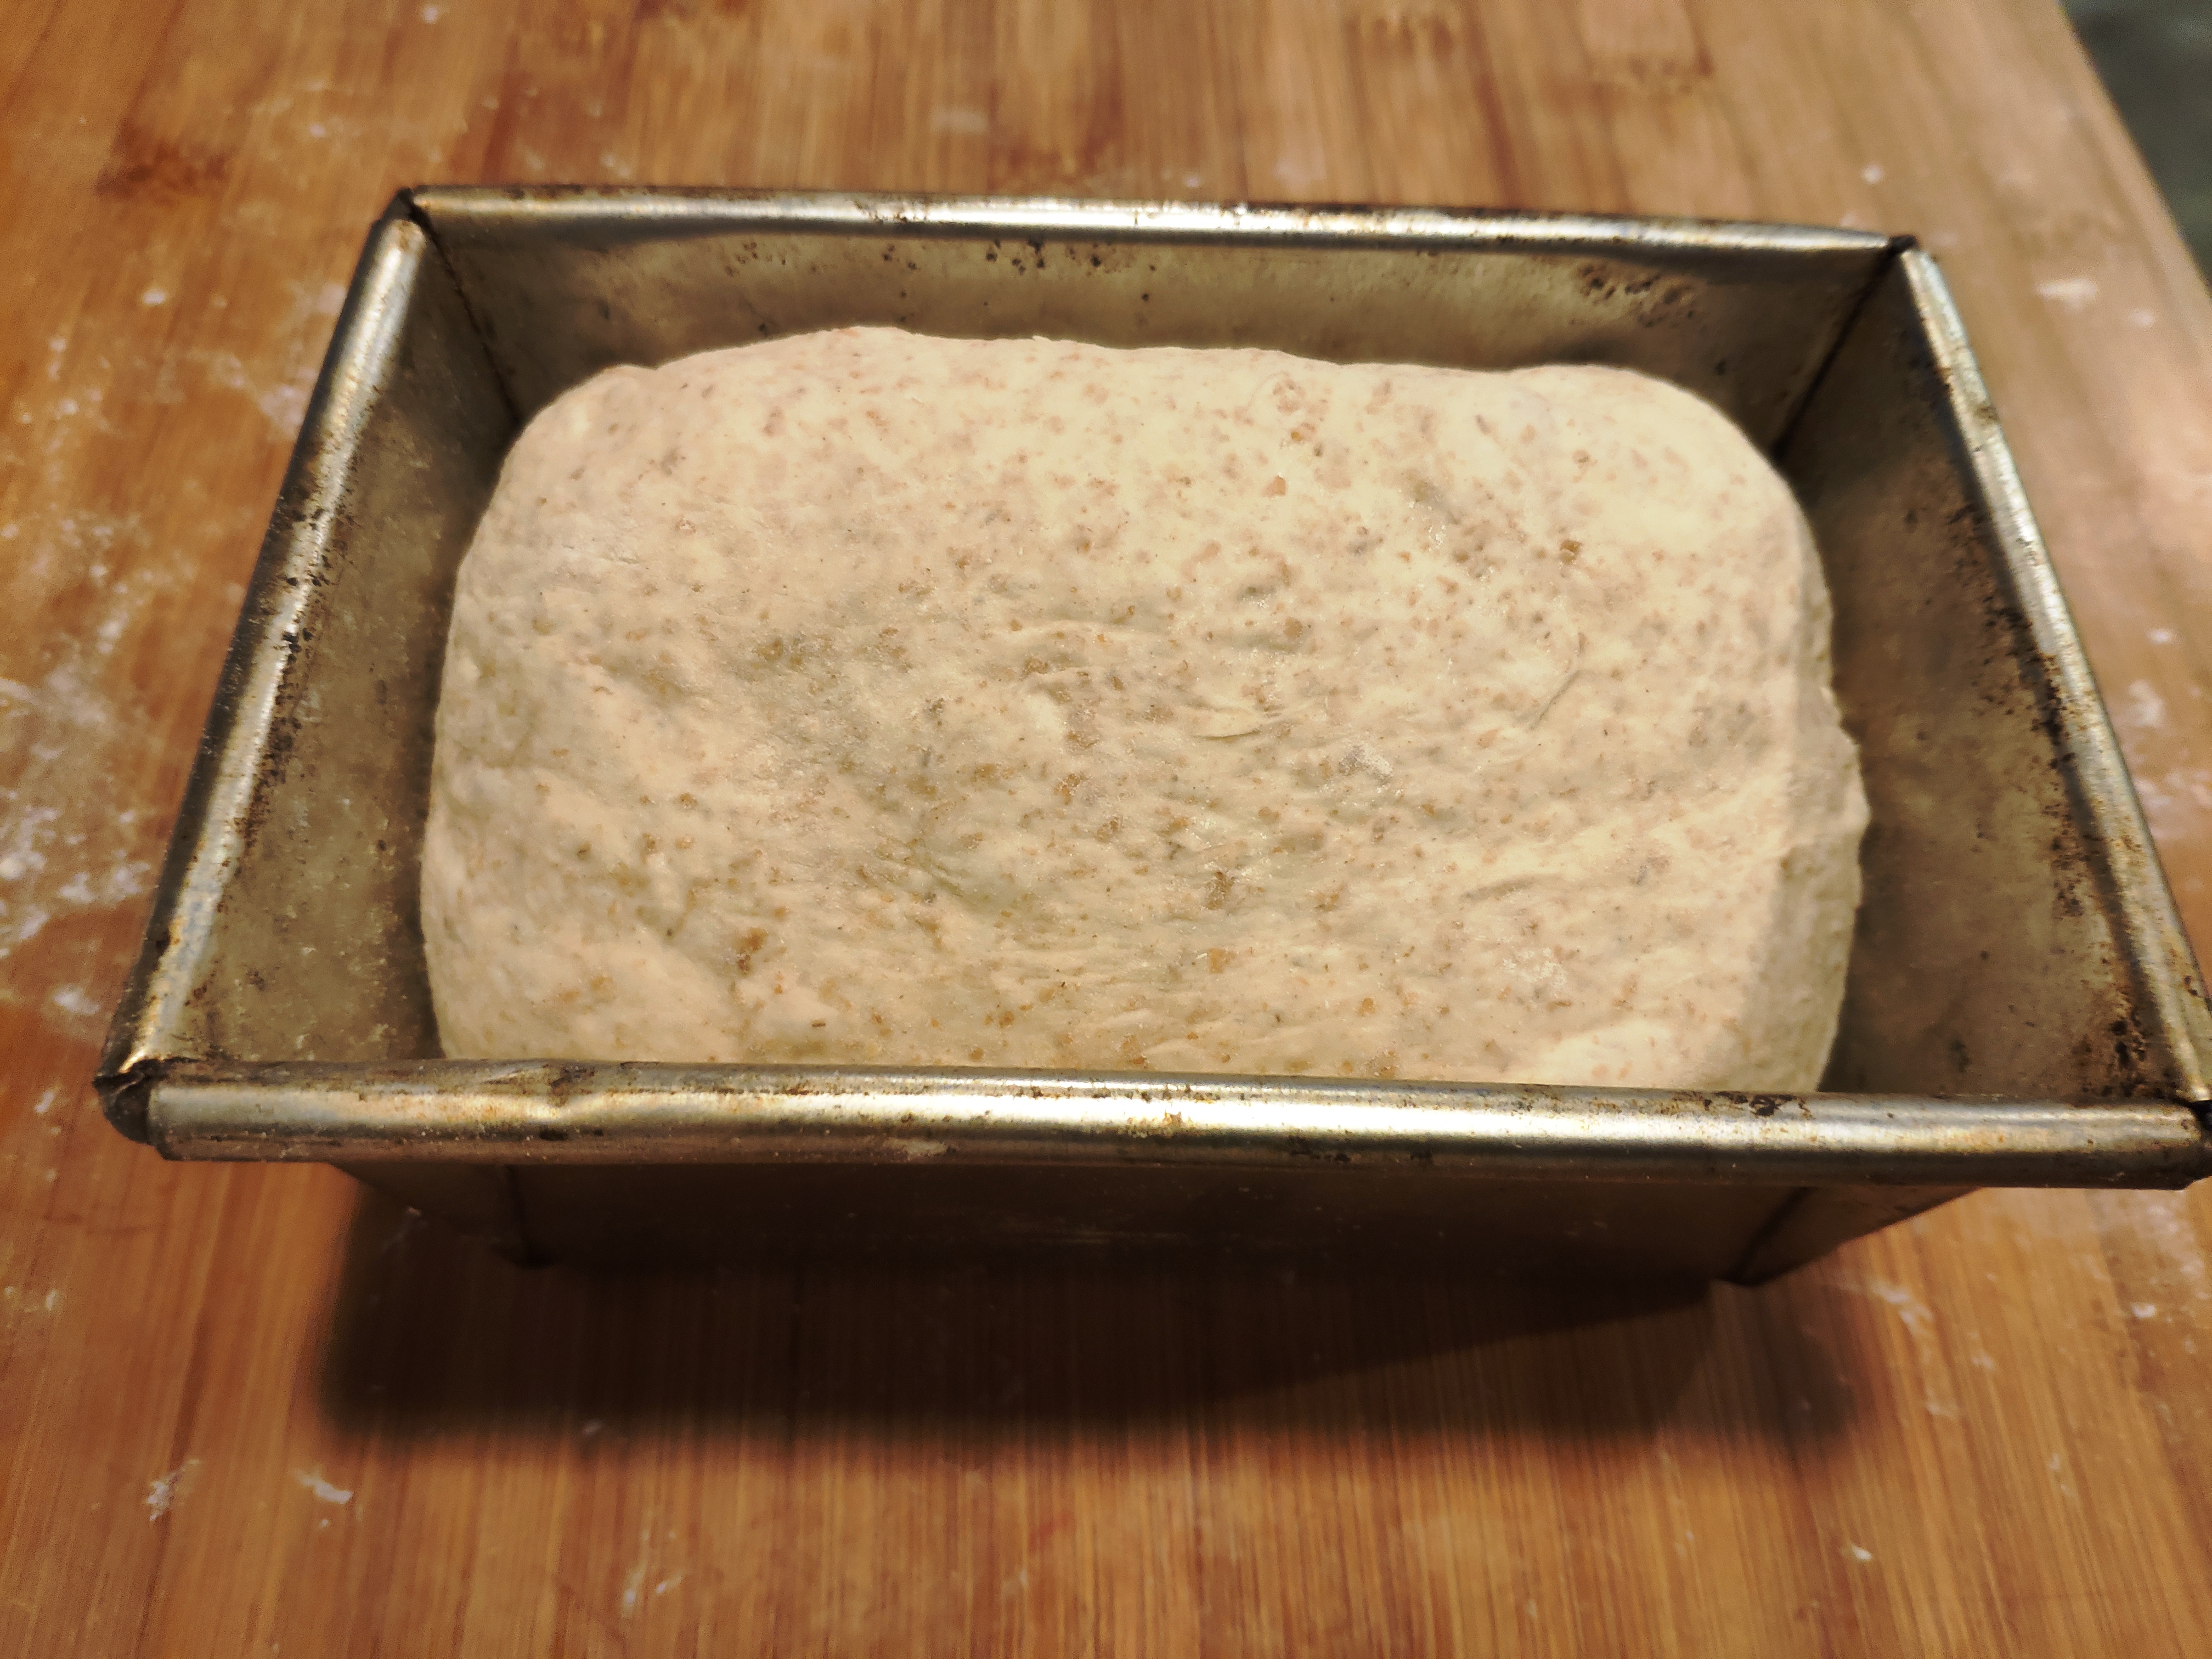
15. Now, you want to shape them into tube-ish shapes to put in the tins. There are various techniques to do this, but the one that stuck with me is, again, from Dan L. Flatten the balls into discs. Imagine four quarters, and stretch out one quarter, then fold the end into the middle of the circle. Repeat with all four quarters.
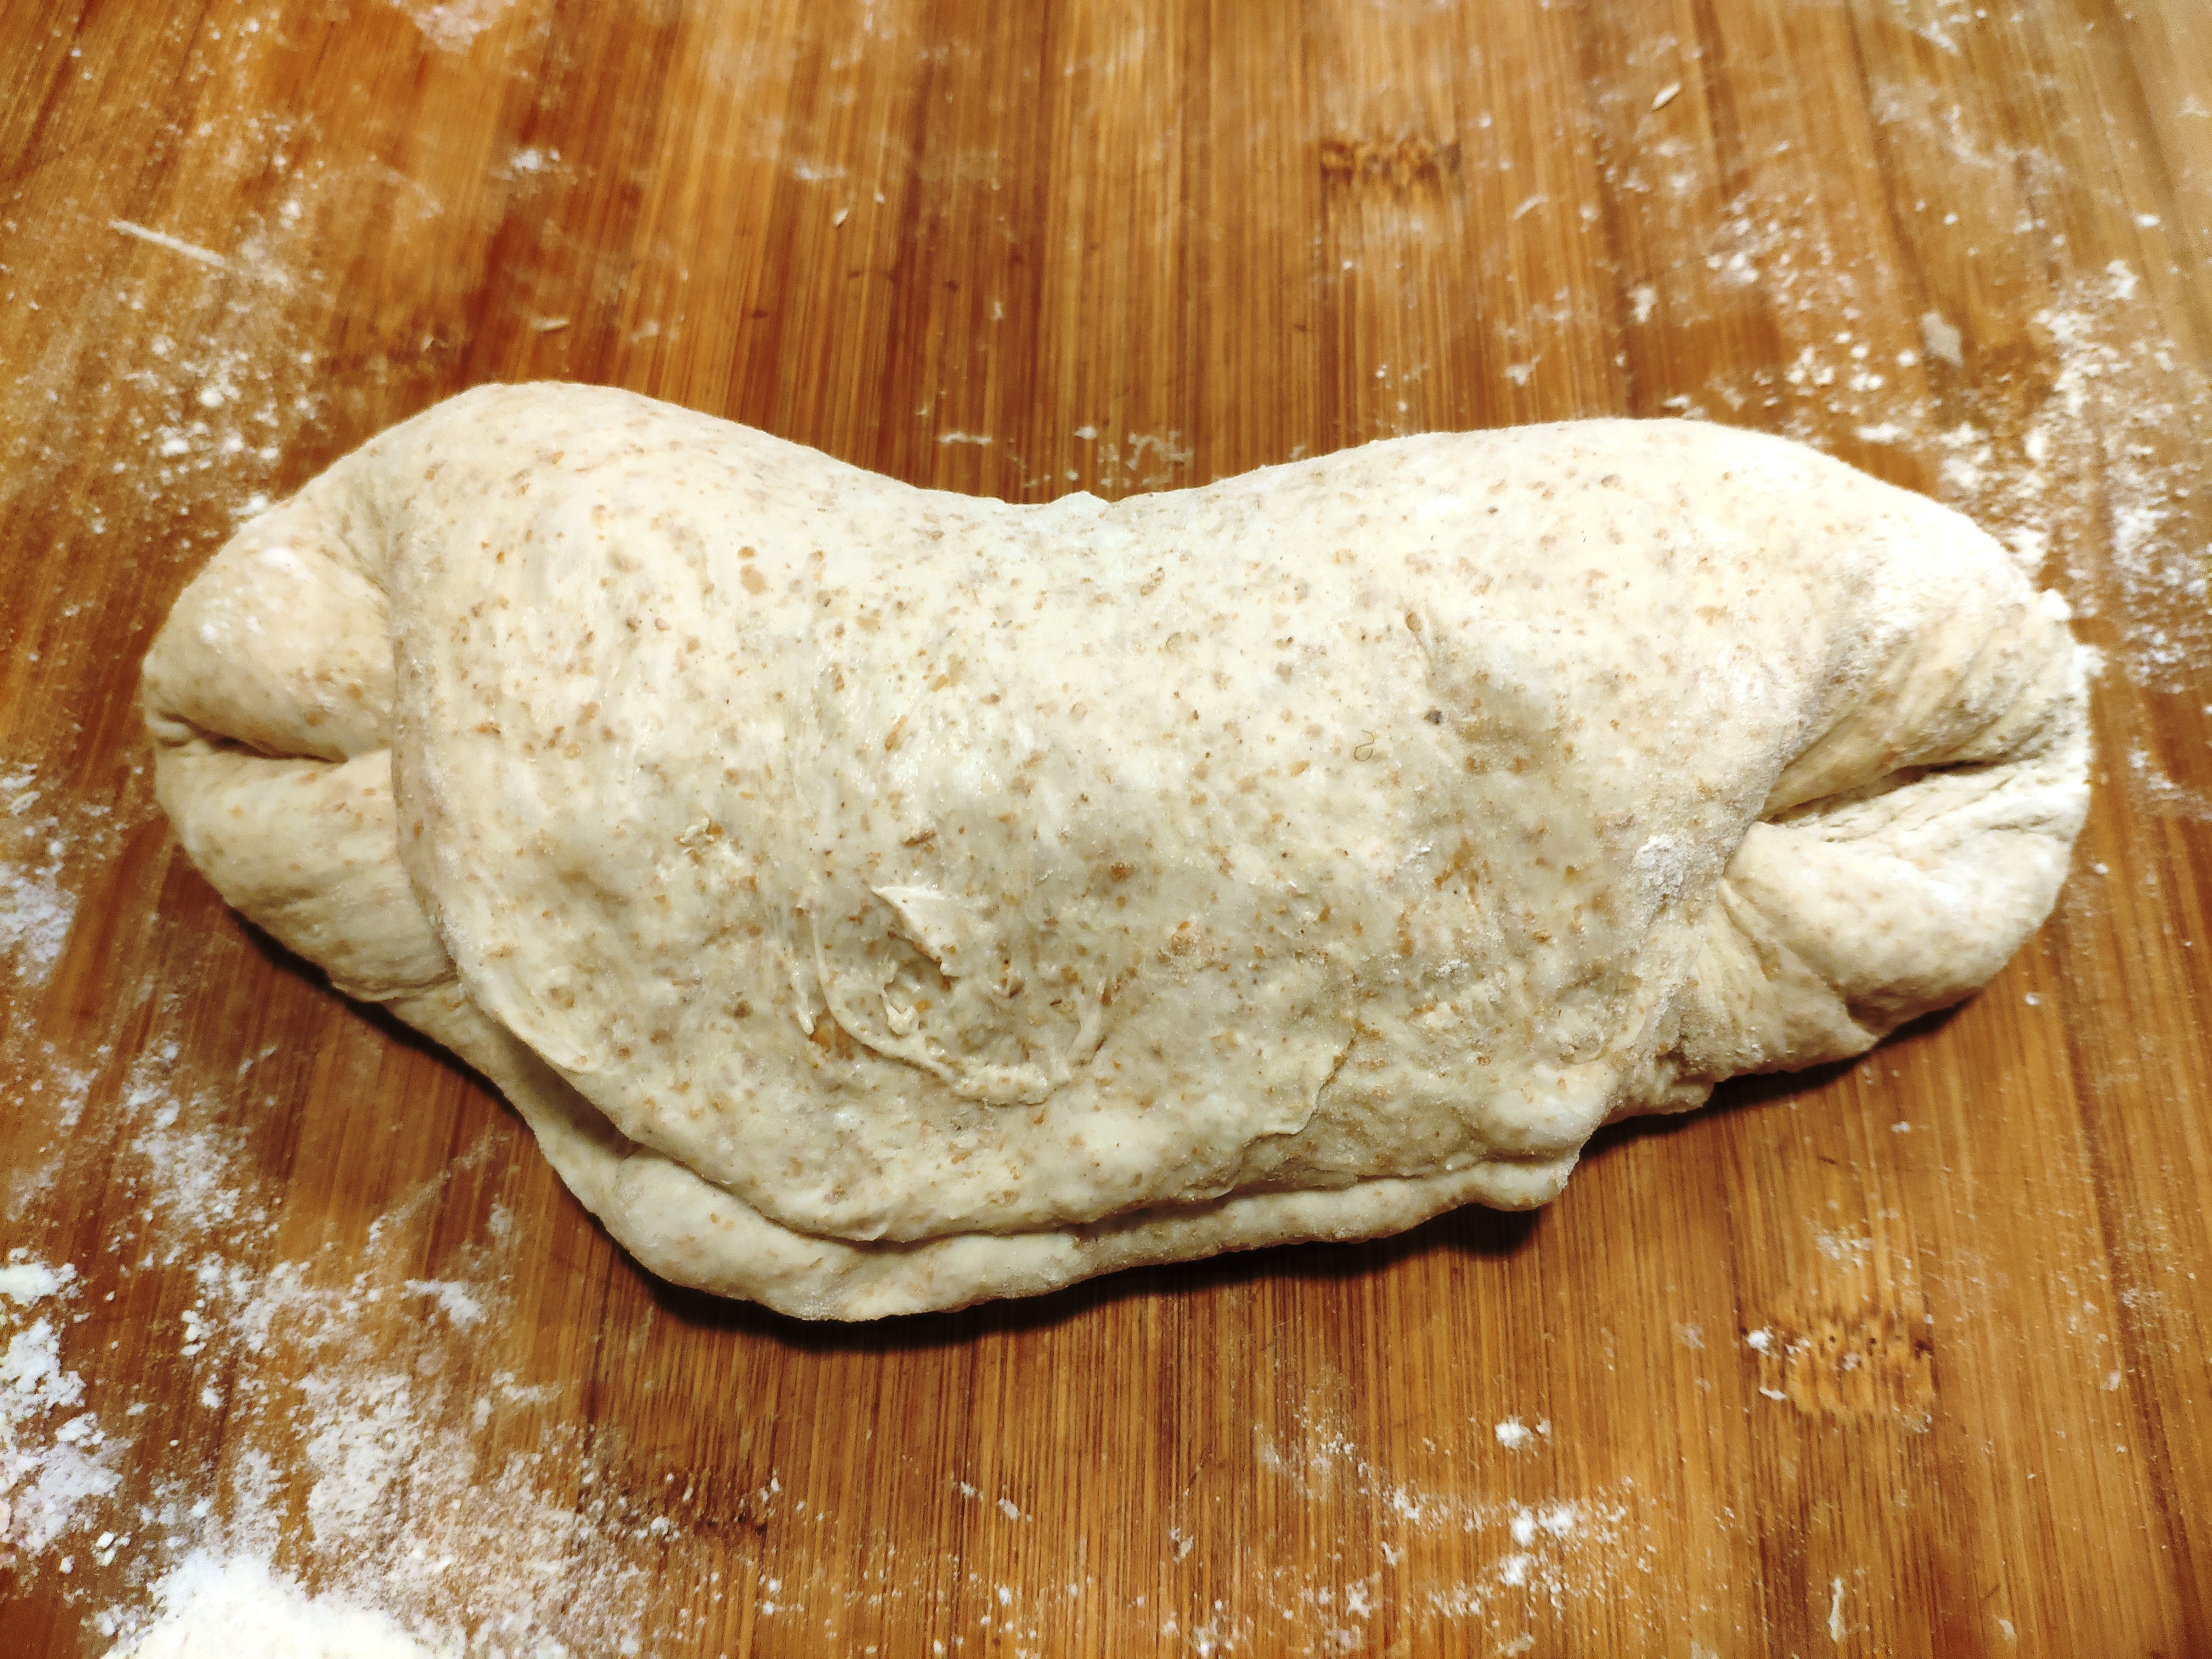
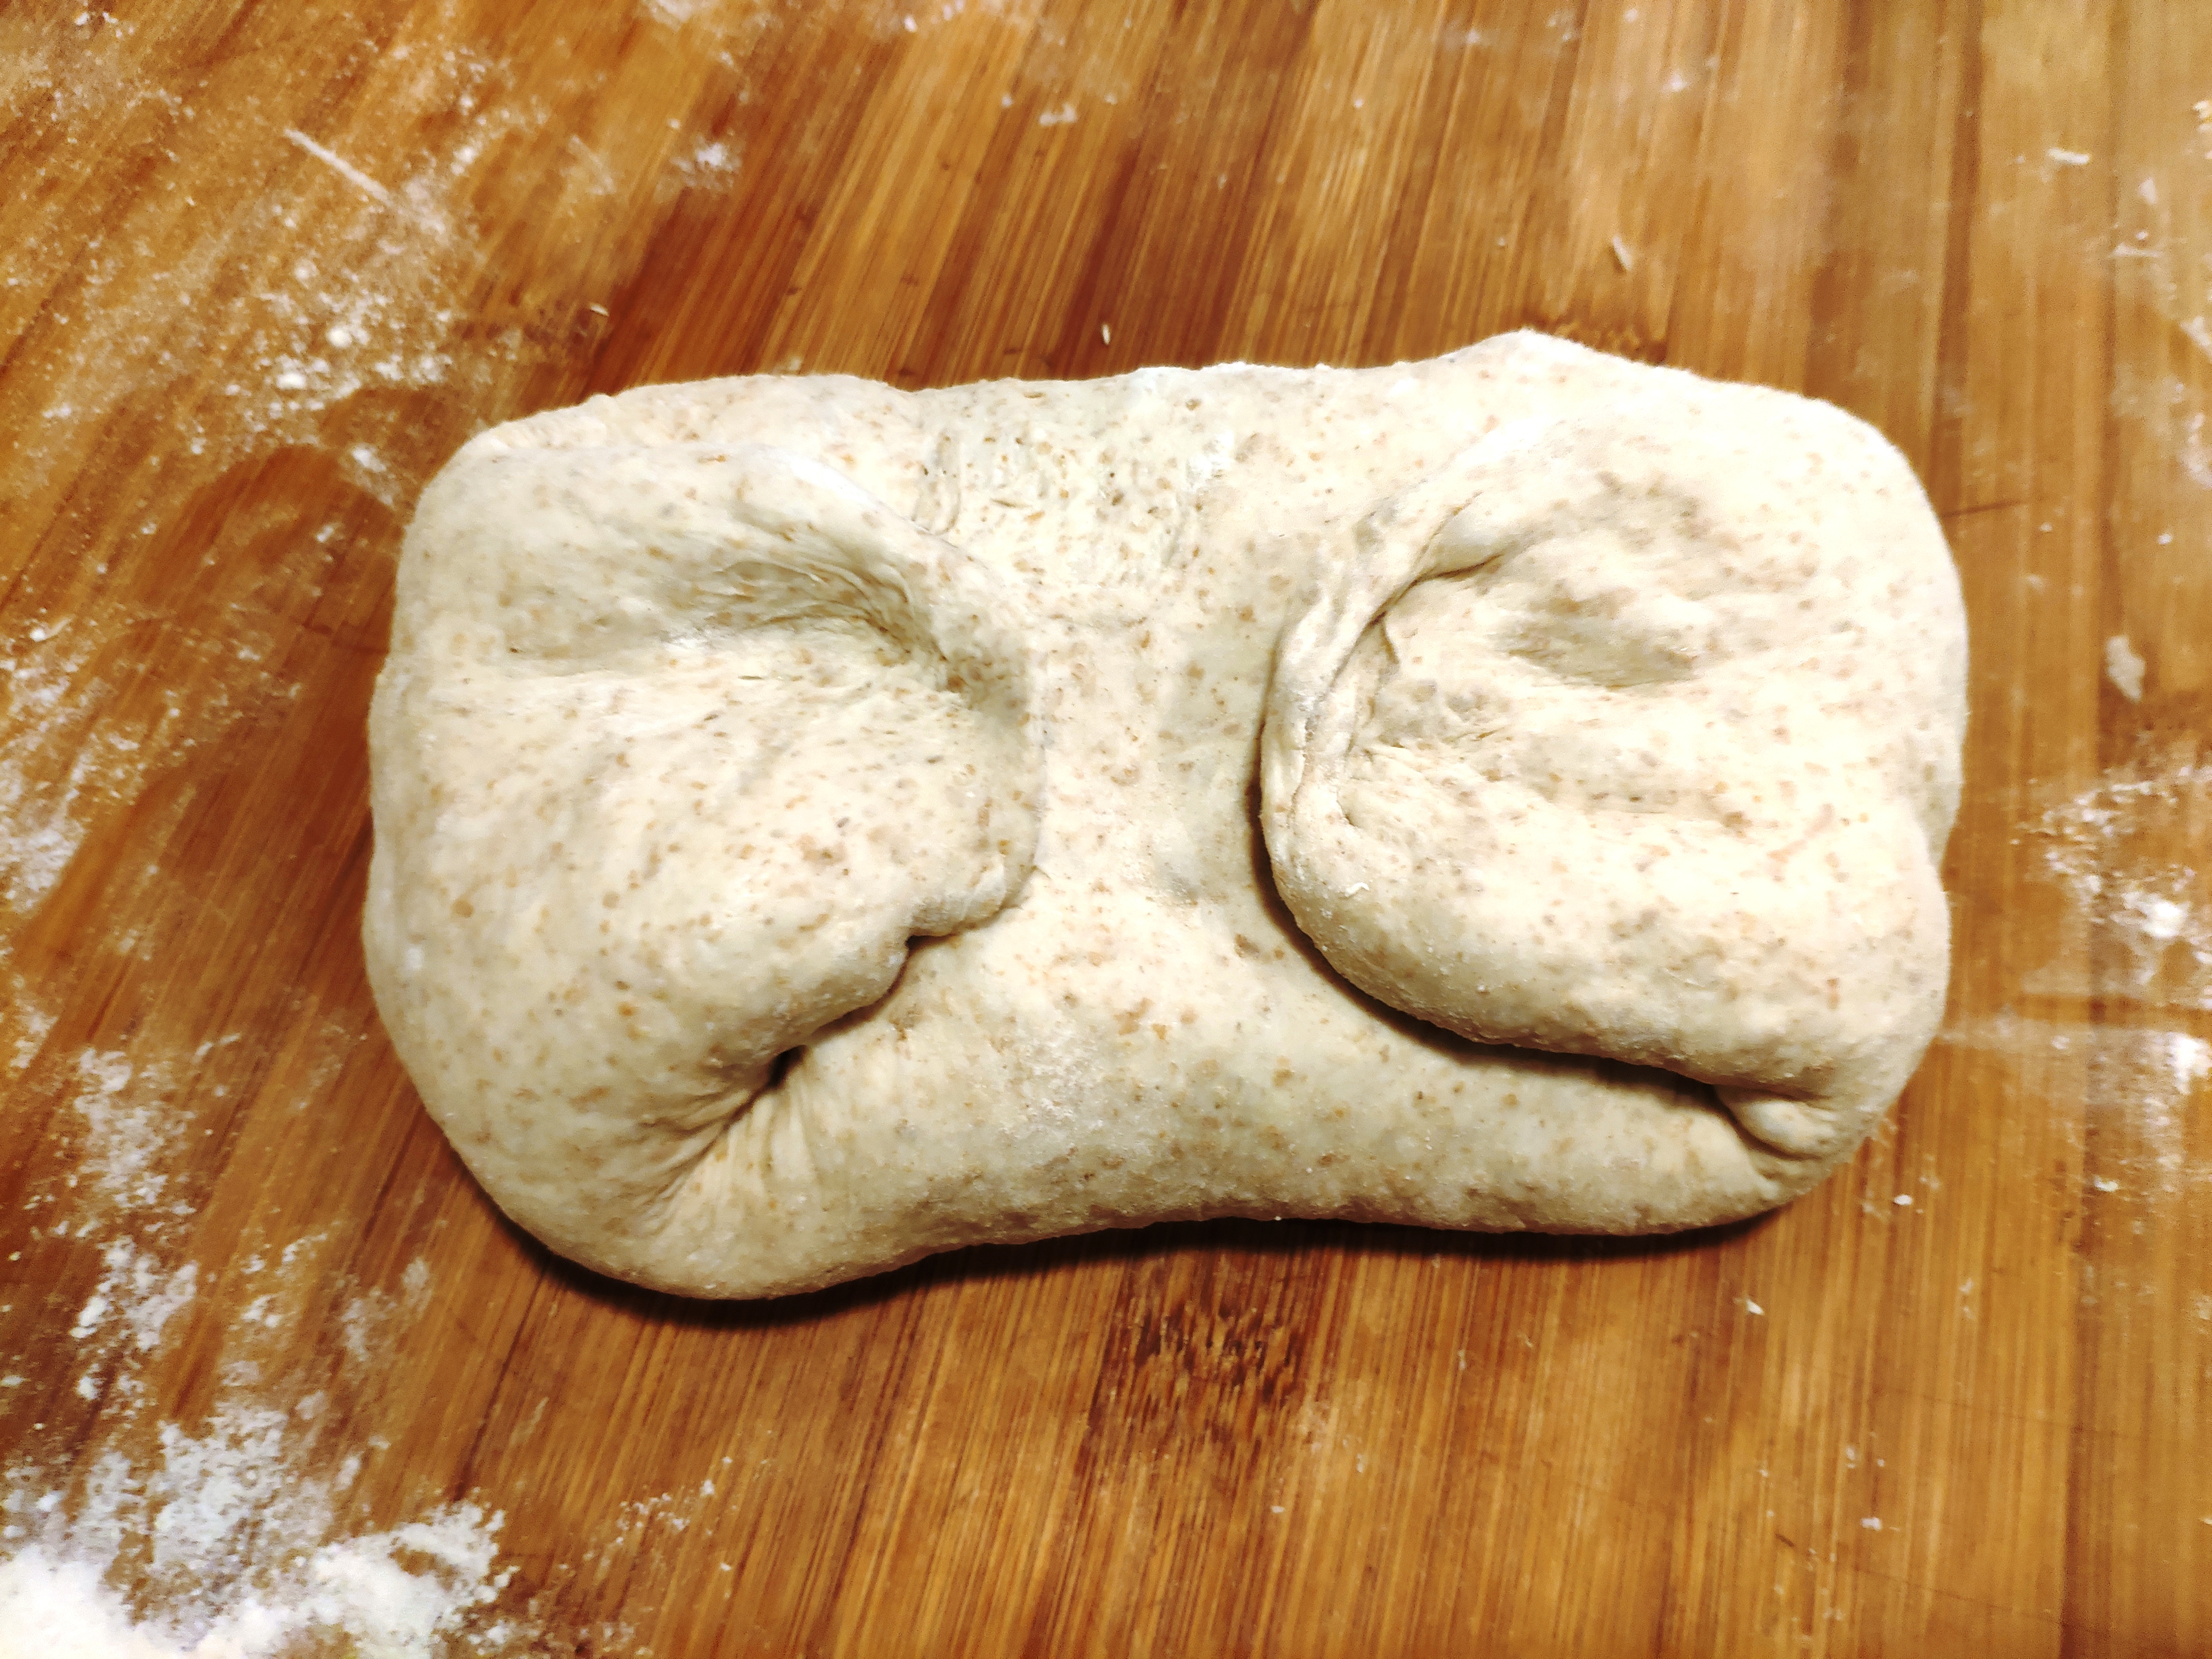
16. Now you’ll have a rough diamond shape. Fold one point into the middle, then another, so the points meet. Now fold in half again and use the heel of your hand to seal the join. You can then fold the ends in and drop this into the loaf tin, with the folds underneath.
17. Repeat with all the balls, then cover and leave to prove. Again, this isn’t an exact science but I tend to go for doubled in size again. You can also use a poke test – if you gently push in your fingertip, the dough should spring back slowly, meaning the protein structure is holding the gas nicely. If it springs back too quickly, it’s under-proved, if it slumps, it may well be over-proved, so give it another knead, and repeat the process from step 13.


18. At the end of this final prove, heat your oven to 220C.
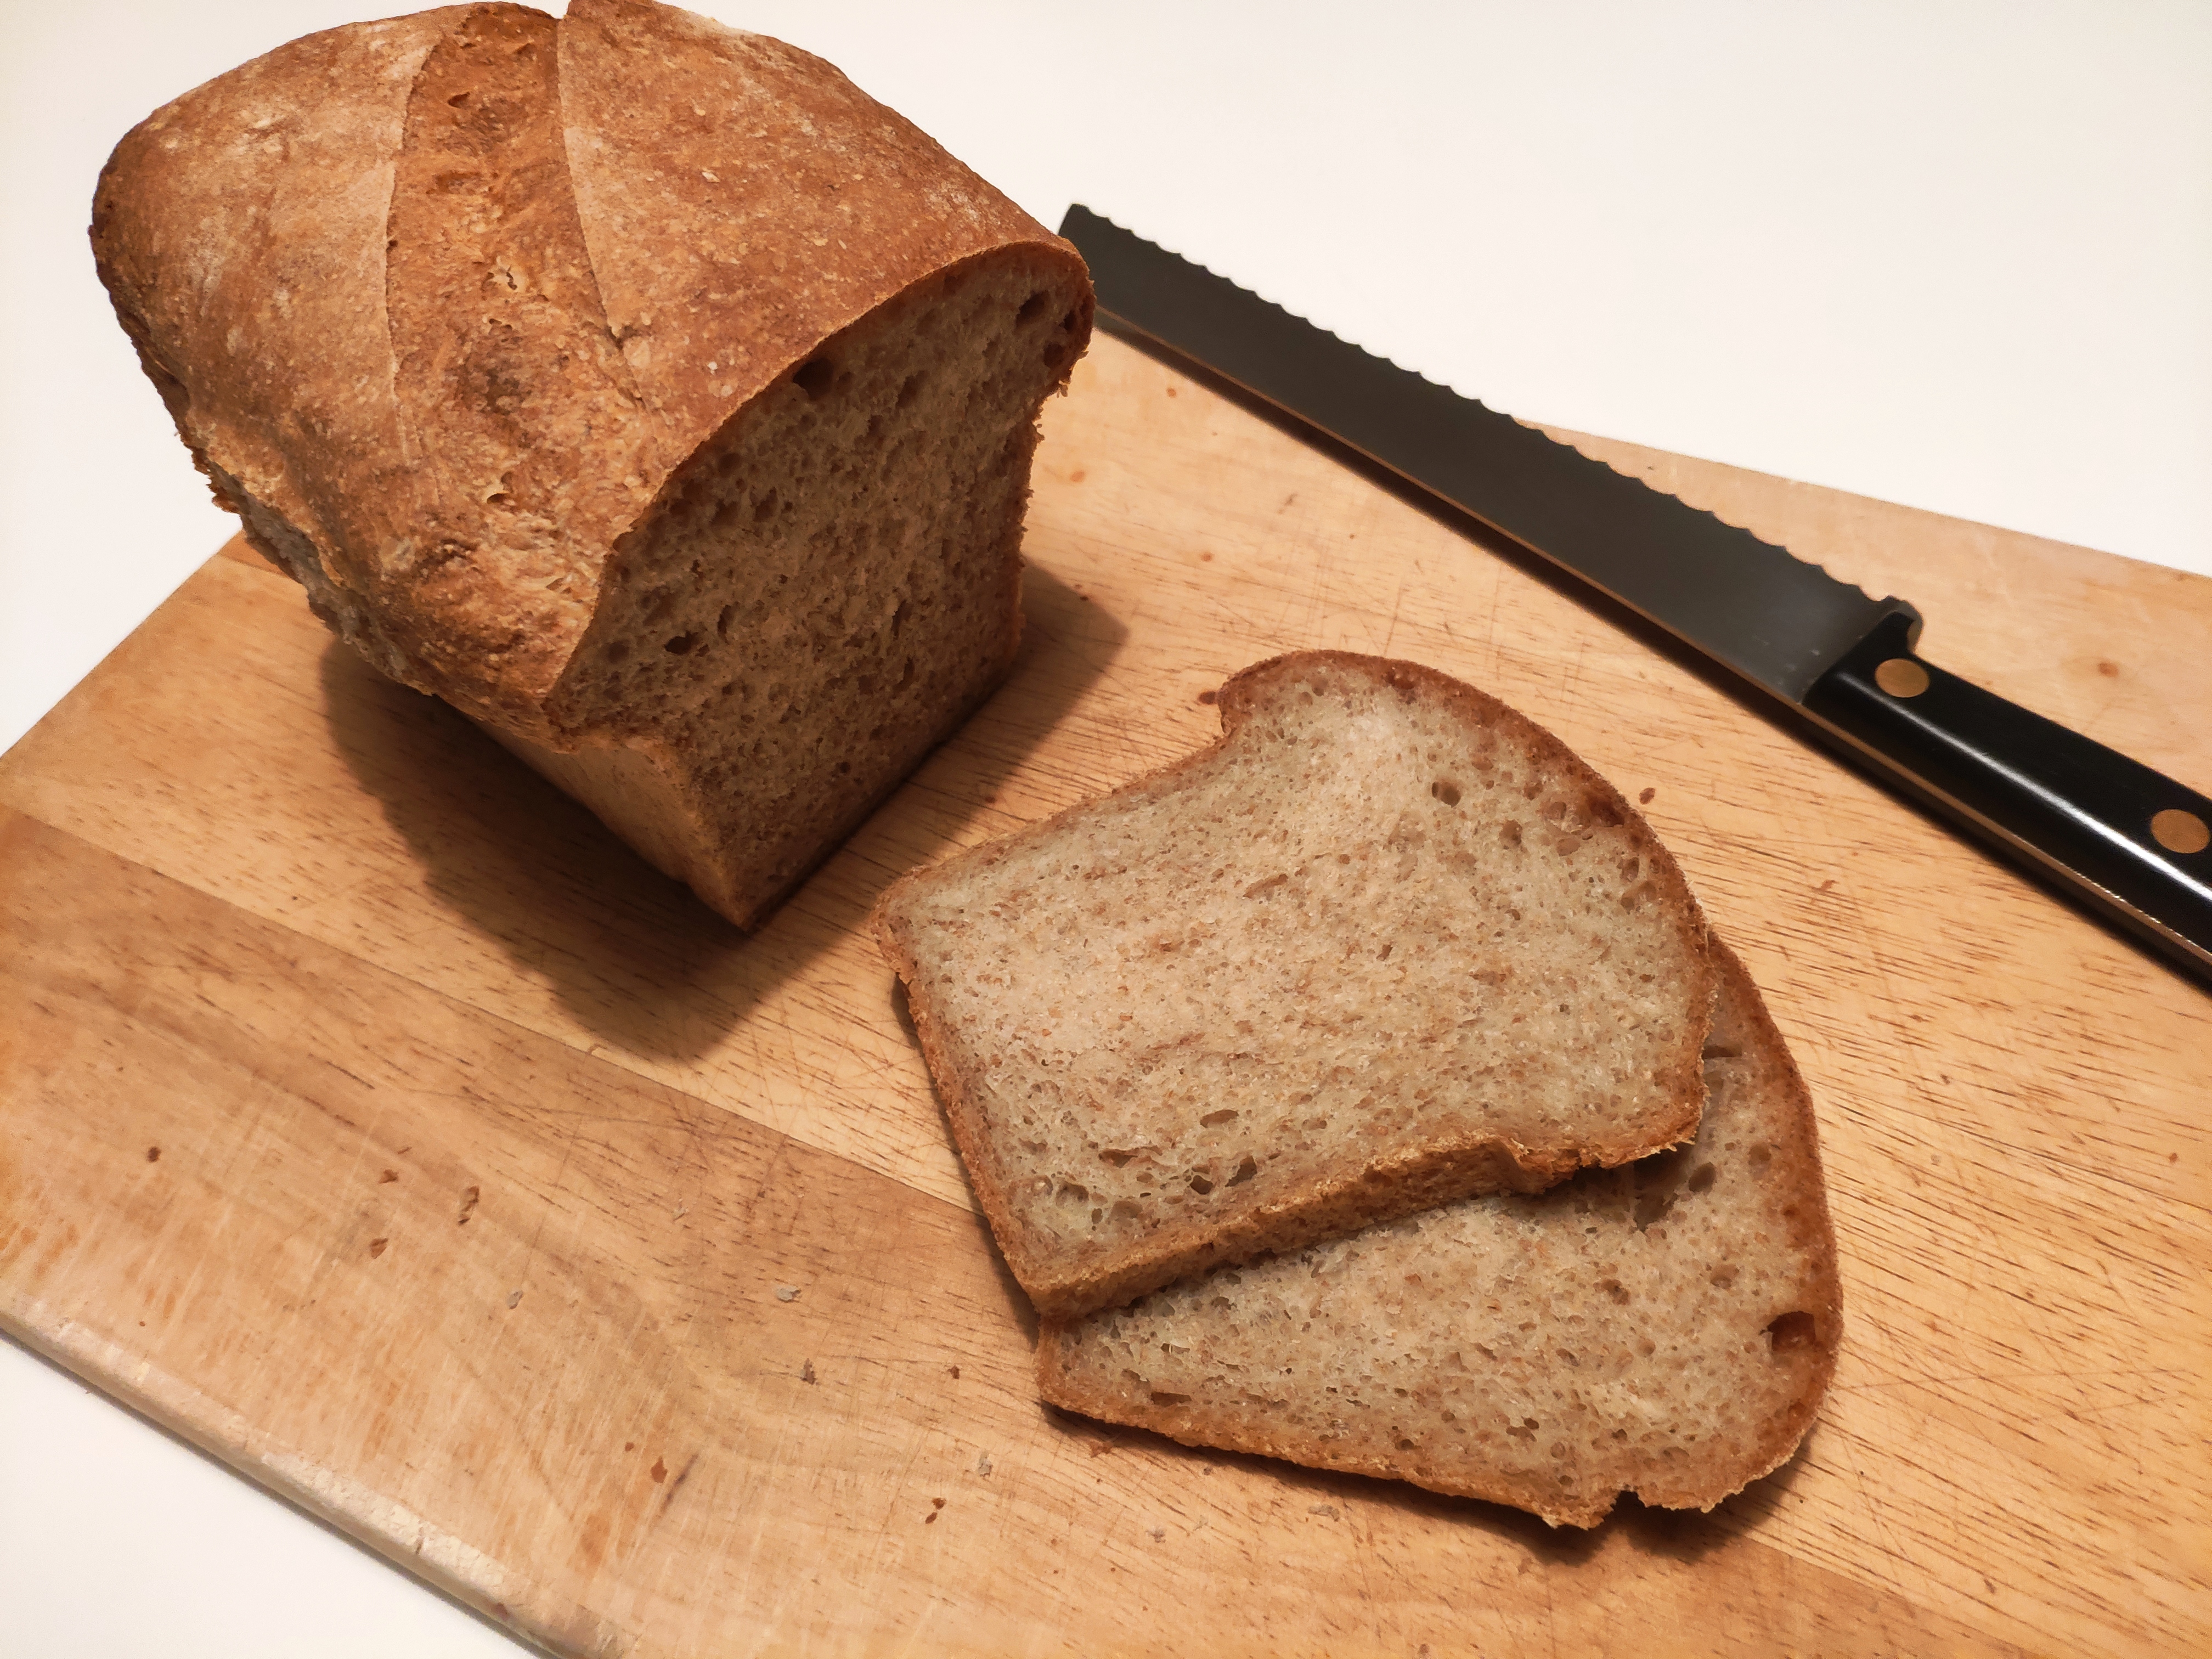
19. Slash the top of the loaves with a sharp serrated knife or special tool called a lame or grignette (if you feel like another little investment). Put the loaves in and bake for 20 minutes, then turn the oven down to 200C and bake for another 20 minutes.
20. Turn the loaves out. You can tap the bottom and listen for a slightly hollow knock, and this give some indication they’re done, but with loaves this size, the 20/20 minute bake should be fine. If in doubt, put the loaves back in, without their tins, for another 5-10 minutes. “Under-prove and over-bake” is a rule of thumb from my old teacher Leslie Gadd**.
21. Cool the loaves on a wire rack. Resist the urge to cut them while hot. Sure the smell is amazing, but essentially they’re still baking. If you try to cut them while hot, you’ll mangle the crumb and it can get all gummy. It can be OK with buns and it’s best with (“English”) muffins, steaming and smeared with butter, but not with tin loaves. When they’ve cooled completely, the steam will have all escaped and the crumb will have firmed up. The flavour will be better too. So just enjoy that aroma and have some patience!
22. When cooled, store in a bread bin in a paper or cloth bag, and freeze any extra loaves.
23. Enjoy! When it’s fresh, my kids demand “soft bread”, after a day or two we go for toast.

Drop me a line with any questions!

* Spelt is just another, older variety of wheat – Triticum spelta, as opposed to the more common bread wheat, Triticum aestivum. There are quite a lot of species of wheat, the Triticum genus of the Poaceae or Graminea, or grass, family.
** Leslie was teaching at the National Bakery School at London South Bank University when I did a baking diploma there back in 2010. He now seems to be operating out of Grantham, Lincolnshire, as Lovely Loaves.

Leave a comment

Filed under Baking, Breads, Recipes

The lords of bread

Many of my posts here include a bit of etymology. I love a bit of etymology. I’m currently reading The Story of English in 100 Words by David Crystal OBE (etc), arguably the UK’s foremost and most popular writer about linguistics.

The entry about the word loaf tickled me. The origin of the word is the Anglo-Saxon hlaf.

Prof Crystal writes “The head of the household was seen as the person who provides bread for all, a hlaf-weard, literally a ‘bread-warden’… A lady was originally a hlæfdige, ‘bread-kneader’.” I love this idea in relation to my contemporary household – where Fran is the breadwinner and I’m the bread-maker. No medieval gender roles for us.

Crystal continues with this intriguing bit of linguistic evolution: “Hlaf-weard changed its form in the 14th century. People stopped pronouncing the f, and the two parts of the word blended into one, so that the word would have sounded something like ‘lahrd’. Eventually this developed into laird (in Scotland) and lord. It’s rather nice to think that the ‘high status’ meanings of lord in modern English – master, prince, sovereign, judge – all have their origins in humble bread.” Despite bread’s demonisation by popular orthorexia and debasement by the Chorleywood process, it’s also nice to think of people making real bread today as food lords.

2 Comments

Filed under Discussion

Harvest festival wheat sheaf loaf

A bread wheat sheaf for a harvest festival

Beside my primary school was a church, St Stephen’s. In the summer, house martins built their nests under its eaves and whizzed over our heads as we came and went or played in the yard on wet days. Just as the house martins were leaving at the end of the summer, the autumn term started. Soon after, we had a harvest festival.

The abiding notion in Britain is that school summer holidays freed up children to help with the harvest. This may be a myth, but certainly the biggest grain harvests start happening here in the middle of school holidays, around the festival of Lammas, 1 August.

Harvest festivals continue through late summer and autumn, notably occurring around the time of the nearest full moon to the autumnal equinox. This year, the equinox is today, 23 September, the full moon 28 September. Though our local primary school is doing its harvest festival on 16 October. I’ve not seen how they do it yet, but I’ve got strong memories from a couple (several) decades ago of the festivals at St Stephen’s, with the altar piled high with foods, to give thanks and for charity. There were tinned foods, but there was also fresh autumn produce, and possibly even a wheat sheaf: real or made of dough.

Stalks and symbolism
A sheaf is a tied bunch of grain stalks after they have been harvested. It was a common sight at this time of year during the centuries when harvests were done by hand with scythes. I did it this way when I lived on a small farm in New Zealand in 1990, and I know people these days growing heritage grain varieties that still do in England, but mostly harvesting is done now with combines: so no more sheaves.

An old "wheatsheaf" pub sign in Dorset

It’s a shame really, as they’re an ancient symbol and one that you’re more likely to encounter now in pub names. Symbolically, however, the wheat sheaf represents plenty, a good harvest, fertility and even resurrection, as the cycle of seasons has once more given grain for bread. Indeed, the sheaf infers bread, and bread is of course a quintessentially important symbolic food in some religions. The heart of Christianity is the eucharist: the eating of bread to reiterate the Last Supper, where Jesus prepared for his sacrifice by shared bread, saying, “This is my body, which is given for you. Do this in remembrance of me.” (Luke 22:20).

Back to school
Although I’m not religious, I enjoy the symbolism and stories, and most of all appreciate the tradition, so I thought it was about time I had a go at a bread wheat sheaf.

It’s based on the recipe in The Bread Book by Linda Collister (1993) which is in turn based on a recipe in The Modern Baker, Confectioner and Caterer (1907) by John Kirkland, a former head of The National Bakery School (founded 1894), then at Borough Polytechnic and now part of London South Bank University. I did a diploma there in 2010, but we didn’t make anything quite this ornate.

This is slightly tricky to do in a domestic oven as it won’t be as capacious as a commercial oven. Mine can cope with baking sheets 35cm wide. It’ll mean your sheaf isn’t as grand as those professionals might make for harvest festivals, but even the comparatively stumpy results can still be very pleasing.

It’s a fairly time-consuming project. Not only do you have to make the dough and wait for it to prove, you also have to shape a lot of small pieces of dough. Notably to make the ears of corn. (And when I say corn, I’m using it in the Old English sense meaning any edible grain, though particularly wheat grain, not the modern American sense – which is taking over here in Britain – meaning maize.)

1350g strong white bread flour
20g salt
8g caster sugar
15g fresh yeast
750g tepid water (approximately, see below)

Glaze
1 egg
Pinch salt

1. Combine the yeast and most of the water. Hold say 100g back.
2. Put the flour, sugar and salt in a large bowl and mix to combine.
3. Add the yeast mixture and bring to a dough.
4. It will be quite a tight, firm dough as you want it for sculpting, however if it feels too dry add a little more of the water. How dry your dough feels will depend on how absorbent your flour is. As I’m using a stoneground flour, which contains more bran than an industrial steel roller-milled flour, it’s quite absorbent.

Turn out the doughKnead to a smooth dough
5. Turn the mixture out onto a lightly oiled surface and knead until smooth and well combined. These days I rarely do long manual kneads, but as this is quite old-school, go with it. I added water to a total of about 750g – meaning the dough is 55% hydration.

Before provingDoubled in size

6. Return the ball of dough to the bowl (cleaned and lightly oiled), cover or put in a plastic bag, then leave to prove until doubled in size. At an ambient temperature of about 18C this too about two and half hours.
7. When doubled, turn out. My total dough weighed approximately 2150g.

Deflate the dough
8. Give the dough another short knead to deflate and redistribute the gases. Again, this isn’t a loaf where we’re after a nice pleasing crumb, it’s a medium for sculpting.
9. Divide the dough up into pieces: two at 320g, one at 400g and the rest, about 1110g. Don’t worry too much about total accuracy – you’re making a wheat sheaf, an organic thing, not something geometric.
10. As this is quite a protracted process, you might want to keep the pieces you’re not working on in the fridge, so they don’t keep proving and swelling too much. Too much proving and the resulting shape may crack where you don’t want it to.

Wheat sheaf base layer
11. Take the two 320g pieces and form two rough rectangles, approximately 22x13cm. Use one to form the trunk of the sheaf, the other the top. Place both pieces on the largest baking sheet you have (that’ll fit in your oven of course). Stretch the head out slightly. You want a kind of cartoon tree or mushroom shape. Prick all over with a fork and brush with water to stop a crust forming. Cover with a damp cloth while you do the next bit.

30 pieces30 pieces into sausages
30 pieces as stalks

12. Take the 400g piece and divide it into 30 pieces, each scaled at around 13g.
13. Roll these pieces into snakes, again about 22cm long.

Add the stalks
14. Place 27 of the snakes on the base, making the wheat stalks. Twist or braid the remaining three to form a sheaf band, tucking its ends underneath on each side.
15. Cover or bag this and place it in the fridge as the next bit is the most time-consuming.
16. Take the large, remaining piece of dough. This is to create to ears. Divide it up into about 70 pieces, each scaled at 16g-ish. Do more, smaller pieces if you want daintier ears.

Make the ears
17. Roll each piece into a ball, then roll out, rolling one end to a point.
18. With a pair of sharp-pointed scissors, make snips in the small piece of dough, three or four, on three sides. Cut down and inwards towards the rounded base. It’s a bit like making dozens of mini versions of the French pain d’épi – meaning ear or cob bread.
19. You could make all of them in advance, but I got the main part out of the fridge again, and started positioning them on the top. Place them loosely to give a sense of them having grown out of the stalks.
20. While you’re doing this, preheat your oven to 220C.
21. Keep adding the ears, layering slightly, with the thickest point in the middle.

Position all the ears
23. Beat the one egg with the pinch of salt and use it to – carefully and lightly – glaze the sheaf.
23. Bake for 20 minutes, take out of the oven and brush with more egg glaze.
24. Turn the heat down to 170C and bake for another 40 minutes or so until nicely browned.

Baked

At this point, you can decide whether you want to eat it – it’s a perfectly serviceable, albeit low hydration, bread – or use it as a decoration. If you want it for the latter, turn your oven down to 140C or 130C and leave it in for a few hours longer to completely dry it out. Collister says six hours and if you have a wood or oil range, maybe you could just leave it in, but using electricity this seems a bit excessive in terms of energy consumption.

Collister decorates hers with a blobby little mouse on the stalks. If I’d been doing this with children in the house I might have been tempted, but as our adoption process continues to drag us along on its emotional roller-coaster, and we still haven’t been able to expand our family, I wasn’t inclined.

It’s easy to make a mouse though – just save 30g or so of the dough used for the wheat ears, make it into an eggy shape, snip a few ears, skewer a few eyes and add a snaky tail. I don’t think the mouse has any particular symbolism, though I could be wrong. Maybe it today it could symbolism how biodiversity is so tragically compromised by modern industrial farming techniques.

Wheatsheaf, detail

Addendum
So I dried out the wheat sheaf loaf – every time I used to oven for other things, then turned it off, I put the loaf back in to dry while it cooled.

I gave it to the local primary school, where I volunteer, and they used it as part of their harvest festival display. It’s a nice echo of my own memories of harvest festival at my primary school, all those years ago.

School harvest festival display


A few notes
1. Here’s a film of a British master baker making a wheat sheaf in 1957. His wheat ears are a bit finer than mine!
2. Out of interest, Fran, my wife, works at Kew Foundation, at Kew Gardens in London. As I was doing this, she was working on a document that contained this remarkable statistic. While the human genome contains 3 billion letters, that of bread wheat (Triticum aestivum L. ) contains 17 billion. I’m not a scientist – clearly – but that’s boggling. The human sense of superiority leads one to imagine a sophisticated, sentient animal organism like us would be that much more genetically complicated.


24 Comments

Filed under Baking, Breads, Discussion, Feasts, Recipes

The Baule: an Italian loaf shape, apparently

Baule bread loaf

Much of the time I’ve been in Italy, I’ve been looking for the definitive book on Italian bread and baking. Every time I visit Eataly or larger book shops, I pick up and put back down sundry tomes. It’s baffling though: many are rudimentary and some of them are even written and published in English and translated into Italian. The book I’m looking for may exist, but I haven’t found it yet.

I’ve not seen the revised edition of (American) Carol Field’s ‘The Italian Baker’ yet, though from my memories of the original, that’s not the definitive book either*.

If I lived in Italy for 20 more years, and worked in Italian bakeries, maybe I could write it… but that ain’t looking likely at the moment.

So in the meantime, I pick up the occasional book to tide me over. The latest one I bought is the Slow Food Editore (the movement’s own imprint) ‘Pane, pizze e focacce’ – “Breads, pizzas and flatbreads” if you want a semi-bodged, largely gratuitous translation.

This isn’t a classic book by any means, but it does have some good stuff about types of lievito madre (“mother leaven”, ie natural leaven or sourdough starter), about grains and ingredients, and about various forms and shapes of breads. Some of the latter – with names like montasù and mafalda – struck my eye.

So that’s been my starting point with this book: trying some new shapes.

Baule

This is about something the book calls a baule. The word means “chest”, “trunk” or “boot” (as in storage area of a car) but I can’t find other evidence on t’interweb for this style of loaf, with this name. I’ve said before, though, much of Italy’s food tradition probably doesn’t exist in digital form yet.

Confusingly, a bauletto (“little chest”) is a term that does seem to be used for this shape of loaf, from Ferrara in Emilia-Romagna, but name is also more commonly used to refer to a white tin loaf, often sliced.

I’ll just have to give ‘Pane, pizze e foccacce’ authors Davide Longoni and Marcella Cigognetti the benefit of the dough…t (hm, that doesn’t quite work does it?) about baule.

This isn’t a recipe, it’s just a record of trying a new shape. For the dough I just used the classic 10g fresh yeast, 10g salt, 350g water, 500g flour, with a mix of strong white and wholegrain.

So basically, you make your dough, and give it a first prove.

Then you deflate it slightly, form a ball and give it a rest.

Shaping ball

Then you stretch out that ball to form a rectangle, which you roll up tightly to form a cylinder or sausage shape.

Rolling up

Roll and stretch this sausage to elongate it.

Elongating the sausage

Once you have a nice long sausage, flatten it with a rolling pin.

Flattening the sausage

Once you have a nice long flat rectangle, roll this up, keeping it as tight as possible.

Rolling up the flattened sausage

You’ll get a nice sort of baton shape.

Rolled up

I love the spiral ends.

Rolled, spiral end

You then get a knife. The book says use the blunt edge, so you could also use a pastry scraper. Make a deep cut into – but not all the way through – the baton.

Cutting the form

Move this to a baking sheet.

Pre-final prove

Cover with a cloth, then leave to prove again, until it’s doubled in size.

After final prove

Bake. I did my usual time and temp for a loaf this size – 20 minutes at 220C, 20 minutes at 200C.

When baked, remove and cool on a wire rack.

Fresh from oven

It looks rather nice, and you can tear it down the centre to share during a meal.

Tearing baule in half

But I’d still love to see one of these things in a real Italian bakery. If anyone has every encountered this shape of loaf in Italy, please do let me know! I’m intrigued.


* I did originally include links to Amazon here, but this excellent piece by Russell Brand reminded me they’re still corporate tax-dodgers with  questionably “cosy relationships with members of our government”.


3 Comments

Filed under Breads

Malted wheat bread

Malted wheat bread made with Wessex Cobber flour

After my recent problems with bread-making at home in Rome, I was keen to try and make some bread during my visit to England last week. Although everyone kept telling me they’d just had three weeks of sun and 30C+ temperatures, when I arrived the British weather returned to form. I left the heat of Rome and was met by rain and grey at Gatwick. (There was one day when it was hot and sunny again, but I spent most of it in transit: on a train, then waiting for a very late-running bus, then waiting on the roadside in a village in the middle of nowhere in Devon when said very late bus broke down. Overheated.)

Eventually I made it to my folks’ place in the middle of nowhere in another part of the Devon countryside. I visited the local town, Holsworthy, bought some flour and yeast, then made some bread. That day, the weather was mixed and barely more than 20C. So nice and familiar and manageable, unlike the 40C ish Roman inferno.

The flour I bought was Wessex Cobber Bread Flour from Wessex Mill. Now, for those without even a passing knowledge of English history (or the literature of Thomas Hardy), Wessex is an ancient English kingdom, where the West Saxons (Wes-sax – geddit?) not only conquered neighbouring Anglo-Saxon tribes, but also fought the Vikings to a standstill under Alfred the Great, effectively creating the first version of an English nation in the 9th century. Or at least that’s my précis. Proper historians who would probably tell it differently, but I have Wessex campanilismo. Either way, Wessex, unlike Essex and two Sussexes, no longer exists as a county. Though at its height, it did dominate much of Devon, a region then mostly still inhabited by Britain’s older, “Celtic” inhabitants. Anyway, the point I’m making is that although it wasn’t a local flour brand, it wasn’t that far away from being local.

Except that when I read the packet more closely it said that because of Britain’s poor cereal yields in 2012 (ruined by the non-summer), the flour was instead milled from Canadian grain. D’oh. Seriously, when I leave Italy and return to tediously supermarket dominated and tragically climate-change-ravaged England locavorism is going to be an interesting challenge. Here in Rome I can buy numerous flours ground from grains grown in neighbouring regions.

*Sigh*

I went ahead and made some bread anyway. Wessex Cobber Bread Flour is a roller-milled wheat flour, containing some barley malt flour and malted wheat grains. The type of bread it makes is more commonly known in the UK as “Granary”, but Granary is in fact a trademarked malted flour owned by Premier Foods, owner of the Hovis brand. So much like you can’t call a Kölsch-style beer “Kölsch” unless it’s made in Cologne the right way, you can’t technically call a Granary loaf “Granary” unless it’s actually made with Rank Hovis flour.

For this bread I used the reliable proportions of 1000g flour / 700g water / 20g fresh yeast / 20g fine salt, ie 70% hydration, though I tend to halve that for a smaller loaf. And I just did a basic bulk fermentation, proving twice until doubled in size. No flies were included in the mix.

Wessex Cobber flour, with fly, and bread

The results were a bit dense, but it was moist and chewy, and after a few days I didn’t get any of the problems I’ve had recently in Rome with the centre of the loaf damply disintegrating. Although that still doesn’t help me diagnose said problems.

Hi ho.

Oh and I’m not entirely sure what a cobber is. I’m guessing it’s a dialect variation on cob, the more common British English name for a round loaf, equivalent to the French boule. It rings a bell. Though the main usage of cobber that springs to mind is the Australian English for “mate, buddy, chum”.

3 Comments

Filed under Breads

24 hour leaven bread

I dropped my camera. My dear old camera. And now it refuses to focus. It was just a compact, but it has been with me a long time, and it certainly took better pics than my phone – as demonstrated with this post.

This is a loaf I made up as an experiment. I wanted to only use my own white wheat leaven, and not any bought yeast. So I made a sponge up with 300g of leaven, 600g water and 400g strong white flour, and left it, covered, for 24 hours.

I then added a few tablespoons of ground linseed, 2t salt, 150g wholemeal flour, 100g rye flour, 200g white flour, and 300g of rye grain that had been boiled and soaked in wine (that’s 300g after the boiling and soaking, not 300g dry) and mixed up a pretty wet dough. I really ought to try and work out the percentages, but I’m not fully apprised of that system yet. Bear with me! Just started a baking course, so hope to get my head around all that soon.

I made two disc or cob loaves, each one with 1100g of dough.

There was some pretty unsightly cracking on baking (220C for 10 mins then turned down for another half hour ish), but on cooling and cutting they have a nice crumb, some good open air holes (a feature desired of sourdoughs etc, if not of more standard loaves) and a reasonable flavour. And the rye grains are great for a nice chewiness, almost a crunch.

Leave a comment

Filed under Baking

A box of bread

Here’s some of the bread I did, catering for a birthday party. From the left: fougasse, apple and oat loaf, alsace loaf with rye.

1 Comment

Filed under Baking

Form factor

I made this loaf the other day, inspired by but not following Richard Bertinet’s Honey and lavender loaf recipe from Dough.

I’m sure a lavender scented loaf would be lovely, but it isn’t ideal of your basic sandwiches-for-work loaf, so I excised the lavender. Also, I’m finding the very best breads I’m making at the moment all involve using some leaven; I can’t resist adding 3 or so tablespoons full to whatever recipe I’m following.

What I liked most about this recipe from Dough was the form factor. Although the rising in the oven split the loaf more radically along one of my cuts than the others, ruining any chance of pretty regularity, in principle I was very happy with the shape of this loaf.

So anyway.

250g wholemeal bread flour (I used stuff that had been ground on the waterwheel at Otterton)
250g strong white flour
4 good tablespoons of white leaven
5g dried active yeast (my local supplier of fresh yeast was all out)
10g salt
320g water
1 teaspoon honey (optional)

1. Mix the flours and salt in a roomy bowl.
2. Mix the water, yeast and honey, then beat in the leaven. (If I’d had freah yeast, I probably wouldn’t have crumbed it into the flour, as per the Bertinent method).
3. Blend this liquid mix into the dry mix, and bring together to make a soft dough. (I might have bunged a bit more water in here, so it’s nice and moist).
4. Turn out onto a lightly oiled surface and knead by scooping with your fingers, stretching and flicking the dough over away from you. I kneaded for about 10 mins until the gluten was really making a nice structure.
5. Form into a ball then return to the bowl (oiled slighly) to rest until doubled in size. This was vary according to how warm or not your resting area is. Took a couple of hours for me.
6. Turn out gently on to the work surface, and gently press down to even out the gas pockets that have formed.
7. Form into a ball again, and rest for 10-15 mins.
8. Take the ball, and, with the most even surface on work surface, stretch it out gently into a squarish rectangle.
9. Here’s where the form factor comes into play. To create a nice squarish free-form loaf, fold the four corners into the middle, press down gently.
10. Put the loaf, join-side down, on a baking sheet lined with a floured cloth and leave the proof until doubled in volume. Again, this took a couple of hours.
11. Pre-heat your oven to 220C.
12. When the loaf has risen nicely, cut a double-cross on the top (I’m using a lame with a razor blade these days – like this).
13. Spray the inside of your oven with water.
14. I’m using a baking stone these days, so, using a floured, lipless baking sheet as a peel, I slid it in and baked it for 10 mins at 220c, then turned the oven down to 200C and baked for another half an hour, until the loaf gave a nice hollow sound when knocked on the bottom.
15. Cool on a rack, under a moist tea towel if you like to keep the crust a little softer.

I was a bit annoyed with the uneven opening of the cuts, but it tastes great.

Leave a comment

Filed under Baking