Tag Archives: leaven

Golspie loaf

Dan Lepard Golspie loaf

Over past several years, probably nearly a decade, my favourite bread book has been Dan Lepard’s ‘The Handmade Loaf’. A lot of the pics from this old Flickr set of mine are the results of recipes from the book. I had a lot of fun trying them, and the book was a real inspiration for me as I got more serious about baking. I thought I’d tried all the recipes, but looking through the book again the other day I found a few I’d missed. The Golspie loaf is one of them.

Dan explains it gets its name from a watermill in Suterhland, northern Scotland, which produces its own stoneground flours and meals. Before wheat became readily available, more common grains used for breadmaking in northern Britain were barley and oats. Traditionally, the round, flat bannock is made from oats or barley. The Golspie loaf is another disc-shaped loaf, with Dan’s recipe based on a barley or rye leaven (sourdough starter) and strong wholemeal flour. I’ve still got some of the Surrey wholewheat flour I used here, while my leaven has been mostly fed with rye lately. Dan’s recipe also used a little extra yeast, but mine’s wholly sourdough. I also added some oatmeal to the dough, as any addition of oats seems to result in a lovely most dough.

Dan Lepard Golspie loaf torn apart

350g leaven – mine was based on rye, but then fed on strong wholewheat flour and was 100% hydration (that is, made with equal proportions of water and flour)
210g water
6g salt
400g strong wholewheat flour
20g oatmeal (I used medium coarse)
Extra oatmeal to coat

1. Put the flour, 20g oatmeal and salt in a large bowl.
2. In a separate bowl, whisk together the leaven and water.
3. Pour the gloopy leaven and water mix into the flour and bring together a dough.
4. Cover and rest for 10 minutes, then give it a brief knead.
5. Cover and rest for 10 minutes, then give it another brief knead. Repeat this once or twice more.
6. Cover and leave the dough to prove. I did this in a cool cupboard over about 4 hours. You want it to prove up until it’s almost doubled in size. You can speed it up a bit in a warmer place, but a slower prove allows the flavour to develop more, and the yeast to work on the wheat proteins.
7. Lightly oil a 20cm springform cake tin and spinkle the inside with oatmeal.

Dough and tin
8. Form the dough into a ball, then flatten this into a disc.

In tin, before final prove
9. Put the disc of dough in the tin, and spread it to fill with your knuckles.
10. Sprinkle the top with further oatmeal.
11. Leave to prove up again. Again, how long this takes will depend on the warmth of the spot, and also the liveliness of your leaven.
12. Preheat oven to 220C (200C fan).

Before bake
13. When the dough is nicely risen, and reinflates slowly when prodded, cut two slices thrpough it in a cross shape, all the way to the bottom. (A metal scraper or cutter like this is very handy.)
14. Bake for 20 minutes, then turn the oven down by 20 degrees and bake for another 25 minutes. Baking times vary depending on your oven too but you want it nicely browned. If you have a fierce oven, check after about 30 minutes.
15. Turn out onto a wire rack and cool completely.

After bake

This is a real companionable bread – the cuts mean you can tear it easily into portions for sharing. Fran’s taken a quarter to work today with some of her salt beef, a project that’s been floating around in brine the past few weeks but was cooked up on Easter Sunday.

Salt beef sarnie

4 Comments

Filed under Baking, Breads, Recipes

Black beer bread

Black beer bread

Readers of this blog may have already spotted that we’re ‘Game of Thrones’ fans. ‘Game of Thrones’ is not only the name of HBO’s excellent TV series, it’s also the title of the first book in George RR Martin’s A Song of Fire and Ice cycle of books and it made a cameo appearance in this post, where we were lolling around in the park drinking Birra del Borgo’s Rubus, reading and enjoying the sun.

I can’t remember what hyperlinked amble took me there, but Inn At The Crossroads is the officially recognised blog for recipes based on foods found in A Song of Fire and Ice. Being a baker, my attention was immediately grabbed by their bread recipes. Specifically black bread – something that’s mentioned in the books as common fare of the people of Winterfell and the North.

Here is Inn At The Crossroads’ first Black bread, and here is their Black bread redux, aka Black beer bread. I wanted to try something similar, but not using commercial yeast – as this didn’t seem to fit into the whole quasi-Medieval vibe of Martin’s world. Instead, I wanted to use beer barm, a byproduct of fermentation.

My first experiment with a real barm bread was pretty successful, though I didn’t use any actual beer or dark flours to make it, so it wasn’t really a black bread or a black beer bread. This, however, is.

Again, I used Mulino Marino Pan di Sempre, a stoneground organic white flour that is made with a blend of Triticum aestivum (that is, common bread wheat), Triticum spelta (spelt wheat) and Triticum monococcum (einkorn wheat), but I also added some wholewheat flour.

I made a leaven with the same barm as before, feeding it up with flour over a few days, then I made up a dough, using beer as the only other liquid, not water.

Now, I mentioned that Dan Lepard’s ‘The Handmade Loaf’ has a recipe he calls “Barm bread”, though he makes it without actual barm, just beer and a leaven. He also heats the beer, killing the yeasts, but retaining the flavour. I wanted to retain the live yeasts from a bottle-conditioned beer, so didn’t heat it.

Flour, dark ale and barm leaven for my Winterfell black bread

The beer I used was Birrificio Math’s La 27, a 4.8% dark beer from the brewery near Florence. They call it a stout, but stout, traditionally, meant strong, and more recently has come to be associated with more full-bodied creamy porters. It’s neither.

The La 27 has a solid fruity smell: specifically black berries like blackberries (!), elderberries and blackcurrants, with a touch of smokiness and a little chocolate, but taste-wise it’s dull, a little charcoal, but not much more depth of flavour. The body was thin and watery, and over-carbonated. The aftertaste was oddly bitter. It was black though, or black enough for a black beer bread.

So anyway, here’s the recipe. If you try it, don’t be afraid to adjust the quantities, as I was very much experimenting when I made it.

I made my beer barm leaven with barm, flour and some cooking water from farro grain; I’d say it was about 80% hydration, effectively. If you can’t get hold of a beer barm, a normal leaven/sourdough starter will suffice, though it won’t be quite as fun.

For the beer, use a non-pasteurised, non-filtered, bottle-conditioned dark ale, stout or porter (not Guinness).

280g beer barm leaven
400g flour (a mixture of white and wholegrain)
10g salt
250g dark ale, stout or porter

1. Combine the salt and flours.
2. Combine the leaven and beer, stirring well.

Winterfell black bread
3. Pour the liquidy gloop into the flour.
4. Bring together the dough. It’ll be pretty sticky. Which is good, albeit tricky to handle. Don’t agonise.
Winterfell black bread

5. Form a ball with the dough, put it in a bowl or plastic container, cover with plastic or a lid, then put in the fridge.
6. Leave in the fridge for around 14 hours.

Winterfell black bread
7. Take the dough out of the fridge and allow to come to room temperature (around 20C ideally).

Winterfell black bread
8. Form a ball, then put it – smooth-side down – in a bowl or proving basket lined with a floured cloth.

Winterfell black bread
9. Prove again for about 5-8 hours more. This will depend on the temperature of your room, the liveliness of the yeasts, etc. You want to leave it until it’s doubled in size and is soft to the touch, nicely aerated.

Winterfell black bread, final prove
10. Preheat your oven to 240C.
11. Upturn the ball onto a baking sheet (so the smooth-side is up), slash, then bake for 20 minutes.

Black bread
12. Turn down the oven to 200C and bake for a further 20 minutes, or until the bread is done. This can be tricky to judge, but you want it to feel lighter, and sound hollow when tapped on the bottom.
13. Cool on a wire rack.

Black bread

Now, the finished loaf looked rather pleasing, and had a lovely smell of chocolate, a scent that you get with certain stouts. Oddly, this smell wasn’t strong with the beer itself, but it’s come through with the baking.

Winterfell black bread

Taste-wise, it’s certainly pretty rustic but is oddly bitter-sweet. I’m not a chemist, but I wonder if the bitterness is related to the alcohod.

I’m sure it would have served very nicely for the hungry Brothers of the Night’s Watch, freezing their behinds off on the Wall. We, on the other hand, enjoyed it for breakfast on a mild late-summer Roman morning slathered with honey. Then for lunch with a lovely crunchy, sharp medium aged pecorino.

Follow my blog with Bloglovinʼ

3 Comments

Filed under Ale, beer, Breads

Real beer barm bread

Beer barm bread

Once Upon A Time
Once upon a time, breweries and bakeries lived side-by-side harmoniously. Brewers merrily went about their noble work, mashing, sparging, fermenting. One blessed by-product of the process was a foam that frothily formed on top of the fermenting liquor. The dusty baker from next door would welcome consignments of this malty foam – barm – and use its natural yeastiness to leaven his dough.

And so it went for long ages.

Until some learned men in the late 18th and 19th centuries improved humankind’s understanding of bacteria and yeasts. By the late 19th century, yeast specifically cultivated for bread-making had become commercially available in block, then in dry, granulated form. And slowly, sadly, the close bond between breweries and bakeries faded away.

This idea of bread being made with brewery by-products has intrigued me for ages, but not having had a ready supply of barm, I’ve never actually tried it before.

A Dan Lepard beer bread

Beer breads
Dan Lepard in ‘The Handmade Loafʼ does a loaf he calls “Barm bread”, but it’s made using a bottle conditioned beer, that is then heated. This seems counter-intuitive, as it kills the yeasts in the beer, but apparently it’s to cook off some of the alcohol, which retards the action of any yeast in the mix. Lepard was effectively using the beer as a flavouring, and then re-introducing yeasts, I believe; so however lovely the results were, it wasn’t a genuine barm bread. (One of my attempts using his method a few years ago is picture above.)

My recent enjoyment of Game of Thrones and the Song of Fire and Ice novels, the source for his great HBO TV series, lead me to the Inn At The Crossroads. This inspired blog features involves real-world interpretations of the fantasy world foods mentioned by George RR Martin in his books, and it got me thinking again about pre-industrial yeast bread-making.

Westeros’ finest
Specifically, I was checking out The Inn At The Crossroads’ bread recipes. They have a few for Martin’s black bread, with the second version made using dark ale, stout or porter. Okay, thought I, that looks fun. But I had one criticism. Surely in Martin’s quasi-Medieval world, they wouldn’t have had “1 packet yeast”; bread would surely have been made with the barm method.

I made a comment along these lines, and one of the site’s creators, Chelsea Monroe-Cassel replied, saying “I agree that this would be the very best way to make this bread!” She also said, “I’ve made several trub breads, with great success.” I’d not heard of trub bread too, but this one is made using the sediment from the fermenter.

Beer barm

My project slightly moved away from the black bread theme, though, as initially I just wanted to make a bread with barm, and with flour with older grain – ie arguably more medieval – varieties.

I bought some Mulino Marino Pan di Sempre, a stoneground organic flour that is made with a blend of Triticum aestivum (that is, common bread wheat), Triticum spelta (spelt wheat) and Triticum monococcum (einkorn wheat).

My friend Michele Sensidoni, a brewer, kindly furnished me with a bottle of barm. It wasn’t very prepossessing stuff: gloopy, brown and malty, separating slightly, but it was exciting to finally get my hands on the stuff.

Beer barm and Mulino Marino Pan di Sempre flour

So:
100g barm
100g flour
Mixed and left overnight. My kitchen was at around 23C. The next day this was clearly alive, and reasonably vigorous. Here’s the before and after shots:

Beer barm leaven Beer barm leaven

I formed a dough with:
200g barm leaven (ie, all of the above)
500g flour
10g salt
300g water

Adjust the water if necessary; you want a nice moist dough.

Beer barm bread, dough

I then put all this in a container and left it in the fridge for 24 hours.

I then took it out of the fridge, and let it come back to RT (again, around 23C).

Beer barm bread dough, before final prove

After a few hours, I formed a ball, and put it in a proving basket lined with a floured cloth.

I let it prove again at RT for around 9 hours.

Beer barm bread dough, proved

I preheated the oven to 230C.

Beer barm bread, pre-bake

When the dough was nice and swollen and soft, I baked it for 20 minutes, then turned down the oven to 210C and baked for another 20 minutes.

Beer barm bread, fresh from oven

The results are very pleasing. It’s got a chewy crust, a reasonably open crumb and a taste that’s subtly sour. Yay.

Crumb CU

Oh, and for etymology geeks (like me), the British English word barmy, meaning a bit bonkers, crazy, comes from barm. As a barm is the foamy scum that results from fermentation, someone who is barmy is a bit bubbly, excitable, unpredictable and possibly even frothing at the mouth. Don’t worry though, making and eating this bread won’t have that effect on you. [insert suitable smiley here to compensate for lame attempt at humour]

29 Comments

Filed under Ale, beer, Breads, Recipes

Biga 2: making a loaf

freshly cut biga loaf

After visiting Il Vecchio Forno in Pescasseroli, Abruzzo, and getting advice from the master baker, I had to try making bread using a biga.

Although I’ve experimented a lot with natural leavens (sourdough), sponge and dough techniques and long fermentations of the finished dough (such as overnight in the fridge), I’ve never actually tried to make bread based specifically on the biga technique, that is using a low-hydration Italian style pre-ferment. This is still experimental though, as I’ve not made a strict biga – I had a healthy batch of leaven around, so I’ve added some of that. Also, I didn’t have enough of one type of flour, so I’ve done a mixture.

The flour types I used were a 0 grano tenero, at 11.5% protein, and a 0 Manitoba at 15.5% protein, W360-400. For an explanation of Italian flour types, see here. For a description of what the heck “W” means in this context, see my previous post.

mixing the biga

Biga

500g flour (370g grano tenero, 130g Manitoba)
250g water (cold, you don’t need to rush the yeast)
5g fresh yeast
30g leaven (at 80% hydration)

biga, before fermentation

1 Dissolve the yeast and leaven in the cold water, giving it a whisk.
2 Add the liquid to the flour in a roomy bowl, and combine.
3 Turn out the mixture onto a lightly oiled surface and bring the dough together. It’ll be quite firm, as it’s only 50% (give or take) hydration at this point
4 Put the biga in a container with a lid.
5 I left mine at room temperature to ferment for half an hour then put it in the fridge… because a) it’s warm here, around 25C (77F) and b) because I had to go out (to a gig).
6 Leave the biga in the fridge for 10-14 hours, until it is soft and relatively lively. It won’t be lively like a liquid leaven as it’s effectively a fairly dry dough.

biga, after fermentation

Bread dough

200g more flour (Manitoba/strong white bread flour)
200g water
10g salt

pieces of biga

1 Take the biga out of the fridge. You can leave it as is, but one site I read suggested cutting into pieces, which seemed like a good idea. Why? Because it’ll warm up more evenly that way and it’ll be easier to combine into the final dough.
2 Cover the pieces and leave to come up to room temperature for an hour or so.
3 In a roomy bowl, combine 200g flour, 200g water and 10g salt, making a pasty mixture.
4 Add all the biga pieces, and mix well, with a spatula and your hands. Really get in there and squeeze it all together, to help form one uniform dough.

making a biga dough
5 Turn the mixture out of the bowl onto a lightly oiled surface and bring together the dough. At this point, it’s around 65% hydration, so it should be moist without being totally sticky and awkward to handle.
6 Form a ball and return to the roomy bowl (lightly oiled).

dough, ball
7 Cover (I used a shower cap), and leave to prove until it’s doubled in size and soft. Time will vary but it took 1 1/2 hours for me. My kitchen was warm, up to 26C (79F).

dough, end of first prove
8 Turn out the dough. It should weigh around 1.2kg, so you could make two smaller loaves, but I wanted to make one large-ish loaf. Form a ball, then leave to rest for about 10 minutes.
9 Form a baton, then place, seam-side up, in a proving basket lined with a floured cloth.

baton
10 Prove again. I left mine for half an hour in the warm kitchen, and it was nice and soft (morbido). I probably could have left it a bit longer – you want it soft and springy.

final prove
11 Turn the dough out onto a baking sheet lined with parchment (I sprinkled mine with coarse cornmeal). Slash the top in your preferred manner.

ready to bake
12 Put a dish of boiling water in the bottom of the oven to fill the oven with steam, preheated to 220C. My oven takes ages to come to temperature but you might have a new-fangled type that heats in 10 minutes. Lucky you.
13 Bake for 25 minutes, then turn the heat down to 200C and keep baking for another 20 minutes. I left mine another 10 minutes, trying to get some colour on top.

Results

All in all, this is one of the better loaves I’ve made recently. Despite our oven not really having any top heat to colour the crust, the rudimentary steam system (domestically, I prefer to use a mister spray, but I ain’t got one at the moment) gave the crust a reasonable crisp crunchiness. The crumb isn’t particularly open, but it’s soft.

Best of all, I got a decent oven spring! I’ve been struggling with the form of my loaves recently. I doubt this decent shape is the result of the biga per se, it may well be more because the dough was a lower hydration than other doughs I’ve made recently (more usually 70% hydration) and because the Manitoba is easier to handle and glutinous then the farro flours and whatnot I’ve been playing with.

I’m not sure my loaf is really a genuine rustic Italian style bread: with its fairly close and soft crumb, it’s more like a classic British bloomer. But hey, I’m happy with that for a first try.

Oh, and yes, from the cracking it was clearly a little underproved, but not radically so.

fresh from oven

Bakers’ percentages

If you’re not familiar with bakers’ percentages, they’re just a way of expressing the proportion of ingredients as a percentage of the flour – or more precisely a percentage of the flour weight. This blog provides a good explanation, if you’re in the mood for some maths.

So, the total ingredients here, including both the biga and the final dough are:

700g flour
450g water
30g leaven
5g yeast (fresh yeast, aka lievito di birra)
10g salt

However, if I break down the leaven, more accurately this means:
717g flour
463g water
5g yeast
10g salt

As bakers’ percentages this is:
100% flour
65% water
0.7% yeast
1.4% salt

Having said all that, I’m sure I’ll keep playing with this technique, and experiment more with quantities – playing with the qb, or quantobasta. This is the “how much is enough”, the quantities that, more intuitively, feel right. (Something that’s discussed by Rachel over here). For starters I think the biga I made was too low hydration, despite the maestro’s advice. So I’ll increase the water, or, if I’m using more of my high hydration leaven (to make a semi-biga, semi-madre), add more of that. Vediamo!

6 Comments

Filed under Breads, Recipes

The natural leaven, or sourdough starter

What is a leaven?
A leaven is simply the agent that causes a bread or other baked item to rise. It can be a chemical agent like baking powder, or it can be a type of yeast, which is encouraged to fart out carbon dioxide to fill your dough with pockets of gas – the holes in the crumb.

The yeasts (products, not species) most commonly used in bread-making are the powdered, instant or easy-blend yeast; the granular active dried yeast (ADY) aka dried active yeast; and fresh yeast, compressed bakers’ yeast, which is known as lievito di birra (beer yeast) here in Italy, a reminder of the relationship between baking and brewing. On this blog, however, I also talk a lot about natural leavens, which I often just refer to as leavens.

Healthy leaven

Yeast, bacteria and a long, strange symbiosis
A natural leaven is also known as sourdough, or lievito naturale or madre (mother) here in Italy (where it’s generally a much lower hydration), or a levain (if you prefer to use a French term to sound extra sophisticated).

The natural leaven is a culture containing both yeast and bacteria strains. So while bakers’ yeast is the strain Saccharomyces cerevisiae, a natural leaven will contain a colony of various strains of wild yeasts and lactobacilli. The latter is a remarkable genus of bacteria that humanity has had a relationship with for millennia. Lactobacilli play a part in the production of many fundamental consumable delights, such as beer, wine, cheese, yogurt, cocoa and, of course, bread.

It’s a fascinating symbiotic relationship, and one I enjoyed exploring while living on a smallholding in New Zealand years ago, making some crazy cheeses. And who’d have thunk chocolate involved fermentation? Well, it does: the pulp and seeds of the harvested cocoa pods are fermented before drying. Gotta love Theobroma cacao – that is “Cocoa: food of the gods” in Greek.

Anyway, I digress. (As usual.)

When humanity first started making leavened bread, it was thanks to lactobacilli and wild yeasts. In a bread natural leaven, the lactobacilli and yeasts live alongside one another in a sludgy slurry of flour and water, the starter. This was the chief way of making leavened bread from around 1500BC (or earlier) until the Middle Ages, when bakers starting using beer barm, the froth on the fermenting brew.

In the 19th century, when the likes of Louis Pasteur were not only overhauling our understanding of disease but also revolutionising the production of fermented foods, Saccharomyces cerevisiae was finally identified and became, effectively, a crop: brewers’ yeast.

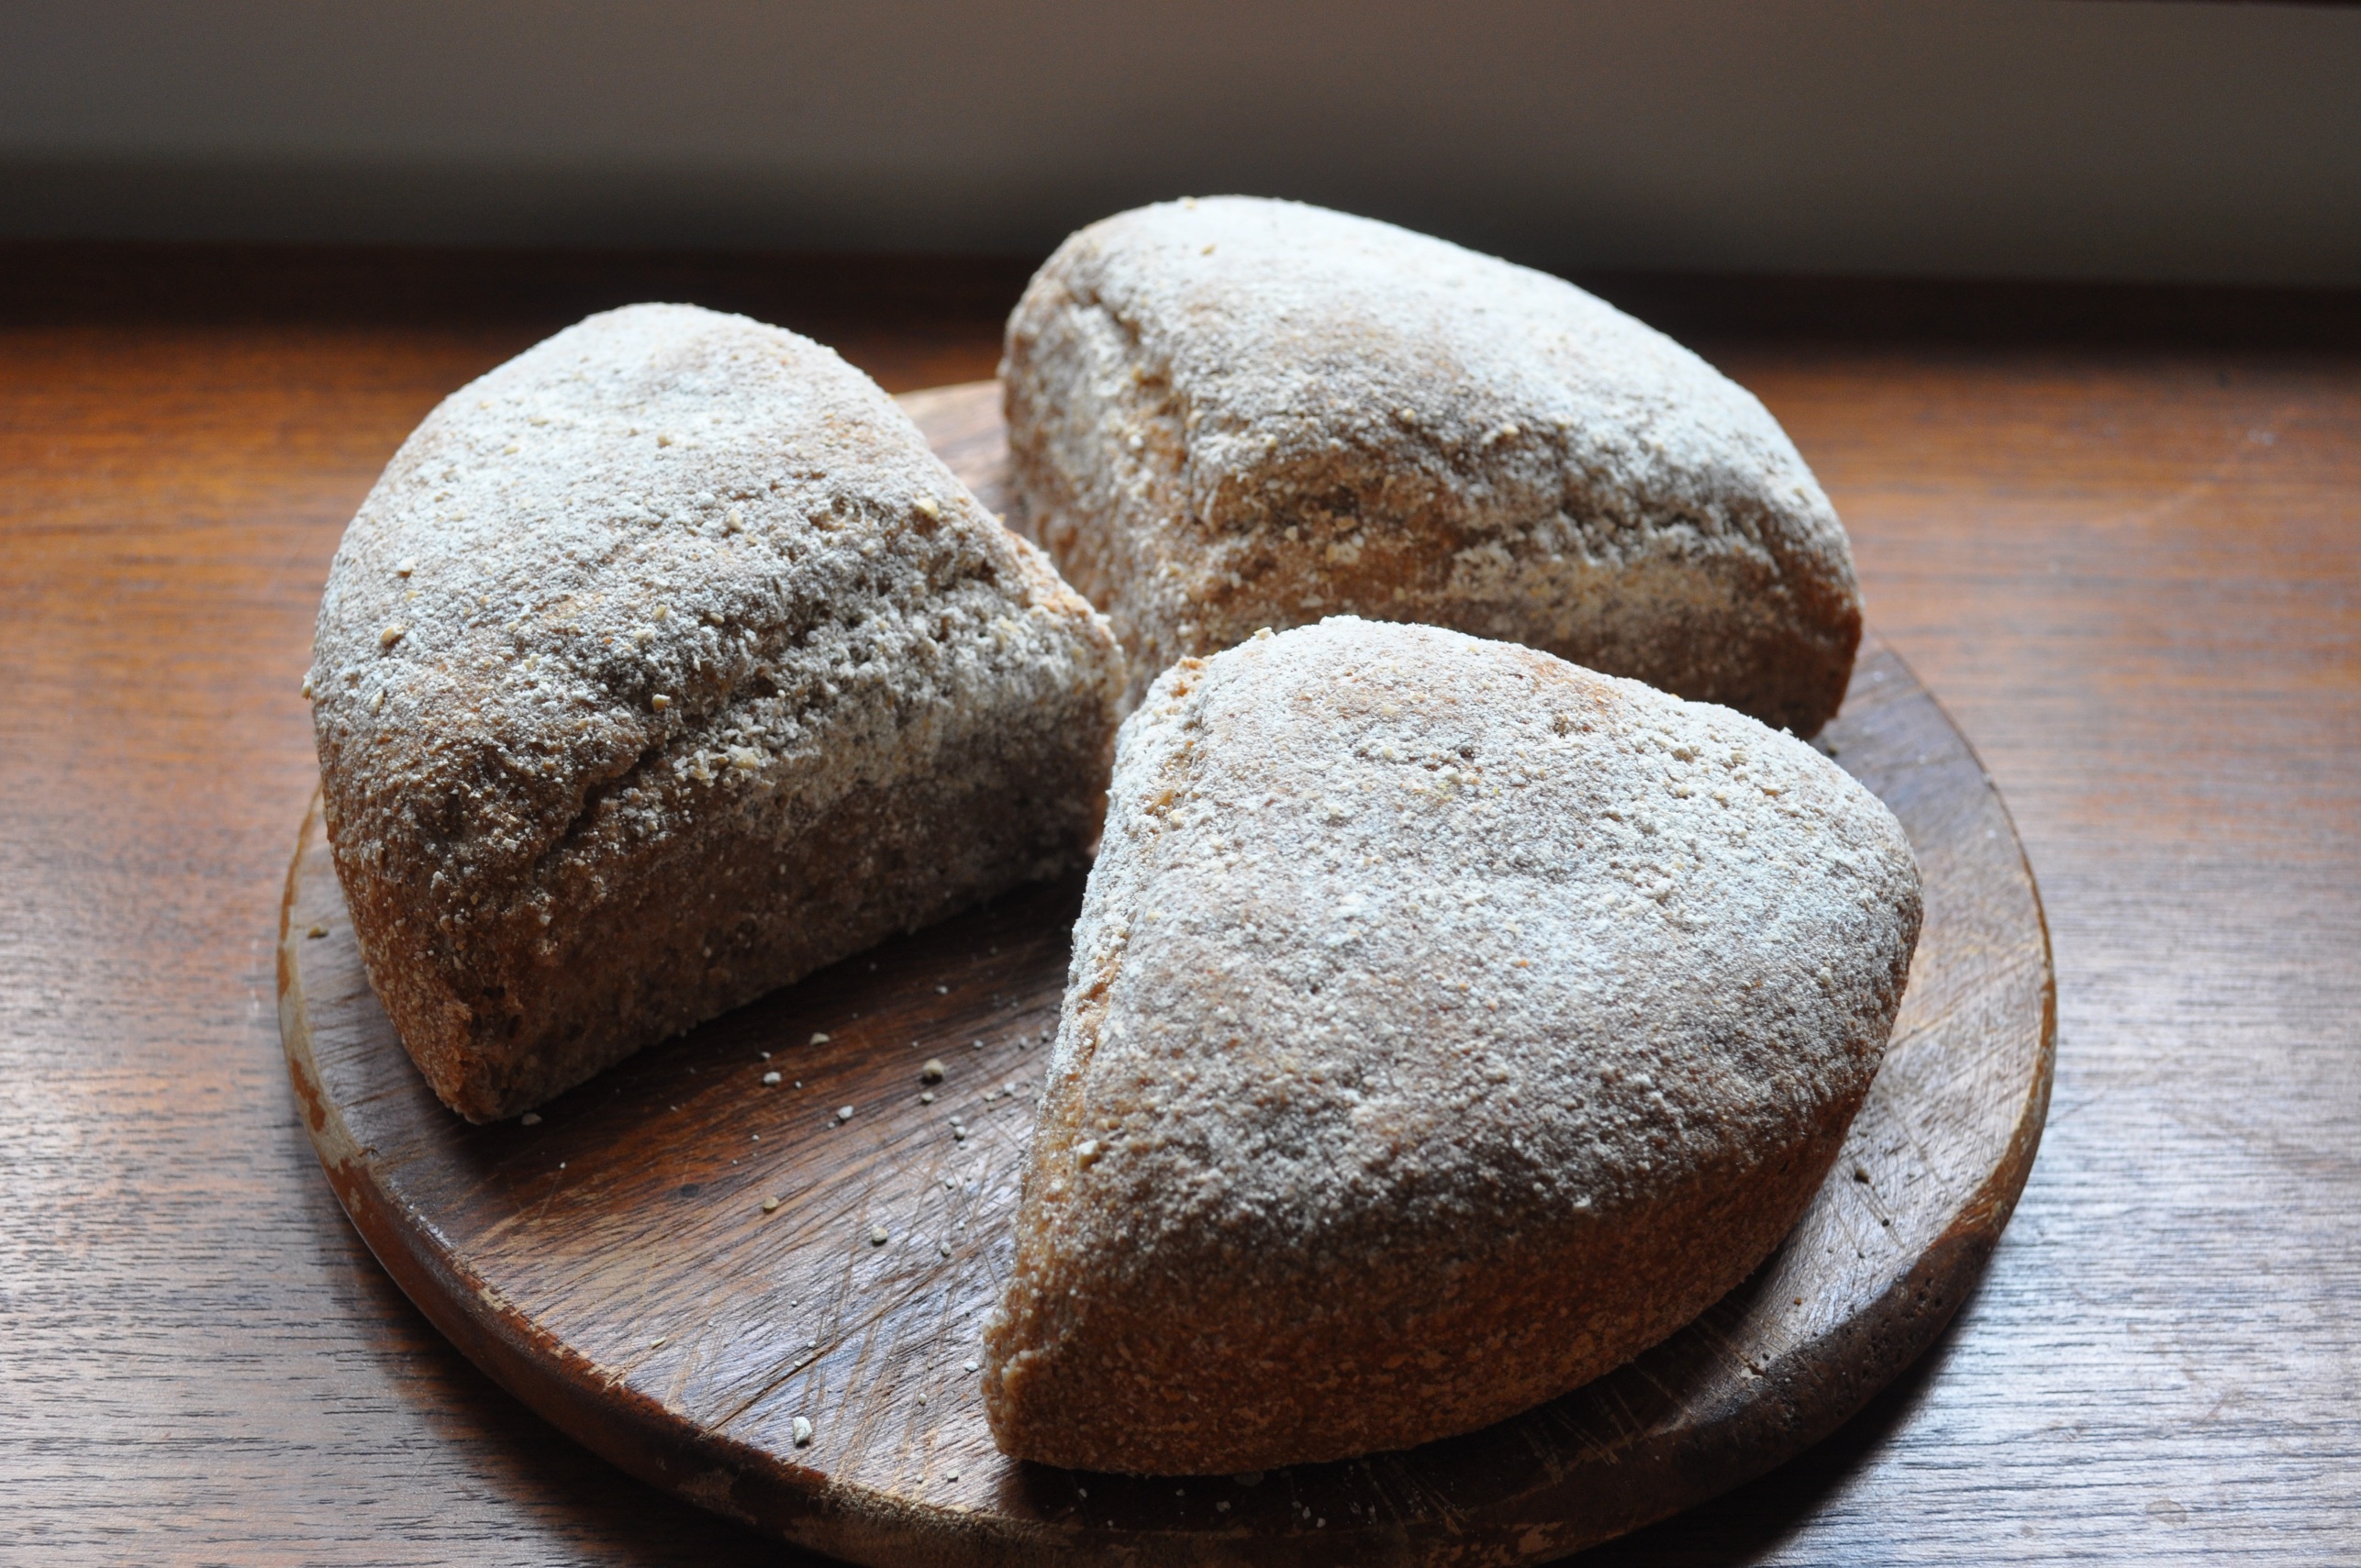
When you mix yeasts with flour, the sugars in the cereal grains (notably maltose) provide them with food. The result of this feeding is lactic and other acids; the by-product is the carbon dioxide. These acids are what can give sourdoughs a pronounced, even tart flavour. Rye flour gives an especially sharp flavoured bread, but some wheat-based sourdoughs can be as mild as breads made with bakers’ yeast.

Healthy leaven

How to create a leaven culture
The easiest way to start a leaven may well be to buy a good book, like Dan Lepard’s The Handmade Loaf. This gives a great account of how it’s done with plenty of lovely pics. Or you could read on, for a somewhat less professional lesson.

If you’re using a good quality flour, one where the character of the grain hasn’t been brutalised too much by industrial processing, it may well contain have suitable wild yeast strains already. The yeasts are also on and in your body, and even in the atmosphere. Some people collect them by leaving a jar of flour and water outside but if you live in a polluted city you might want to control the process a little more carefully.

You can do this by putting a handful of raisins and a few teaspoons of live yogurt in a mixture of equal proportions of water and flour. Another baker here recommends rhubard. While Sandor Ellix Katz says “organic plums, grapes, or berries.”1 The fruit will (hopefully) have just the right yeasts on their skin, the yogurt will introduce the lactobacilli. Put the jar, covered with a cloth or with the lid on loosely, in a warm place.

Over the following few days, feed more flour and water to the leaven, stirring it well. To keep things at a reasonable domestic scale, I tend to feed mine around 20g each of flour and water, morning and night. Equal proportions of water and flour mean you have a “100 per cent hydration” leaven2. Lepard suggests increasing the proportion of flour slightly to slow down the fermentation.

It should start to bubble – not like a fizzy drink of course, but you’ll see gas in the sludge and perhaps some foaminess. The smell will become slightly alcoholic too. If your leaven is nice and active and bubbly, it’s happy – so strain out the raisins, their work is done. You can now use some for baking. (Instead of straining out the raisins at this point, you can just soak them overnight at the start and use the liquid. Watch the video here on Viva La Foccacia. It’s in Italian, but even if you don’t understand, the process is clear.)

If you just keep feeding the leaven, without removing any to use, it can become unhealthy, with too much ethanol (another yeast by-product) in the mix. If this happens, simply take a small amount, and, in a fresh jar, start feeding it again.

Feeding the leaven

Your pet slurry
When you have a natural leaven, you have to think of it almost like a pet: it’s a living thing that needs care, needs feeding. But that doesn’t mean it’s hard to maintain. If I’m not baking much, or not making sourdoughs, I leave my jar of the leaven in the fridge for weeks, even months occasionally. This retards the fermentation process, as the culture prefers a temperature of 25-35C, not the 4C or so of a fridge.

After a while, the leaven will divide into a grey, putty-like goop, with a watery liquid on top. It’s not dead though, just a bit unhappy. To revive it, you can take a spoonful of the goop, put it in a clean jar and start feeding it again, as described above.

If you change the flour, the yeast strains may well change, and your bread may well taste different, but to me that’s all part of the fun. My leaven is about four years old now, had moved house three times and even moved from Britain to Italy. During this time, it’s been fed on white wheat flour, wholewheat flour, durum wheat flour, emmer flour, spelt flour and rye flour.

For a while I had two parallel cultures, one white wheat, one rye, but it didn’t really seem necessary. If you plan ahead, you can simply take some leaven and feed it with a different flour, creating another strain. This may take around a week of regular feeding.

Be nice to your pet slurry and it could last you a lifetime. Or several lifetimes. There are stories of prospectors in the American gold rush who carried their sourdoughs, which may well have originated in Europe, across North America. I can well believe this as, years ago, I knew an Austrian guy in New Zealand who’d transported his culture around the world in the form of dried flakes, which he rehydrated when he wanted to bake. (He was basically smuggling. Introducing food, vegetable matter and organisms to the Antipodes is a serious no-no these days as they have major problems with foreign species. Don’t do it kids!)

Anyway, some of the US immigrant natural leaven cultures may well still be used today in the thriving sourdough bakery scene of the West Coast US. Certainly some cultures still in use date to the mid-19th century. Gotta love that symbiosis.

Footnotes
1 Katz is a respected US fermentation expert. Something of a guru in fact, who treats his HIV with fermented foods. His book Wild Fermentation includes a recipe for Basic Sourdough Starter (page 95), which says this about the inclusion of fruit: “One effective technique for speeding up the introduction of wild yeasts into your sourdough is to drop a little unwashed whole fruit into it. Often on grapes, plums, and berries you can actually see the chalky film of the yeast (‘the bloom’) that is drawn to their sweetness. These and other fruits with edible skins… are great for getting sourdoughs bubbling. Use organic fruit for this. Who knows what antimicrobial compounds could lurk on the skins of the fruits of chemical agriculture?”

2 Bakers’ percentages are based on the amount of liquid (usually, but not always, water) as a proportion, a percentate of the flour in the recipe. There’s more info here. Leaven percentages are considered in the same way as dough percentages.

11 Comments

Filed under Breads, Flour & grain

Pane di San Martino

In the autumn of 2011, I noticed bags of a yellow-ish powder on a stall in the farmers’ market in the Ex-Mattatoio in Testaccio, Rome. It was farina di castagna – chestnut flour. That is, flour made from the dried and milled nuts of Castanea sativa, the sweet chestnut tree.

At the time, I experimented with it. A friend commented that there is in fact a traditional Italian bread made with chestnut flour, called pane di San Martino, or St Martin’s bread. The feast day of St Martin is 11 November, just around the time the year’s chestnut flour becomes available.

Anyway, I mentioned this bread to a teacher who I was doing a (food-focussed) conversation class with. She dug out a recipe. Well, she clearly Googled a recipe, as a quick Google myself soon found her source, which is here (in Italian).

After having gone through all that, I then completely failed to try the recipe. A year went by, autumn returned – and so too did the chestnuts, and chestnut flour. So last week I bought a new pack, and determined to revisit the pane di San Martino recipe.

Firstly, however, I had to translate it.

It talked in vague terms: “Prendere mezzo mestolo di farina di castagne e mezzo mestolo di farina di frumento…”, that is “Take half a ladle of chestnut flour and half a ladle of wheat flour…” But which ladle? I’m not a fan of the cup measure in recipes – especially as a US and an Australian cup, say, are different sizes. But what about an Italian ladle? I had two in my kitchen, one medium-small, one medium-large. Was either suitable? I plumped for using the medium-large one, and weighing the flours in grams. (If you’re interesting in scaling up recipes, using grams and kilos makes things a lot easier, in part as the maths are more manageable when you’re working with percentages and a measures based around factors of ten. Ounces smounces.)

Anyway, I translated and converted the recipe, but it still wasn’t quite right in terms of the liquid/dry quantities, so I also revised it while making the dough. Indeed, all flours have different absorbency, so you will have to have a feel for dough when you’re adding mixing the water and flours. This time, I used an organic, stoneground farro bianco – white spelt – flour from the renowned Marino Mulino. If you use a wholewheat flour it will require a more water than a white flour.

So. Pane di San Martino. My teacher gave me some notes that said this bread is found from Emilia-Romagna in north Italy to Salento, in Puglia, the heel. I’ve never seen it in Rome though. In fact, I’ll come clean and say I’ve never seen it anywhere, in the crumby flesh. So although my version is based on an Italian recipe, my version has no claim to authenticity. Which might upset an Italian baker, but shouldn’t be a problem if you stumble upon this recipe from other climes.

The recipe uses both a leaven (sourdough culture) and fresh yeast. This is a technique used by one of my favourite bakers, Dan Lepard, though it might upset some purists. OK, purists, that’s two warnings now.

Make a sponge with:
50g chestnut flour
50g of wheat or spelt flour
12g fresh yeast
50g wheat or spelt leaven/sourdough culture (100% hydration – that is, made with 50% water, 50% flour)
180g tepid water

Cover and leave to ferment for around two hours.

Make a dough with:
The pre-ferment
350g wheat or spelt flour
250g chestnut flour
300g water. Add more if the dough feels too tight.
20g olive oil
12g salt

Combine with a spoon or spatula. You want a moist dough. Don’t be afraid to add more water. When it’s a good consistency, knead to combine.

Cover and leave to rest for 10 minutes.

Add:
180g walnuts and knead gently to combine.

Cover and leave to rest for 10 minutes.

As the original recipe didn’t involve first and second proving periods, nor does this version. (I think I may work on this recipe though, and adjust the proving. Watch this space.)

Weigh the dough and divide in two. Form two balls, then leave these to prove in baskets or bowls lined with flour clothes.

Leave to rest for around two hours in a warm place away from draughts. Timing will vary depending on the temperature of where your prove the dough.

Preheat the oven to 220C.

Line a baking sheet with parchment. (I’m not using a stone at the moment, just a fierce domestic gas oven.)

When the dough feels springy and alive, almost jelly-like, you’re ready to bake.
Gently upturn the proving baskets/bowls onto the baking sheet.
Make cuts in the top – you can make slashes how you feel, as long as you use a sharp blade and don’t drag at the dough. (Slashes in a loaf used to be the owner’s signature when people used communal village bread ovens.)

Bake for 20 minutes, then reduce the temperature to 200C and bake for a further 20 minutes.

You want the loaf to have a nice colour, and sound hollow when you knock on the bottom. (This isn’t an exact science either but if it sounds hollow, that’s some indication the dough isn’t still soggy and doughy inside, instead it’s baked and dry.)

Leave to cool on a wire rack.

The resulting bread is sweet, almost cake-like, and pleasant for breakfast or afternoon tea, and makes good toast when it’s aged past its initial softness.

Addedum
The great travel writer Eric Newby had a strong connection to Italy – he hid in the Italian mountains during WWII, as described in his wonderful Love and War in the Apennines, and he and his wife – who he met during the war – returned there many times, eventually buying a house in the mountains in 1967. It was called I Castagni, “The Chestnuts”; on the theme of said foodstuff, in A Small Place in Italy he writes “This room extended the whole height of the building and had originally been constructed for the purpose of drying chestnuts. They were laid out and dried over a fire that had a chimney which extended up to the height of the roof. When they were dry they were ground up into a pale, brownish flour and used to make a rather sickly, sweetish sort of bread called castagnaccia which, until long after the last war, was a staple food in many parts of mountain Italy.”

Later on, he writes more about the importance of chestnut trees for “the principle necessities of life”, from building materials to food, specifically castagnaccia, “what had been a stabple food that most old contadini [peasants] now wanted to forget they had ever eaten, because of the memories it brought back of long years of poverty.” Interestingly, the suffix -accio / -accia often indicates a perjorative, so castagnaccia could be translated – very loosely – as “yucky chestnut bread”.

3 Comments

Filed under Baking, Breads, Recipes

24 hour leaven bread

I dropped my camera. My dear old camera. And now it refuses to focus. It was just a compact, but it has been with me a long time, and it certainly took better pics than my phone – as demonstrated with this post.

This is a loaf I made up as an experiment. I wanted to only use my own white wheat leaven, and not any bought yeast. So I made a sponge up with 300g of leaven, 600g water and 400g strong white flour, and left it, covered, for 24 hours.

I then added a few tablespoons of ground linseed, 2t salt, 150g wholemeal flour, 100g rye flour, 200g white flour, and 300g of rye grain that had been boiled and soaked in wine (that’s 300g after the boiling and soaking, not 300g dry) and mixed up a pretty wet dough. I really ought to try and work out the percentages, but I’m not fully apprised of that system yet. Bear with me! Just started a baking course, so hope to get my head around all that soon.

I made two disc or cob loaves, each one with 1100g of dough.

There was some pretty unsightly cracking on baking (220C for 10 mins then turned down for another half hour ish), but on cooling and cutting they have a nice crumb, some good open air holes (a feature desired of sourdoughs etc, if not of more standard loaves) and a reasonable flavour. And the rye grains are great for a nice chewiness, almost a crunch.

Leave a comment

Filed under Baking

Form factor

I made this loaf the other day, inspired by but not following Richard Bertinet’s Honey and lavender loaf recipe from Dough.

I’m sure a lavender scented loaf would be lovely, but it isn’t ideal of your basic sandwiches-for-work loaf, so I excised the lavender. Also, I’m finding the very best breads I’m making at the moment all involve using some leaven; I can’t resist adding 3 or so tablespoons full to whatever recipe I’m following.

What I liked most about this recipe from Dough was the form factor. Although the rising in the oven split the loaf more radically along one of my cuts than the others, ruining any chance of pretty regularity, in principle I was very happy with the shape of this loaf.

So anyway.

250g wholemeal bread flour (I used stuff that had been ground on the waterwheel at Otterton)
250g strong white flour
4 good tablespoons of white leaven
5g dried active yeast (my local supplier of fresh yeast was all out)
10g salt
320g water
1 teaspoon honey (optional)

1. Mix the flours and salt in a roomy bowl.
2. Mix the water, yeast and honey, then beat in the leaven. (If I’d had freah yeast, I probably wouldn’t have crumbed it into the flour, as per the Bertinent method).
3. Blend this liquid mix into the dry mix, and bring together to make a soft dough. (I might have bunged a bit more water in here, so it’s nice and moist).
4. Turn out onto a lightly oiled surface and knead by scooping with your fingers, stretching and flicking the dough over away from you. I kneaded for about 10 mins until the gluten was really making a nice structure.
5. Form into a ball then return to the bowl (oiled slighly) to rest until doubled in size. This was vary according to how warm or not your resting area is. Took a couple of hours for me.
6. Turn out gently on to the work surface, and gently press down to even out the gas pockets that have formed.
7. Form into a ball again, and rest for 10-15 mins.
8. Take the ball, and, with the most even surface on work surface, stretch it out gently into a squarish rectangle.
9. Here’s where the form factor comes into play. To create a nice squarish free-form loaf, fold the four corners into the middle, press down gently.
10. Put the loaf, join-side down, on a baking sheet lined with a floured cloth and leave the proof until doubled in volume. Again, this took a couple of hours.
11. Pre-heat your oven to 220C.
12. When the loaf has risen nicely, cut a double-cross on the top (I’m using a lame with a razor blade these days – like this).
13. Spray the inside of your oven with water.
14. I’m using a baking stone these days, so, using a floured, lipless baking sheet as a peel, I slid it in and baked it for 10 mins at 220c, then turned the oven down to 200C and baked for another half an hour, until the loaf gave a nice hollow sound when knocked on the bottom.
15. Cool on a rack, under a moist tea towel if you like to keep the crust a little softer.

I was a bit annoyed with the uneven opening of the cuts, but it tastes great.

Leave a comment

Filed under Baking

Handmade loaves

Although I blog about my baking over at Cake-Off (now gone), the emphasis there is on cakes, cupcakes, tray-baked cakes, biscuits, cookies and all things sweet and yummy. For my bread-making, I’m going to try and write about it a little more here.

I’ve been making bread on and off most of my adult life, starting, like much of my more homely, traditional interests, with the time I spent on small organic farms in the Buller Gorge, South Island, New Zealand in the late 1980s and 1990s (a couple of years in total, on about off). There, mentored and encouraged by first Mr Stephen McGraph of Newton Livery then, more significantly, by Ms Nadia Jowsey of Old Man Mountain, a highly accomplished baker and chef, I started to learn all about making real bread.

Last year, I was given a copy of The Handmade Loaf as a present. This excellent book is by Dan Lepard, the master baker who has been writing the baking column in the Weekend Guardian the past few years. Its emphasis is on using a natural leaven – aka levain, aka ferment – in your breads. I’m not sure I can entirely summarise the difference in results between a homemade loaf made with just commercial yeast (be in easy-blend, dried or fresh) and one made with your own leaven, but it certainly adds different qualities: you can achieve very different textures, but the main difference is probably a depth of flavour. Plus, where making your own bread is always deeply satisfying, that feeling is multiplied when the only raising agent you’re using is a natural yeast you’ve cultivated yourself. There are different methods of doing this, but Lepard’s basically involves using the natural yeasts presents on the skin of raisins, feeding it with flour and water, and nurturing it over a week or so.

Not all my experiments with the recipes from The Handmade Loaf have been a resounding success, but all have been informative experiences. And some of them have resulted in some of the best breads I’ve ever made.

Here are just a few examples from the past few months.

The mill loaf
This is second recipe in The Handmade Loaf. It uses leaven made with white flour (you can make rye leavens, etc), alongside white flour, wholewheat flour and rye flour. It’s a great all-rounder, for wholesome sarnies, top toast or just a few slices with a meal. It’s one of the recipes in the book I make the most, though for home use I half the book’s quantities, which call for half a kilo of levian, along with a kilo of flours (combined), and more than half a kilo of water.

Onion and bay loaf
This is a yummy loaf where you chop some onion, then head it, along with some bay leaves, in milk. You then cool the milk and use it for the dough’s only liquid. The finished loaf is a lovely savoury affair, that’s both nice and alliumy and instilled with the distinctive sweetness of bay. This one uses both some white levain and some fresh yeast.

Lemon barley cob
Made this one a while back. It uses white leavain and some fresh yeast, combined with 100g barley flour and 150g white flour. A little lemon juice and zest gives it, in combination with the barley flour, gives it a slight tang. Need to practice this one a bit more.

Ale bread with wheat grains
This is a great one, though takes a little more advanced planning. Its given distinction by the addition of wheat grains, which you simmer, then soak overnight in ale. I love ale. I love bread. And of course the two are closely related – or at least they used to be, before the advent of commercial yeast when much baking would apparently involve using the barm from beer-making for your yeast starter.

Rolled oat and apple bread
This is one of my favourites from The Handmade Loaf, so far. Adding the remains of the porridge to the bread dough was one of the things I learned from Stephen and Nadia, and this recipe incorporates a similar process – making some semi-porridge by soaking oats in boiling water. The apple here also keeps the loaf loaf and moist and soft. The recipe uses grated apple, but I had some pureed remains of our apples in the freezer, and added that instead on one occasion; the results were similarly successful.

Barm bread
Another connection with the old tradition of making beer with beer barm. Here, you make a barm by mixing bottle-conditioned ale with some white flour and white leaven the leaving it overnight. The loaf itself just uses this barm, water, strong white flour, and a little salt. Yum. Check out the texture – I’ve never achieved anything like that with a non-leaven bread. Though again, this needs a little practice, as it’s a bit too crusty.

Bottom line: get this book. And get baking! That said though, what’s with the prices on that book now? Mitchel Beazley – do another print run for crying out loud!

5 Comments

Filed under Baking, Breads