Tag Archives: baking

Wild garlic focaccia

Wild garlic focaccia

When I was a little kid in the 1970s, I was intrigued by the copy of Richard Mabey’s 1972 classic Food for Free on my parents’ bookshelves. But I also loved actual shopping with my mum. I remember walking down the high street of my home city, Winchester, her carrying a wicker basket and us visiting actual grocers, bakers, fishmongers and butchers. But Sainsbury’s had also arrived, and they were soon gone. Put out of business. Times changed.

I loved the supermarket too, fascinated by the variety and such things as hazelnut flavoured Mr Men yogurt. So we weren’t exactly food foragers, but my mum is knowledgeable about plants so could often identify things in hedgerows and woods on family walks. Like most people, we foraged blackberries, but while I did learn that rosehips had been used to make a vitamin-rich syrup during the privations of World War 2, for us at primary school they were more important for crushing up and sticking down the back of other kids’ shirts as itching powder.

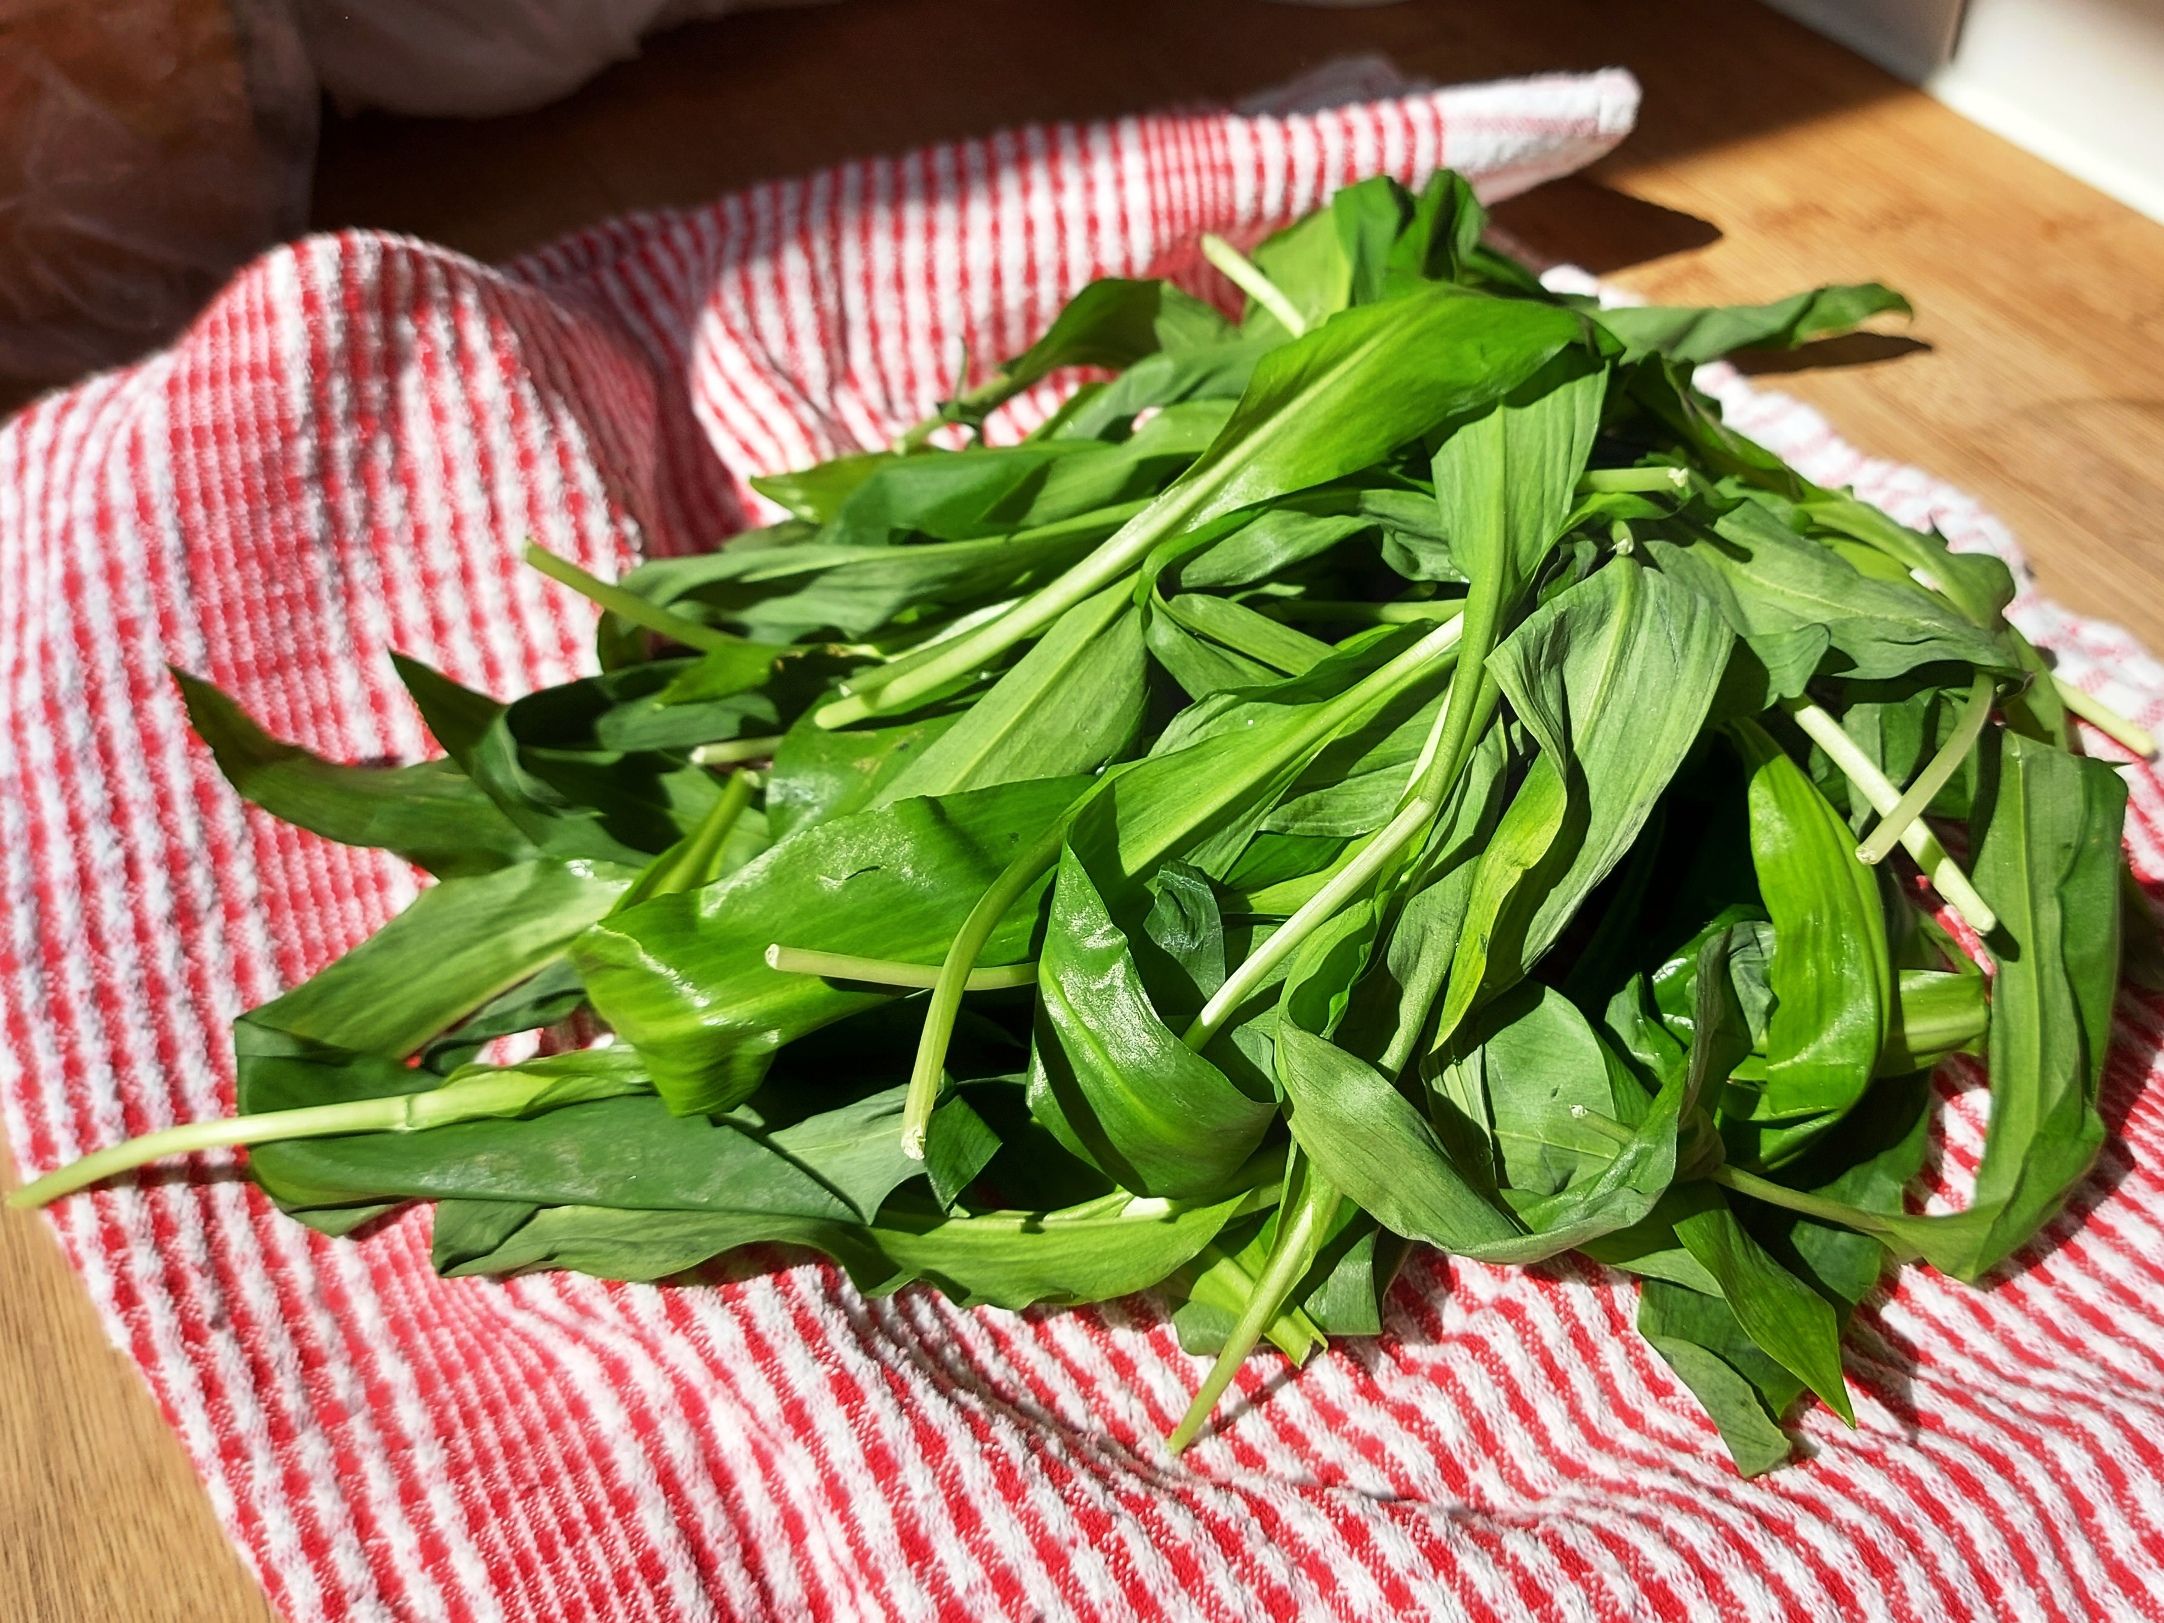
Foraging, like baking, is of even more popular these days. And spring is when, among other things, the wild garlic appears. Wild garlic, like blackberries later in the year, is an entry level foraging plant, it’s easy to identify and can be plentiful. We met up with some old friends the other day, for our first pub garden get-together in who knows how long, then took the long way home afterwards. Dom took us to a favoured wild garlic patch, importantly away from the main dog toileting route. A strong garlic flavour is good. A dog wee flavour, not so much.

Wild garlic tends to grow in cool, shady places in deciduous woods and close to streams. Your nose may well help you find it. It’s so pungent, in principle it’s hard to confuse. Though it does grow alongside lords and ladies1 (Arum maculatum), whose young leaves can look similar at a glance but are a very different shape when inspected. And don’t smell of garlic. But they are also toxic, so take care.

Fresh wild garlic - washed

Food for bears
Wild garlic is a wonder. Even its Latin name is great – Allium ursinum, bear garlic. Do bears like it? They’re smart omnivores, so it wouldn’t surprise me. We hunted them to extinction in Britain though, so it’s not something I’ll ever see here. The common name I grew up with for wild garlic is ramsons, which apparently derives from the old English hramsa, and may be related to the Greek krómmyon, meaning onion.

Anyway. We got a lot on that jaunt with Dom and family. I say a lot, but it was actually only two small nappy disposal bags, which were buried at the bottom of our backpack (unused), a legacy of the kids’ younger days.

If you have a lot of wild garlic, you may well need to process it. Years ago, when we still had an airing cupboard, I dried it, but found it lost its flavour. Fresh, it makes a good pesto, whizzed up with nuts, oil, grated parmigiana and seasoning. It’s also good for a simple pasta, just roughly chopped, softened in olive oil and combined, perhaps with a squish of lemon juice. You can also use it to make the Middle Eastern coriander condiment zhoug (thanks to my friend Alex, owner of Middle Easten food business Kabak for that one). Another way to process it was suggested by Dom: wild garlic butter. Just chop the garlic leaves fine, then combine it with softened butter, form into a roll, then freeze in greaseproof paper. You can then cut slices off to cook with, using it in lieu of normal garlic in recipes.

Focaccia variations
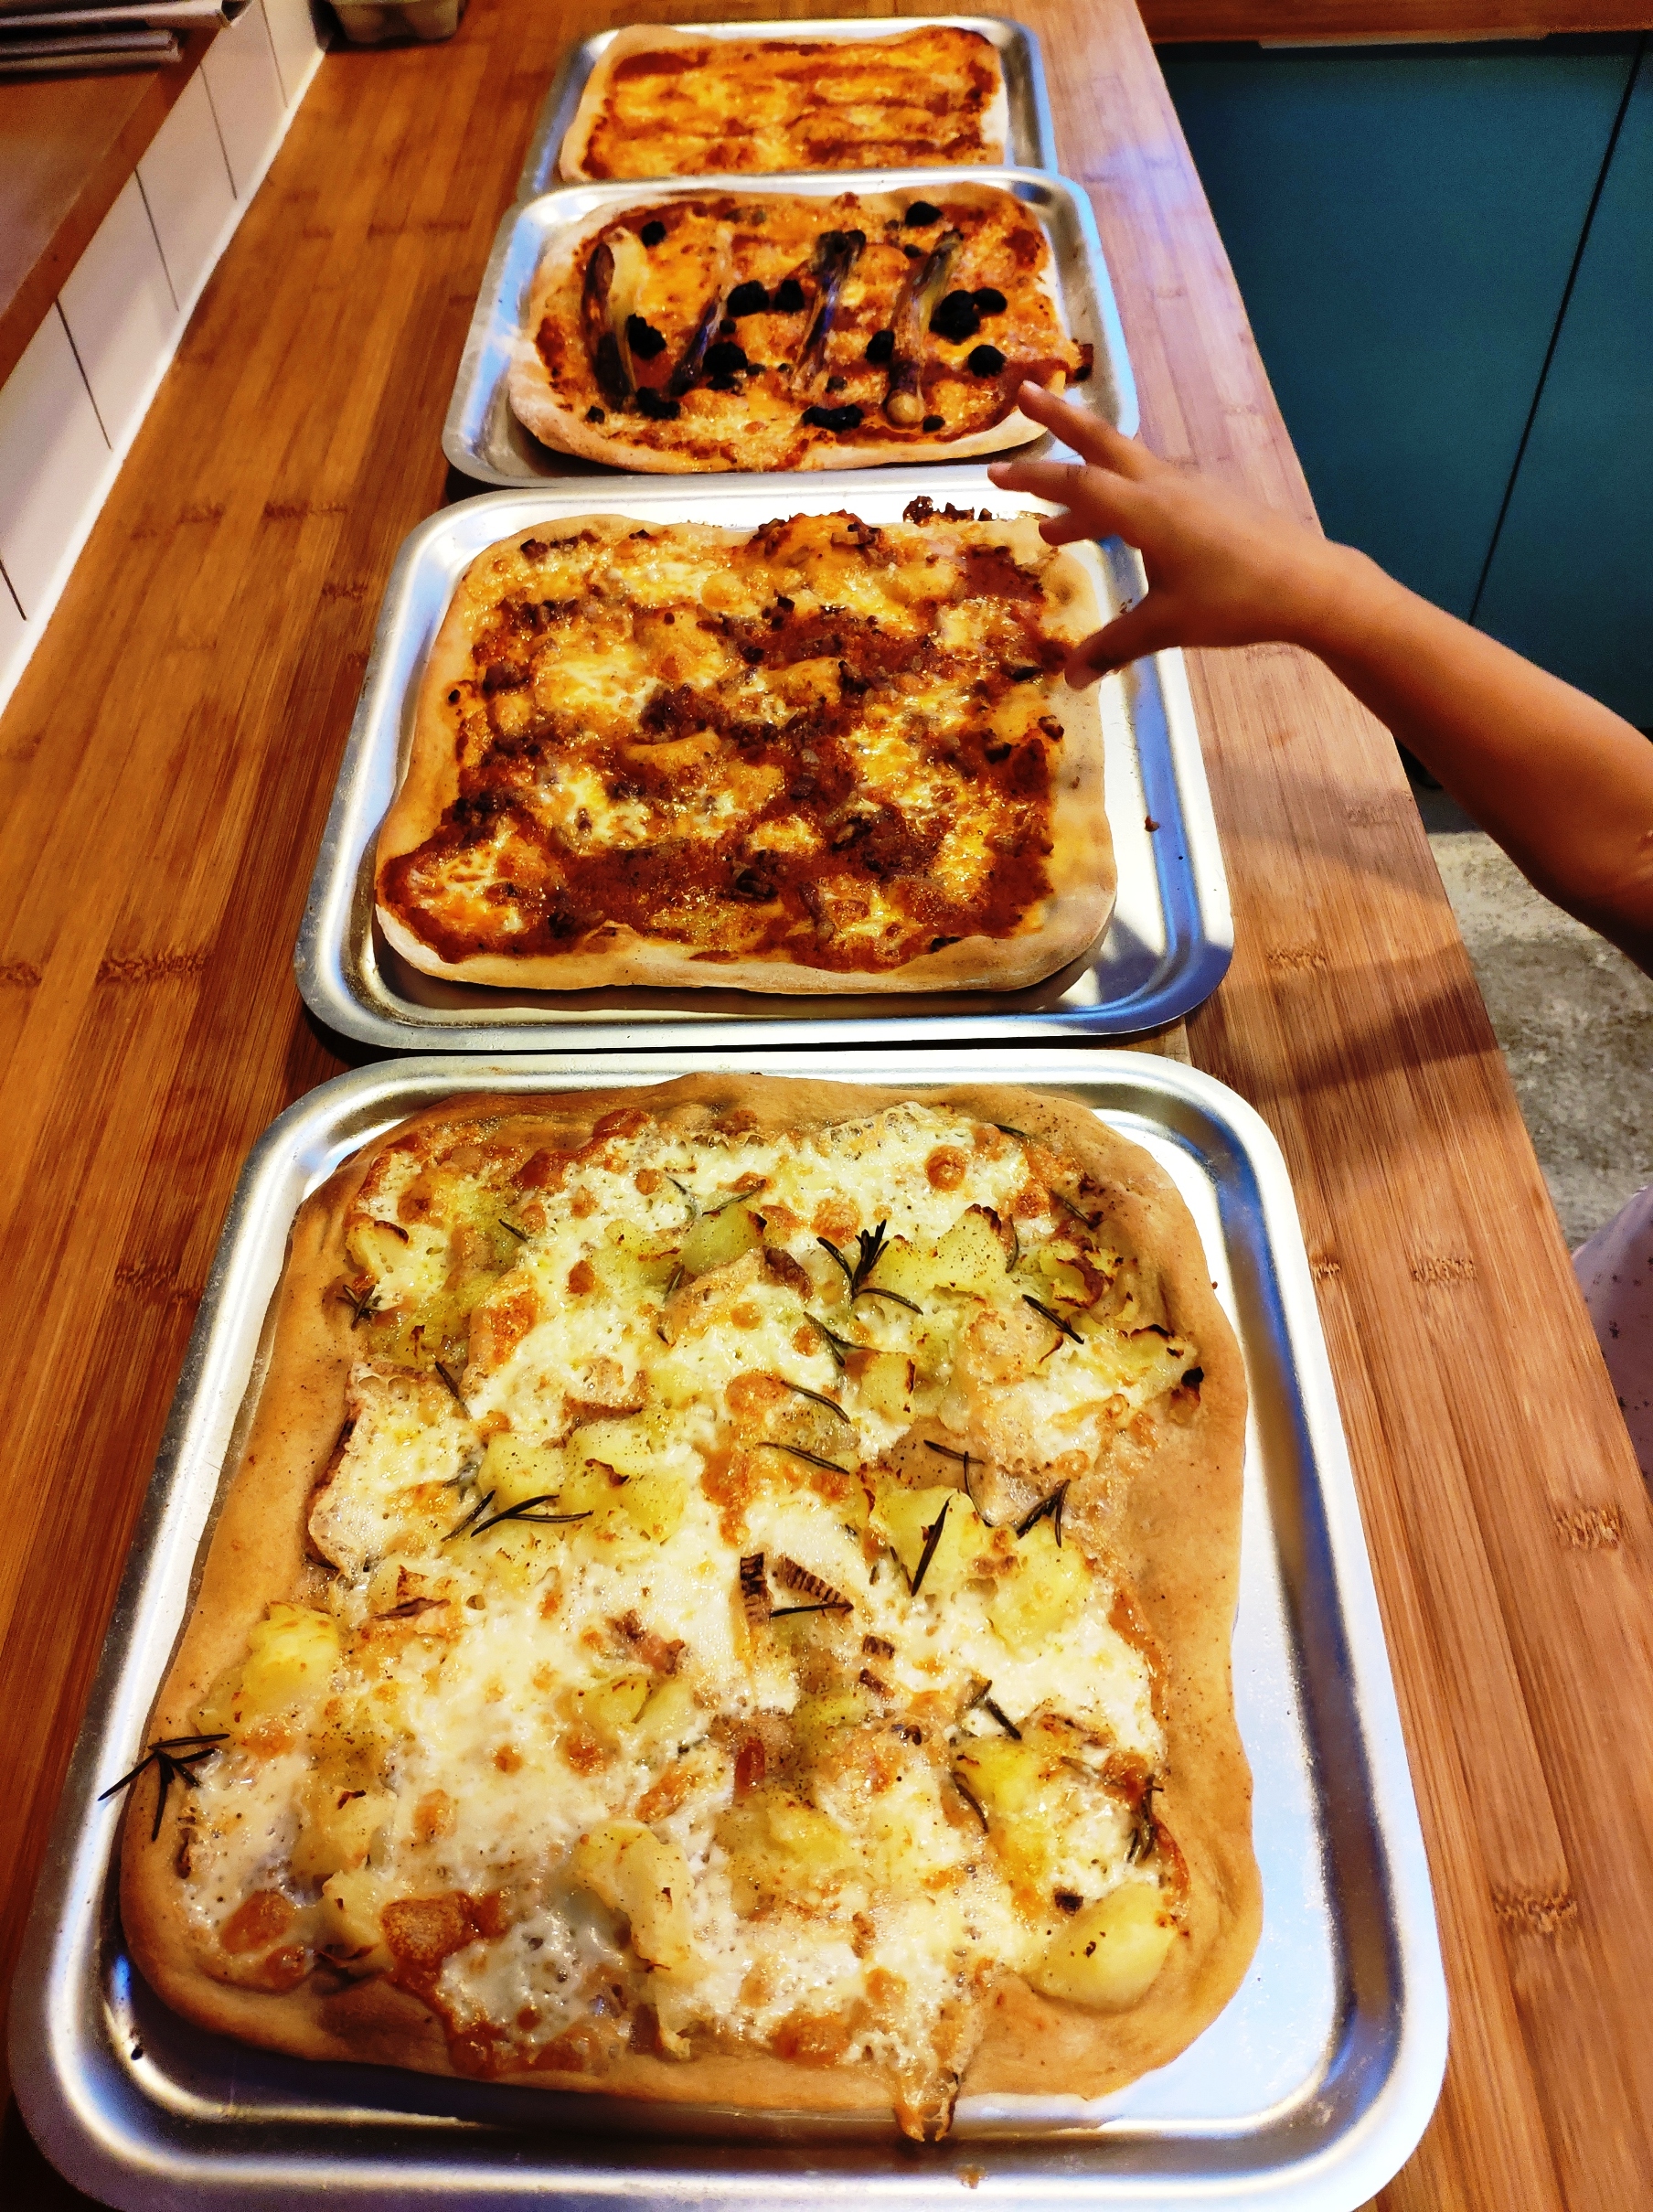
This year, I had another thought – wild garlic focaccia. As with every idea, it’s already out there on the internet, but I just used my basic focaccia recipe and added some wild garlic whizzed up in a food processor.

What we know as focaccia in Britain is more specifically Genoese focaccia, a white, somewhat soft tray baked bread containing a decent amount of olive oil. They bake it with salt, olives or herbs like rosemary. I’ve asked one Italian friend if they eat Allium ursinum over there, and he says yes, but not often. Which surprises me, as they have a strong foraging culture there. Even our local market in Rome would sell a misticanza2 of mixed foraged greens – foraged weeds – including dandelion leaves and whatnot. In the 1960 film Two Women / La ciociara, starring Sophia Loren as a shopkeeper who flees WW2 Rome to her native village in the mountains with her daughter, there’s a scene where the villagers are foraging the fields for any misticanza, any greens they can eat to keep starvation at bay.

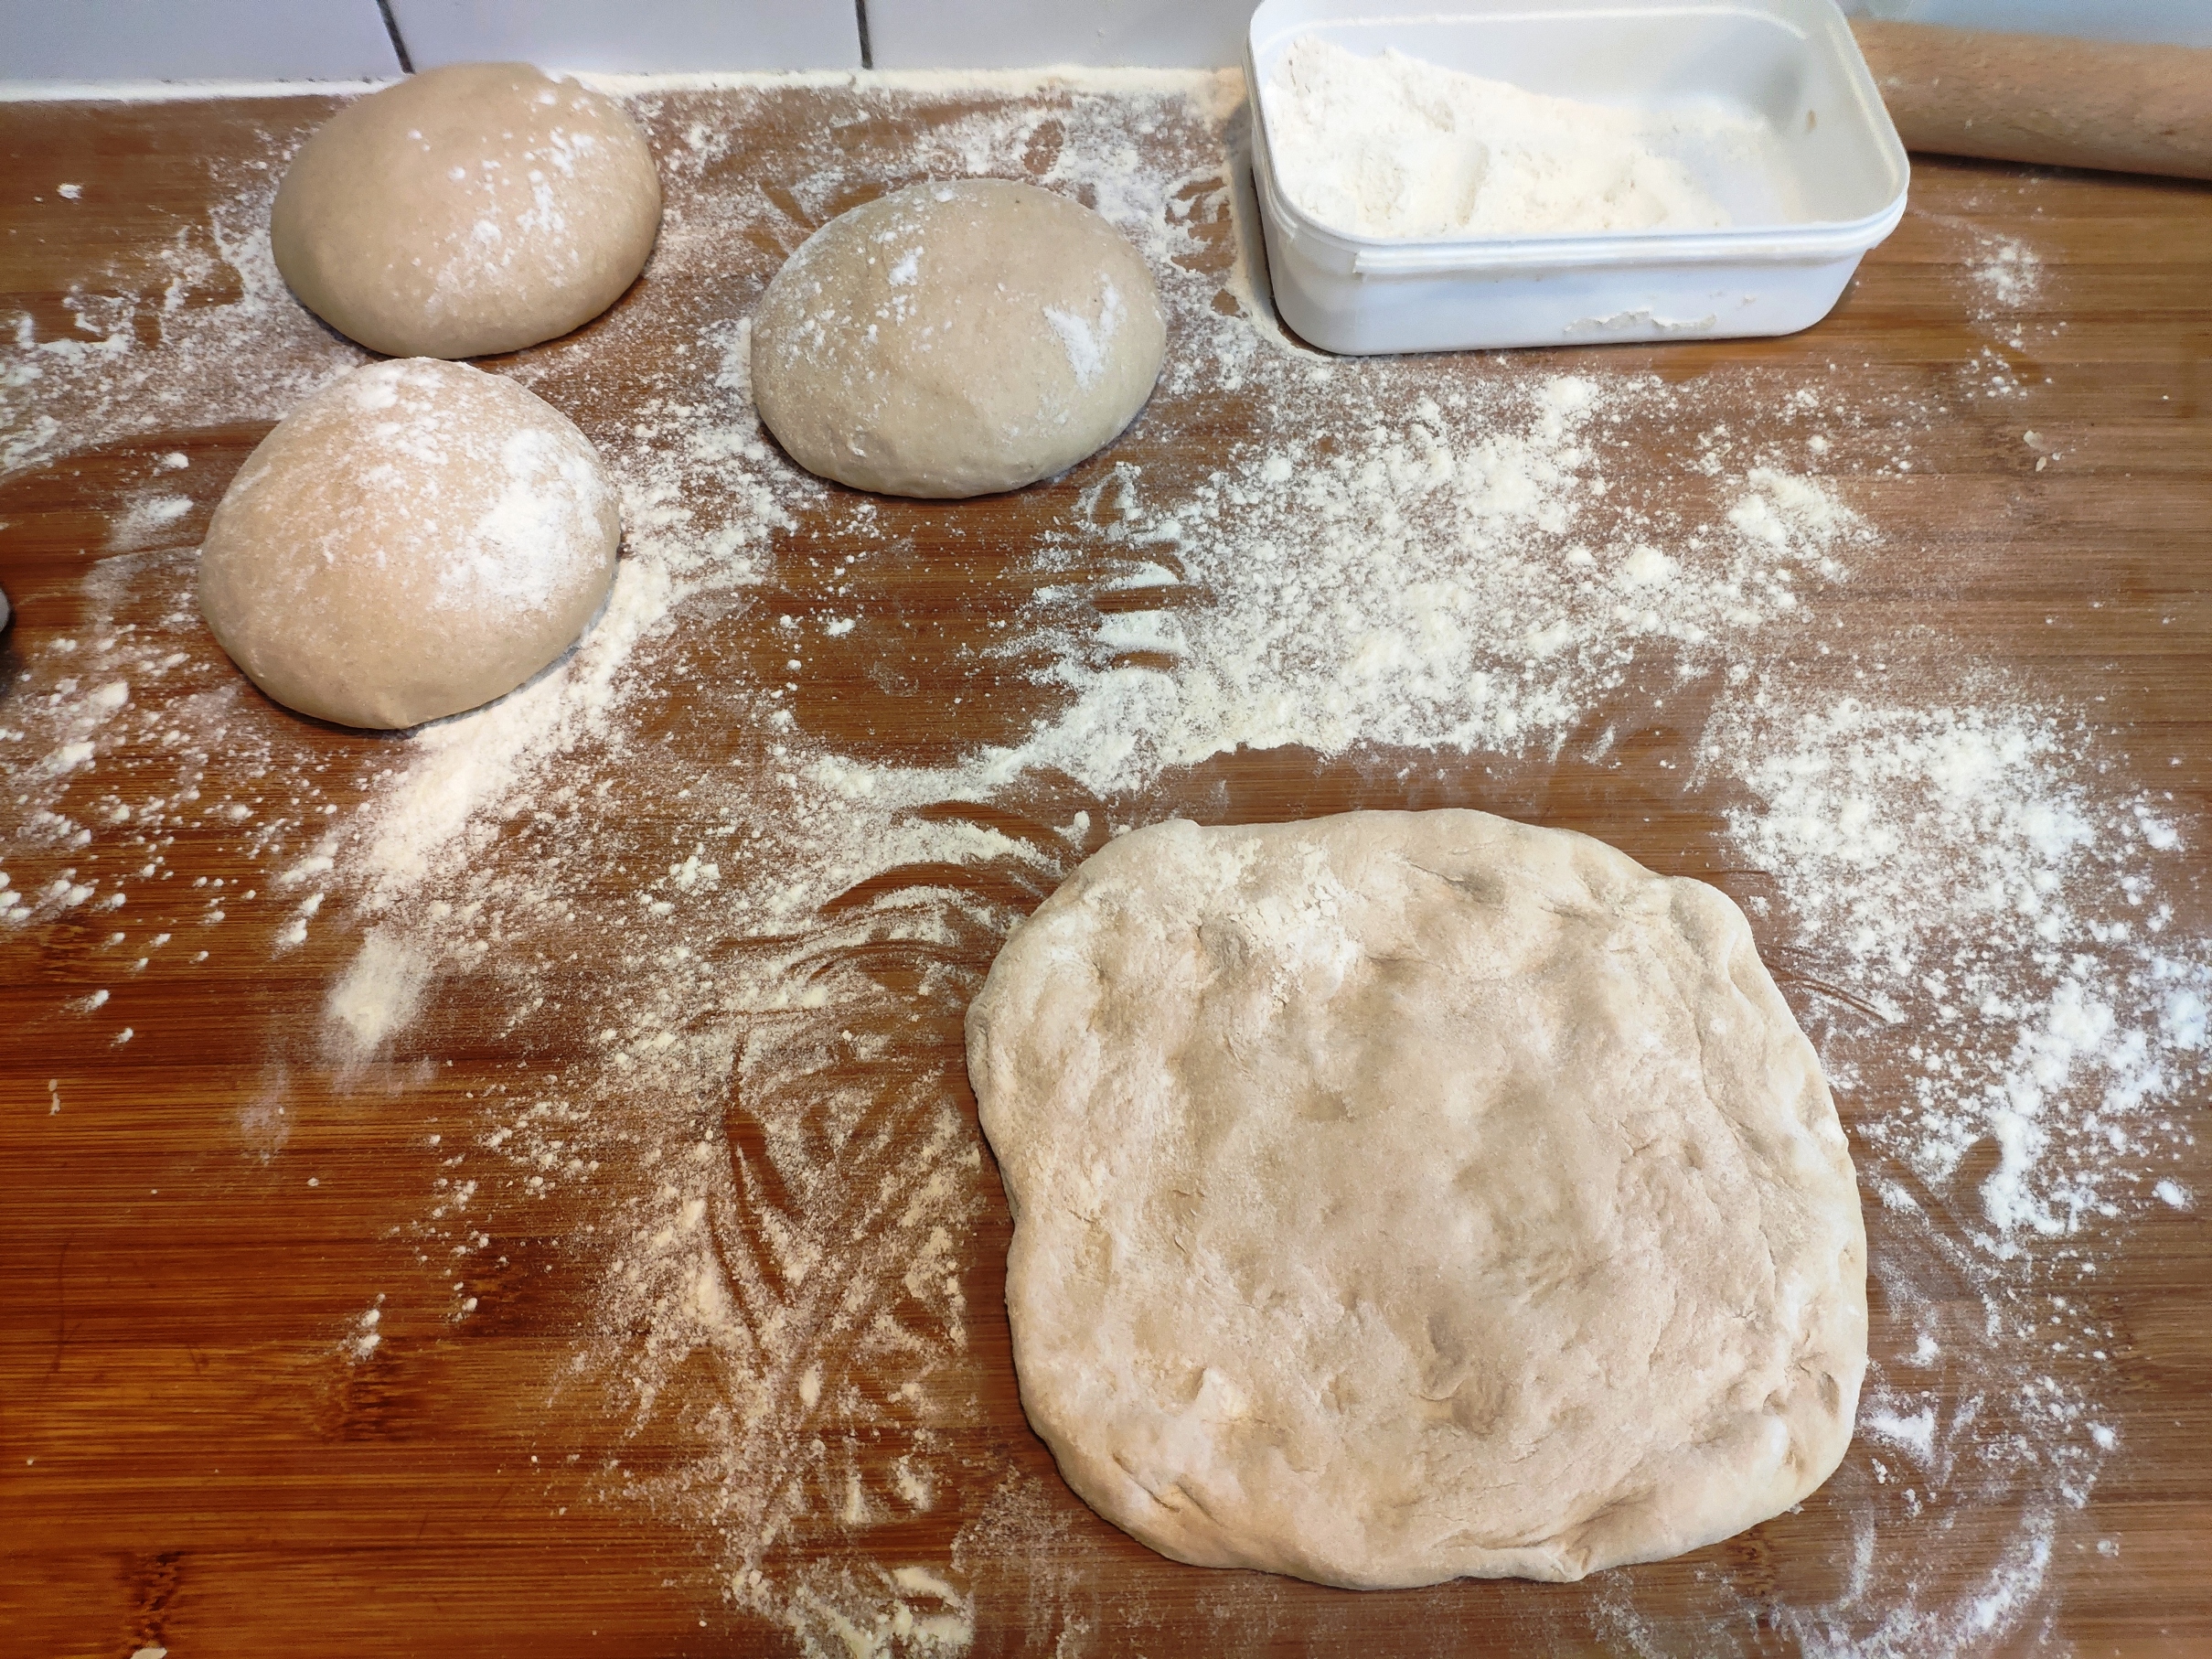
Anyway, here’s the recipe. Use the basic recipe – with whatever editions you like – at other times of the year when wild garlic isn’t available.

Makes one large, 1kg, loaf

Ingredients
360g water, tepid
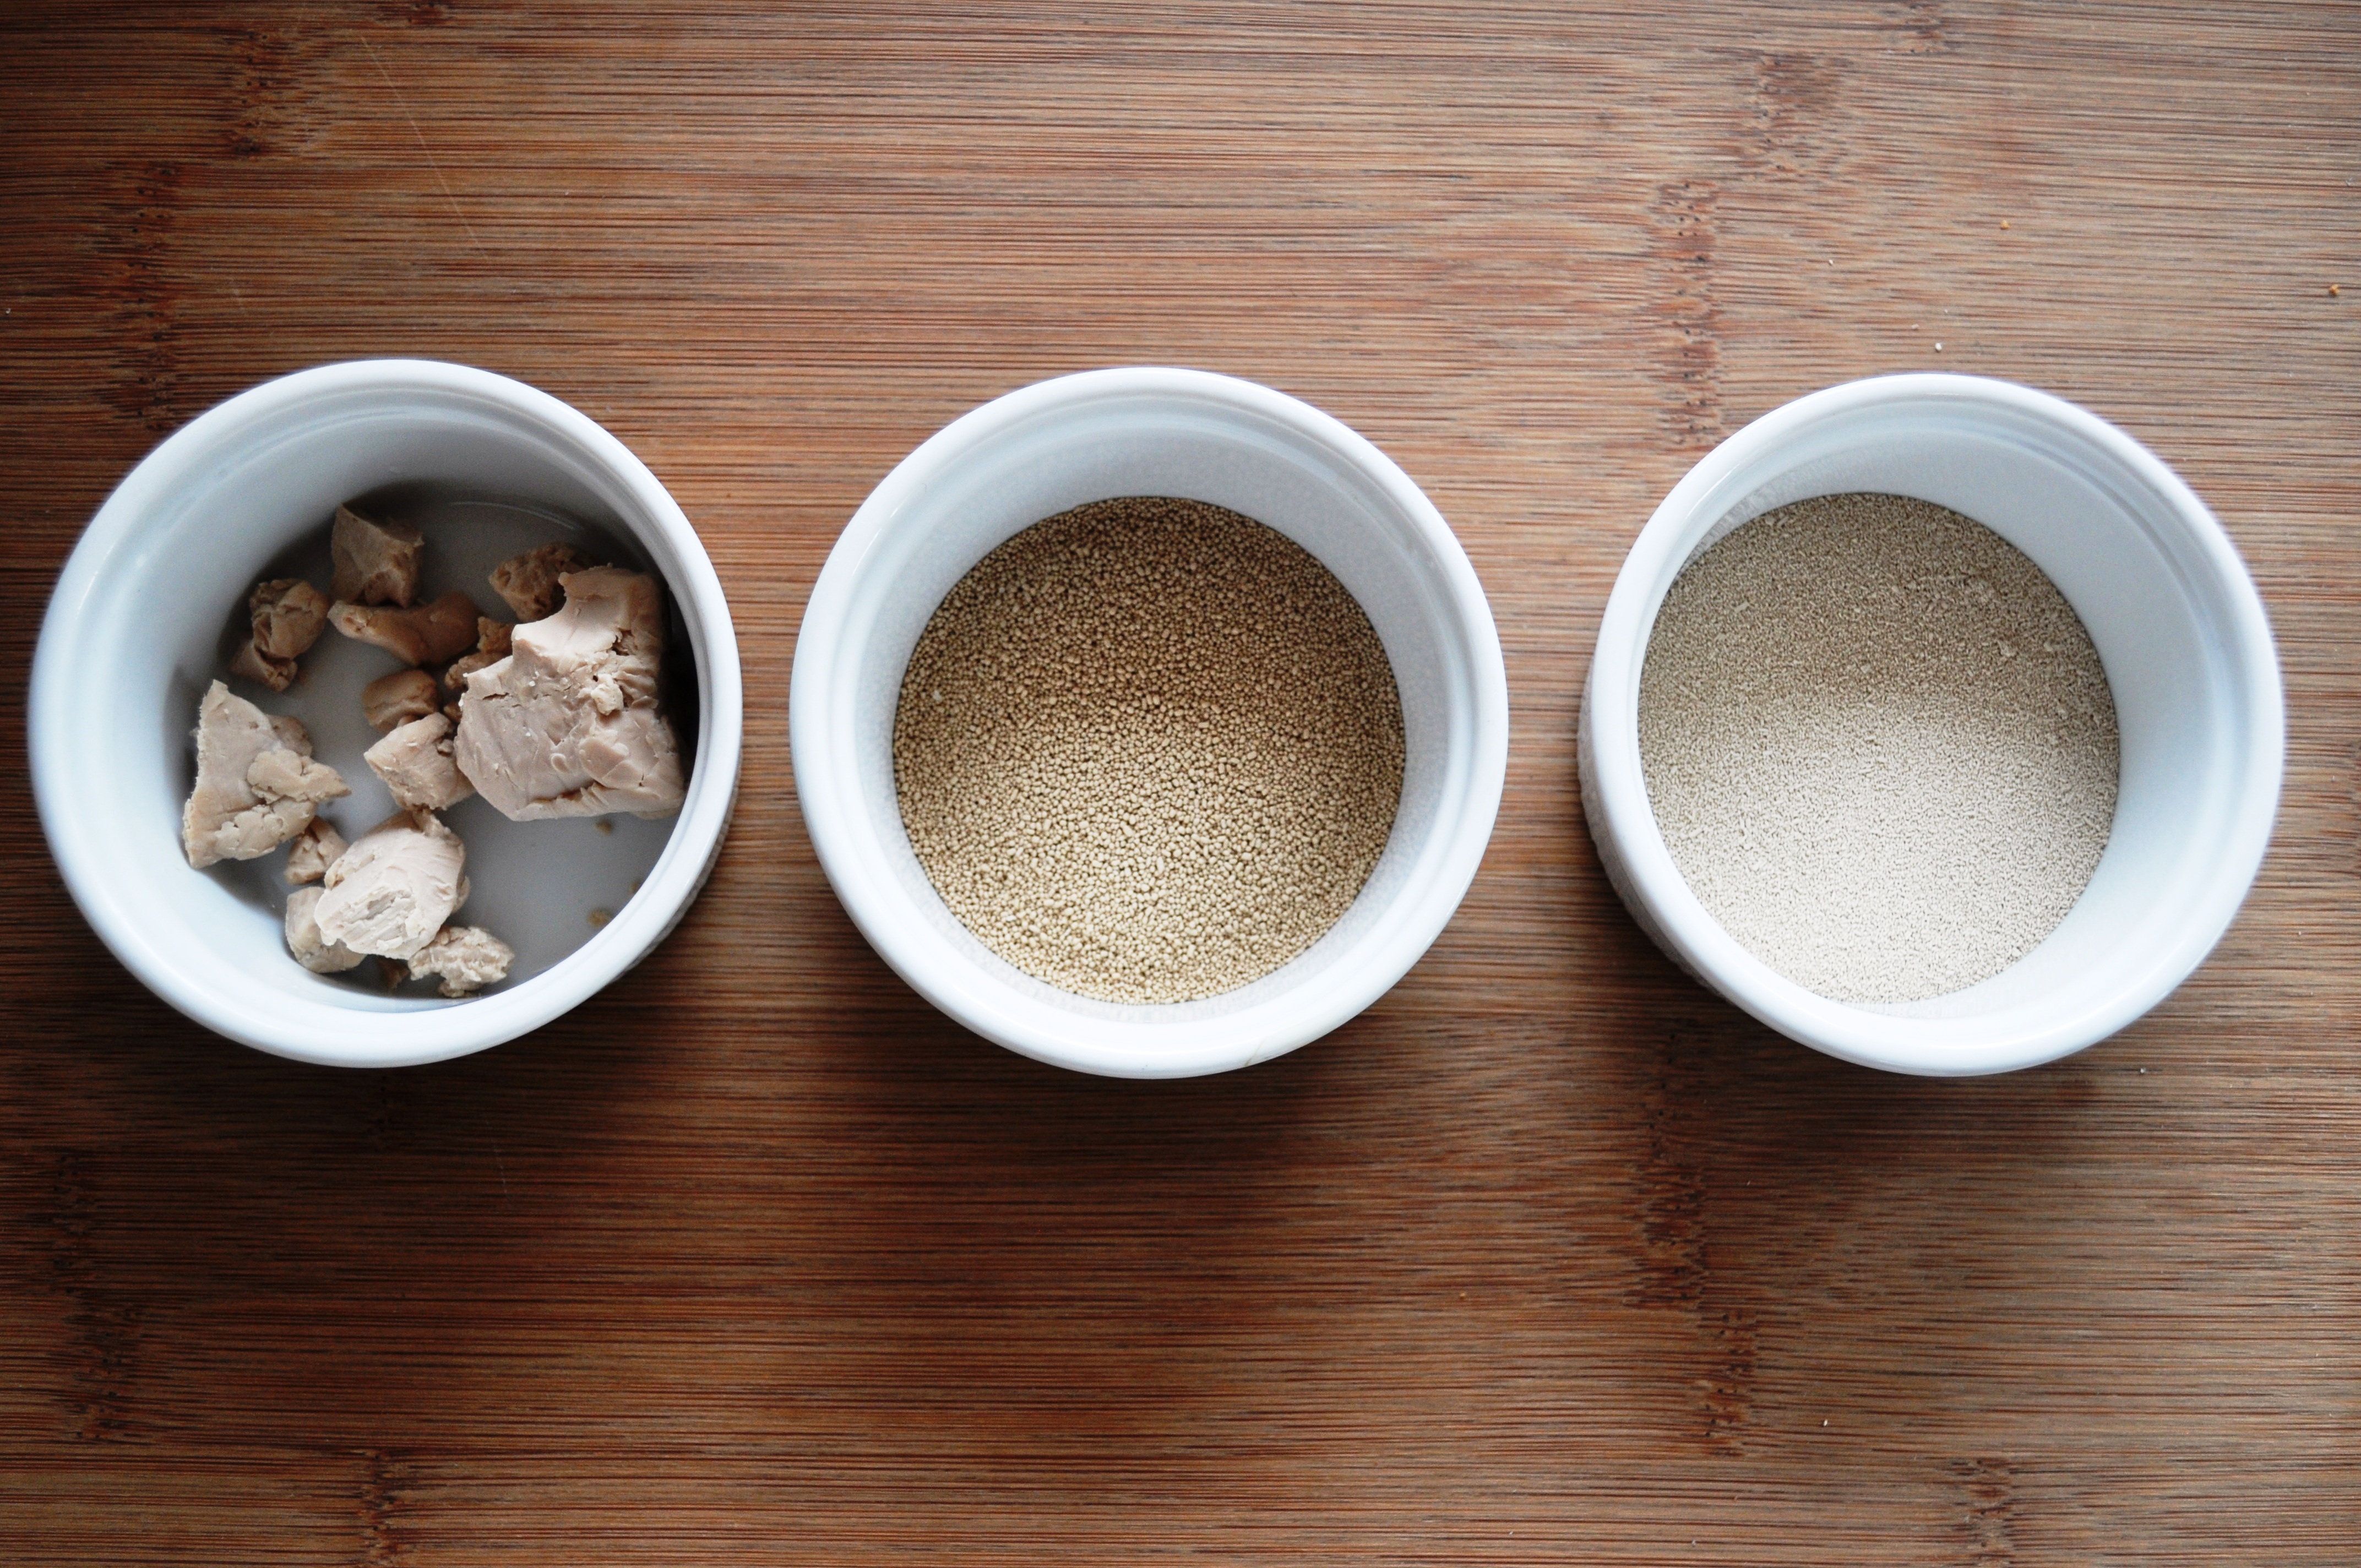
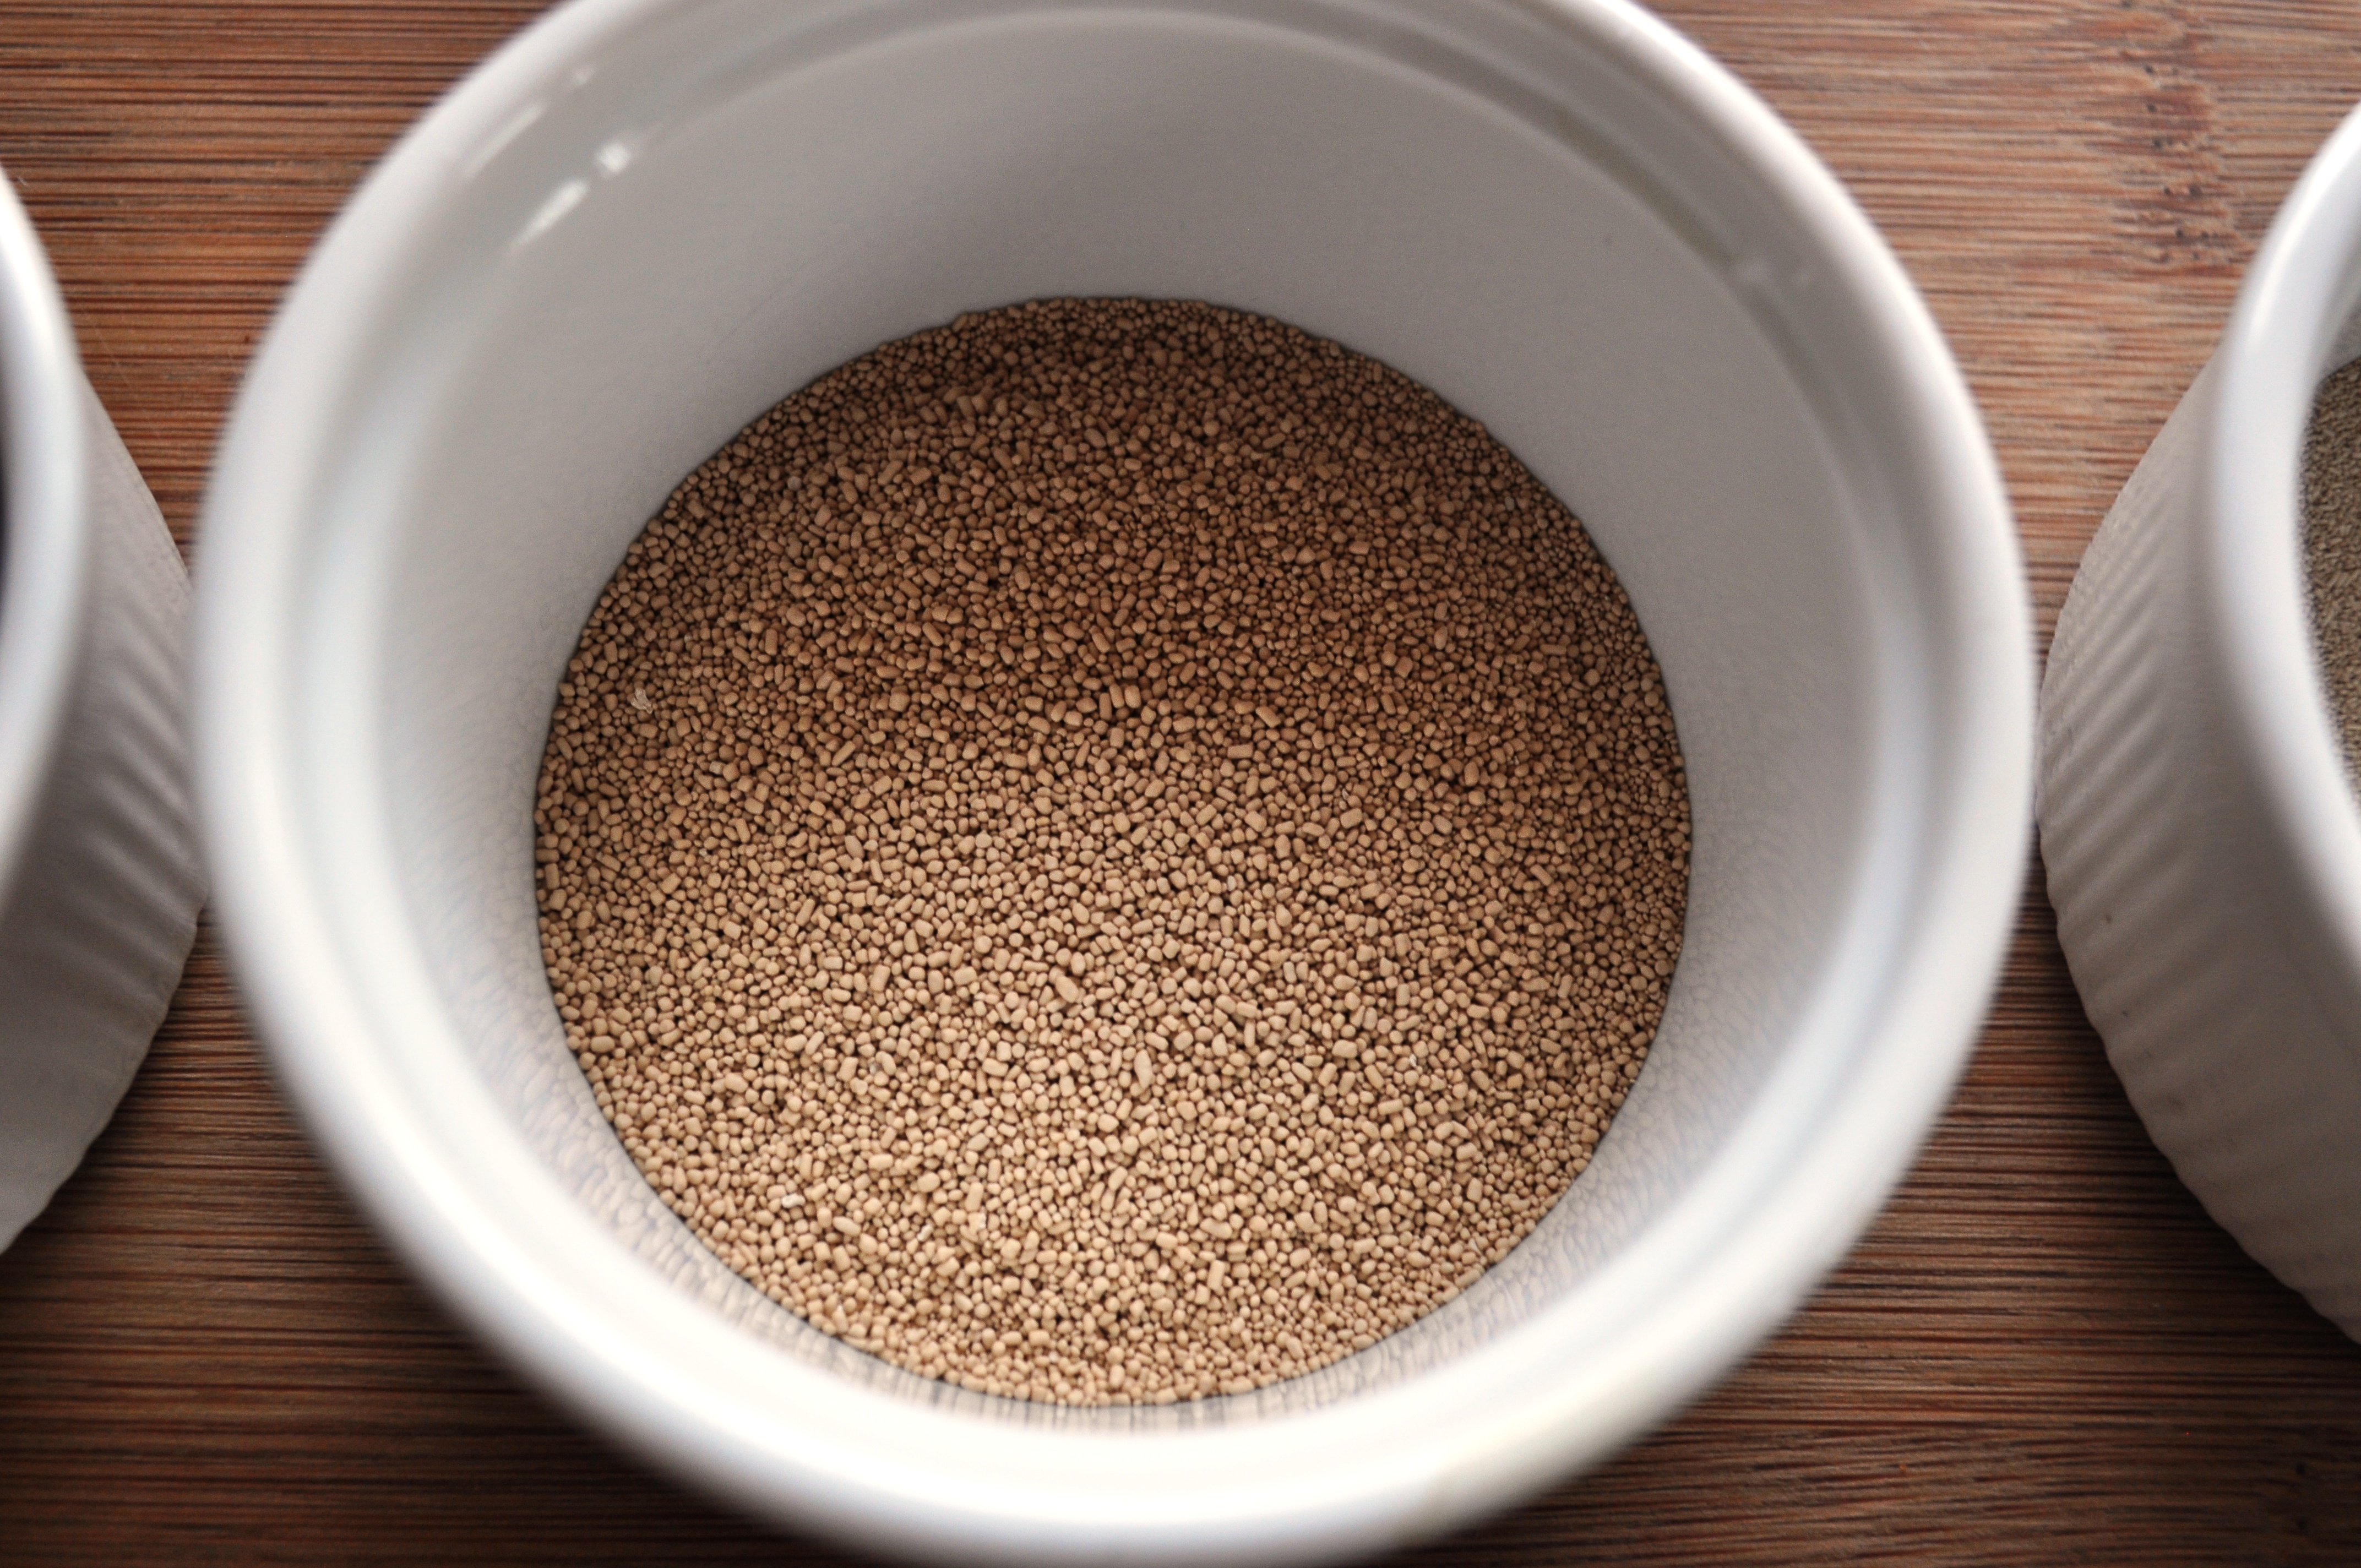
6g active dried yeast or 12g fresh yeast
585g strong white bread flour
9g fine sea salt
60g extra virgin olive oil

For the wild garlic paste. (I’m not going to be my usual precise self for this bit, as it’s flexible.)
About 80g wild garlic, a nice big handful
A few glugs of extra virgin olive oil
Good pinch of coarse sea salt
Add some chili flakes if you like some heat

Plus some more extra virgin olive oil

Method
1. Put the water in a mixing bowl (or indeed the bowl of a mixer, if you prefer) and add the yeast. Leave it to froth up.
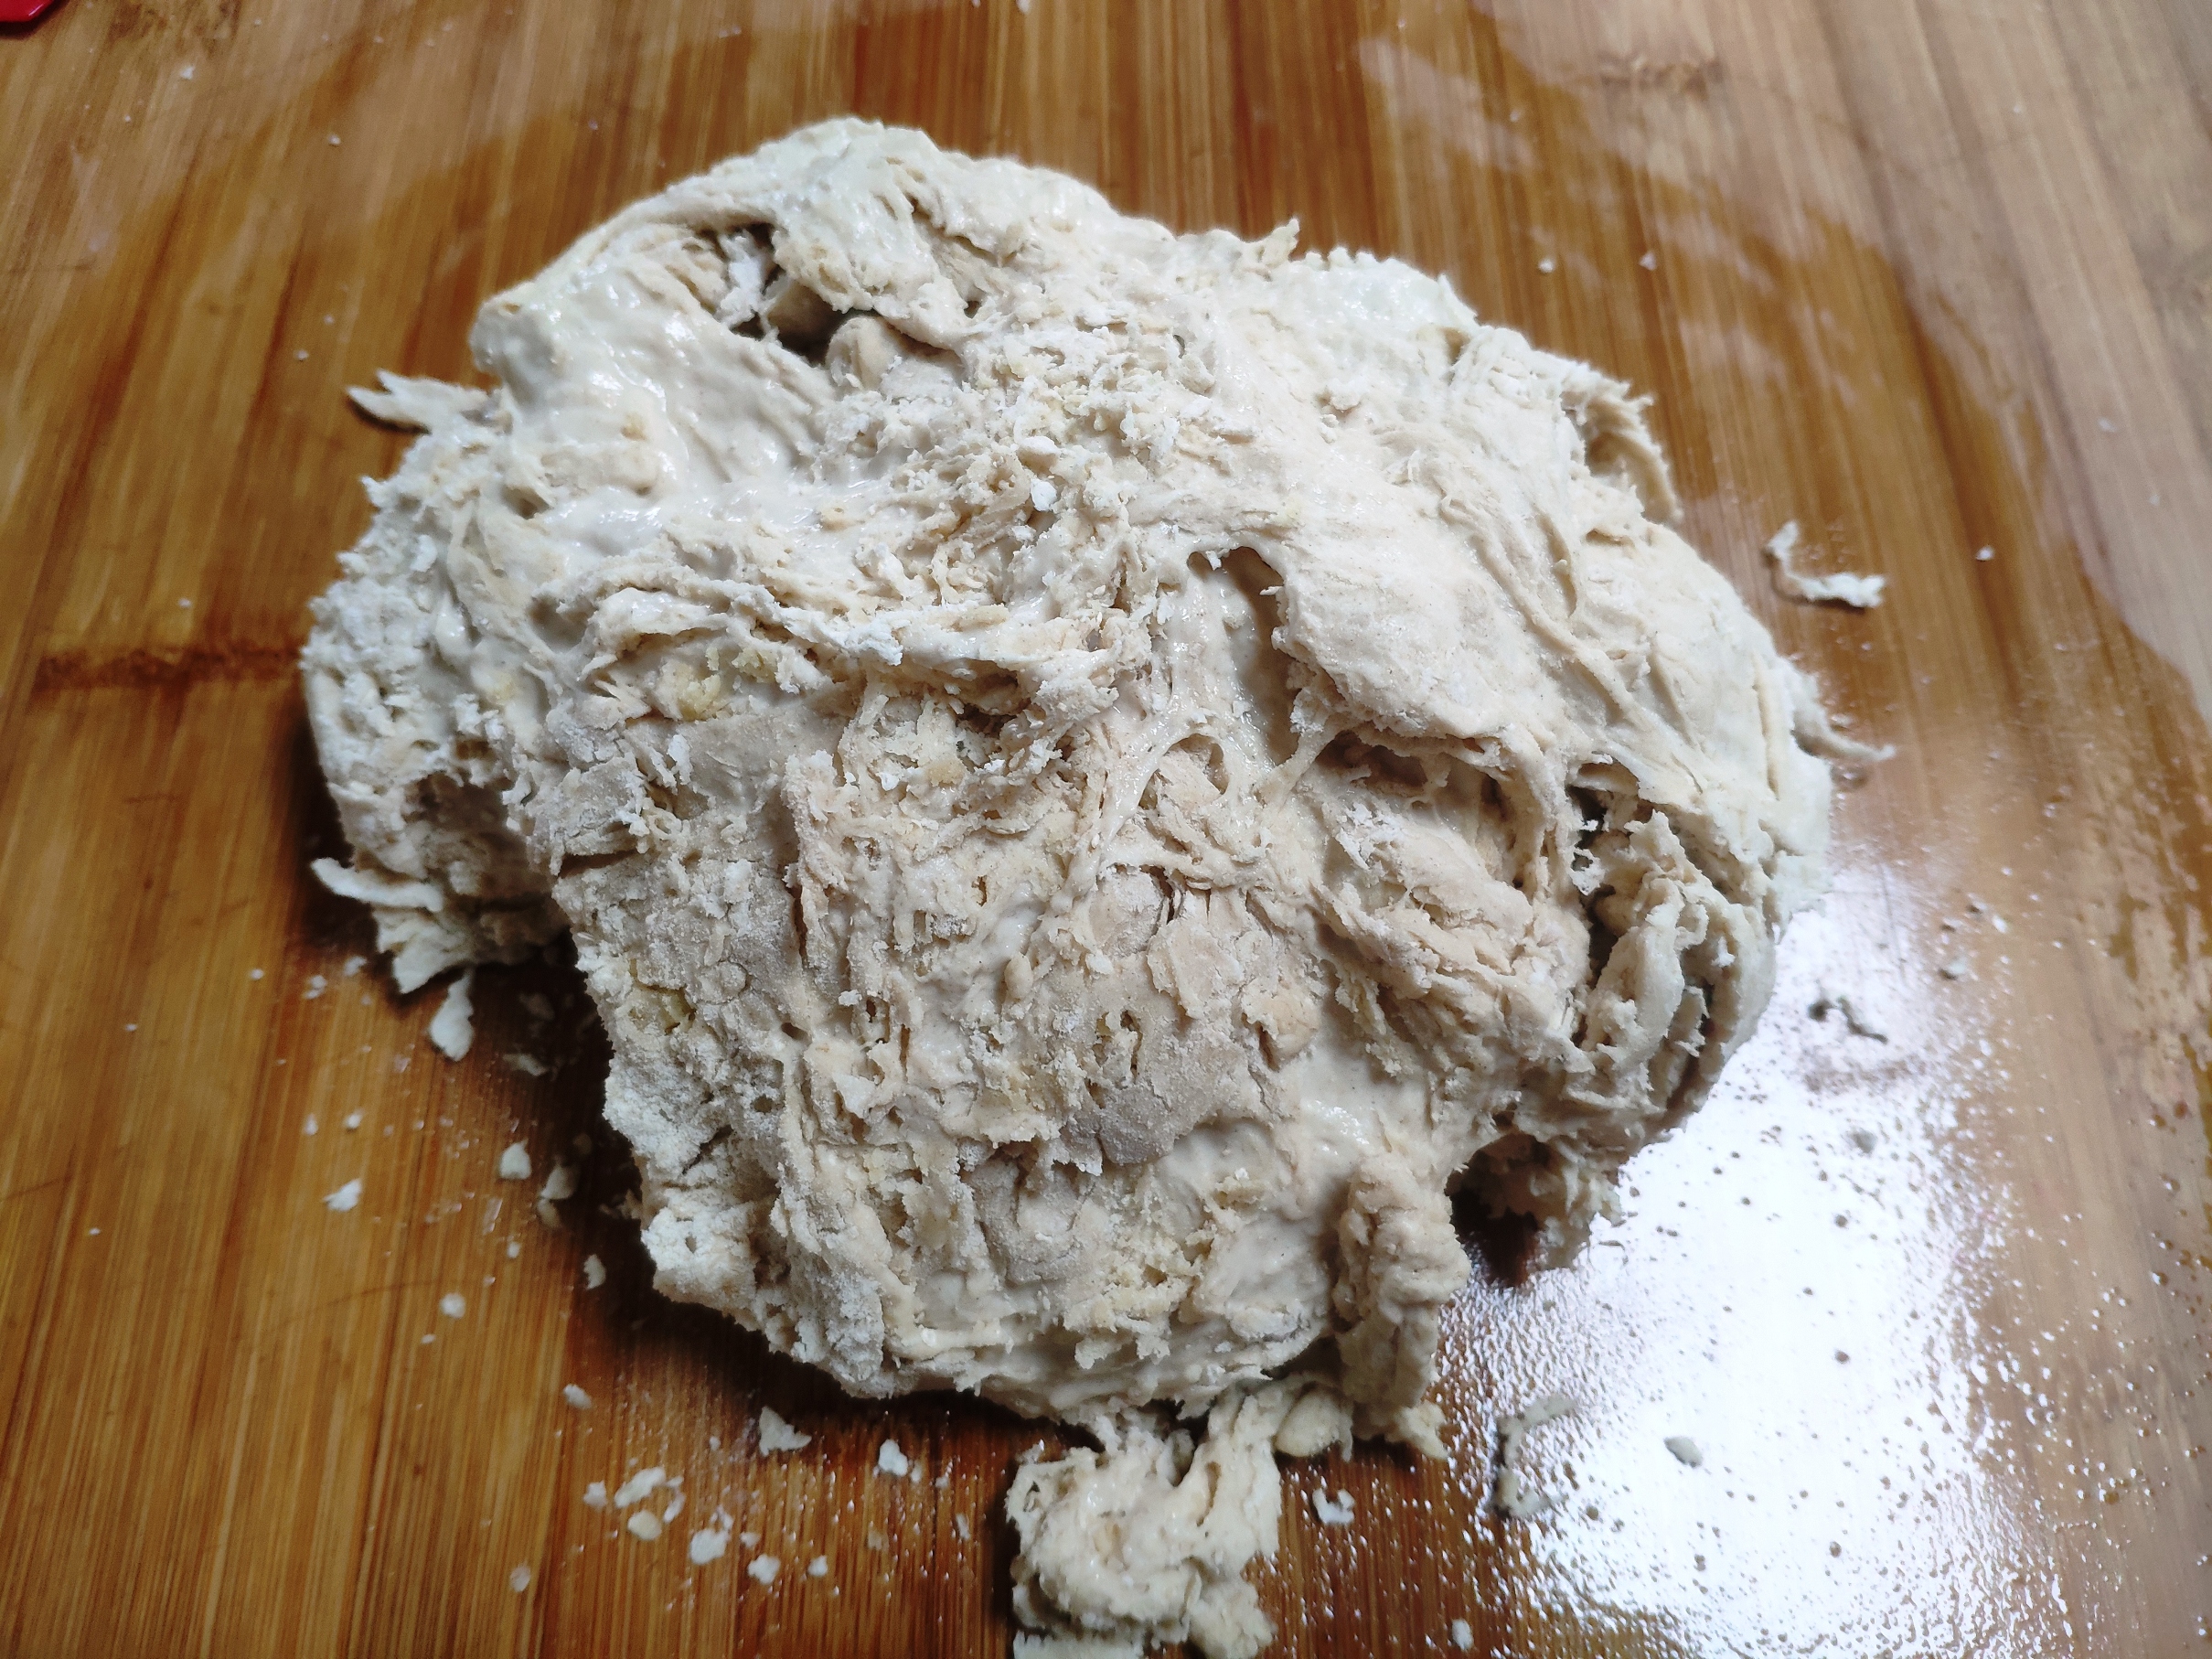
2. Add the flour, salt and olive oil and bring to a dough.
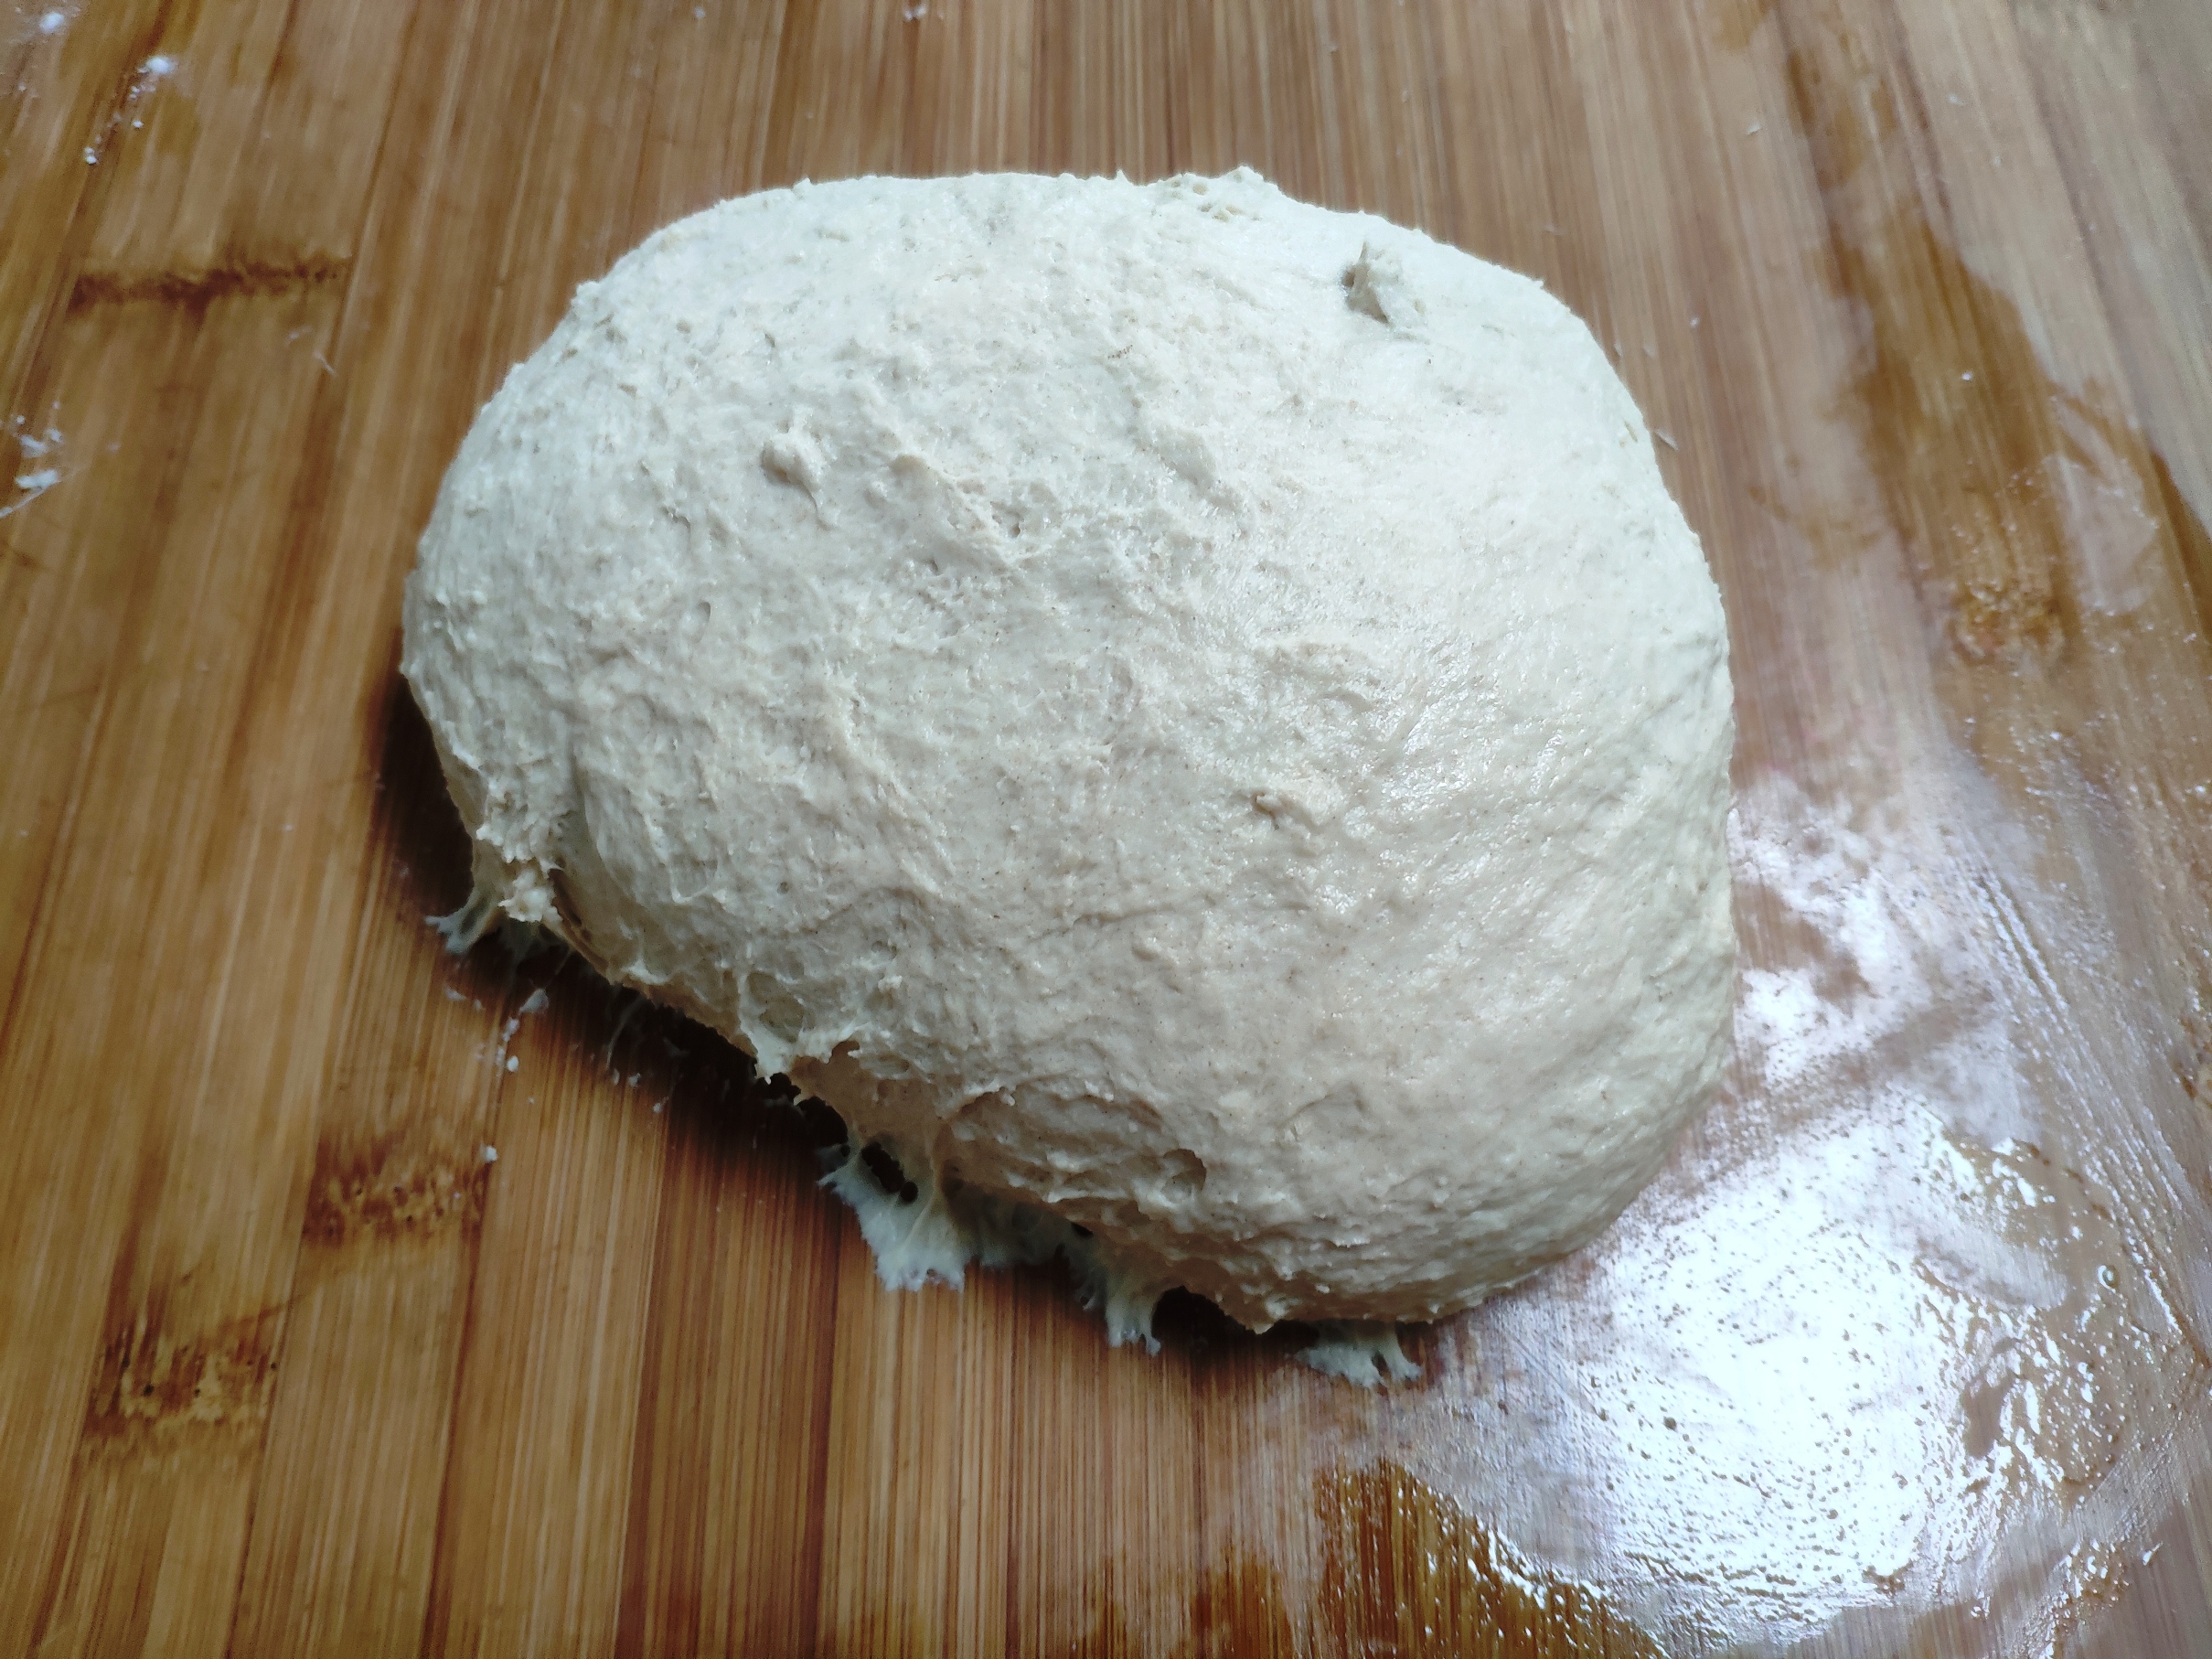
3. Knead until smooth, by hand or in a mixer.
4. Leave 10 minutes or so and give it another quick knead.
5. Leave half an hour, then stretch into a rectangle and fold into thirds.
6. Leave the dough to prove until doubled in size.
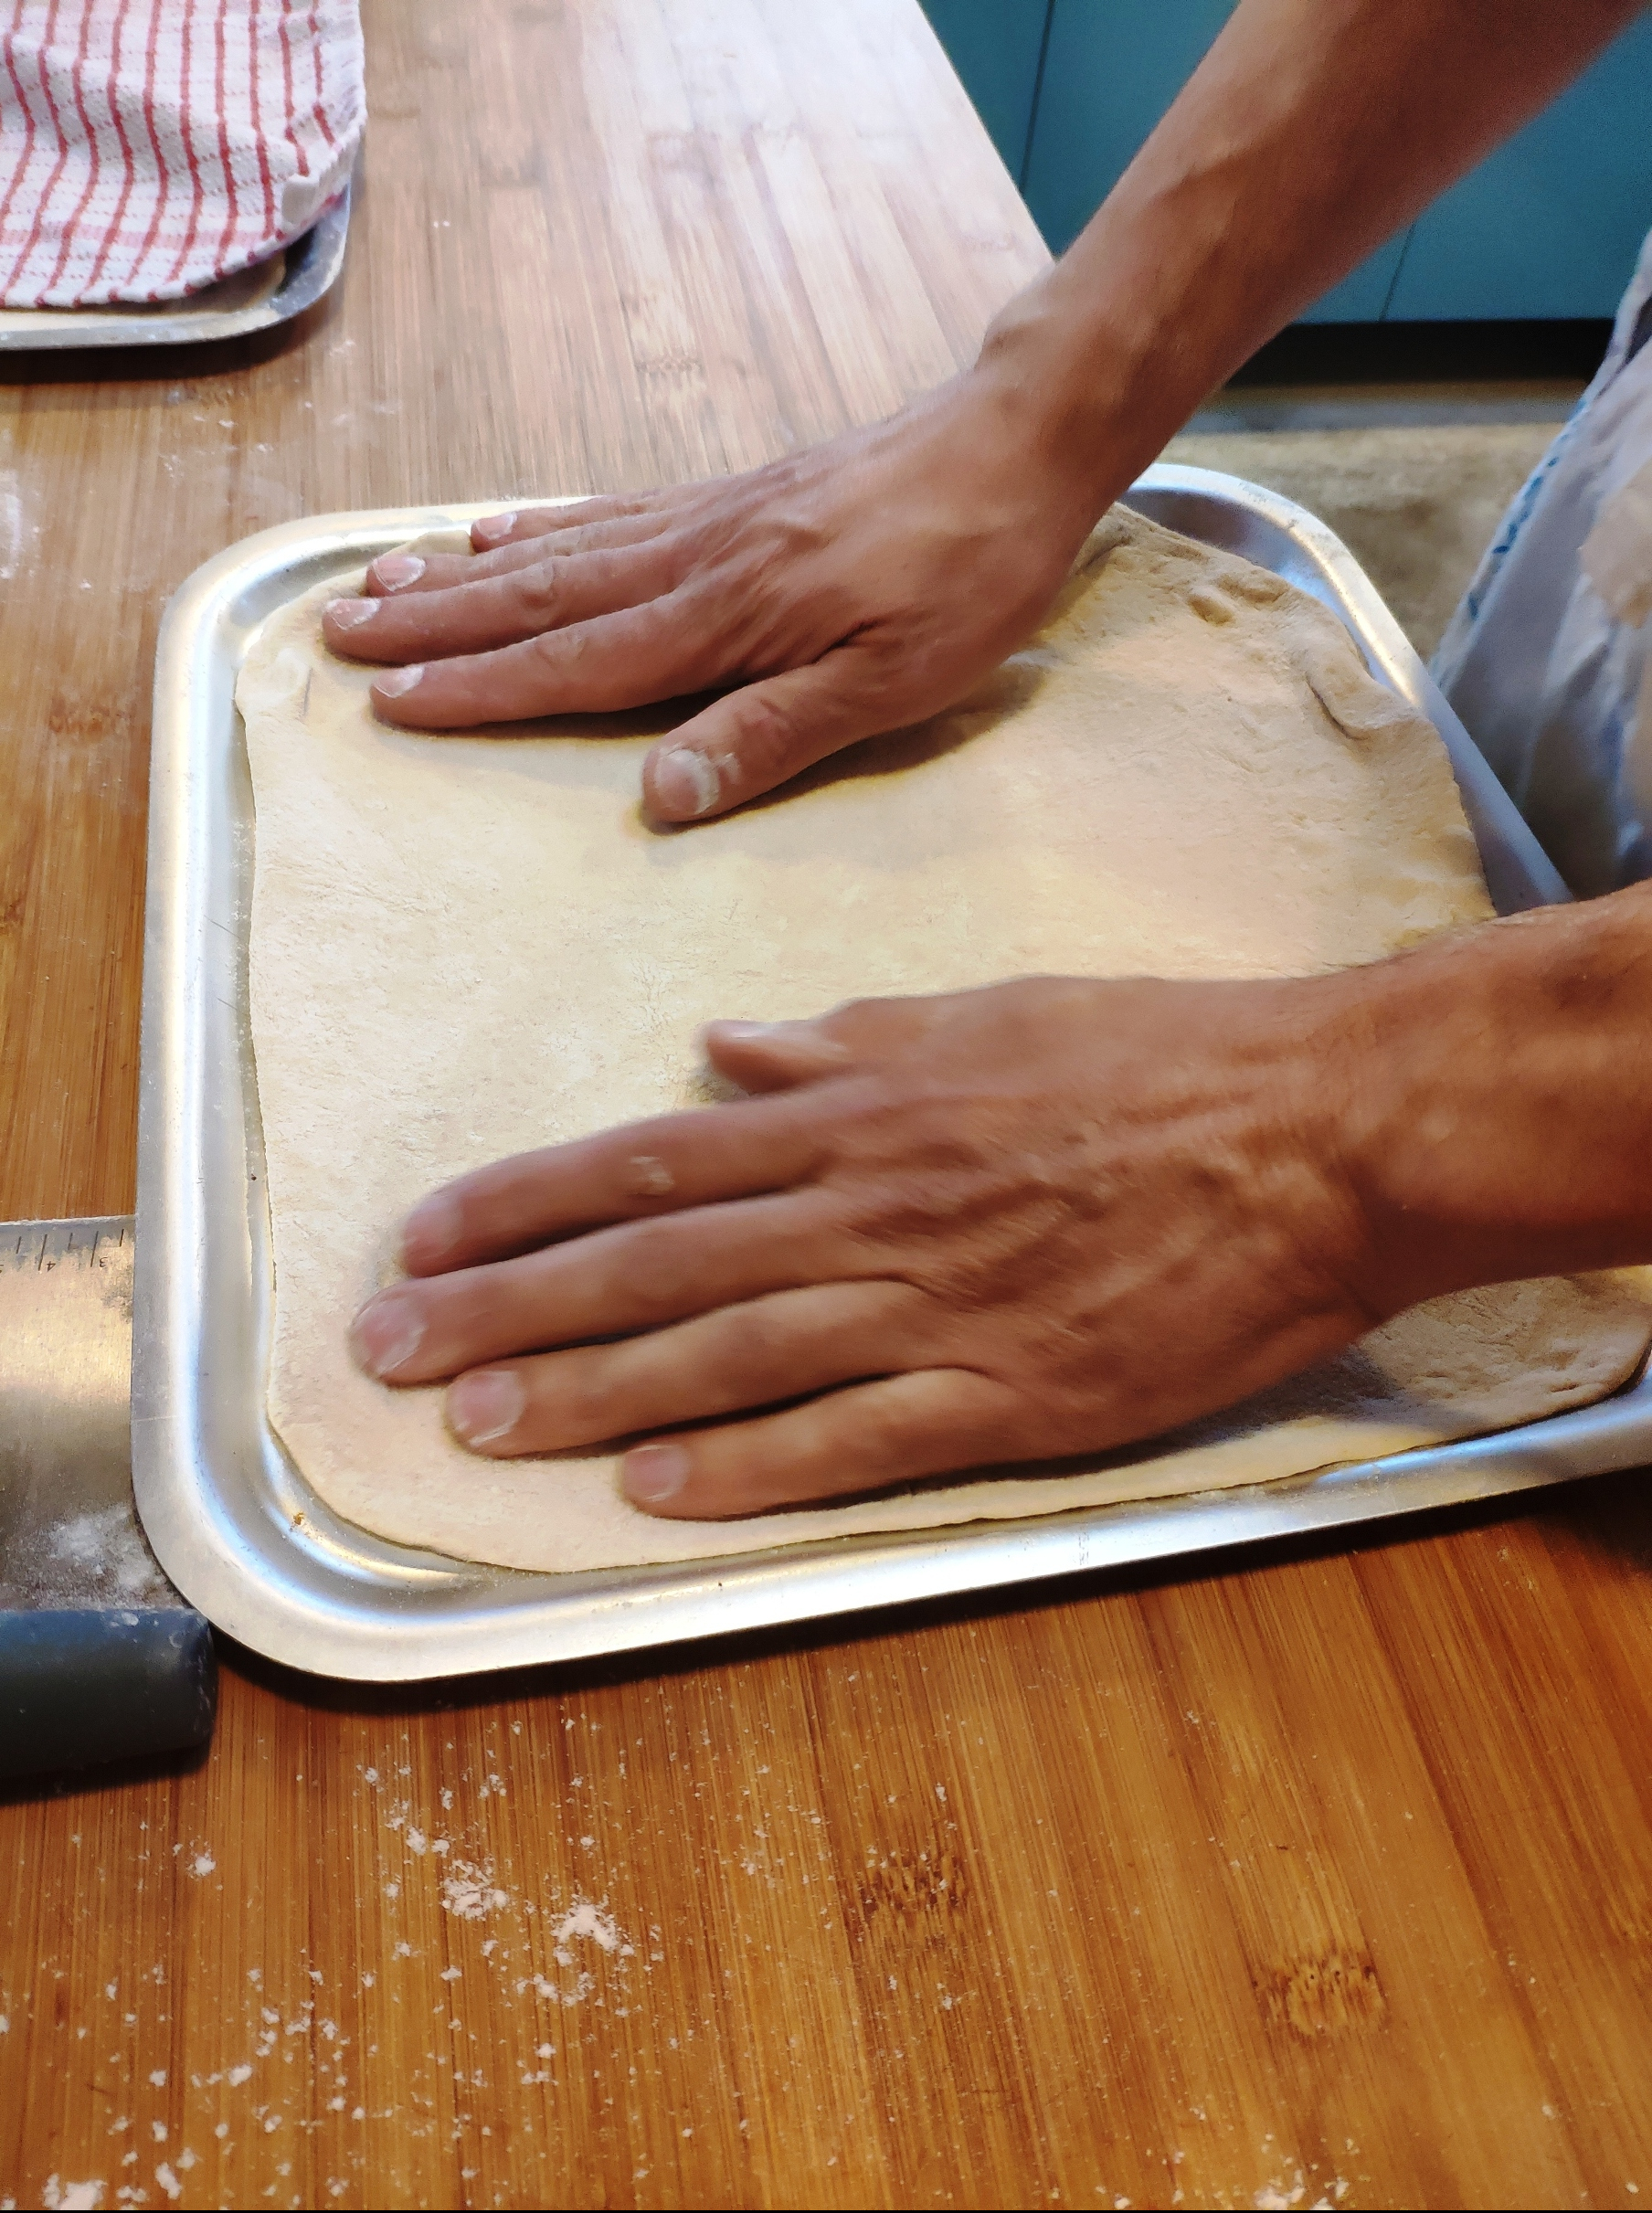
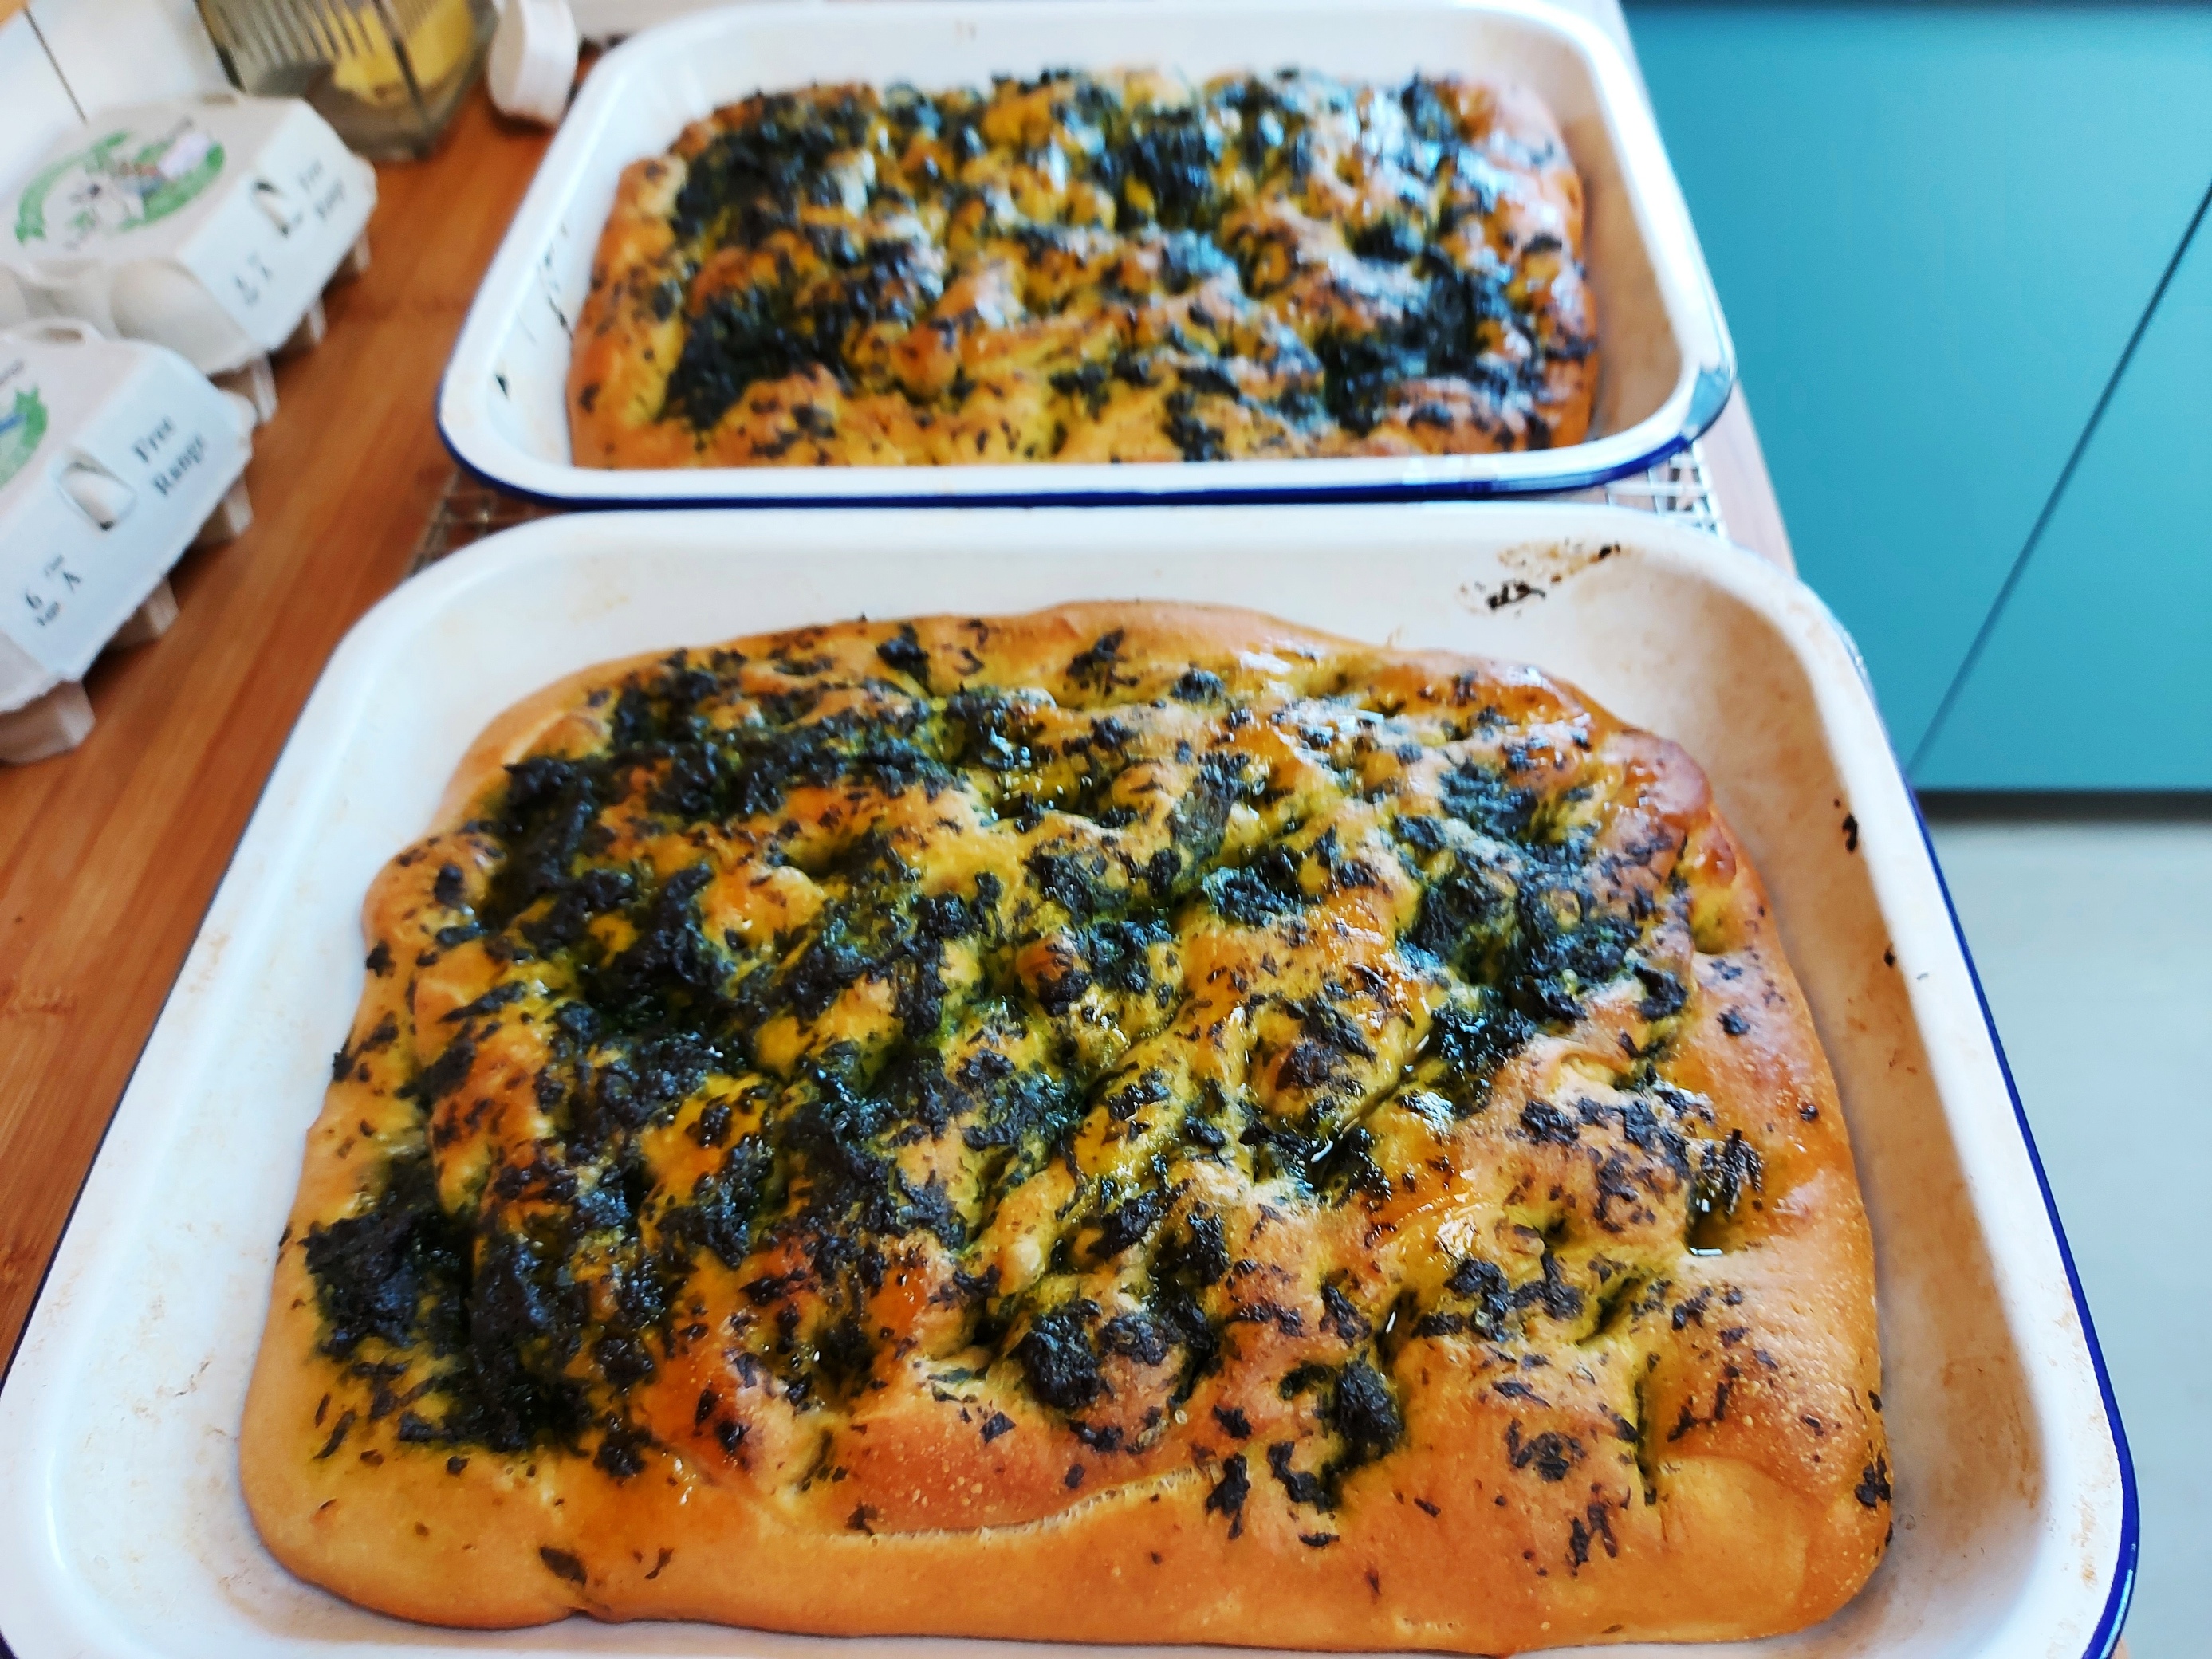
7. Stretch the dough out and put in an oiled baking tray. I use a rectangular enamel one that is 25x35cm, 5cm deep.
8. Leave the dough to rest and prove a bit more, for about 15 minutes.
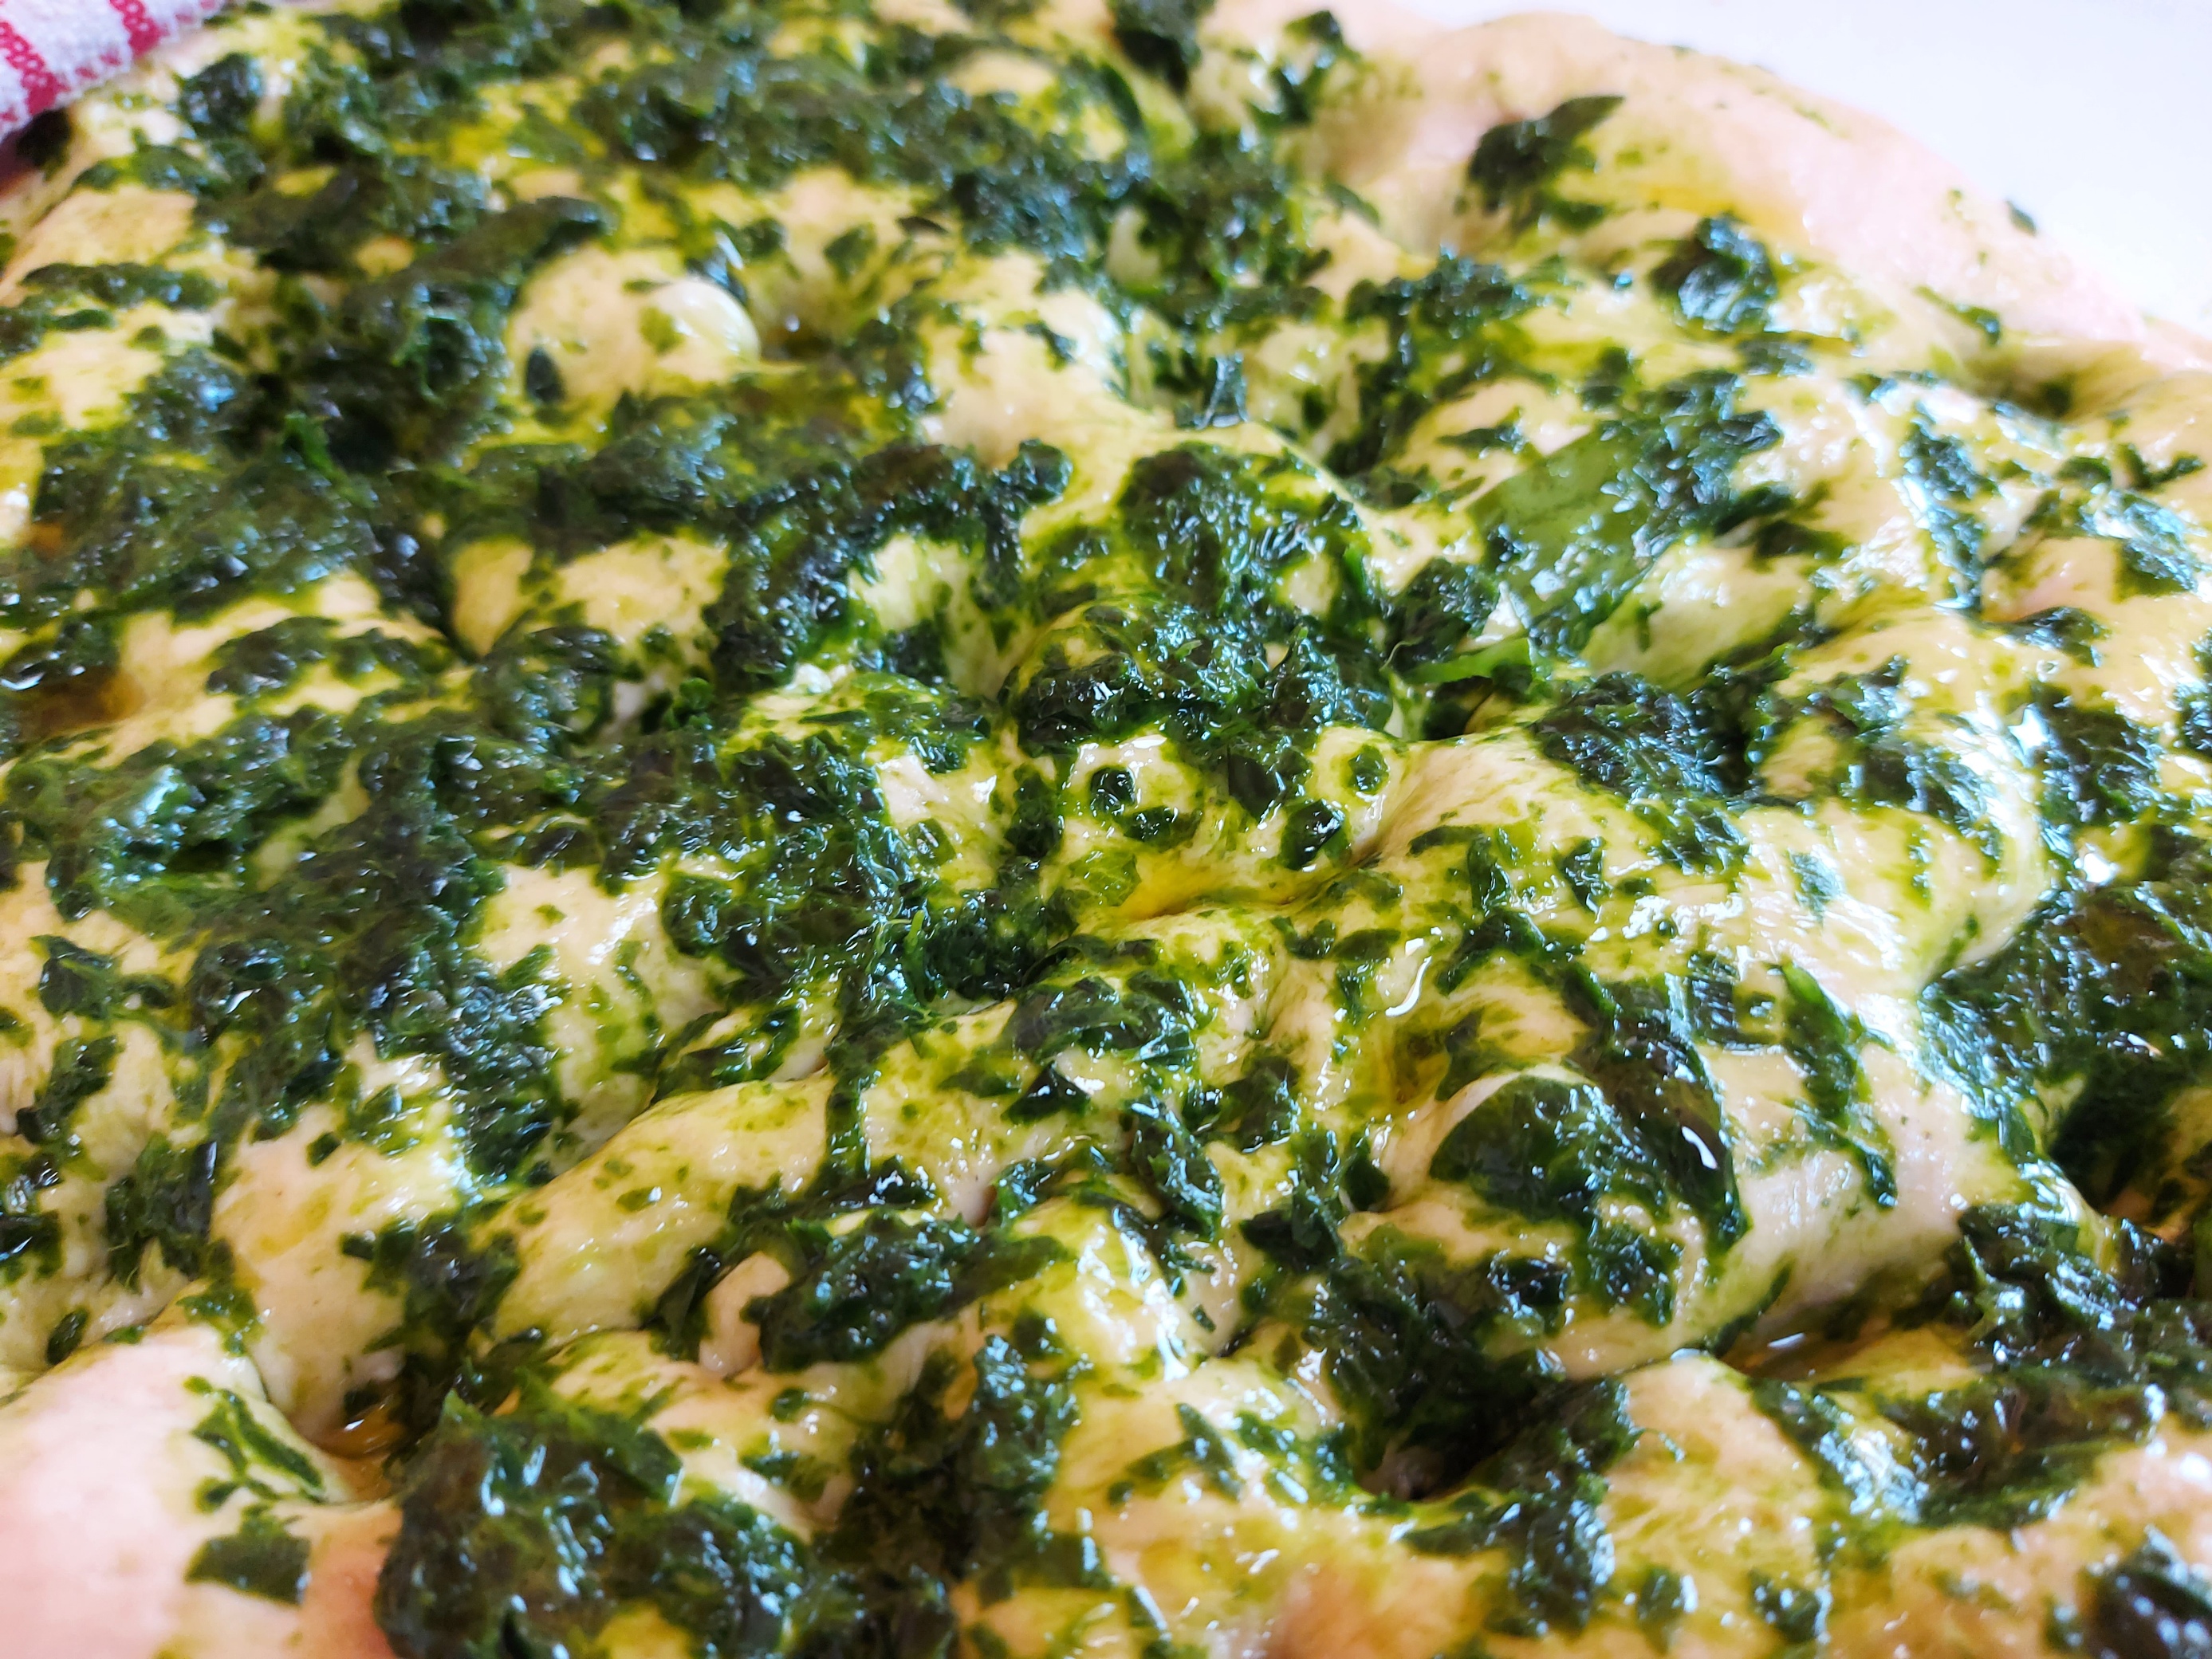
9. Make the wild garlic paste in a food processor – just squash the leaves in, with a few glugs of extra virgin olive oil and a good pinch coarse sea salt. Whizz it up to a coarse paste.
10. Smear the paste all over the dough, pushing in your fingertips to give the bread its distinctive cratered surface and disperse the garlic.
11. Cover and leave to prove one last time, until doubled in size.


12. Preheat your oven to 220C.
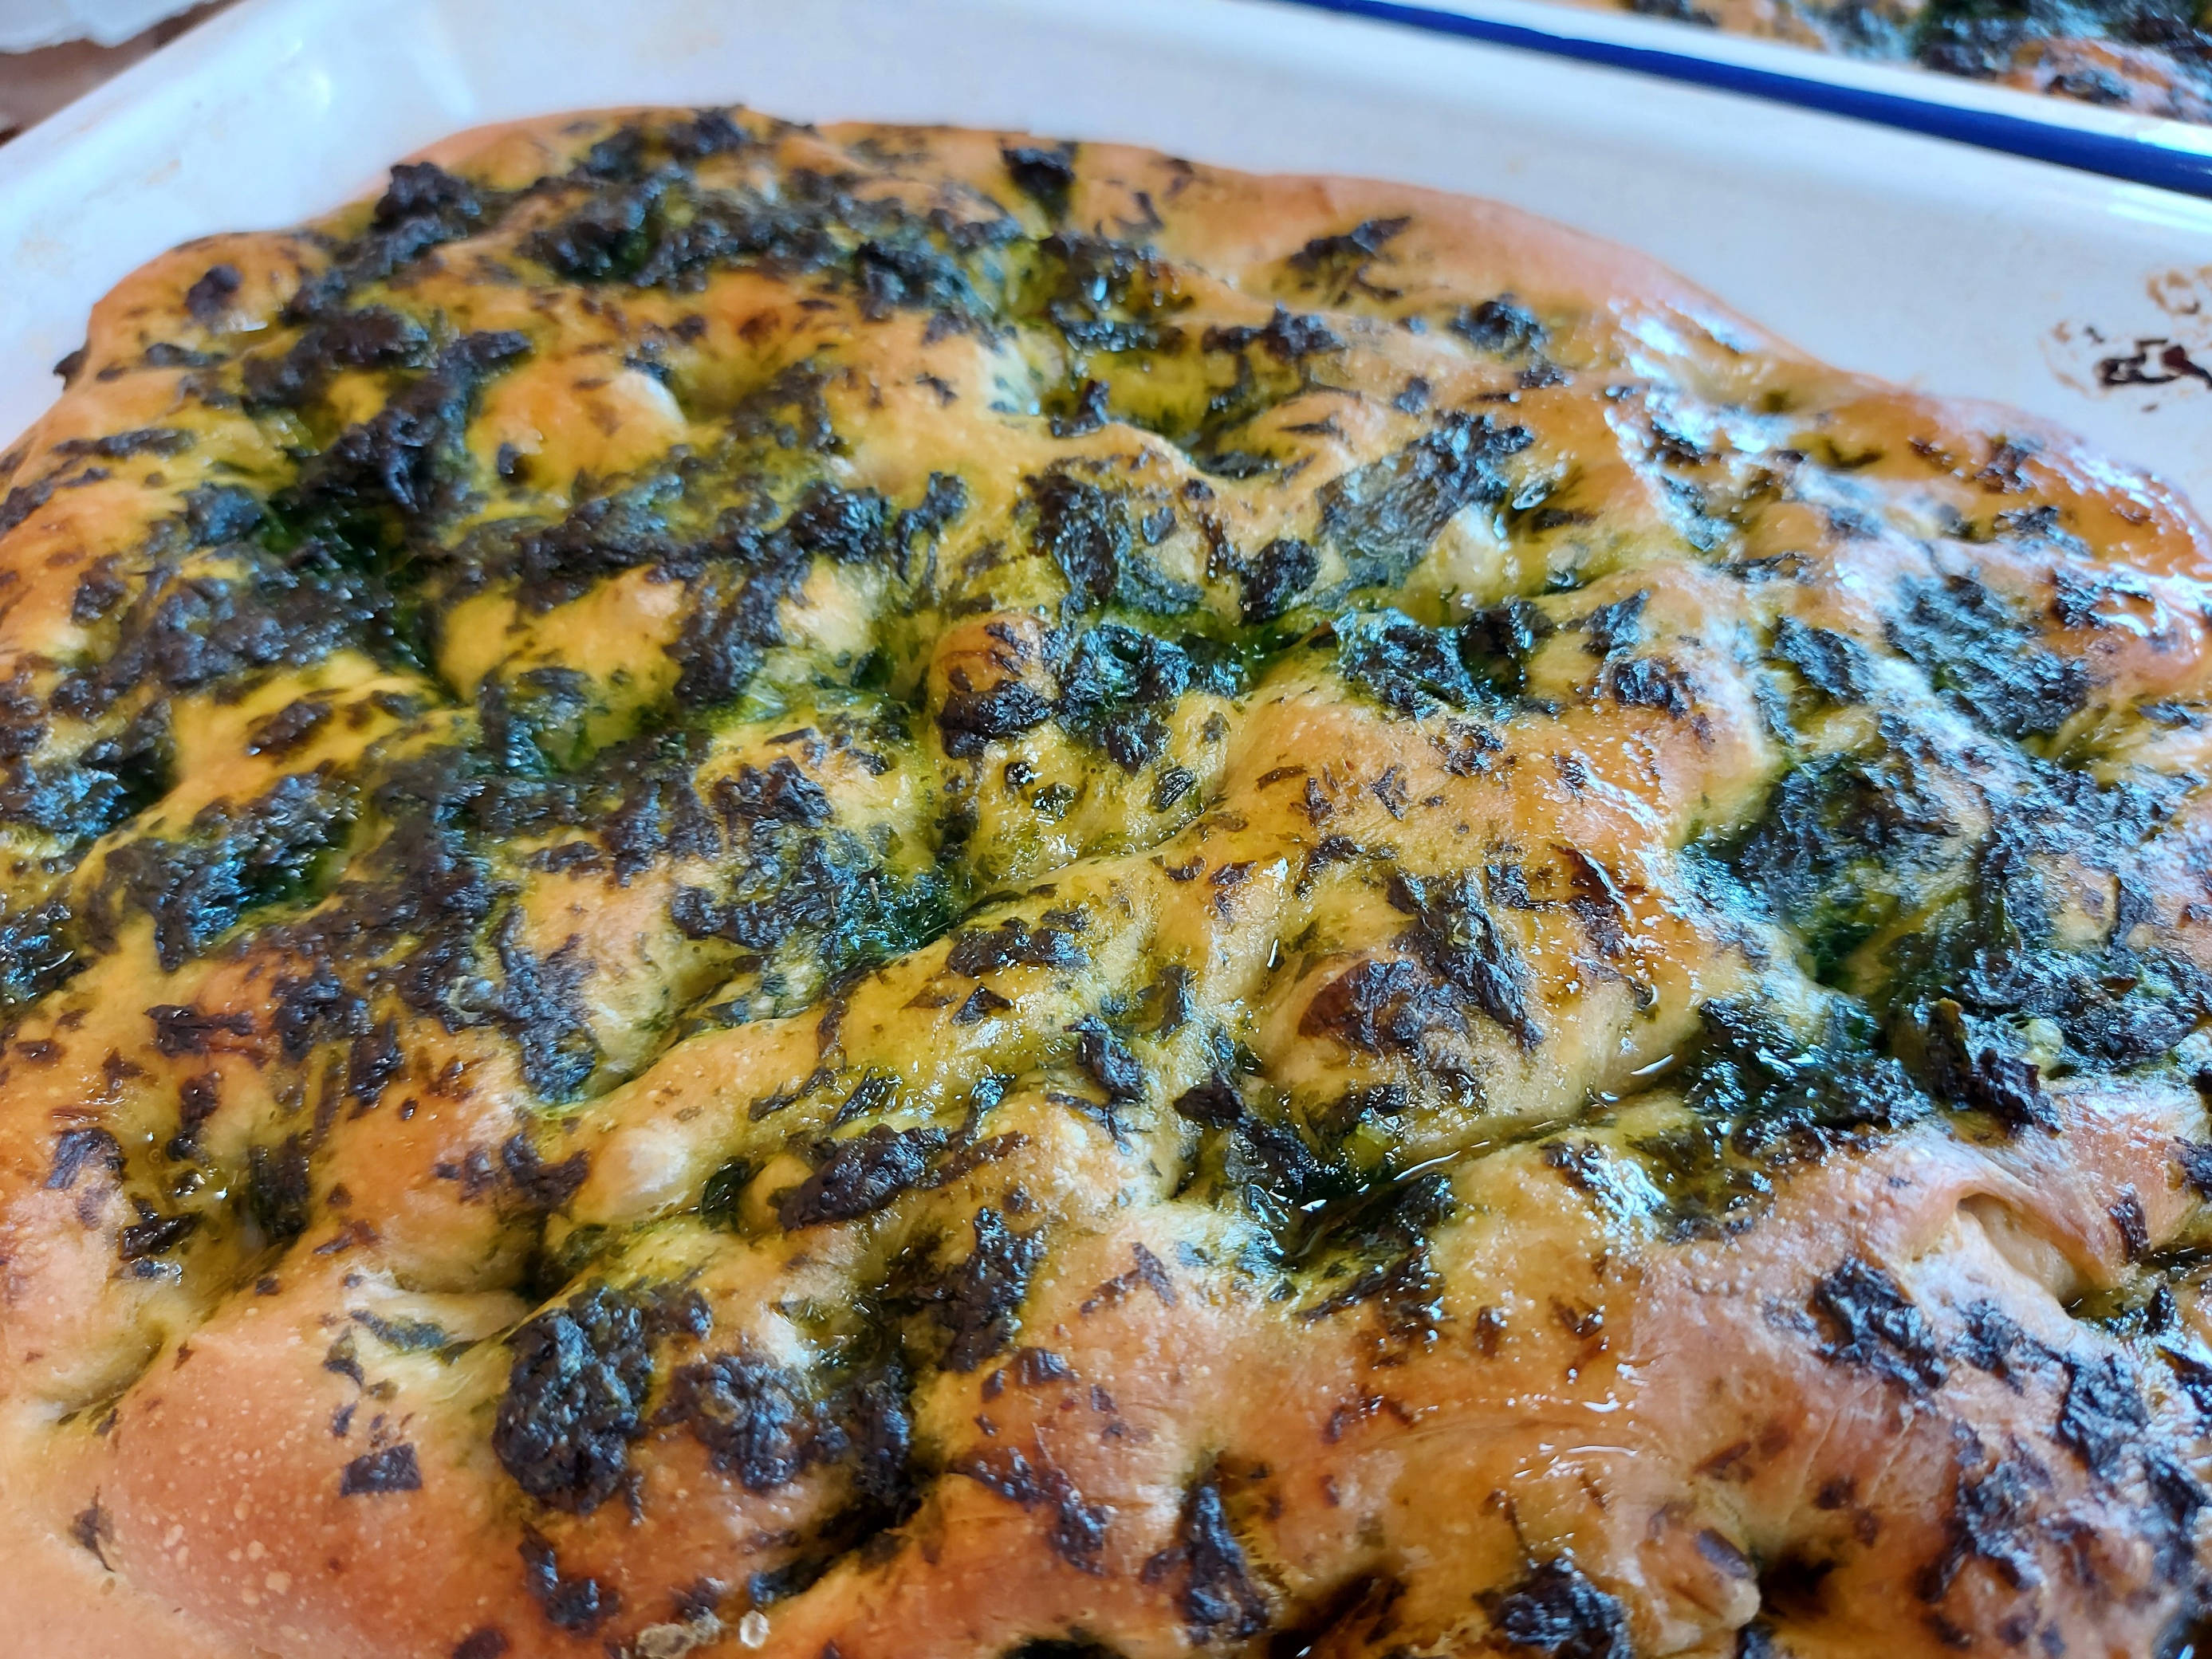
13. Give the bread another drizzle of olive oil then bake for around 20 minutes, until golden.
14. Remove from the oven and drizzle with a bit more olive oil, so the bread is nice and moist.
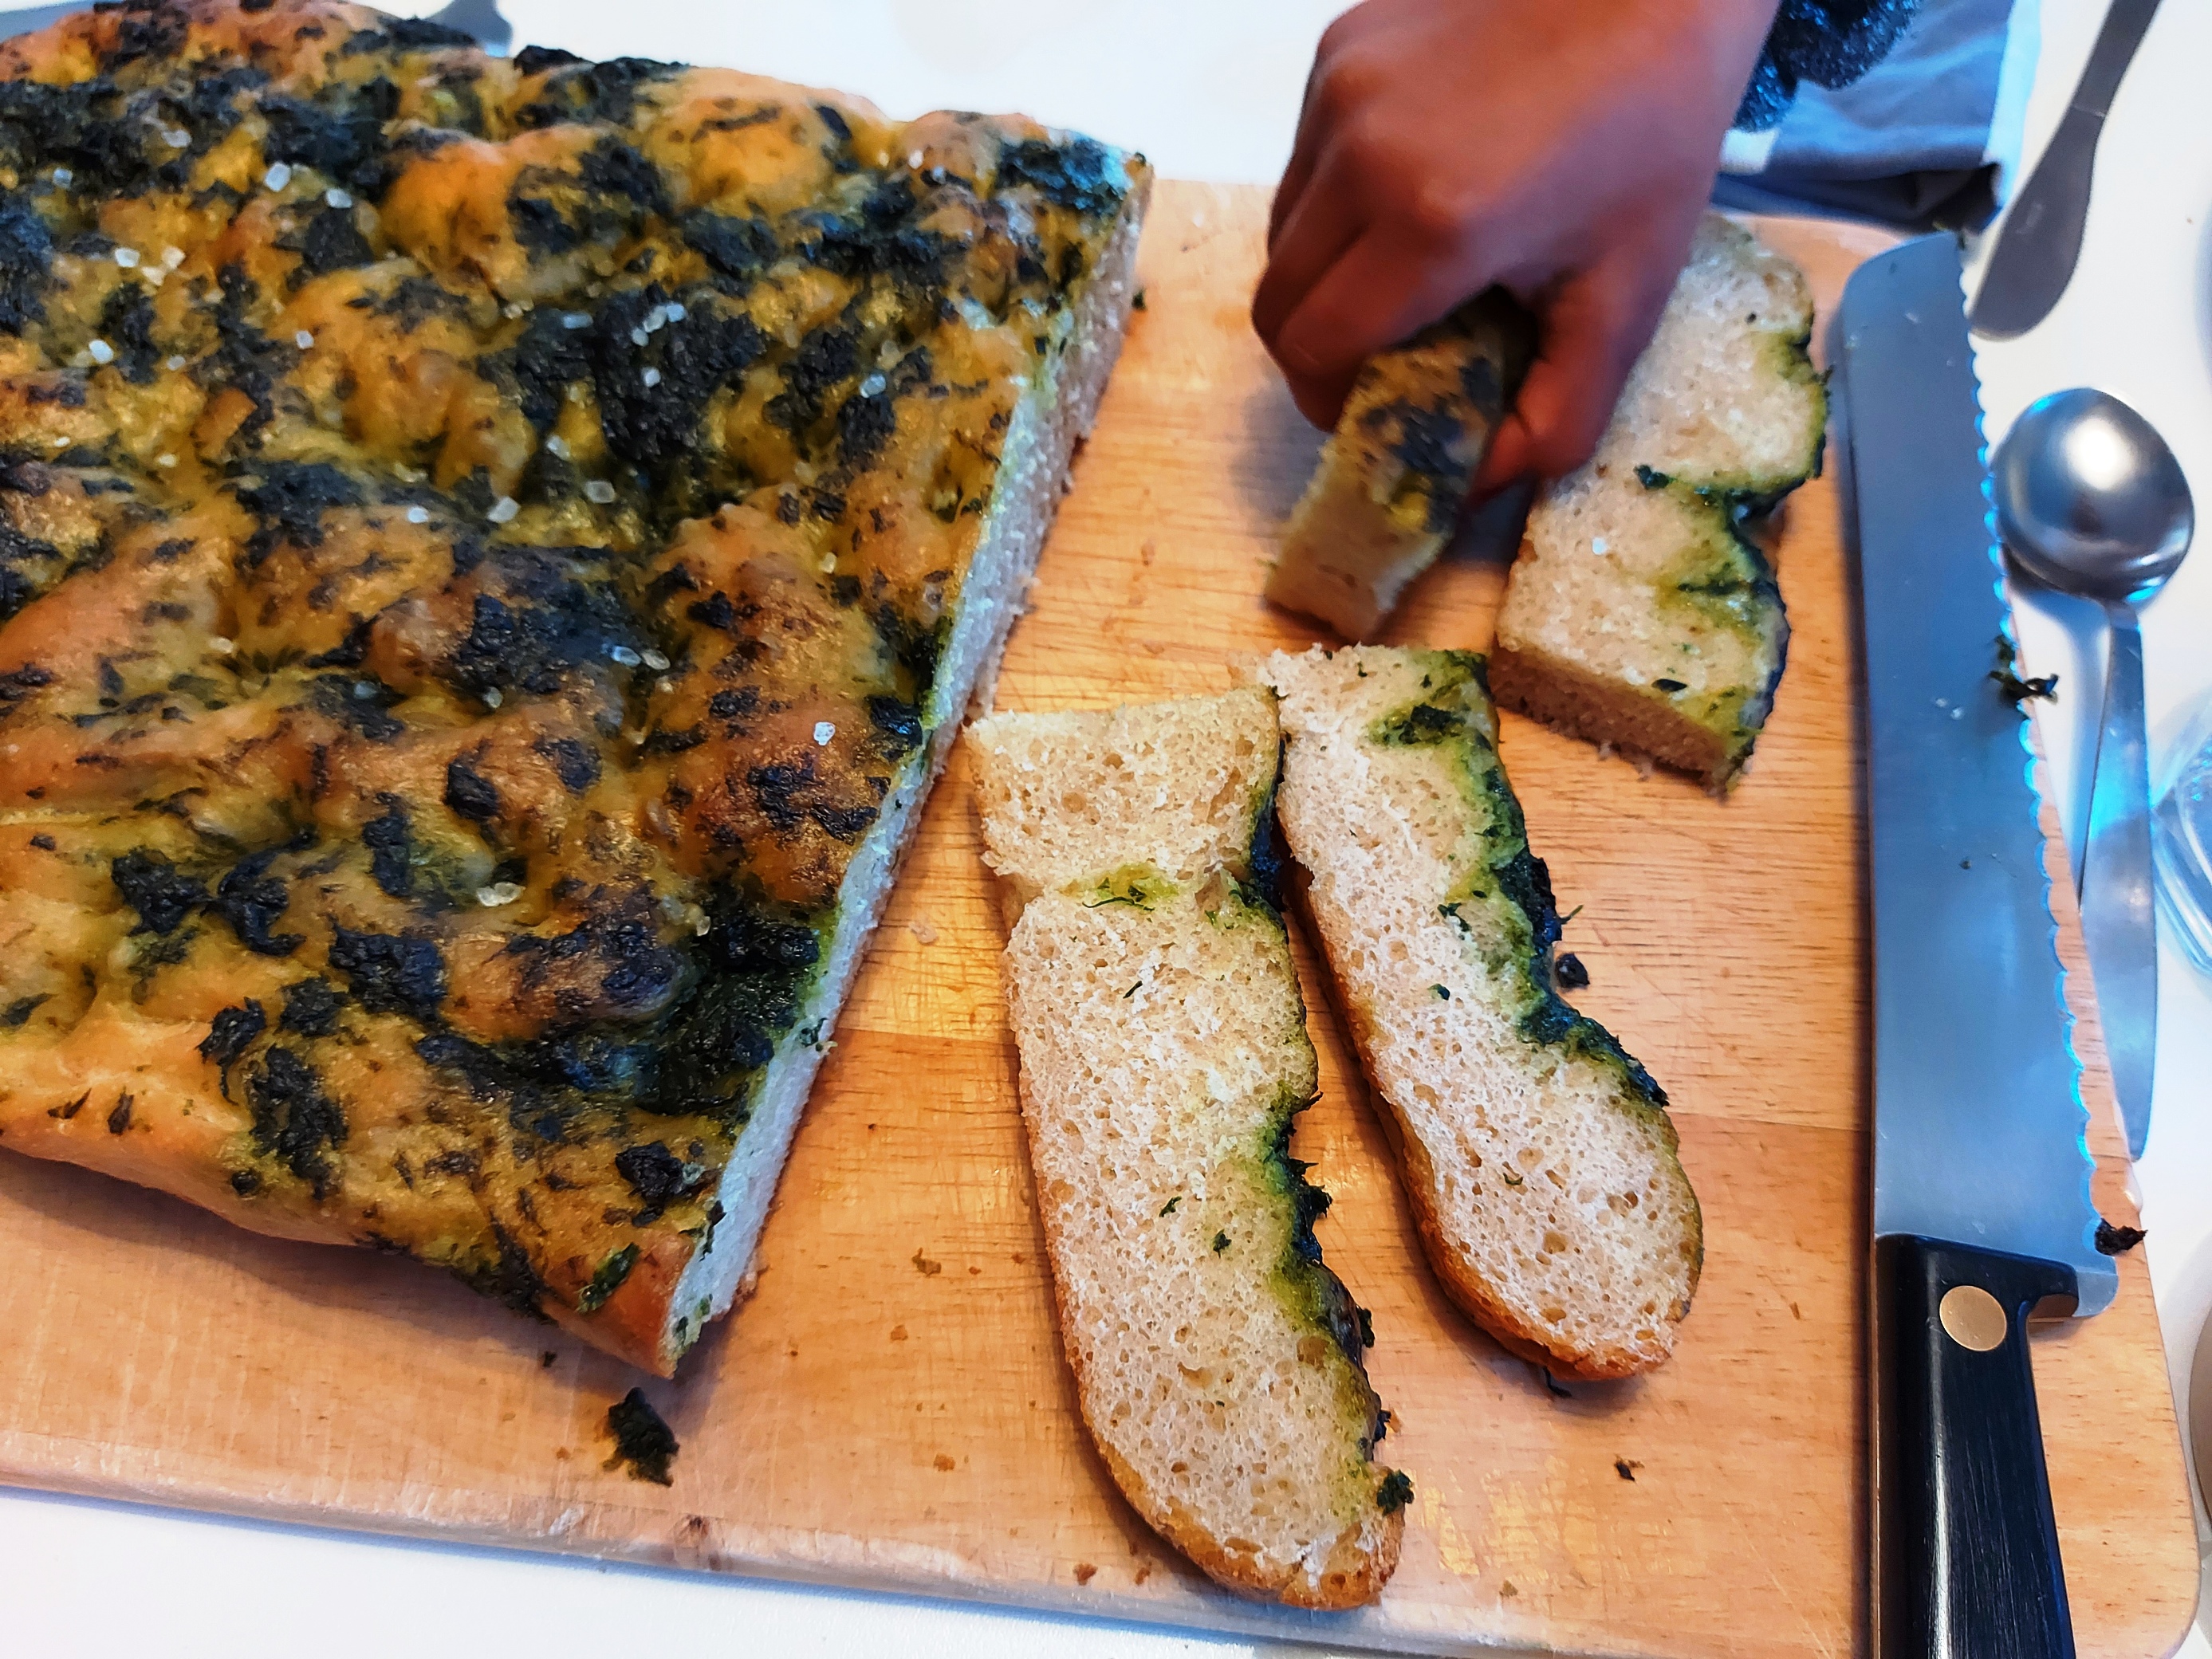
15. Cool in the tin for 10-20 minutes then remove. Eat warm or later on. All that oil means it stays soft well for a few days.

Like many parents, I struggle to get anything green into my kids’ diets. I’m somewhat baffled by the seemingly innate resistance to any brassicas for example. It’s purple sprouting broccoli season in England now, and that veg is such a delight – sweet, and you’d think child-friendly with its small, tender heads. But no. The kids did, however, love this bread. The big one (increasingly big this year) absolutely scovered3 the stuff.

Wild garlic focaccia

1 Just look at the Wikipedia page for all the wonderful common names for this lily. I grew up calling it lords-and-ladies or cuckoo pint, but there are numerous other names.
2 In Oretta Zanini de Vita’s book The Food of Rome and Lazio, she lists “Arugula [rocket], wild chicory, rampion, salad burnet, wood sorrel, borage, wild endive, poppy greens and other bitter greens” for Misticanza Romana.
3 Our family portmanteau word that derives from “scoffed” and “hoovered”.

1 Comment

Filed under Baking, Recipes

Pizza to feed the family

pizza

This is the pizza I make for family and friends. It’s rolled out, thin and crispy, and baked in my puny electric oven on baking sheets. I find this approach more convenient to make over the course of a family Saturday, starting with a sponge (aka preferment) in the morning before swimming lessons, making a dough around midday, then bulk fermenting for about four hours.

Much as I’ve enjoyed the certified Vera Pizza Napoletana – “real Neapolitan pizza”– in Naples, I don’t really feel the need to try and emulate the Neapolitan style pizza, with its wide crust (cornicione). And if I’m honest, I always preferred the thinner crust, no-nonsense Roman-style ones we used to eat in places like Ai Marmi on Viale Trastevere and da Remo in Testaccio anyway. This dough does work opened by hand, slid off a peel onto a baking stone, if you favour the round, pseudo-Neapolitan style, but I prefer to roll, bake four at a time, then sit and eat with my family.

Variation on a theme
Pizza is ubiquitous. It’s Italy’s most successful export. And as anyone who’s eaten pizza in various corners of the world will know, it’s changed a lot in its travels*. Even within Italy, and within the diverse regions, and the provinces within those regions, pizza has enormous variety, not just familiar Neapolitan and Roman. It’s fat, thin, doughy, crunchy, round, square, long (alla pala), stuffed (farcita, or scaccia from Sicilian) or sandwiched (pizzòlo, also Sicilian) or pasty-like (calzone) or pie-like (rustica etc), tray-baked (like Palermo’s sfincione), fried (fritta; they loved fried in Naples). Flatbreads have infinite variety. Populations move, cultures hybridise, and the human experience is constantly in flux. The weather changes (now more than ever), ingredients change, processes change. Food, like language, is always changing.

During our time in Rome we also encountered the great Gabriele Bonci, star Roman pizzaiolo. His original hole in the wall pizza place, Pizzarium, located behind the Vatican, doesn’t have a fixed menu, it varies constantly with what’s available. Our very last visit there before moving back to England from Rome, Fran had a pizza with mortadella and Brussels sprouts. Who’d have thought Italians even had sprouts, let alone put them on their pizza? It was inspiring and a long way from the sort of thing that would achieve certification from the Associazione Verace Pizza Napoletana – and all the more exciting for it.

Sauce and toppings
This post is principally about my pizza dough. For tomato sauce, I often use a very simple one made with a tin of tomatoes, with a dash of dried oregano, black pepper and salt. Sometimes I add a bit of garlic or pinch of chilli. Then I use a stick blender to puree it. Other times, I’ll make a sauce with garlic, basil, a pinch of chilli, salt and pepper in a pan with lots of olive oil, warm that up then add a tin of tomatoes, cook that down, then put the whole lot through a mouli (food mill) to get out any fibrous bits. This is my son’s preferred pasta sauce.

As for toppings – just go for it. Whatever you prefer. This time round I had some local leeks from market for one, roasted first. For another, I bought some taleggio, which I used on a pizza bianca (white – no tomato sauce) with some boiled potato, a good drizzle of olive oil and some sprigs of rosemary from the garden. For my bacon-loving wife, we had some quality pancetta from Beals, renowned charcuterie (or salumi, in Italian) made locally from mangalitza pigs.

My favourite is usually aubergine, sliced longways about 5mm thick, roasted with olive oil and salt and pepper, then add to a pizza rossa (red – tomato sauce), with salty black olives and pecorino – it’s an offshoot of what the Italians would call “alla Norma”, a pasta sauce from Catania in Sicily. We didn’t do that this time. Another one I like is broccoli – cooked to tender, then gently fried in olive oil with garlic and chilli.

My pizza dough recipe
Anyway, this is my pizza dough recipe. Not a whiff of “authenticity”!

It is a 66% hydration dough – ie the weight of water is 66% of the weight of the flour (400g/600g). That means it’s pretty easy to handle, not too sticky.

I use a blend of flours. I find this gives the best extensibility and doesn’t shrink back in on itself. For the light spelt flour, I either use Sharpham Park or Stoates, British, stoneground. You may have a local variation.

Makes 4 pizzas

400g water
4g active dried yeast (or 8g fresh yeast)
600g flour – 200g strong white, 200g plain (all-purpose), 200g light spelt
6g fine sea salt
20g extra virgin olive oil (approximately)
Extra oil for oiling worktop and drizzling

1. Warm the water, add the yeast. Allow to froth.
2. Add about half the flour, mix well to combine, then cover. Allow this sponge or preferment to get nice and bubbly. Depending on the temperature in your kitchen, this can take anything from half an hour to a few hours. Leaving it gives us enough time to swimming lessons and back.

Pizza sponge

3. Pour in a few good glugs of olive oil, around 20g, and combine.

Pizza sponge with olive oil

4. Add the salt and the rest of the flour and mix well. You can do this with a mixer with a dough hook if you have one.
5. If you don’t have a mixer, turn out the shaggy mass** onto a lightly oiled work surface and knead to bring together.

6. Form into a rough ball then put in a lightly oiled bowl, cover (shower caps are great for this) and rest for about 10 minutes.

2020-03-07 12.40.09

7. Turn out and knead briefly. It should be smoother now, and easier to form into a neat ball.
8. Turn out and give it another brief knead. Rest for another 10 minutes.
9. Give it another knead then return to the bowl, cover and rest.
10. Give it a nice long fermentation. You can give it a stretch and fold if you like. This is a good process for helping the dough structure. Simply turn out the dough onto the lightly oiled work surface, stretch out a rough rectangle, fold one third in, then the other third. (Check out my old post on pizza bianca for more details or this technique.) If it’s rising too fast and you want to delay things, you can also put it, covered, in the fridge.
11. When the dough has doubled in size, turn it out. It should weight just over 1kg.
12. Divide up the dough into four pieces, scaled at just over 250g each.

Shaping pizza dough into balls. Bottom two cut off the main lump, top left is tucked, top right is shaped.

13. Tuck any rough pieces underneath then shape into a ball, ideally by cupping in your hand and making circular motions.
14. On a liberally floured area, leave the balls to rest, covered. Alternatively, you can put the balls in a container, cover it with a lid and leave somewhere cool if you need some more time.
15. I give my pizzas a final prove for about half an hour once I’ve stretched then out, but this is optional. Again, it’s about what fits in with your household routine.
16. On a floured worktop, squash a ball of dough down with the heel of your hand, then flatten out. Roll out to a size that fits your baking sheets – mine are 30cm square. (If you prefer round, go for it. If you prefer using a peel and sliding your pizzas onto a pizza stone, go for it. This dough works well for that too.)

Shaping pizza dough

Rolled out pizza dough

17. Preheat your oven. Mine says it’s 220C on the dial, but it doesn’t really muster much more than 210C.

Pizza dough on baking sheet

18. Top your pizzas, helped and/or hindered by children.

2020-03-07 17.28.53

19. Put in the oven for about 8 minutes, then swap around on the shelves and bake for another 8 minutes or so. Your oven will be different to mine, but you obviously want nice bubbly cheese and some colour on the crust.

2020-03-07 17.46.52

20. Turn out onto boards, slice and dig in.

If we’ve got any leftovers, I’ll happily blast them in the oven again for a few minutes then eat them Sunday evening – the one evening when the kids are allowed food in front of the telly in our house. I love a slice cold too.

* What are your most memorable, weird and wonderful pizza experiences? Whitebait pizza in Hokitika, South Island, New Zealand is one of mine. And the abovementioned sprouts.
** This is a Dan Lepard turn of phrase.

11 Comments

Filed under Breads, Discussion, Flour & grain, Pizza, Recipes

Back again and more brioche

That was a long hiatus. The past few years have been quite intense on the parenting front, and the blog was a victim. Last month we underwent a significant transition though – our younger one started school. So now I have a bit more time and headspace to get this blog going again.

One thing I have been doing the past few years is making brioche. We all love brioche in our family. As much as I like to support my friend Einat’s Mamoosh bakery, with its top quality pittas and brioche, I enjoy making our own. It’s cheaper too, obviously, and times is tough financially for us normal families as the years of moronic, shambolic Brexit suicide drag on. Never mind how the climate crisis is going to affect food supplies and costs.

All and sundry
Anyway, as I mentioned in a post back in 2016, when I started my brioche experiments I found more than 20 recipes in my cookbooks and notepads. I hadn’t realised quite how much variation there was. The Art of French Baking by Ginette Mathiot in its 2011 might have unreliable recipes but it’s good for highlighting the differing types, with the quantities of egg, butter, milk and all the things that enrich the dough varying enormously. After trying several Mathiot ones, I’ve tried, among others, the Roux brothers, Prue Leith and Caroline Waldegrave, Dan Lepard, Justin Gellatly, Andrew Whitney, Paul Hollywood, and one from the National Bakery School, an alma mater. The one I ended up preferring came from River Cottage Handbook No 3 by Dan Stevens.

One thing they have in common is that the dough is sticky and fatty from all the butter and as such can be messy to process with warm human hands. To bypass the sticky kneads, I simply mixed it with a spatula then left it in the fridge for a few hours, then kneaded again when the butter had firmed up.

Finally, a mixer
Something else makes made it all a lot easier though – the acquisition of a mixer. I’ve wanted one for years, but the classic KitchenAids and Kenwoods you see on Bake Off are beyond our means at £250 to £500. I’d seen one a lot cheaper in Aldi, which was originally £100 I believe then came down to £50. Which is great price-wise, but what of its quality? If it’s so poor that it lasts only a tenth of the time a £300 one does, it’s a false economy.

Then suddenly, there in the offers aisle, was an Aldi Ambiano mixer, the last one, for just £20. Which I couldn’t refuse. Now, it’s clearly not as robust as the big brands, it’s a bit noisy, and the attachments don’t do a great job of reaching the sides of the bowl. But it’s not bad, and has transformed my relationship with brioche dough.

Saturday night and Sunday morning
My goal was to come up with a recipe I could do during the day on a Saturday, bake in the evening, then have for Sunday breakfast, as Sunday is “Jam day” in our house, when the kids are allowed sugary spreads. With a few tweaks the Daniel Stevens one works well in that time – start Saturday morning, bake in the evening. You can even leave the dough in the fridge for longer to fit in with your day’s activities.

As for the flour: usually I make breads with Stoates, which is organic and stroneground – which is great nutritionally thanks to the higher content of bran and germ, but has given a greyer, crumblier result to some of the brioche. So now I’m using whiter, more industrial, more finely bolted strong white from the supermarket.

Ingredients
90g full-fat milk, warmed
25g caster sugar
10g active dried yeast (or 15g fresh)
400g strong white bread flour*
5g fine salt
100g butter, softened
4 medium eggs (220g), beaten

Egg/milk to glaze (optional)

Method
1. Stir the sugar into the warmed milk then sprinkle on the yeast and leave it to froth up.
2. In the bowl of a mixer, combine the flour and salt.
3. Pour in the frothy yeast mix, add the beaten egg and soft butter, then mix on a slow speed until well combined. Alternatively, mix all the ingredients in a bowl and combine by hand with a silicone spatula. With both approaches, make sure to scrape down the sides of the bowl so everything is combined.
4. Cover the bowl and put in the fridge for a few hours to firm up the butter.
5. Turn out of the bowl onto an lightly oiled worktop and give a it a bit of a knead by hand, forming a nice neat ball.
6. Put the bowl in a clean, oiled bowl, then cover and leave to prove at around 18C. It doesn’t need a warm place, as you want a nice long fermentation time.
7. When it’s doubled in size, remove from the bowl and decide how you want to shape it.
8. Sometime I use classic fluted, tapering brioche moulds, sometimes I form a long snake then twist it before putting it in a loaf tin, but this time I went for the tear and share approach. The total dough weight is about 820g, which I divided into 10 pieces at 82g each. You could do more, for smaller tearing pieces – say 14 at about 58g each. Form these pieces into balls, leave them to rest, covered, for 10 minutes, then put them in a long loaf tin. I use one that’s 29cm long, 10cm wide, 7cm deep.
9. Cover the tin with a cloth then leave for a final prove. Timing will depend on the air temperature, but leave until nice and swollen.
10. Preheat the oven to 200C.
11. You can glaze the loaf with some egg, or a mix of egg and milk, but frankly it’ll get wolfed even if you don’t.

12. Bake for 10 minutes then turn the oven down to 180C and continue baking for about 30 minutes. Make sure you don’t have an oven shelf above it, as it rises quite a lot when it the yeast experiences the oven heat (this is called the oven spring).

13. Turn out onto a wire rack to cool.
14. Wrap it in a cloth or put in a cloth bread bag until you’re ready to eat it.
15. Serve with jam and butter. (Though my kids demand honey.)

* During the 2020 lockdown, when everyone got into baking and flour became scarce, I managed to score a sack of T55 flour. This is a French flour, equivalent to Italian type ‘0’. Although the wholesaler I bought it from listed it as “Strong Bread Flour”, it’s actually low protein – 9.8%, which is around the same as or even lower than many plain/all-purpose flours. I’ve been using it to make brioche and it’s worked well.

8 Comments

Filed under Baking, Breads, Recipes

A baking lesson from videogame The Witcher 3

For those of you not in the know about the huge swathe of culture known as videogaming, The Witcher 3 is an award-winning bestseller where you have involved adventures in a fantastical open world. This is a genre that is getting increasingly sophisticated, with vast, detailed environments populated by innumerable characters and creatures. A few years back, I wrote about the pleasures of exploring the world of Skyrim, notably following its resident foxes. The Witcher 3, which I finally got for my birthday back in September, isn’t quite so good with its ecology, but there I did encounter one wonderful detail recently. Not about wildlife, but about food. The sort of thing that really chimes with me and my baking obsession.

So, your character, Geralt of Rivia, is attending a wedding celebration (while possessed by a ghost, no less. You probably don’t need any more detail). At the wedding, a mysterious character you’ve previously encountered makes an appearance. He’s called Gaunter O’Dimm, and he’s magical, knowledgeable and powerful. He talks about wishes, and I assume from his surname he’s some kind of djinn, or genie. I’ve not finished the game yet, so I’m not sure (and may never be). In this particularly scene, what nature of beast he is isn’t important – it’s his thoughts on baking.

As you approach, an old lady is saying, “But gingerbread’s nowt but honey, flour, eggs and spices.”  O’Dimm says, “I beg to differ madam. You omit the most important ingredient of gingerbread – time.” She responds, “Time? What do you mean, time? An ingredient?” So he explains: “Time gives the proper consistency. Time provides the ideal crunch on the outside, the delicious moistness within.” She then asks, “So how much of this time does it take?” And his discourse reaches its conclusion: “That you will not find in any recipe. You must surrender to your senses… Time, time is the key.”

Now, I’m not sure if he’s alluding to other things, you know, metaphorically, but in literal terms he’s saying something I often say to people who ask me about bread-making, and something I’ve mentioned frequently here too. For example, when talking about what makes for real bread or real beer, I said, “Fermentation time is just too import to neglect or reject. Time is just too important to rush. Time is the defining ingredient for craft bread or craft beer, or as I’d prefer to call them, real bread and real beer.”

In the Medieval-style fantasy world of The Witcher 3, baking – even gingerbread – would involve yeast, or at least a natural leaven. But even with commercial, cultivated yeast, time is arguably the most important ingredient. Use too much yeast and rush the proving and the result will be overly gassy and hard on your guts, potentially leaving you feeling bloated or uncomfortable. Use less yeast and allow for a long prove, and the yeasts will have time to feed on the maltose in the flour, changing the chemical balance of the dough. The resulting baked bread will taste better and easily digestible.

This is on the reasons people have trouble with supermarket “bread”. These industrial products do not respect the time factor. The dough is rushed in the industrial Chorleywood bread process, resulting in indigestible products the Real Bread Campaign and others have referred to as “pap”. Chorleywood is very much at the heart of our troubled relationship with bread these days.

“Artisan” bakeries offer real bread, but it can be so expensive it seems an item only for the well-off. But don’t let this force you to eat pap – how about trying your own baking? People say, “Baking’s too time-consuming.” But this isn’t quite true – I tend to create a sponge, or pre-ferment, with water, yeast and about half of the total flour as the kids are having breakfast. This can then be left for hours, allowing the yeast to get a head start. I then make the dough with the rest of the flour and a dash of salt, then leave that alone for several hours. I usually then bake late afternoon or in the evening.

Baking is more about a little bit of planning and can be fitted in around other activities – you know, work, childcare. It really is best to just leave the sponge and the dough alone for long periods, following Gaunter O’Dimm’s edict about the importance of the ingredient that is time.

1 Comment

Filed under Baking, Discussion

Banana and date muffins

You know something I dislike? The school summer holidays. I used to love them as a child. Unlike today, when we seem to get our best weather in May and June, before schools even break up, in the seventies and eights, summer seemed to really happen in August. It went on and on and was a delight. Thinking about my childhood now, it sounds like something from the thirties or fifties – long games of French cricket, roaming in the water meadows and Downs, chasing round the garden with brother trying to catch stag flying beetles (successfully) and bats (unsuccessfully) with a minnow net attached to our long bamboo laundry prop.

Obviously, my kids are a lot younger, but I can’t imagine them forming any particularly fond memories of this summer just passed. Aside from the summer weather seeming to end the moment school broke up, to be replaced by weeks of grey, the whole experience seemed very unsettling for my three-year-old son, T-rex.

After nearly a year at nursery, he was thriving. He’d made a lot of friends and by and large seemed settled and happy. He was sleeping well, making decent progress with his food fussiness, pretty much out of nappies, and getting excited about the prospect of “Big boys’ Lego” for his fourth birthday later in the year. Then suddenly all the routine disappeared and things regressed, became increasingly unsettled.

It’s hard to create a routine when you may be away for a spell, may be visited by family, may be able to grab a bit of sunshine, but then get wrong-footed by rain. As most organised summer holiday activities are for ages 5-6 plus, I had to try and create my own. But three-year-old boys aren’t the biggest fans of arts and crafts. Mine certainly isn’t. All he wants to do is watch The Lego Batman Movie.

I try to cook with them, and the Raver, now aged two, enjoys that – well, some “mix-mix” and the licking spoons at least. As T-rex has decided he doesn’t like “nana shake” – one of his long-time breakfast favourites – any more, I had to come up with other solutions for over-ripe bananas. Googling didn’t really satisfy, so I reached for my vintage copy of Fresh and Natural, a New Zealand hippy classic, published in 1980 and gifted to me by my old friend Nadia the final time I saw her at her home in the Malborough Sounds in October 2013, a year before her untimely death. It includes a nice flexible recipe for banana muffins, one I remember using when I lived with Nadia in 1994-95 and helped feed her large family in the Yellow House at Old Man Mountain in the Buller Gorge.

I tried to get T-rex interested in this project, but even before making or seeing the finished product he said “I won’t eat those.” It’s a protest and control tactic he’s using quite a lot currently. Refusing tea before I’ve even put it on the table, before I’ve even made it.

We hoped the return to nursery would settle him, but instead we underestimated the shock of how much his class would have changed. Loads of his friends have gone up to reception. I realise now he’s a boy who feels particularly settled when he slots into a social group of older boys, whose more alpha ways give him guidance and stability. The teachers had said the older kids often get into the role of being in charge, being the guides themselves. I hope T-rex does. I hope he likes these muffins.

This isn’t a parenting or adoption blog, so I want to keep things light, but T-rex is, in the technical term my wife taught me, dysregulated. England isn’t like France or Italy where people may take the whole of August off and hang out at the beach with family. Here, primary carers can face a long slog through the summer and sometimes children struggle. And it’s not like we need this Victorian institution of long summer holidays that freed up children to help with the harvest. The most my kids harvest is under-ripe tomatoes. So anyway, I also dearly hope that politicians move to adjust the length of the summer school holidays. Though if those in power are all wealthy, reactionary deadbeats who never even change their own kids’ nappies, I suspect it’s unlikely.

So yes, a slog – hence this blog has been a bit quiet lately. And even now I’m posting, it’s for something very undemanding. Not sure I’ll be able to muster any fancy stuff any time soon…

Here’s the recipe. Converted to new money, with added dates. The original uses nuts. You can use either or both, or neither.

50g butter, softened
50g golden syrup
1 egg (that is, about 50g without shell)
5g vanilla essence
2 mashed bananas (that is, about 200g)
105g milk
4g baking soda
300g plain flour, ideally stoneground or even wholegrain
5g baking powder
50g chopped dates

1. Preheat oven to 200C. Like a muffin tin with cases, or just grease it if you don’t have any.
2. Beat together the butter and golden syrup until creamy.
3. Add the egg and vanilla and beat well.
4. Dissolve the baking soda in the milk.
5. Mash the bananas.
6. Alternately add the milk and banana to the mixture.
7. Sieve together the flour and baking powder and add.
8. Add the dates.
9. Equally divide the batter into the muffin cases (or not).
10. Bake for about 20 minutes, until nicely browned.

Nice for breakfast, with some butter and maybe a drizzle of golden syrup or honey.

4 Comments

Filed under Baking, Recipes

The sheer indulgent excess that is monkey bread

Monkey bread

In my time as a baker and sugar addict, I’ve made or consumed a vast number of rich concoctions and enriched doughs, from multinational doughnut variations to chocolate babkas. But nothing was quite as indulgent as monkey bread, something I’d not heard of until a few weeks back when a recipe by Jane Hornby popped up in a BBC Good Food newsletter.

Monkey bread is basically made with an enriched dough, with balls or chunks dipped in more butter, sugar and spices, and arranged in a ring shaped tin for baking. It is a kind of sticky, cinnamony, buttery, pull-apart, tear-and-share bread that clearly has its origins in traditional sweet, spiced buns and breads of Germany, Scandinavia, the Netherlands, and even Britain (eg the Chelsea bun). Those traditions crossed the Atlantic with migrants who settled in America, where they changed, evolved – and had gallons of butter and tons of sugar thrown at them.

The oldest print version of monkey bread is from 1945, and by ZaSu Pitts1, an American actress with a career that spanned the silent and early sound eras. While much of Europe was suffering from rationing, American was producing monkey bread. Goshy.

No one knows where it gets its name, but it’s either because it supposedly resembles the monkey puzzle tree, or because it’s like something monkeys would get in a frenzy over pulling apart. The latter seems more likely to me, as we – four adults, four little monkeys (aged 1 to 11) – ate it together, falling on it with simian fervour.

There are savoury versions or versions with dried fruit, but this one is based on Hornby’s – cinnamon, sugar, butter, some roasted pecans – and it seems closer to the classic US type. My bundt tin wasn’t quite big enough, the whole thing was absurd, and I can’t really imagine being able to justify making it too often, but it’s a pretty awesome thing to have in one’s repertoire.

Recipe

Dough
200g full-fat milk
85g unsalted butter
12g active dried yeast (or 20g fresh yeast)
50g caster sugar
2 eggs (that is, about 110g of egg)
550g strong white flour
6g fine sea salt

Assembly
125g unsalted butter
12g cinnamon
4g powdered ginger
2g grated nutmeg
225g light muscovado or light soft brown sugar2
140g pecans, toasted and roughly chopped

Icing
100g icing sugar
3g vanilla essence
15g milk
5g cinnamon
30g unsalted butter, melted

Method
1. You need a bundt pan or similar ring-shaped tin, ideally 30cm in diameter.
2. To make the dough, first melt the butter and warm the milk slightly. I did this in a microwave. Stir in the caster sugar, scatter in the yeast, and leave it a few minutes to get going.
3. Put the flour and salt in a large bowl, then pour in the yeast mix. Of course, you can do this in a mixer. If you have a mixer, combine and mix and skip to 8.
4. Beat the eggs together then pour in too.
5. Bring together to form a sticky dough.
6. Turn out and knead to combine and homogenise.
7. Form a ball, then leave to rest again, covered, for another ten minutes.
8. Give it another knead, then cover and rest again. Repeat this once or twice more until you have a nice smooth dough.
9. In a clean, lightly oiled bowl, cover and leave to rest again, until the dough has doubled in size.
10. Prepare the bundt tin by melting the 125g of butter then using some of it to brush the inside of the tin.
11. Mix the sugar and spices, then sprinkle some of this into the buttered tin. Add a handful of the roasted, chopped pecans.
12. When the dough has proved, you need to divide it into pieces. Hornby’s recipe said 65, I went for 50 as that seemed a tad excessive. The total dough weighed about 1060g, so I divided it into pieces each weighing about 21g.

Balls of dough for monkey bread

13. Roll these into balls. You don’t really need to, but I fancied it, just cos, to maintain the technique, which involves cupping your hand over them, and rolling them on a lightly oiled worktop. If you get proficient, you can do one in each hand. Ta da.
14. Leave the balls under a cloth as you work so they don’t dry out.
15. Put the rest of the melted butter in a flat-bottomed bowl or container, and the rest of the sugar and spice mix in another.

Assembling monkey bread

16. Roll the balls, in batches, in the butter, shake off any excess, then roll them in the sugar and spice mix. Place them in the tin.
17. Form a layer, sprinkle with more pecans, and keep going until the tin is full and balls all used up.

Monkey bread, before final prove

18. Cover again, then leave to prove one last time, until bulging and springy to the touch. Push a finger in and the dough should slowly re-expand.

Monkey bread, after final prove

19. Heat the oven to 180C, then bake the bread for about 40 minutes. Turn the oven down a bit, or cover with foil, if it’s over-browning before this time.

Monkey bread, baked
20. Leave to cool in the tin, then turn out when still warm but not hot.
21. Whisk together the ingredients for the icing then drizzle over.
22. Eat with for breakfast, with a morning coffee, as afternoon tea, or even as a dessert – which is what we did.

Good. Excessive. Indulgent. But good.

Monkey bread

Footnotes
1. More about her here. Her recipe, and more about monkey bread, can be found here.
2. I find these sugars behave pretty similarly in baking, though muscovado sugars were originally those of lower quality, and have higher molasses content.

13 Comments

Filed under Baking, Breads, Cakes (yeasted), Recipes

How to handle a sticky bread dough

Stretching sticky dough

Tomorrow is Good Friday, the day when, traditionally, western Christians ended their Lenten fast. In Britain, this was marked by eating hot cross buns. So I’ve just made a batch, from my recipe. It’s a day early, but what the heck, the local supermarket has been pumping out its fake hot cross bun smell for at least two months already and most people probably aren’t even aware of the old traditions any more.

My recipe involves handling quite a sticky dough, so that got me thinking – perhaps I should have included some more advice about how to handle it. But it’s quite an important subject for making, so here’s a whole post on it.

When I talk about sticky doughs, this generally means doughs with a higher proportion of liquid to flour. These are called higher hydration doughs, and they often make for the best breads, especially with wheat. They can be softer, with a more open crumb and a better crust. If you’re doing an enriched dough – for a brioche, challah or any number of feast day bakes such as hot cross buns – the stickiness can also be further exacerbated by extra sugar, fats and egg.

A typical error inexperienced bakers make is to keep adding flour to such sticky doughs – putting lots on the work surface and adding more to the mix itself until it stops being sticky and feels easier to handle. This isn’t great, as it will make the crumb dense and dry. And if you add too much extra flour later on, it’ll miss out on the fermentation, being essentially raw – and indigestible.

Anyway, Ecco! Or voila, as we say in English: here are my tips for handling sticky doughs.

1. Get yourself a plastic dough scraper.
Seriously, after a bowl – and an oven of course – this is the most useful bit of kit for making bread dough. As a sticky dough adheres to your worktop, use the scraper to keep freeing it. You can also use it to make sure any bits of dough that go astray from the main lump are reincorporated. This the type I use. It’s a reasonable size and has a straight edge – good for the worktop – and a curved edge – good for freeing dough from bowls.

Scrapers

2. Get a metal dough cutter/scraper
Not quite as essential as the above, but it can be used a similar way. One option is called a Scotch scraper.

3. Oil the work surface
You can sprinkle your worktop with flour, but on the initial knead I prefer to oil the worktop. If you have a stainless steel or even marble surface, it’s not so relevant, but if your worktop is wood or bamboo (like mine), smear your work area with a few drops of oil. Generally I’ll just use sunflower seed oil, but if I’m doing an Italian or Middle Eastern bread, I may use a bit of olive oil. The oil stops the dough sticking… quite so much.

4. Clean and oil the bowl
After your first knead, and before you put the ball of dough back in the bowl, clean it. Dry it then add a dribble of oil and rub it around. Again, this’ll stop the dough sticking to the bowl, so it’ll come out more easily when you do your second knead. It’s not essential, but it’s helpful.

5. Knead with quick, confident movements
Watch a professional baker or an experienced home baker in action, and they don’t mess about with the dough. It’s handled with quick, confident movements. Indeed, even if you have a sticky dough, and are kneading it by hand, as you develop it, it will strengthen, become less sticky and start to form a ball. I would recommend getting hold of Richard Bertinet’s book Dough, as it comes with a DVD that shows this process. Someone has posted that video on YouTube, though I’m not sure how long it’ll stay up. He starts kneading from about 4 minutes in.

6. Flour your hands
Some people like to wet their hands, but I like to put a bit of flour on mine, not unlike weight-lifters dusting theirs with talcum powder.  It’s not something I do assiduously, but it can be a handy way of making things a bit easier without resorting to adding loads of extra flour to the dough. Also, towards the end of the knead I’ll clean my hands with some flour. OK, I’m not exactly cleaning them, but if you rub some flour between your hands as you would a bar of soap, it helps to get any dough off. My tactic is to do it directly above the sticky dough: the extra flour falls onto and around the dough, and I can then use the plastic scraper to tuck it under the lump, making it easier to form into a ball and put back into the bowl.

4 Comments

Filed under Baking, Breads, Discussion

Types of yeast for baking

3 x yeast

From the left: fresh yeast, active dry yeast, instant yeast

One of the awkward things about writing recipes for baked goods leavened with yeast is that there are three different types of yeast available commercially. Each has a slightly different quality, each is used in a slightly different way, and there are several different names to boot. It can make for some convoluted recipe ingredient lists.

I wrote more here about the specific species of yeast that we use for foods and our relationship with them, but here I want to look at the types of commercial yeast and how you use them.

Leaving aside sourdough / natural leavens / wild yeasts, the three yeast products in question are: fresh, active dry yeast and instant yeast.

Fresh yeast

Fresh yeast

Also known as cake yeast, compressed yeast and, in Italian, lievito di birra fresca (fresh beer yeast), fresh yeast is my preferred form. It is strangely both squidgy and crumbly.

In large scale bakeries, they may use 200g, 500g or 1kg blocks of the stuff, but for the home baker you may find it in 25g, 42g or 50g cubes or in the US I believe it comes in 2 ounce (57g) packs. Italian supermarkets stocked it, but most British ones don’t. I’ve heard that you can ask in in-store bakeries, but as these places are generally not actually bakeries – they mostly buy in pre-made dough and bake it off, rather than making it from scratch on-site – I doubt this. I get mine from a health food shop that sells it in 30g and 60g bags. You can buy it mail order easily enough (eg from Bakery Bits in the UK).

Using fresh yeast,  typically you activate it in your liquid – water, or perhaps milk if you’re doing an enriched dough. If the liquid is tepid, the yeast will form a froth after a short while. I prefer to use mine like this as I feel it makes it easier to distribute it into the flour, but Breton-born, Britain-based baker Richard Bertinet, for example, simply rubs it in as you would to add fat to flour. I’ve done this, and it works fine.

Fresh yeast is best stored in the fridge and will only last a few weeks, max. Then it’ll darken and go sludgy and not do you any favours.

Active dried yeast

Active dry yeast

ADY was the baking yeast I grew up with – small granules that sat in the fridge door in a jar or orange tin. It doesn’t need to be stored in the fridge, but arguably that way it’ll last for months, possibly even years, as it’s pretty much inert, the live component encased within the shell of the granules.

You do need to activate ADY to use it – again by adding it the liquid component of your recipe, and letting it froth up. Adding some sugar or honey to the liquid encourages this, as it gives the yeast some immediately accessible carbohydrates to start feeding on before it gets access to the carbohydrates in the flour.

Powdered yeast

Instant yeast

Also known as easy-blend, easy-bake yeast, fast action or quick, this is another type that can, confusingly, also be referred to simply as dry or dried yeast.

It’s similar to ADY but is finer, almost powdery. I don’t tend to use this, it’s just not something I learned to bake using, or have a particular affinity for, but it’s probably the most commonplace type of yeast available these days.

You can buy it in packs, such as these 125g ones from Dove’s Farm, but most typically you’ll find it in sachets of 7g (1/4 oz), which is about 1 1/2 teaspoons and is considered a convenient amount – you’ll often find recipes with 400g flour and 1 sachet, but recipes that rush the fermentation and proving times may do, for example, 500g and 2 sachets.

The big difference when using instant yeast is that you don’t need to activate it or mix it with the liquid first – you add it directly to the flour.

Compared to fresh yeast – which is essentially a product consisting of exactly the same commercially cultivated microorganisms – instant yeast will contain additives. Nothing too scary – just ascorbic acid and sorbitane monostearate (E491), an emulsifier. Though personally I would rather use a product that’s been industrially messed around with less, even if it’s just a little bit.*

Converting between types of yeast

As with all these things, if you look around online no one is quite in agreement about how to convert quantities of the different types of yeast, but a good rule of thumb is to use half the weight of fresh if converting to ADY, and a third of the weight of fresh if converting to instant.

So for example, a recipe that calls for 20g fresh yeast you could replace that with 10g ADy or 7g instant yeast. Or as percentages where fresh yeast is 100%, ADY is 50% and instant is 33%.

Of course, as you learn more about baking you’ll learn more about these variables – so for example, if you do a longer fermentation, you may be able to reduce the amount of yeast in a recipe and just leave the yeast to keep working. If you want a quick loaf (which I don’t recommend, because long fermentation = more digestible = less issues with wheat), a recipe may call for a much higher proportion of yeast.

My basic recipe made with commercial yeast works with these quantities:

1000g flour (100%)
350g water (70%)
20g fresh yeast (2%) or 10g ADY (1%)
20g fine salt (2%)

Addendum

If you’re interested in food history – as I am – Dorothy Hartley’s round-up for yeast types from her 1954 book Food in England is an noteworthy comparison. She lists five types of yeast:
Brewer’s Yeast – made by “the brewer’s wife; and sold to the farmer’s wife at market, to which it was carried in earthenware jars.” This is what we’d call barm, and something I’ve experimented with thanks to a supply from my brewer friend Michele.
Dry yeast – for storage or use aboard ships, “made by spreading the yeast out on a wide board, and more on top, over and over, as it dired, till it was a couple of inches thick.” It was then cut into pieces and stored, then reactivated in warm water as we commonly do with fresh yeast.
Potato yeast – potato boiled “and pounded up with some treacle and their own boiled water” with a little yeast added. So not really a type of yeast in itself, more of a medium. Although if left, such a mixture will develop its own wild yeast culture – this is the technique used for Maori rewena bread.
German yeast – imported from Hamburg then later Holland. “It was introduced in about 1850, and by 1866 we imported 5,735 tons in a year.”
Modern yeast – “obtained from a grocer will have a fresh clean smell, and be cool and firm.” She describes breaking it up and activating it in sweetened water, so it actually sounds like fresh yeast.

Possibly creating confusion, in The Last Food of England (2007), Marwood Yeatman says “Compressed yeast, known to the Victorians as ‘German’ or ‘dried’, and which we call ‘fresh’, is descended from brewer’s yeast.”


* All these yeasts are industrially cultivated of course, fed sugars and pushed through a series of tanks, vats and fermenters, sealed to prevent any contamination from wild yeasts. But it’s a matter of degrees and where you prefer to draw your line as the number of additives in our foods increases, even in tiny incremenents. I strongly believe the ever-increasing industrial processing and additives in our food are responsible for so many health and dietary issues and disorders.

When I was a kid in the 1970s, maybe one person in school (say 1%) had a food allergy or intolerance, now every second person has one.

Take wheat – a lot of people have difficulties with it today, or believe they do, hence the proliferation of gluten-free products (many of them hideously industrially processed) and gluten-free baking blogs and books. I ardently believe, however, that for most people (not all) the problem is more likely to be with the industrial “food” product and the ingredients, not with the grain itself. Human civilisation was largely built on wheat, at least in the Middle East and Europe.

If you eat a sandwich made of white sliced “bread” you may well feel bloated and sick; if you eat a sandwich made with real bread – made from just wheat, water,  salt and yeast (better yet, sourdough) and fermented for at least five hours, preferably more – you may not have the same reaction. I stopped  eating sliced industrial “bread” because it made me feel ill. This is what got me more interested in making real – really digestible, really nutritious – bread.

Humanity developed the skill of converting wheat into a nutritous foodstuff by giving it a long fermentation: a form of processing. And not packing the bread with additives. Sliced industrial “bread” may only be fermented for 20 minutes and is packed with additives. Is it any wonder modern “food” is making people ill when we so readily reject knowledge garnered and honed over millennia in favour of hubristic chemistry experiments?

8 Comments

Filed under Baking

From building site to castle. Real, actual castle

Kingswear Castle sunflare
As our building works were plodding into their most inconvenient stages we’d arranged to go away. I went down to Devon to see my folks, visiting a strangely dead village on the way down where all the cafes were closed but there was this great carving on an old pub.

Wheatsheaf

Being in Devon was lovely in itself as we got to enjoy the last vestiges of summer while mowing a meadow, but also because staying at my parents’ house meant I had use of an actual kitchen, something I’ve not had for 13 weeks now. So I could get stuck straight in with the baking, using up some something aging ingredients to make a surprisingly good loaf and okay almond and candied peel cookies.

Bread and biscuits crop

For the weekend, thanks to a generous gift for Fran’s big birthday and my less significant one from my folks, we went and stayed in a castle. An actual castle. Surely all boys – and many girls – fantasise about living in castles when they’re young, and this was about as good a fulfilment of that as I could hope for, aged forty-something in the 21st century.

Dartmouth and Kingswear castles

Kingswear Castle is a small defensive fort built a few meters above the waterline of the mouth of the river Dart. It was constructed at the turn of the 15th century to form a pair with Dartmouth Castle just over the river. Both were fitted with cannons to cover the mouth of the river in case of attack by enemy ships trying to take advantage of the sheltered port of Dartmouth. Improving technology soon made Kingswear Castle obsolete and it fell into disrepair. A Victorian aristocrat owned it in the 19th century, then the local MP in the mid-20th century, but I can imagine it wasn’t the easiest home. The gardener there told us the winter 2013-2014 storms involved waves breaking into not just a small Victorian bedroom in a turret at ground level, but also into an upstairs bedroom. Like Dartmouth opposite, it was also a significant spot in WW2, and there’s a blockhouse in the garden.

Shadow, blockhouse, rocks

As a place to visit though, with some mixed but not extreme weather, it was a wonderful experience. Partly, again, as it had a kitchen so I could do some cooking and baking, but partly because it had a kitchen with a view across the mouth of the River Dart or out to sea.

Apple cake, Dartmouth Castle

Among the things I made were the Dan Lepard apple and orange crumble tart I mentioned in my last post. It was delicious, especially with some of that divine dairy nectar clotted cream. (In this case, from Riverford Dairy. So good.)

Apple cake 2

I also made a loaf, about 80 per cent spelt, given an overnight fermentation. First I put it the dough an embrasure on the spiral stairway to prove.

Spiral staircase long prove

But I think there was too much warm air coming up, so I moved it to the ground (or rock) floor, where the old gun ports are. The finished loaf looked a bit like a seal, suitably enough as I’d seen one on the evening we arrived.

Gun floor

On our final morning, the weather was a tad wild and windy, and the waves were breaking into these ports. No wonder it wasn’t an easy place to live, especially for the MP, who put his kitchen in here and presumably watched it floating around in the surf on regular occasions.

Kingswear Castle panorama

Before the final wet and windy morning, however, we had some lovely weather. Good enough for a sunny walk along the coast path, via the old WW2 installations and current Coastwatch station at Froward Point, to Coleton Fishacre. This is a National Trust property, built in the 1920s for the D’Oyly Carte family, founders of the Savoy Theatre and patrons of Gilbert and Sullivan. I loved the 1920s styling, but particularly enjoyed the kitchens, replete with their fake loaf of bread.

D'Oyly kitchen

The sunny weather also gave us a nice backdrop for a patriotic moment and some beer tasting. This included a range from a new brewery near Winchester, my home town, called Mash. To be brutally honest, we found most of their beers insubstantial, not ready for release. But good luck to them. I always enjoy encountering a new brewery.

Mash and flag

Then we had some more local beers from Teignworthy Brewery in the Devon village of Newton Abbot (which we’d driven through.) This mild was almost a porter, with charcoally hints and a medium body.

Teignmouth Martha's Mild

The (sensible) boozing didn’t stop when we’d left either. We tried some more beers from Clearwater Brewery, in the north Devon village of Bideford.

Clearwater beers

The baking didn’t stop either. I was able to make one more loaf, this time with Wessex Mill‘s Wessex Cobber, a lovely malty flour I’ve tried before. As well as being an amazing holiday, it was just such a relief to have an opportunity to do some baking. For someone who makes bread every week, being without a kitchen for so long has been an interesting trial.

Wessex Cobber loaf

2 Comments

Filed under Ale, beer, Baking, Misc, Travelling

Microwave chocolate cake experiments

Microwave chocolate cake - weird texture?

As you may have noticed, this beer-and-baked-goods site isn’t featuring much of the latter at the moment. Due to buildings works, we’ve not had a kitchen for a month, and probably won’t have one for another couple of months at least, so there’s not baking going on here. Instead, we have a pathetic electric hotplate and a basic microwave.

And can you bake in a microwave? No, you can’t. Not literally at least, as the verb to bake apparently has its origins, via the Middle English baken, the Old English bacan, the Old Norse baka, and even the Old High German bahhan, in the Greek phōgein meaning to roast, to parch, to warm. So in essence baking is a process based around heat, specifically dry heat. Microwaving, on the other hand, involves zapping the food item with energy from approximately the middle of the electromagnetic spectrum.

You’re not cooking with thermal energy as you do in a conventional oven, you’re cooking with energy that generates thermal energy. You’re not baking with a dry heat, you’re causing molecules in the food – particularly the liquid component, the water – to dance and get hot.

I didn’t grow up with microwaves, and only acquired one when a relative of Fran’s died about a decade ago. I know they’re an efficient way of preparing food, but if you take pleasure in cooking, it’s quite likely you take pleasure in the tangibility of real heat: from an electric element in an oven, from a gas flame on a hob. The latter particularly has a kind of primal immediacy, like a neat, manageable campfire.

Is this baking? No. Give me a flame or a heating element.

So having said all that, I must report I’m surprised at my first microwave cake. How can you make a cake without baking it? I can’t really reconcile that, yet the mixture I made was a pretty normal cake mix, and it was cooked in the microwave in about five minutes, and the results are most definitely a cake. Not a good cake, but definitely a cake.

It’s not all good news though. What makes it not a good cake is a certain dryness, a weird airy homogeneity, a lack of depth of flavour and a slightly dry, ashy mouthfeel. Though the latter may be partly explained from the relatively high amount of baking powder in this recipe. Some jam and ganache, or even some standard water icing, might mask that, and compensate a bit for the dryness, but it’s definitely not as good as a real, proper, baked-in-an-oven cake. Nuking all the water molecules to cook the batter is no substitute for real heat.

But while I’ve not got an oven, it’ll have to do.

140g plain flour
40g cocoa
3 tsp baking powder
150g caster sugar
100g sunflower oil
100g hot water
2 eggs
1 tsp vanilla essence

Microwave choc cake ingredients

1. Grease and base-line a 22cm microwave-safe cake container. This could be a glass dish or a silicon cake pan.*
2. Sieve the flour, cocoa and baking powder together into a mixing bowl.
3. Stir the sugar into the flour mix.
4. Whisk together the sunflower oil, hot water, eggs and vanilla essence in a jug.
5. Pour the liquid mix into the dry mix and combine well to break down any dry lumps.
6. Pour the batter into the prepared pan or dish.
7. Cover with clingfilm (aka plastic wrap). This is the bit that freaks me out. Making a cake? With heat? With plastic?

Before cooking - cover with plastic
8. Put the pan or dish in the microwave and hit it at max power. Time will depend on your microwave. Mine is 700W, and it took seven minutes. If yours is 800W max, it may only take 5 or 6 minutes. Peel back the plastic and check with a skewer to see if the cake is cooked fully. If not, nuke it a bit more.
9. Remove from the microwave and allow to sit for about five minutes.

After cooking - remove plastic
10. Run a palette knife around the edge then turn out and allow to cool completely.

Slice

11. Decorate with ganache, or apricot jam and melted chocolate and butter like a sachertorte. Plain like this (above) it’s a bit dry.


* I tried to buy the latter, a silicone cake pan from a brand called Zeal. Unfortunately it didn’t say whether it was microwave-safe. I assume it would be, but don’t know enough about microwaving to be certain. So I didn’t buy it. I’ve emailed the Kitchen Innovations, the company behind the Zeal brand, but they’ve not replied. Got to love a brand that communicates with its potential customers.

2 Comments

Filed under Cakes, Misc, Recipes