Category Archives: Pastry

Foraged herb quiche, aka weed pie

This past month the weather has gone from cold (the end of winter), to unseasonably warm (a dash of climate change), to cold again, to just about normal for the time of year. Spring. It is definitely spring. The view from my kitchen sink has turned into a wall of fresh green and red, the latter the leaves of an ornamental cherry. The lawn needs cutting, other than the increasingly large area I’m converting into a wildlife friendly wildflower patch, and it’s dotted with dandelions. It’s very green, as only new growth can be.

There’s a very distinct type of middle-aged man here in Britain who obsesses over his lawns – feeding them, blasting them with chemicals, mowing them into neat stripes. I like some neatness, but the favourite part of my garden these days is the unruly wildflower patch. By June it’ll be full of flowering weeds – wild carrot, salad burnet, wild oregano, greater knapweed, red clover, little daisies, giant daisies, yarrow, fleabane, and many many more (I reckon there are 30-plus species in there now). But now it’s mostly about the dandelions. Some wildlife gardening experts recommend you leave them because, as they flower early, they’re an invaluable food for bees. I struggle a bit with this, as if you like a wildflower patch, dandelions can also take over a bit, spreading their seeds effortlessly, their wide leaf crowns out-competing other species.

So they take a bit of management. Not with toxins, but the occasional digging out. And eating. I’ve just used some of their leaves in this quiche, along with herbs foraged on a walk on Easter Monday. It was one of our favourites routes, taking in Knowlands Wood*, a private wood in East Sussex whose owners allow (respectful) access, which at this time of year is carpeted with wood anemones (Anemonoides nemorosa) and native bluebells (Hyacinthoides non-scripta, not the introduced Hyacinthoides hispanica, which takes over parts of my garden). Then heading for the Spithurst Hub café, with its wonderful selection of Swedish treats – cinnamon, cardamom and vanilla rolls. Love that fika action. Walking back, we even saw our first orchids of the season on an old railway embankment, early purples (Orchis mascula, not edible and not to be picked!).

My friend Alex “Kabak” Marcovitch gets fairly obsessive about the foraging at this time of year, notably going for hogweed (Heracleum sphondylium) shoots. I went for your basic wild garlic (Allium ursinum), which is very easy to over-pick, and indeed I’m still using up a roll of wild garlic butter I made last year and froze, as well as jack-by-the-hedge aka garlic mustard (Alliaria petiolata).

When you get your foraged wild herbs there’s always a question of what to do with them. I’d recently noticed I had leftovers of four different types of pastry in the freezer – hot water crust, almond pastry, puff pastry and cream cheese pastry, from a great pie crust recipe by Dan Lepard. I used some of them in an excellent recipe for oat biscuits, which I will share on here at some point. But for the herbs, I decided to make a quiche or pie, using up the cream cheese pastry. I’m not going to give a recipe here for the quiche as it was pretty freeform but here’s Dan pastry.

These quantities make about 750g, which is quite a lot, hence I had some left in the freezer. You’ll need a food processor with a decent capacity. This makes life a lot easier, though you can make it by hand too.

400g plain flour
1/2 teaspoon baking powder
1/4 teaspoon fine salt
150g unsalted butter, chilled and cut into cubes
150g full-fat cream cheese
1 egg, beaten

1. Simply combine everything except the egg in a food processor and process until uniform. Alternatively, sieve the dry ingredients into a bowl then rub in the butter and cream cheese.
2. Add the egg and bring to a dough, kneading – but not overkneading – until smooth.
3. Wrap and chill in the fridge, or freeze, until you need it.

So, quiche.  I’ve never much liked quiche. As a vegetarian throughout the nineties and noughties, I was often faced with quiche. Never a nice, homemade quiche, but a deeply dodgy supermarket-industrial quiche that was offered to me as the vegetarian option by people who couldn’t even begin to handle meat-free cooking. Times have changed a lot since then, with the huge rise in vegetarianism and veganism recently, though I expect the supermarkets still sell the same vile quiche, which always seemed to taste just eggy. I know egg is essential for quiche, but the whole idea is you can pack them with flavour to the point where the egg is mainly a binder – not the overall flavour, especially not that that nasty caricature of egg flavour found in industrial food.

Here, I sautéed down a finely sliced onion in some wild garlic butter and oil, added loads of black pepper and a good pinch of ground up dried chillies (the last of last year’s crop) and briefly wilted down the coarsely shredded weeds – about three large handfuls of the garlic, jack and dandelions leaves. Stinging nettles (Urtica dioica) would also be good, but the usual patch in my garden hasn’t appeared this year and I forgot to grab any on our walk. Then I beat three eggs and added some chunks of feta and hard goats cheese, as well as a nice teaspoon or so or za’atar. As I said – somewhat freeform. Combine the egg mix with the weed mix.

Meanwhile, I’d rolled the pastry to about 5mm and lined a flan tin. I pricked the bottom, then baked this blind for about 25 minutes in a 180C oven. When the pastry was slightly browned, I took it out then added the filling, and baked it for another 20 minutes or so, until nicely browned. Garnish with any wild spare wild herb flowers or dandelion petals, and enjoy with a salad.

* If you want to visit Knowlands Wood in East Sussex, not far from the county town of Lewes, this What Three Words is right in the middle. We tend to park in a layby outside Holmansbridge Farm Shop and pick up the public footpath there. It’ll lead you towards the woods, either across a field or via an old railway embankment,, forking around a sewerage works. Otherwise, head to the Spithurst Hub and follow the permissive paths from there, initially along a track into fields populated by ewes and newborn lambs at this time of year. The owners of Knowlands, Nick and Harriet Lear, have managed the 30 hectare woods since the early 1980s as a private nature reserve and their work is really paying off. The birdsong – including nightingale if you’re there at the right time in spring – and butterflies are testament to this.

2 Comments

Filed under Food misc, Misc, Pastry, Pies & tarts

Pear tarte tatin

For those not familiar, a tarte tatin is the pastry equivalent of an upside-down cake. Fruit is caramelised in butter and sugar, topped with pastry, baked, then inverted to serve. It’s a format that is forever associated with Stéphanie and Caroline Tatin, the Demoiselles Tatin. These sisters ran a hotel in France in the late 19th century and the story goes that Stéphanie accidentally invented the tart when she cocked-up making a traditional apple tart one day.

It’s probably hokum, and such a pastry format may have existed beforehand, but an inverted, caramelised apple tart became the signature dish of the Hôtel Tatin.

These days, there are numerous variations on the theme. I’ve done savoury versions using onion and beetroot. But my mainstay became a pear version, thanks to the fact that in our old house we had a prolific pear tree. I planted a pear tree in our garden when we moved here to Lewes about 10 years ago. I pruned it a few years ago, and it had a year off fruiting last year, but this year it had 30-plus healthy pears, despite only being an unsubstantial thing less than two metres call. A good height for my seven year old to help with the picking.

You can make a tarte tatin with shortcrust or puff pastry, but I prefer the former, especially when it’s made with the addition of ground almonds.

I think I could have packed more fruit into this version, and it’s not exactly elegant. But frankly, it’s delicious – butter, sugar, caramelised fruit. So good. My pastry skills are basic, but when you tuck the pastry in and it bakes, it creates possibly the best bit of the whole concoction – thick bits of pastry coated in caramel.

For the pastry
200g plain flour
30g ground almonds
30g caster sugar
Pinch of fine salt
100g unsalted butter, chilled and diced
1 egg, lightly beaten
A little cold water

For the fruit and filling
About 1 to 1.5kg pears, ideally slightly under-ripe. Comice, Williams, Conference are all good.
115g unsalted butter
200g caster sugar

You will also need an ovenproof pan or skillet. I use a cast iron skillet 26cm in diameter.

1. First, make the pastry. This is very easy in a food processor. Put the flour, ground almonds and sugar in the bowl the whiz briefly to combine. Add the butter and whiz until it looks like breadcrumbs. Add the beaten egg, then a little water. Not too much. Just enough to create a firm dough. If you don’t have a food processor, rub the butter into the flour until it resembles crumbs then stir in the sugar and ground almonds. Bring to a dough with the egg and a little water, if necessary.
2. Wrap the pastry and leave in the fridge until you’re ready to use it.
3. For the filling, slice the butter thinly and arrange on the bottom of the pan.


4. Sprinkle the caster sugar in a layer over the butter.
5. Peel, half and core the pears. I used a melon baller to core them, but you can use a teaspoon if you don’t have one.
6. Put the pear halves in the pan, core side down, rounded side up.
7. Put the pan on a medium heat and cook, melting together the butter and sugar, which will then start to caramelise.


8. Meanwhile, heat your oven to 220C.
9. When the butter/sugar mix is starting to caramelise, roll out the pastry to a rough circle a little larger than the diameter of the pan. Timing this is tricky, and I think I took mine off the heat a little early. You don’t want to burn the caramel, but you want your fruit nicely tinged.
10. Remove the pan from the heat and allow the bubbling to subside slightly before covering the fruit mix with the pastry.
11. Tuck the edges of the pastry into the pan and prick all over with a fork.


12. Put in the oven to bake for around 20 minutes or until the pastry is nicely browned.
13. Take out of the oven and allow to cool a little.
14. This is the tricky bit. Run a knife around the edges of the tart then invert it onto a large plate. Some of the fruit may well stick, so just carefully ease it out of the pan and put it back in its slot in the pastry.
15. Serve warm or at room temperature, with a blob of thick cream or vanilla ice cream. Try not to agonise about the calories or cholesterol.

Oh, and although this was delicious, I think I could have packed more pears in. You can also put the fruit the other way up, so you have the rounded bits upwards when you turn it out. The Roux Brothers do it that way with apples in their classic Roux Brothers on Patisserie. Prue Leith and Caroline Waldegrave, meanwhile, in Leith’s Book of Baking, do thick slices of apple. An image search online shows many variables. Frankly, such arrangements are up to you. All delicious and indulgent.

7 Comments

Filed under Pastry, Pies & tarts, Puddings & desserts, Recipes

Canterbury apple tart

Canterbury tart

My copy of the Roux Brothers on Patisserie is inscribed as a gift from my parents for Christmas 1995. They posted it out to me in New Zealand, where I enjoyed an antipodean summer Christmas. As summer gave way to Autumn, we began the Old Man Mountain apple harvest. In was in that orchard that I got, aged 24, my first ever bee sting. It descended liked a Stuka and stung me just below the eye.

I made a lot of French apple tart that Autumn. Mostly successfully, until the one time when I was helping my host, mentor and friend Nadia with a catering job. I made three or four in large trays, but failed miserably to get the liquid for the glaze to setting point. I’m still ashamed of that cock-up. Nadia wasn’t happy with me. I still love the Roux French apple tart, too. Though these days I’m possibly more keen on Canterbury tart.

We’ve lost so much of our culinary tradition in this country. I’ve said it before, but the combination of urbanisation, two world wars, the industrialisation of farming practices and the rise of the supermarket homogenised much of our food. Furthermore, we have a long history of food fashions and fads, such as royals employing French chefs. More recently, thanks to the work of food writers and immigrants, we’ve embraced Indian subcontinent and Italian-inspired food to the point where most families eat pasta more than they eat traditional British stodge, for example. We probably do. I’m not sure what I’d do without pasta to fill up T-rex most lunchtimes.

It shouldn’t need saying, but British food can often rival anything from our continental neighbours. We had our Dutch friend Annely visiting this weekend, and as she loves cheese treated ourselves to some pricy local fare. One was Lord of the Hundreds, a sheep’s milk cheese as good as any Sardinian or central Italian pecorino. Another was Lord London, a soft cows’ milk cheese as good as any French brie.

So when you discover a recipe like Canterbury tart, it’s worth noting that it’s as good as if not better than a classic French apple tart, and more straight-forward to make too. Now, I’m loathe to say Canterbury tart is an old, traditional Kent recipe as I can’t find much information about it. Several websites cut and past the same blurb saying the first recorded recipe was written by Geoffrey Chaucer in 1381 but I’m doubtful. Kent is certainly the heartland of apple growing, so let’s say it likely has some history. I got the recipe from my mum. Googling, it looks like one from Mary Berry. I wish Berry had told us where she got it from but her recipes are somewhat lacking in preamble.

Pastry
100g butter
225g plain flour
25g sifted icing sugar
1 egg, beaten

Filling
4 eggs
225g caster sugar
2 lemons, zest and juiced
100g melted butter
2 large cooking apples, peeled & cored, about 350g
3 dessert apples, peeled, cored & thinly sliced
25g Demerara sugar

A 25cm (or thereabouts) flan tin

1. First make the pastry. If making by hand, rub the butter into the flour and icing sugar until the mixture resembles breadcrumbs, then stir in the beaten egg and bring together to form a dough.
2. If making the pastry in a processor, combine the flour, butter and icing sugar in the bowl then add the egg and mix until the dough starts to form.
3. Form the pastry into a smooth ball, wrap in plastic and chill in the fridge for at least 30 minutes.
4. Roll out the pastry and line the flan tin, leaving an overhang. Chill the tin for a further 30 minutes (or longer if you need to).
5. To make the filling, beat the eggs, caster sugar, lemon rind and juice together in a mixing bowl. Stir in the warm melted butter, then coarsely grate the cooking apples directly into the mixture. Mix well.
6. Have the dessert apples ready sliced.
7. Preheat the oven to 200C, putting t a heavy baking tray in to heat up. (You don’t bake the pastry case blind, so this will help cook the bottom.)
8. Remove the pastry case from the fridge and spread the runny mixture in the bottom. Level the surface and arrange the dessert apple slices on top, neatly overlapping.
9. Sprinkle with Demerara sugar.
10. Put in the oven and bake for about 40-50 minutes, until the centre feels firm and the apples slices are slightly browned.

Serve warm, with cream or ice cream obviously. Though I would say I prefer it when it’s cooled and firmed up more. Even after a night in the fridge. Yum. The citrus/apple combination works so well.

By the way, I’m aware my pastry looks a bit messy. Although I can be somewhat perfectionist in some areas, I’m long reconciled with my shortcomings as a pastry chef. The important thing here is that it tasted good.

3 Comments

Filed under Baking, Pastry, Pies & tarts, Puddings & desserts, Recipes

Mince pies for Christmas

Mince pies

Clearly, I’m interested in traditional feast day foods on this blog. Many, if not most, of our traditional feast day activities have been lost here in Britain. This is due to various factors, notably the 19th century industrial revolution that shifted the population from rural labour to urban industry; then the privations of two world wars and dependence on imported food; then the ensuing embracing of industrialised food production.

Christmassy flavours
When I made the Cattern cakes in November, a friend mentioned that they tasted “Christmassy”. This is interesting, as it demonstrates how the only strong legacy of our traditional feast day foods is at Christmas. It might be grotesquely commercialised, and shifted forward from the Twelve Days (25 December to Epiphany Eve, 5 January) into late November and Advent, but for many it still involves the consumption of traditional foods: mince pies, a heavy fruit cake and plum pudding. All of which feature dried fruits and spices.

We take them for granted now, as jars of dozens of types of spices are readily available from any supermarket, but in antiquity and the Middle Ages they were enormously expensive. Later, in the age of European empires, their trade fuelled many economies, notably imperial Dutch and British*. They really were only ingredients for special days, or for the wealthy, until fairly recently.

While spiced (cinnamon, nutmeg, clove, ginger etc), fruity flavours were once more associated with various celebrations through the year, now we just think of them as “Christmassy”.

Mince pies

Anyway, that’s a thought for this post. Mostly, I realised that while I have various multinational feast food recipes here, I don’t have any basic British Christmas ones. That’s partly because I don’t like Christmas cake and plum pudding. I didn’t like mince pies growing up either, but then I discovered a simple recipe for mincemeat and gave them a whirl. They were good. Making your own is so much better. I know Christmas can be stressful for many but this recipe involves just a fruity preserve and some pastry – nothing too complex, and both can be made ahead of time. The mincemeat will sit in a jar, the pastry can be frozen.

Sweet meat
Oh, and many wonder why the filling – sweet, fruity – is called “mincemeat”. Well, in the Middle Ages, puddings and pies would often involve fillings that mixed what we’d considering today as sweet and savoury, notably meat, spices and sugar. I’ve written previously about the term “pudding” – which can still refer to sweet or savoury items in British English. The precursor of Christmas pudding (aka plum pudding), plum pottage, featured meat along with the dried fruit and spices. The legacy of this in mince pie fillings is suet – traditionally a fat from around the kidneys of beef cattle, or mutton (sheep older than two years).

I do tend to use vegetarian suet substitute, partly from force of habit as an ex-veggie, but also because it’s easier at parties when many guests may be too. But it is still a conundrum, as vegetarian suet used to be hydrogenated fat, since deemed a nutritional nightmare, and is now mostly palm oil, an environmental nightmare. So your call on the lesser of two evils.

The mincemeat recipe here was originally from Delia Smith, the pastry originally from Linda Collister.

First make the mincemeat, ideally in October or November – when you can get some fresh homegrown cooking apples. You will need a couple of medium sized jars, washed and rinsed thoroughly. I then tend to put them in a low oven when I’m ready to bottle, to dry them and sterilise.

Fill the pies and top with stars

225g Bramley apples, cored and chopped small (no need to peel them)
110g shredded suet
175g raisins
110g sultanas
110g currants
[total 385g of these]
110g whole mixed candied peel, finely chopped
175g soft dark brown sugar
grated zest and juice 1 orange
grated zest and juice 1 lemon
25g whole almonds, cut into slivers, or flaked almonds
1 tsp ground cinnamon
1 tsp ground allspice
1 tsp ground cloves
1 tsp ground ginger
1/2 tsp ground coriander
1/2 tsp freshly grated nutmeg
3 tbsp brandy

1. Combine all the ingredients, except for the brandy, in a large mixing bowl.
2. Mix thoroughly.
3. Cover the bowl with a clean cloth and leave in a cool place overnight or for 12 hours, so the flavours have a chance to mingle and develop.
4. Preheat oven 120°C.
5. Cover the bowl loosely with foil and place it in the oven for 3 hours. It’ll look fatty. Don’t worry, this is right. As it cools, stir it from time to time.
6. When the mincemeat is cold, stir well again, adding the brandy.
7. Bottle in sterilised jars.

It’ll keep for months, even years. I had a jar for two years once and it was fine, indeed it was probably better as it gives time for the flavours to mature.

Pinning out for mince pies

Now, the pastry.

Readers of this blog will know I love ground almonds as an ingredient for cakes. They’re a great addition to sweet shortcrusts too. My mother has just been reminiscing about the mince pies made by her mother, my Granny Buckley, and how “Ground almonds in the pastry was her trick.” So such tastes must run in the family.

This recipe calls for one egg yolk but I’ve also done it with whole egg, and then just used less water to bind. Both are fine.

200g plain flour
30g ground almonds
30g caster sugar
Pinch salt
100g butter
1 egg yolk
2-5 tbsp cold water

1. Sieve flour into bowl.
2. Dice butter and rub in. Alternatively, combine in a food processor.
3. Add ground almonds, pinch salt and sugar.
4. Lightly beat the egg then add to the dry mix.
5. Bring together dough adding enough water to create a soft but not too wet dough.
6. Form ball and wrap in plastic. Rest in fridge for half an hour or freeze.
7. Roll out to about 4mm and cut discs to line the dips in a pie tray.
8. Fill each with some mincemeat.
9. Add lids – either whole discs or star shapes. The latter is easier (no crimping required), and cute to boot.
10. Bake for about 15-20 minutes at 200C, until nicely browned.
11. Dust with icing sugar before serving.

Freshly baked mince pies

If mince pies are a big part of your Christmas, I’d heartily encourage you to make your own. I don’t claim mine are the best mince pies, and they’re certainly not the neatest or most aesthetically pleasing – like everything I make these days, they’re slightly rushed as I’m either waiting for kids to wake from their afternoon naps or I’m knackered at the end of the day. But they’re easy to make and really, honestly, so much better than any of the industrial crap from the supermarkets.


* See this blog post by botanist Stephen Forbes for more about the origins and history of spices.

5 Comments

Filed under Baking, Feasts, Pastry, Recipes

Game pies with hot water crust

Game pies

I don’t feature meat on this blog often but I do eat it, and I particularly like game. The guy selling game has reappeared on our local market. Game season1 offers the omnivore some interesting alternatives to meat from farmed animals. We’ve had some venison, but I’ve also been making some pies. (If you want to go straight to the recipe, skip down here.)

I’d like to think I have a considered approach to consuming meat. It’s not something I do lightly. I grew up with a conventional British diet, which involved roast meat on Sundays. When I first visited New Zealand, in 1990, I was 19 and didn’t really know any different. But when I ended up living at Newton Livery, a small South Island farm owned by heavy horseman Stephen McGrath, he was vegetarian. So I started eating veggie too.

When I got home I saw a documentary about industrial pig farming, which affirmed my vegetarianism. Intensive industrial animal farming is horrifying. I remained a veggie, then later a pescatarian, for about 20 years, with only a few exceptions. I was from the school of thought that I shouldn’t eat animals if I wasn’t prepared to kill them myself. The second time I lived in New Zealand, in 1995, I had a chance to put this into practice.

I was living at Old Man Mountain and Nadia had three roosters, which were fighting in the hen house. One of them had to go. I killed it, plucked it, gutted it, hung it, cooked it and ate it. Such an act is probably nothing for a countryman, but it was quite bloody for a townie. But a chook is fairly low-level butchering compared to a pig, say. When some hunter friends stopped by, I went with them into the bush, hunting pigs (or boar if you prefer).

We didn’t find any that day, but it got me thinking more about game meat. New Zealand is in a difficult position regarding game such as boar, deer and chamois are all non-native2 and have not natural predators. As such they’re highly problematic for the country’s unique ecology. They trash the bush and compete with native species, so arguably humans have a responsibility to control them. This means hunting, and that is a source of food.

The virtues of hunting
New Zealand’s hunting culture is very different to the largely elitist situation here in the UK, but we do have some comparable problems. Whereas the NZ problems concern native forest, here it’s more about farmland. Before you get to sentimental, bear in mind that Britain is a small island, with about 60 million people crammed on it. It’s a place that’s seen increasing agricultural use over the past approximately 6,500 years and as such our countryside is by and large a place defined by human activity. There’s no true wilderness left in Britain3. Like it or not, our countryside is heavily managed, and, for food production, that means controlling the populations of animals that, for example, eat the seeds of newly sown crops.

We have two native species of deer in Britain, red and roe, and several introduced species (fallow, sika, muntjac), all of which may cause problems as they don’t have any natural predators either – we killed all our bears and wolves off years ago, as part of that process of transforming wilderness into farmland. So we cull deer.

Large numbers of other common species, such as wood pigeons (Columba palumbus) and rabbits (Oryctolagus cuniculus4), can also be problematic for crops, and are similar hunted or trapped. Some of this meat ends up with the sort of vendors who arrive on my local market at this time of year.

Strong meat
The fact that game animals are mostly wild means that they haven’t been fattened up like domestic animals, meaning the meats are leaner. But where fat is flavour in much cooking, game compensates with its distinctive… gaminess. That said, it’s a very varied area of meat: I can’t imagine my parents were the only ones to trick us as children into eating rabbit saying it was chicken, as it’s similarly white and mild.

So anyway, I was vegetarian or pescatarian, until I fell in love with Fran, a dedicated meat-eater. One weekend morning we were making bacon sarnies – real bacon for her, and fake rashers for me – and the absurdity of the situation hit me. Her meat was from an old hippy couple who had a stall on our local farmers market, my “ethical” option was some crap from a factory made with soy of dubious provenance, most likely an intensive, chemicals-doused farm in China or on former rainforest in Brazil. I started to eat some meat then, then relaxed more on a world trip – I mean, quibbling about the stock of my pho in Vietnam seemed similarly absurd.

Coming home, I started to enjoy exploring game. One recipe I discovered early was for game pies, which combine mixed game meats with pig meats, and are flavoured with herbs and juniper berries. The latter are an classic flavouring for many game dishes.

Juniper berries

Who doesn’t love a pie?
I’ve done a lot of vegetarian experiments with pulses and suchlike to try and make a really good pie (a two-crust pie, ie crust all around), a pie that could compete with a classic meat pie. Some were good, but not as good as a pie like this. It’s a very gratifying pie. It’s also a timeless pie; I can imagine something similar being made here for centuries, being stolen off a stall in a market by an urchin in Tudor London or eaten on a tartan rug by a minor Victorian aristocrat on a shooting weekend in the Highlands in Scotland.

The pastry alone is very satisfying. It’s hot water pastry, a hot water crust. You make it my melting fat in water, bringing it to the boil then adding it to flour and forming a dough. After it’s cooled, and the fats have firmed up a bit again, it’s easy to handle and perfect for moulding freeform pies. Don’t be intimidated!

Form the pies

Makes 4 medium-sized pies

Filling:
250g mixture of game, ie venison, rabbit, pheasant, wood pigeon. Many game merchants will sell a ready-made game pie mix.
60g unsmoked streaky bacon, chopped
200g sausage meat
1 egg (about 55g beaten egg)
Small bunch of parsley, finely chopped
Small bunch of sage, finely chopped
Grated zest of half a lemon or orange
5 juniper berries, finely ground (more if you really like juniper)
Salt and freshly ground black pepper, lots of black pepper

Hot water crust pastry:
250g plain flour, plus extra for dusting
1/2 tsp fine sea salt
1 egg
50g unsalted butter
50g lard
85g water

Plus extra beaten egg for glazing

Parsley, sage and lemon zestParsley, sage and lemon zest, chopped

1. First make the pastry. Sift the flour and salt into a mixing bowl.
2. Crack the egg into the flour, beat it briefly and cover with flour.
3. Put the butter, lard and water in a pan and heat. Once the butter and lard have melted, increase the heat and bring to the boil.
4. Pour the boiling water and fat around the edge of the bowl and quickly combine using a palette knife or similar. Knead the dough lightly until smooth, then wrap in plastic. Allow to cool, then rest in the fridge. You want the fats to start to set again, to firm up the pastry to make it more manageable, so at least 30 minutes.
5. Meanwhile, prepare the filling. Trim the game, then cut into cubes about 1cm-ish. Mix with the chopped bacon, sausage meat, beaten egg, herbs, zest and ground juniper berries, and season with salt and plenty of black pepper.
6. Divide the meat into 4 portions, each weighing around 140g, and roll into balls.
7. Take the pastry out of the fridge. It should weigh about 500g.
8. Prepare some baking sheets, lined with baking parchment or silicone sheets.

Roll pastry and cut discs
9. Roll the pastry out on a floured surface to around 3mm thick. Cut out 4 circles, 14cm in diameter, using a saucer as a template.
10. Place the circles on the baking sheet, then put a ball of stuffing in the middle of each.
11. Use the pastry off-cuts, squidged together and rolled out again, to cut out 4 lids, 7cm in diameter.
12. Place a lid on the top of the stuffing.

Stretch up the pastry

13. Wet the edge of the base, then stretch up the pastry to meet the lid. Pinch the edges together, with the lid edge on the inside.

Squeeze together bottom and lid
14. Repeat with the others and then chill for at least an hour, until the pastry feels firm.
15. Preheat the oven to 190C.
16. Make a steam hole in the centre of each pie with a skewer then bake them for 15 minutes.
17. Remove the pies from the oven and reduce the temperature to 170C.
18. Brush the pies with beaten egg then return to the oven. Bake for a further 20-30 minutes until cooked through and nicely browned.

Game pies

Notes
1. There is no one “game season” in the UK. It varies between the different countries in the Union, the various species and even sex within a species. There’s also distinctions between species that are wild and those that are bred on estates by gamekeepers (notably fowl like pheasants, Phasianus colchicus, another non-native species, originally from Asia). Broadly, however, we see more game meat available in the winter, although rabbits can be hunted all year (see note 4, below). Deer species can, broadly, be hunted late summer to spring – but only the males. The season for females is shorter. There’s more information here.
2. There are no indigenous land-based mammals in New Zealand. The only native mammals are bats and marine animals (dolphins, whales, seals and sea lions). More information here.
3. Wilderness is defined as land that’s “wild and uncultivated” and “uninhabited or inhabited only by wild animals.” Even Britain’s wildest places, such as Dartmoor, are shaped by human activity, such as woodland clearance, burning and game-keeping.
4. This is something that’s long been debated. For years it was believe that the European rabbit was introduced to Britain by the Normans, after the conquest of 1066AD, but archaeological evidence indicates they were in fact first brought over as a food source by the Romans, who invaded in 43AD. The Normans may have brought over more, after the Roman rabbit population had dwindled. The narrative isn’t entirely certain. What we do know is that “Britain’s estimated 40 million rabbits cost the economy more than £260 million a year including damage to crops, businesses and infrastructure.” (Full story here.)

11 Comments

Filed under Pastry, Pies & tarts

Pistachio-cinnamon pastries and memories of Nadia

Cinnamon-pistachio pastries with Maghrebi type tea

This time last year, my wonderful old friend Nadia was hospitalised. A few days later she died, surrounded by her family. It was her birthday too, so the end of October is double memorial to Nadia. She is much-missed and I think of her often, especially when I’m cooking.

I lived with Nadia and her family in the mid-1990s, in a kind of long-term WWOOFer role on a farm called Old Man Mountain in the verdant, wild Buller Gorge on New Zealand’s South Island. Although I worked on the farm for its owner, Susie, I spent a lot of time with Nadia in the kitchen of her yellow house, talking about and making food. She was one of the key cookery mentors in my life.

During my year there, Nadia and I went through phases. We obsessed over French patisserie, and I made my first croissants in her oven. We made samosas and curries and south Asian feasts; Nadia was part-Indian, but hadn’t travelled, so my experience of growing up in a country with a huge South Asian food scene were a useful source of information for her. Then we obsessed over Middle Eastern food. I’ve always been more inclined to sweets, cakes and pastries, so I dug out recipes along those lines. Some made it into my journals.

After Nadia’s death, I revisited those journals and transcribed more of the recipes. This is one of them. It’s called cinnamon pistachio crescents in my notes and it says it’s of Middle Eastern origin. I’ve no idea if it is a genuinely Middle Eastern recipe either, or the Arabic name of these pastries. They may well be related to croissants though, given the shape and the high butter content, so perhaps they’re a hybrid of Arabic food heritage and French imperialism. A terrible lack of information, I know. All I know is that they’re a bit like croissants, but there’s no lamination here, so they’re a lot easier to master. Perhaps they’re related to the Jewish rugelach. If anyone does know the name of Arabic pastries like this, please do enlighten me!*

The recipe, now somewhat tweaked by me, may well be from a Middle Eastern cookbook my mother sent out to me in 1994. I saw it last, in October 2013, just after we’d left Rome and had gone travelling to see international friends and family: on a shelf in Nadia’s house in the Marlborough Sounds. Perhaps it’s still there. One day I may be able to check it, when we next visit NZ. Who knows? With the recent eleventh hour failure of our adoption match, I don’t really know what life holds next. While we nurse our bruised dreams I know at least there will be more baking.

Baking of things like these. I’m making them thinking of Nadia, bustling around her kitchen at Old Man Mountain, twenty years ago. I wish I could email her to ask her to look in that old recipe book. It’d take her a week to find the time away from her precious, precarious garden and connect to her agonisingly slow dial-up, but I miss her communiqués, her snatches of life, her ardent discussion of food.

48 cinnamon pistachio pastries, with Nadia

Dough
10g active dried yeast or 15g fresh yeast
60g water
25g caster sugar
125g strong white flour
125g plain flour
4g fine sea salt
200g unsalted butter, melted
2 eggs, beaten (that is, 120g beaten egg)

Filling
6-8g cinnamon (to taste)
80g caster sugar
50g pistachios, roughly chopped or quickly broken up in food processor.

Roughly chop pistachios

Makes 48

1. Mix the yeast with the water. You can use tepid water to get the yeast going if you like, but as these have a long prove in the fridge it doesn’t really matter.
2. Stir in sugar.
3. Combine the flours in a bowl, add the salt, then mix in yeasty water, melted butter and egg.

Mix the damp doughFirm up the dough in fridge
4. Mix up to a dough. It’s very moist from all the egg and melted butter so it really is a case of mixing, with a spatula. Cool the dough in the fridge a bit to firm up the butter then you can give it a knead, just to make sure everything is nicely homogenised.
5. Return the dough to a clean bowl, greased with a little oil, cover, then put in the fridge and leave for at least three hours, or even overnight.
6. Take the dough out of the fridge and allow it to come back to room temperature. (The butter will have set hard again, so it’ll be difficult to handle until it’s warmed up a bit again.)
Cinnamon and pistachio filling mix
7. Combine the cinnamon, sugar and chopped pistachios to make the filling.
8. Preheat the oven to 180C and prepare several baking sheets, lining them with parchment or silicone sheets.
Cut the dough into 6 piecesForm 6 balls
9. Divide the dough into six balls, each weight about 111g, then cover and let them rest for 10 minutes.
Disc 20cm in diameterSprinkle filling
10. On a lightly floured surface, roll out each ball into a disc, keeping them moving to avoid sticking. Roll to about 20cm in diameter.
Divide into 8 segmentsRoll up the segments and form crescents
11. Sprinkle the filling onto the discs, then cut each one into eight segments.
12. Roll up the wedges, starting from the wide end, and shape into crescents.
Place on lined traysBake until browned
13. Place on baking sheets, cover and prove for about 20 minutes until slightly risen.
14. Bake for around 12 minutes, until nicely browned.
15. Cool on a wire rack.

Pistachio cinnamon crescents

I imagine these would go very well with a nice strong, short cup of coffee, but as I don’t drink it, I can’t say! I can say they also go nicely with tea, black or green. But the ideal drink to have them with would be that sweetened blend of black and mint tea, served in glasses, as drunk in Arabic world, especially the Maghreb. I like to think that when I first made them at Old Man Mountain in 1994, me and Nadia sat down to try them with a with a cuppa, critiquing them. Nadia probably said they were good, but she preferred savouries.


* Since writing this, I’ve done a little more research. In Arabic countries, such a pastry might be referred to as a sanbusaj, sambusak, sambosak. It’s the same in Hebrew. And similar in many other languages across the Middle East, western and southern Asia. Indeed, they’re probably all from the same Persian root word: sanbosag. A more familiar related word here in the UK is the Indian Subcontinent samosa.

But, you may be wondering, what’s a usually savoury, deep-fried parcel got in common with a crescent, yeasted dough, buttery pastry? Well, broadly, there’s all just variation on a theme of filled pastries. This recipe, for example, is savoury, but uses a similar technique to mine here, and as such nicely bridges the gap.


15 Comments

Filed under Baking, Pastry, Recipes

Tippaleivät – Finnish May Day fritters

Tippaleivat

In England, for May Day we all – of course – morris dance around poles bestrewn with ribbons and get drunk on ale*. I’m not sure we have any particular traditional celebration foods. So I was looking around for treats from other nations. I came across tippaleivät (plural) or tippaleipä (singular).

Tippaleivät are eaten in Finland as part of celebrations on Vappu, the Finnish May Day, Walpurgis day. Love that word, Walpurgis. Walpurgisnacht. That’s German of course, though Germany has a relative of tippaleivät, cruller, the US has its funnel cake, while they’re all also arguably a distant relative of the South Asian jalebi. Mmm. Jelabi.

Frying 2

Basically they’re just swirly fritters, which can be flavoured with lemon zest and vanilla, though the latter can come via a dusting of vanilla-flavoured icing (powdered) sugar. I’ve seen recipes for yeasted versions, versions with baking powder, and versions with no raising agent at all. I’ve taken the middle path.

My Finnish friend Tomps tells me that tippaleipä means “drop bread” – as in, you’re dropping the batter. I’ve read lots of tips on how to shape the fritters as you fry them as you just pipe a worm of thick-ish batter straight into the oil. Some people say use a ladle, others a metal ring of some persuasion, or even a tin can with both ends removed.

But using a ladle and a piping bag simultaneously over hot oil seems a tad fiddly to me, whilst most tin cans these days have a plastic lining – not ideal in oil at 180C (360F, for those of you in the 19th century). So I just did mine free-form. They’re perhaps not the neatest, but they hit the spot.

Squeezing, dribbling

Happy May Day! Happy Vappu! And indeed happy Beltane!

2 medium eggs (about 100g beaten egg)
25g caster sugar
200g plain flour
1 tsp baking powder
1/2 tsp fine salt
100g milk
1/2 tsp vanilla essence [optional]
zest of half a lemon [optional]
Sunflower or rapeseed (canola) oil, for deep-frying
Icing sugar, for serving

1. In a large-ish bowl, combine the egg and sugar, and vanilla (if using), and beat slightly.
2. Sieve together the flour and baking powder, add the salt and zest (if using).
3. Alternately add flour mix and milk to the egg, beating to create a thick batter.
4. Put the batter in a piping bag fitted with a smallish nozzle, max about 5mm. Alternatively you could use a plastic freezer bag and snip off the corner. Just keep it away from the hot oil!
5. Heat the oil to 180C.
6. Drizzle a thread of batter into the oil, forming a nest shape.

Dribbling, frying
7. Cook until golden, about 4 minutes, then take out and drain on paper towels.

Frying
8. Serve dusted with icing sugar.

In Finland, they’re eaten with a lemony mead drink, sima. We’re just having ours with coffee and hot chocolate.

Tippaleivat, overhead


* Or not. Due to the convention of Bank Holiday Mondays, today isn’t a national holiday – that comes on Monday. Which isn’t actually May Day.

6 Comments

Filed under Cakes, Pastry, Recipes

Pastiera Napoletana – Neopolitan grain and ricotta Easter tart

Blur

“On sale now – and only in this season – is a pagan springtime cake, pastiera Napolitana, made with soft grains of all kinds, removed from their husks months before ripe, and cooked with orange blossoms. There is a description of it by one of the Latin authors.”

Norman Lewis includes this description in his entry for 28 February in his book Naples ’44. Lewis was a sergeant in the British Army Intelligence Corps and kept a diary of life in the war-torn city. It’s hugely evocative – largely of the privations of impoverished Neapolitans, but it also includes rich records of Naples’s seasonal traditions, including its unique foods.

Pastiera slice

I first encountered pastiera when we visited the city in June 2013, and was drawn in by the cute olde style packaging of a bakery that specialised in this special pastry. Although that bakery seemed to sell it all year round, pastiera is more specifically associated with Easter. Though its origins – as Lewis says – are pagan, ancient Roman. It may have been eaten as part of celebrations of the goddess Ceres (Demeter to the Greeks) who oversaw agriculture, grain and fertility.

Or something like that. The modern pastiera is likely decidedly different to the ancient Romans’ concoction, though both probably featured eggs and grains, symbolic foodstuffs for pagans and Christians alike.

The other important ingredient is ricotta. In England the stuff you get is a dense, slightly characterless cow milk blob rammed into plastic tubs. In Roma – ah, the ricotta of Roma! Fresh stuff is sold every day in the city, curdy delicacies that sit, plump and proud, in little baskets in the displays of market stalls, cheese shops and alimentari. Some are made with sheep milk (the classic), some cow milk, some a mixture.

I do wish I’d made this back in Rome, so I could have at least tasted the difference. I suspect made with real, fresh ricotta it would have been a somewhat different proposition.

Anyway, it’s about time I tried making one!

Pastry

300g plain, all-purpose or low-protein 00 flour
140g unsalted butter, cold
100g icing sugar
2 eggs

1. Sieve the flour.
2. Cut the butter into cubes.
3. Lightly beat the eggs.
3. Put the flour in a food processor, add the butter and blitz quickly until it resembles crumbs. Then add the icing sugar and blitz quickly again to combine. Alternatively, rub the fat into the flour by hand until it resembles crumbs then sieve in the icing sugar and mix.
4. Add the egg a little at a time, until the dough comes together. Again, you can do this in the processor or by hand. You may not need to use all the egg; you don’t want the pastry too damp.
5. Briefly knead the dough until it’s smooth. Don’t do it too much.
6. Wrap in plastic and leave to rest in the fridge.

Ricotta mix

Filling

The grain is the most distinctive ingredient here. You can usually get whole wheat grains from health food shops, and they will need simmering in water. Some may need soaking before cooking – follow the instructions on the packet. Make sure you could them enough as undercooked grain, like undercooked pulses, isn’t great for your digestion. You may be able to source pre-cooked grain in a can. Once cooked, drain, reserving the cooking water – it’s great for bread making.

Pastiera is also called pastiera di grano, with grano meaning grain in Italian, but it’s also used as a synonym for wheat. If you prefer, you could use another type of grain – such as one of the older varieties of wheat like spelt, einkorn or emmer. You could even use barley or oats. Or a mixture, as Lewis mentions.

300g wheat grains (cooked weight)
350g milk
30g unsalted butter
1 lemon, zest
1 orange, zest
1/2 teaspoon cinnamon
1 tsp vanilla essence
500g ricotta
250g caster sugar
2 whole eggs (about 120g beaten weight)
1 egg yolk (about 20g)
100g candied peel [ideally orange and cedrocitron, but latter not common in UK]
2-3 tbsp orange blossom water – optional, to taste

Uncooked wheat grainCooked wheat grain

1. Firstly, cook the wheat grains. Or open the can…

Wheat with milkWheat with milk 2
2. Combine the cooked grain, the milk, the butter, the zest, the cinnamon, the vanilla in a saucepan, cook gently for another 30 minutes or so. Again, you don’t want to turn it into a porridge, so keep an eye on it, as you would a stove-top rice pudding.
3. Blend the ricotta with the eggs, egg yolk and sugar.

Add grain to ricotta mixAdd peel to ricotta mix
4. Add the grain mixture to the ricotta mixture, then stir in the peel and orange blossom water, to taste. This stuff can be quite pungent, so go easy.
5. Grease a 25cm pie or flan dish or even a spring-form cake tin then line it with the pastry.

Pastry casePastry case, pricked
6. Prick the bottom with a fork and trim the edge roughly. We’ll tidy it in a mo.
7. Pour the filling into the pastry case. (Mine was a bit full – but I only had a 24cm tin. Hence I suggest using a 25cm tin.)
Pastry strips

8. Gather up the pastry offcuts, roll out again, and cut strips about 15 wide. If you have a pastry wheel with a serrated edge, this looks cute, but it doesn’t matter if you don’t.

Trim edges
9. Create a criss-cross pattern on top of the filling with the pastry strips, with the pieces of pastry set at an angle so you get diamonds, not squares. Tidy the edges.
10. Preheat the oven to 180C.

Baked
11. Bake the pastiera for about 1 hour and a quarter, keeping an eye on it. If it starts to brown too much, cover with foil and turn the heat down to 160C. It should be firm and set, if not, leave in the oven for another 15 or so minutes.
12. Allow to cool completely, then dust with icing sugar and serve at room temperature.

Happy Easter!

Pastiera cut

12 Comments

Filed under Baking, Pastry, Pies & tarts, Puddings & desserts, Recipes

Puff pastry, three recipes compared

Dan Lepard puff pastry baked

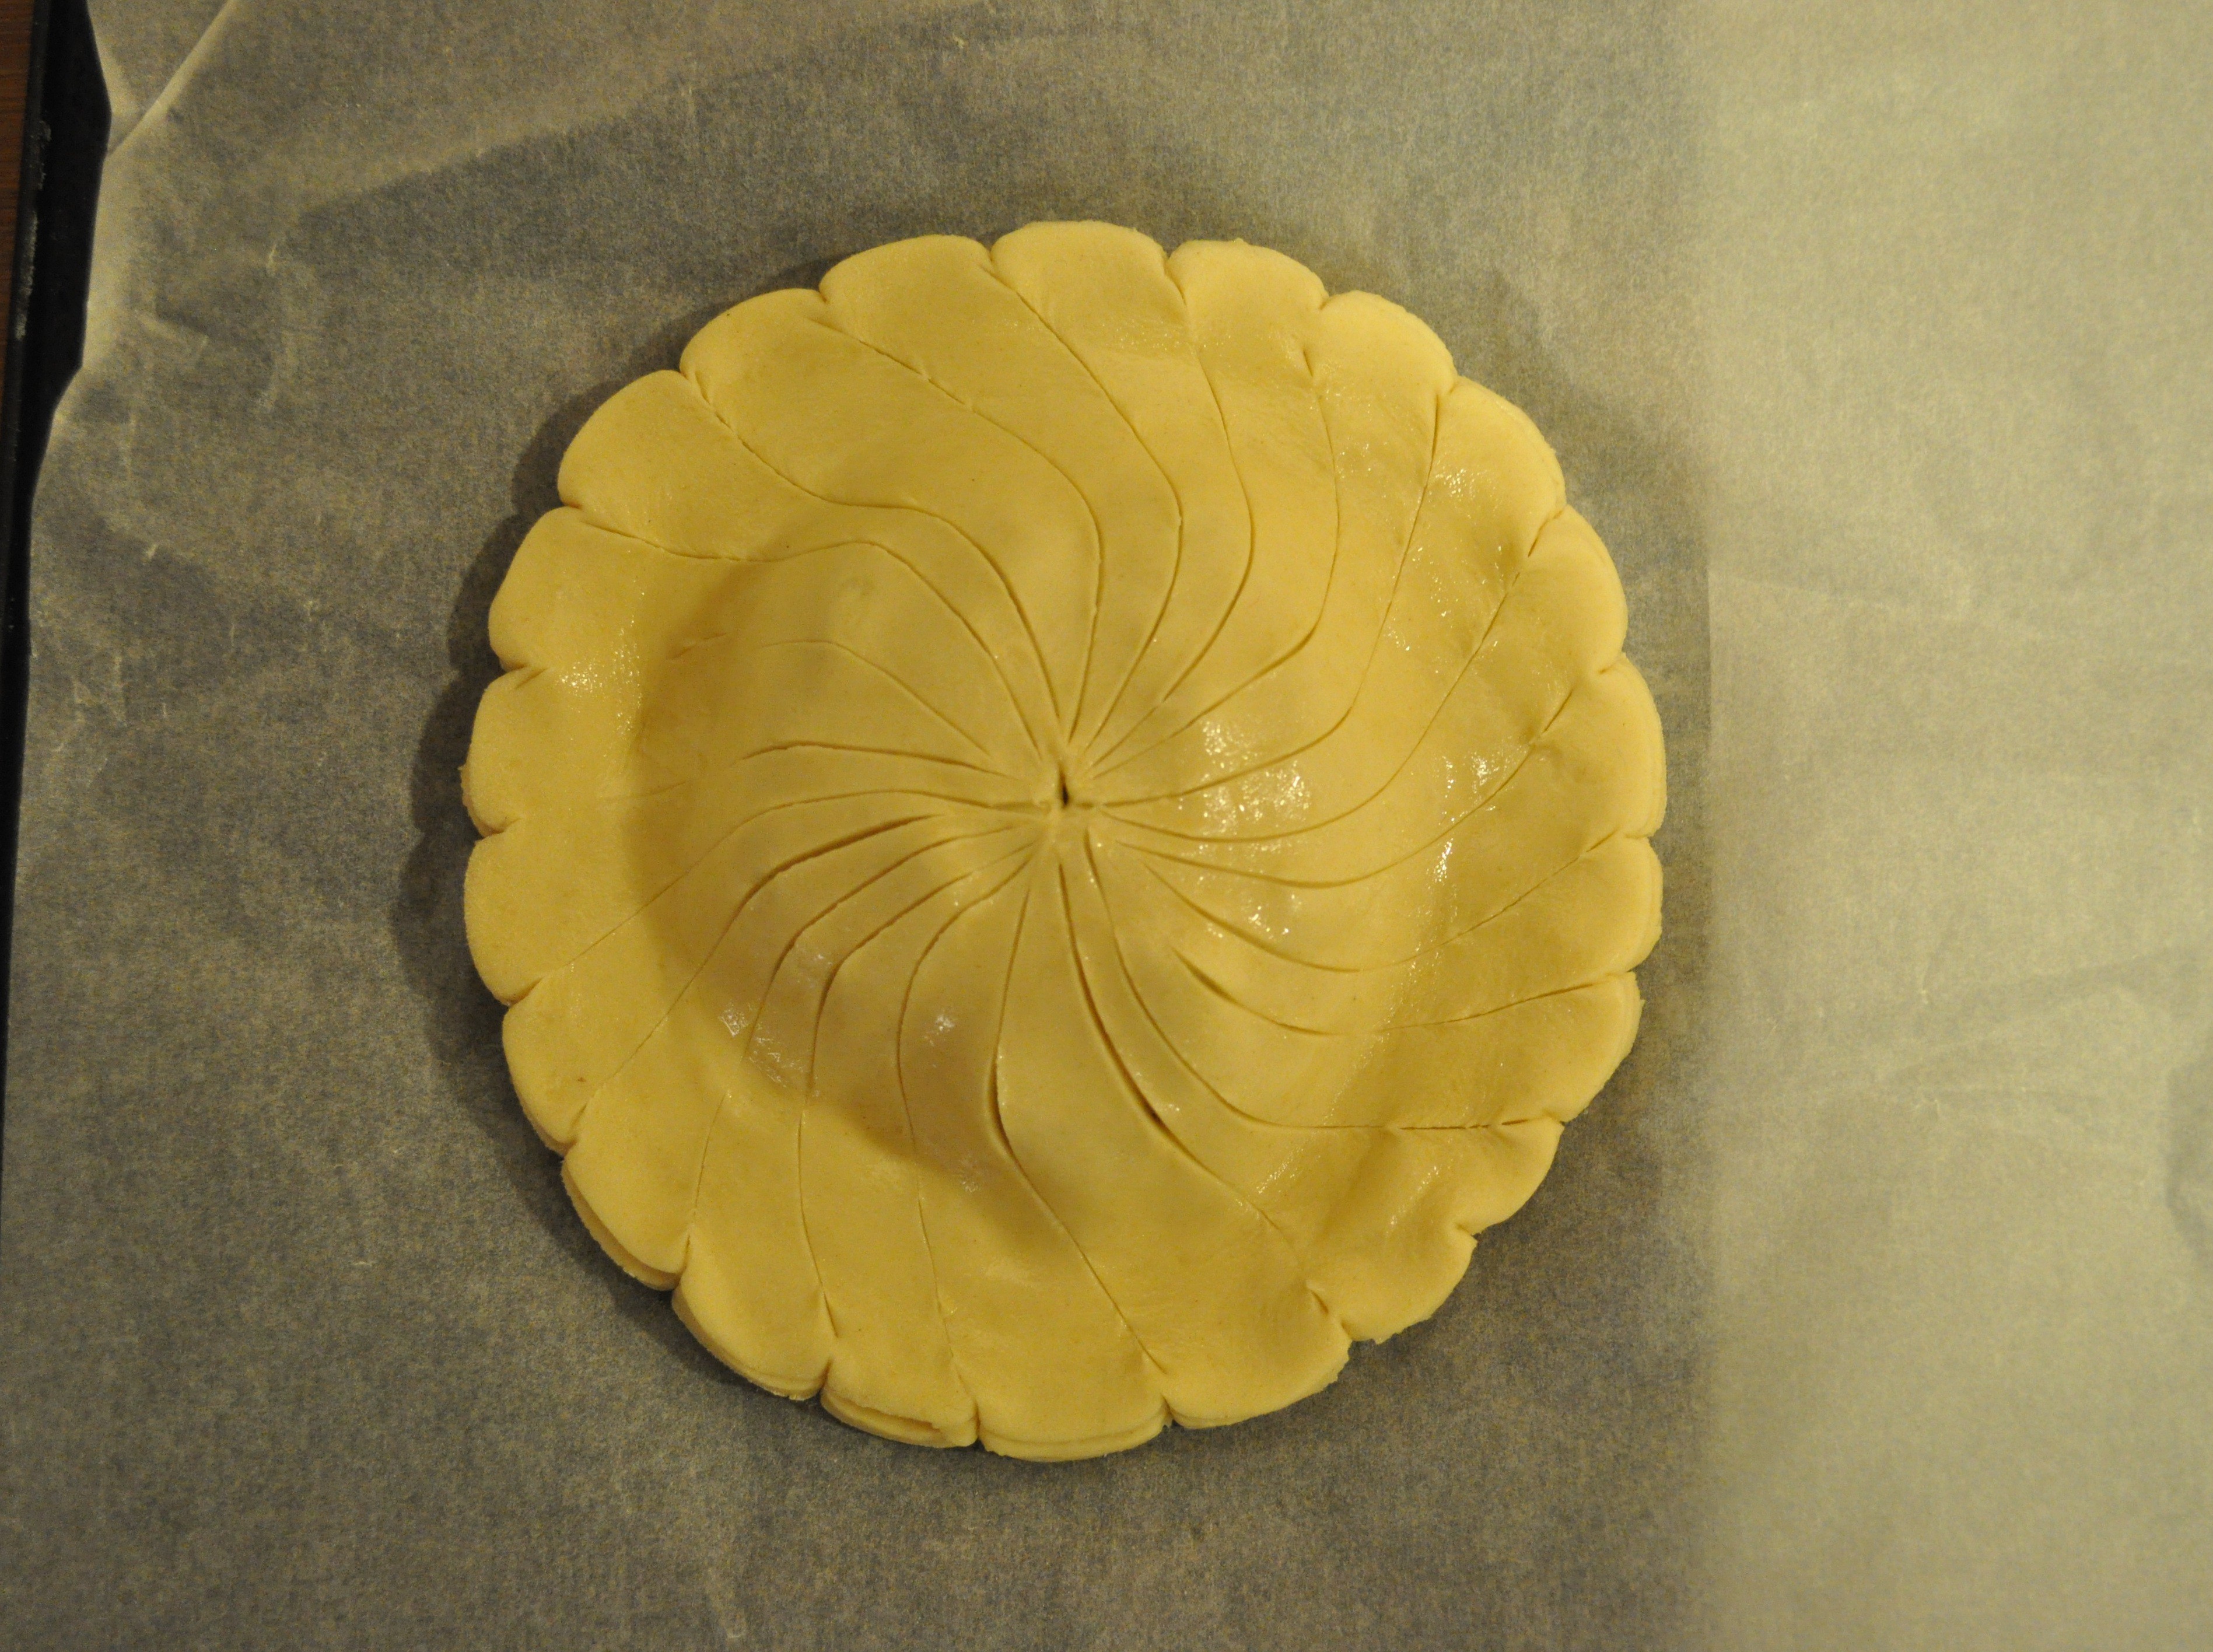
The past week or so I’ve been playing around with puff pastry. The first recipe I made was from Ginette Mathiot’s The Art of French Baking. I used this for my galette des rois Epiphany tart, but wasn’t entirely satisfied with it, so I started reading up and decided to compare some different recipes.

I’ve made puff pastry in the past, but like most home cooks I’ll either do rough puff or just buy ready-made. It always just seemed a bit of a faff to do at home, especially after I’d done it at college on a pastry break, aka dough sheeter, aka laminating table – a kind of conveyor belt with adjustable rollers that makes it so much easier and quicker to make laminated dough or pastry.

That’s what puff pastry is – it’s laminated, it consists of layers, lots of layers. Although croissants or cornetti are also laminated, they use a yeasted dough. Puff pastry doesn’t contain any leaven or raising agent, and lift mostly relies on the lamination, with layers of butter trapped between layers of a simple dough. When it’s baked, the water in the mixture turns to steam, tries to expand and pushes upwards. The fat layers trap it, opening up the product.

In French, classic puff pastry is called pâte feuilletée*. The whole art of making it and using it is called feuilletage, which can also be translated as lamination. The basic technique involves creating a simple paste that’s predomiantly flour and water, called the détrempe, and laminating into it butter (or other fat), called the beurrage.

Puff pastry/Pâte feuilletée from The Art of French Baking by Ginette Mathiot

This book was originally published in 1932. If you look at older recipe books, there’s often quite a lot assumed on the part of the writer and the recipe can seem cursory to modern readers. Such is the case here, when you compare it to books – or indeed blogs – with lots of helpful pics.

200g plain flour
Pinch of salt
100g ice cold water
100g butter, diced and softened

GM1

1. Sieve the flour and salt into a bowl and add most of the water to create “a smooth, elastic dough adding the rest of the water if necessary.”

GM3
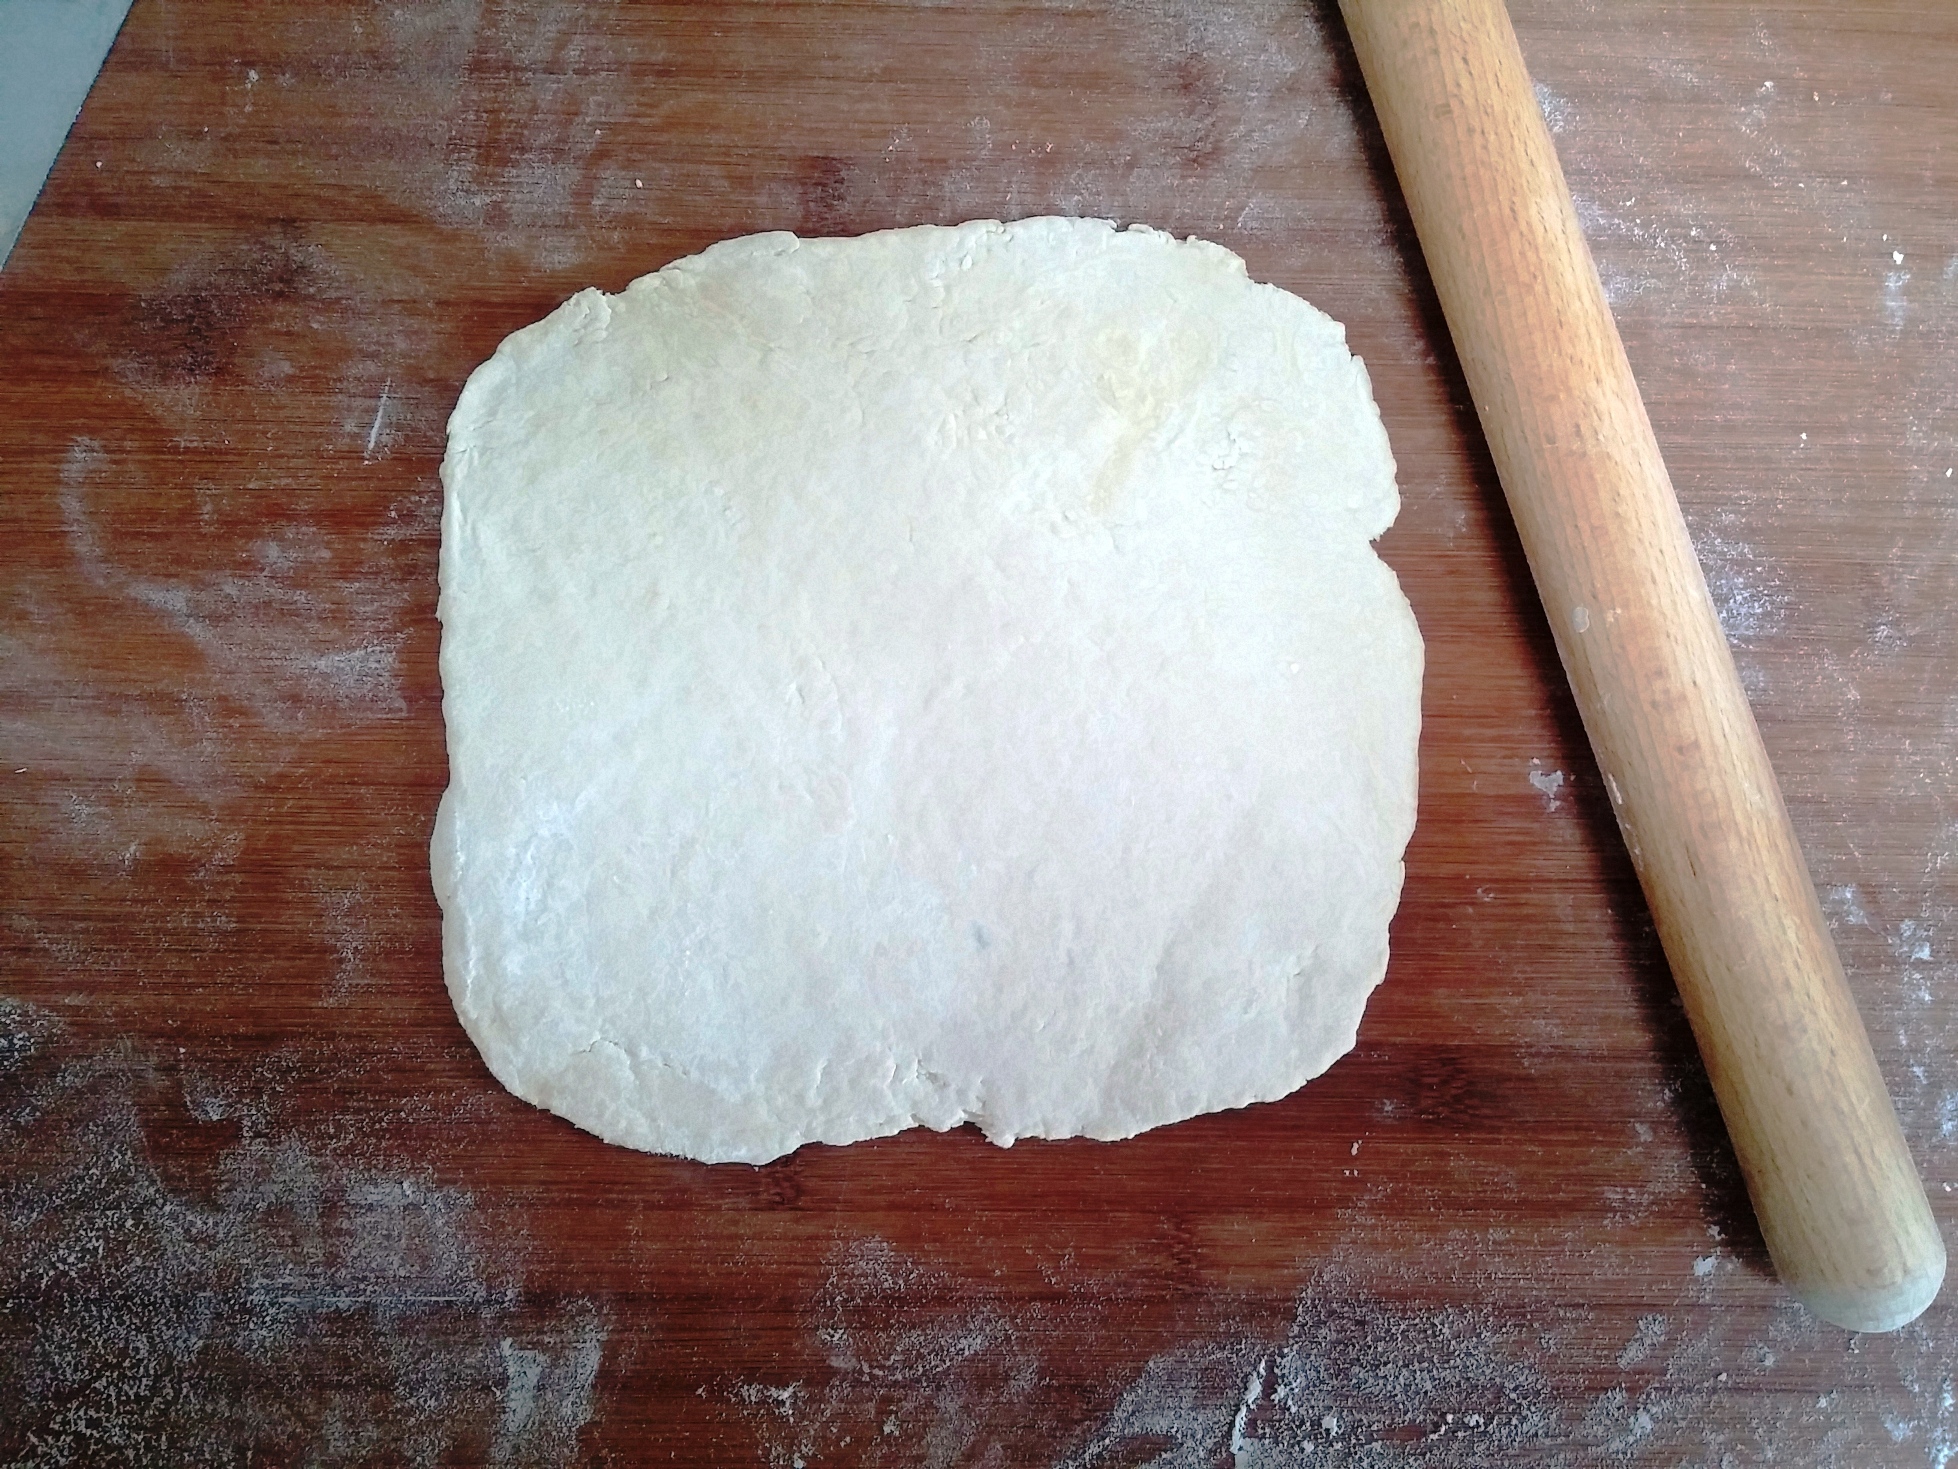
2. On a lightly floured work surface, roll it out. She says 15mm thick, which seems a bit thick considering the quantities. She doesn’t give any guidelines for how big a sheet of pastry you’re aiming for.

GM4
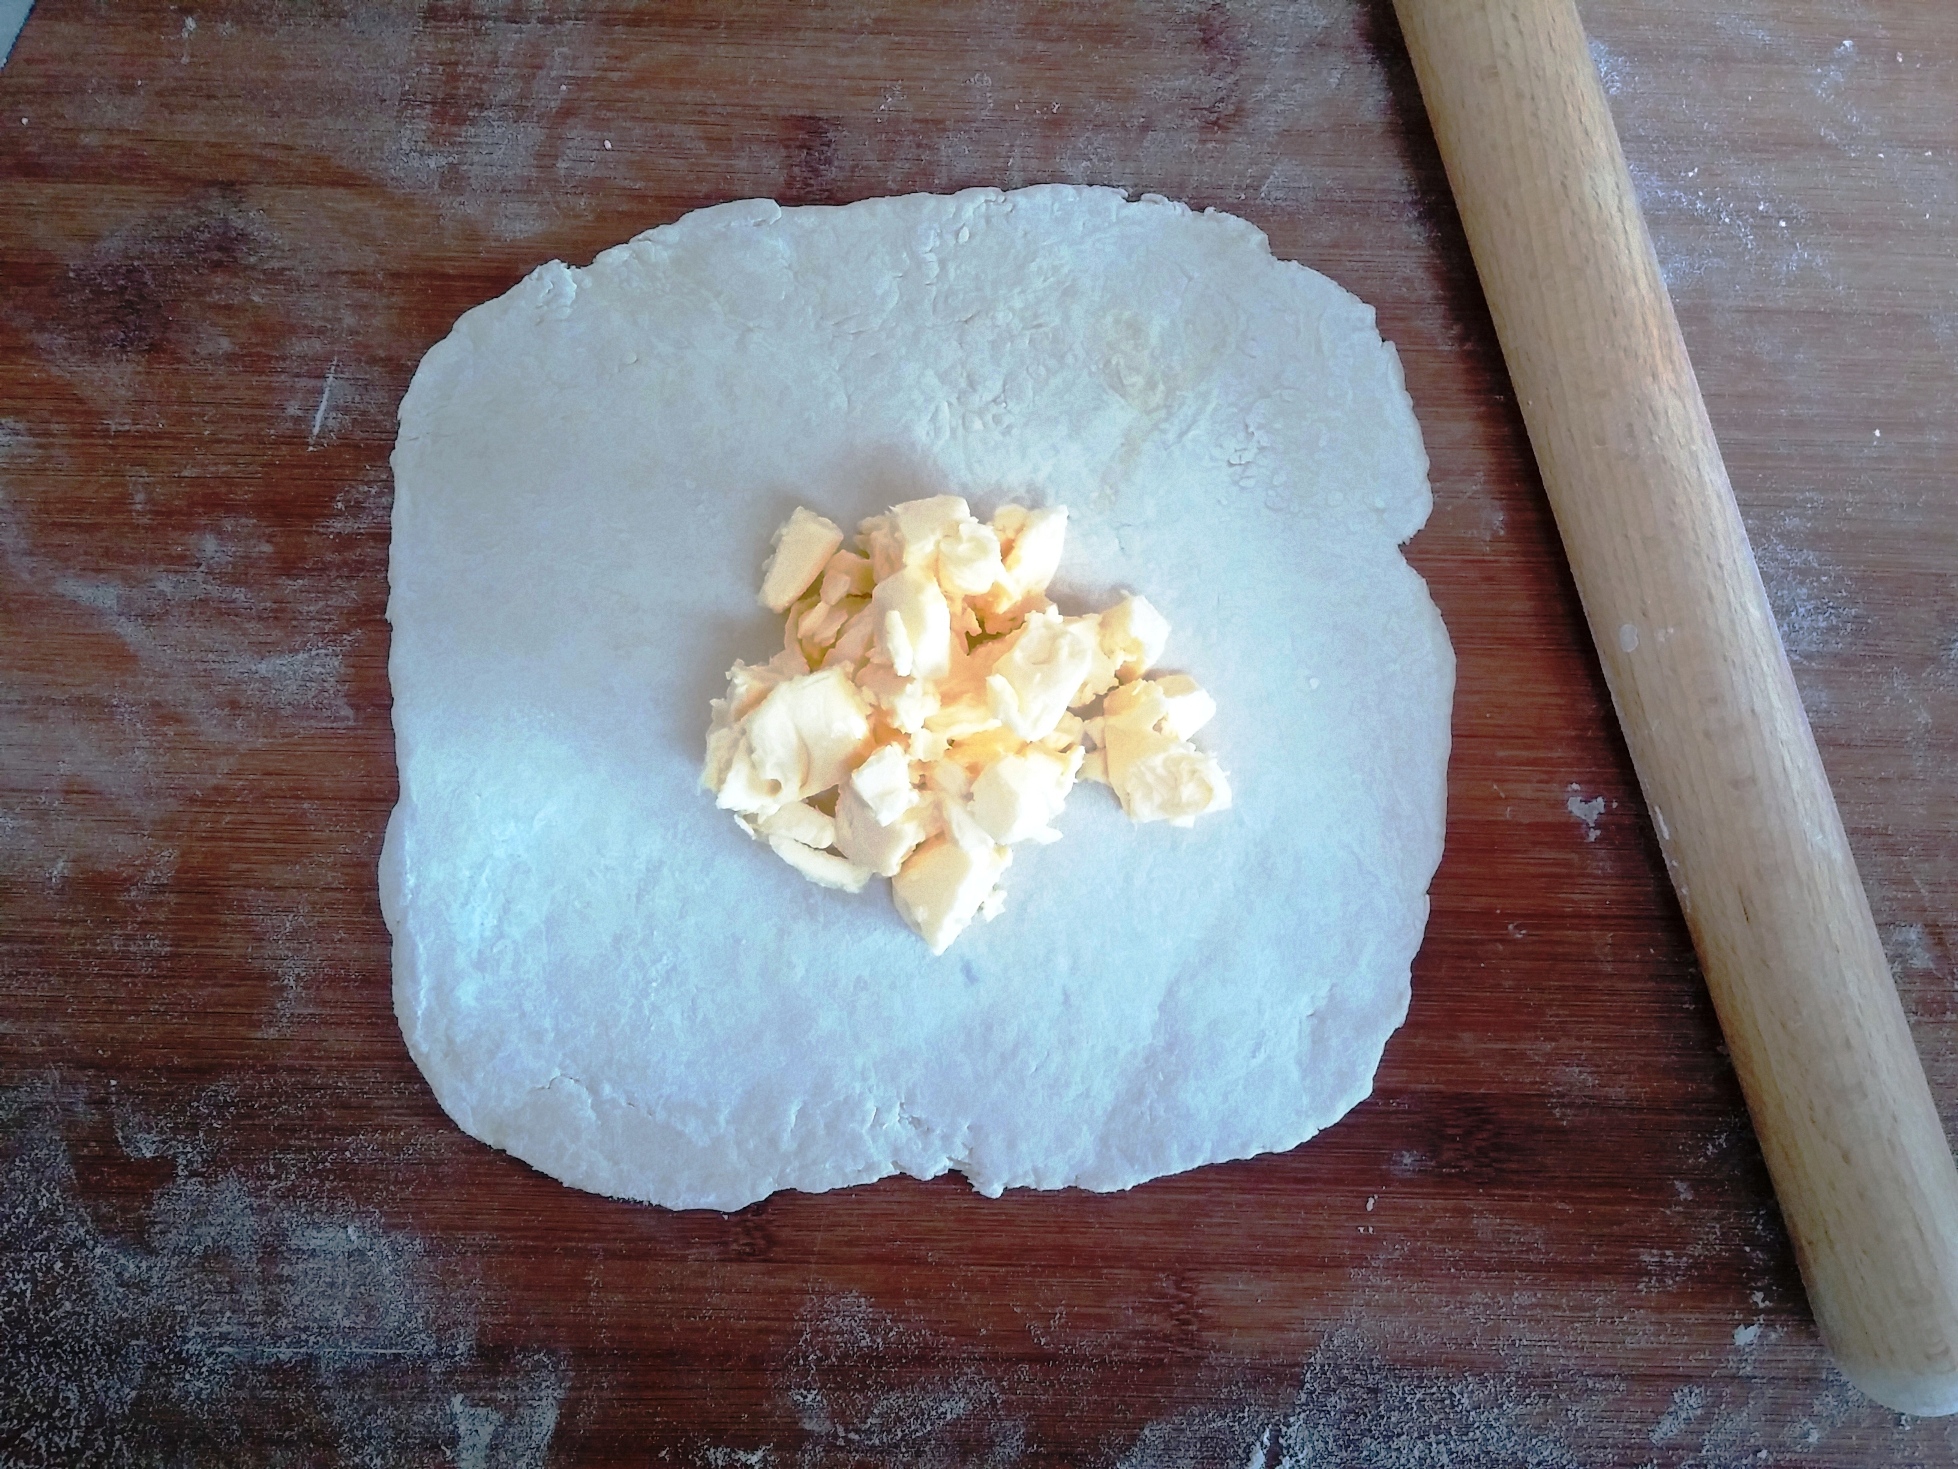
3. Add the butter to middle of the sheet “and fold over the flour corners” to enclose.

GM6
4. Wrap and chill for 10 minutes in the fridge.
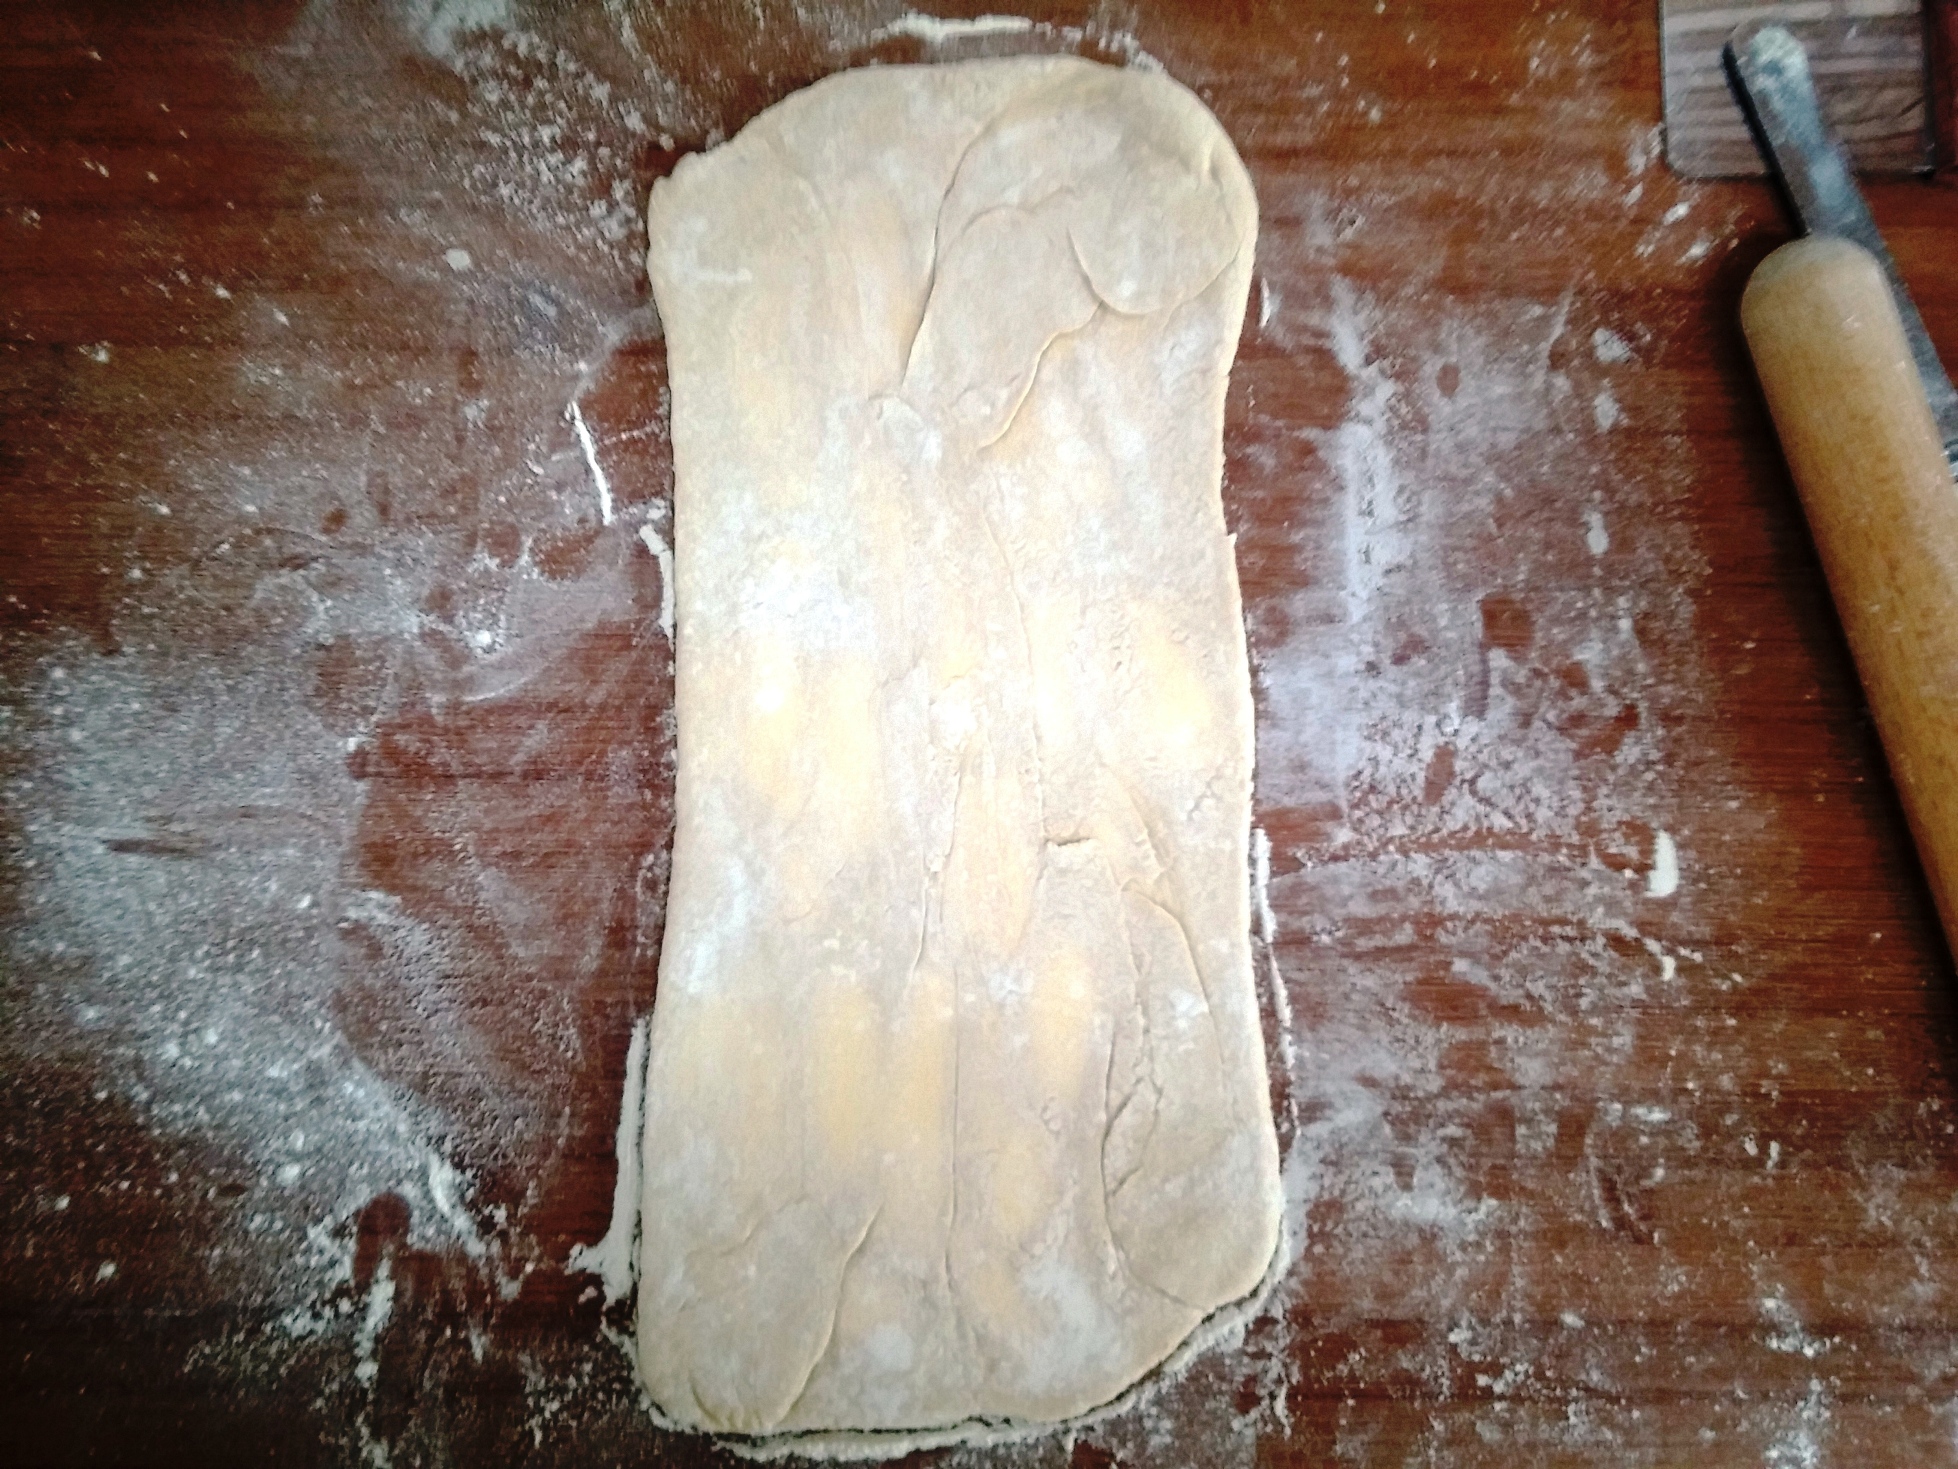
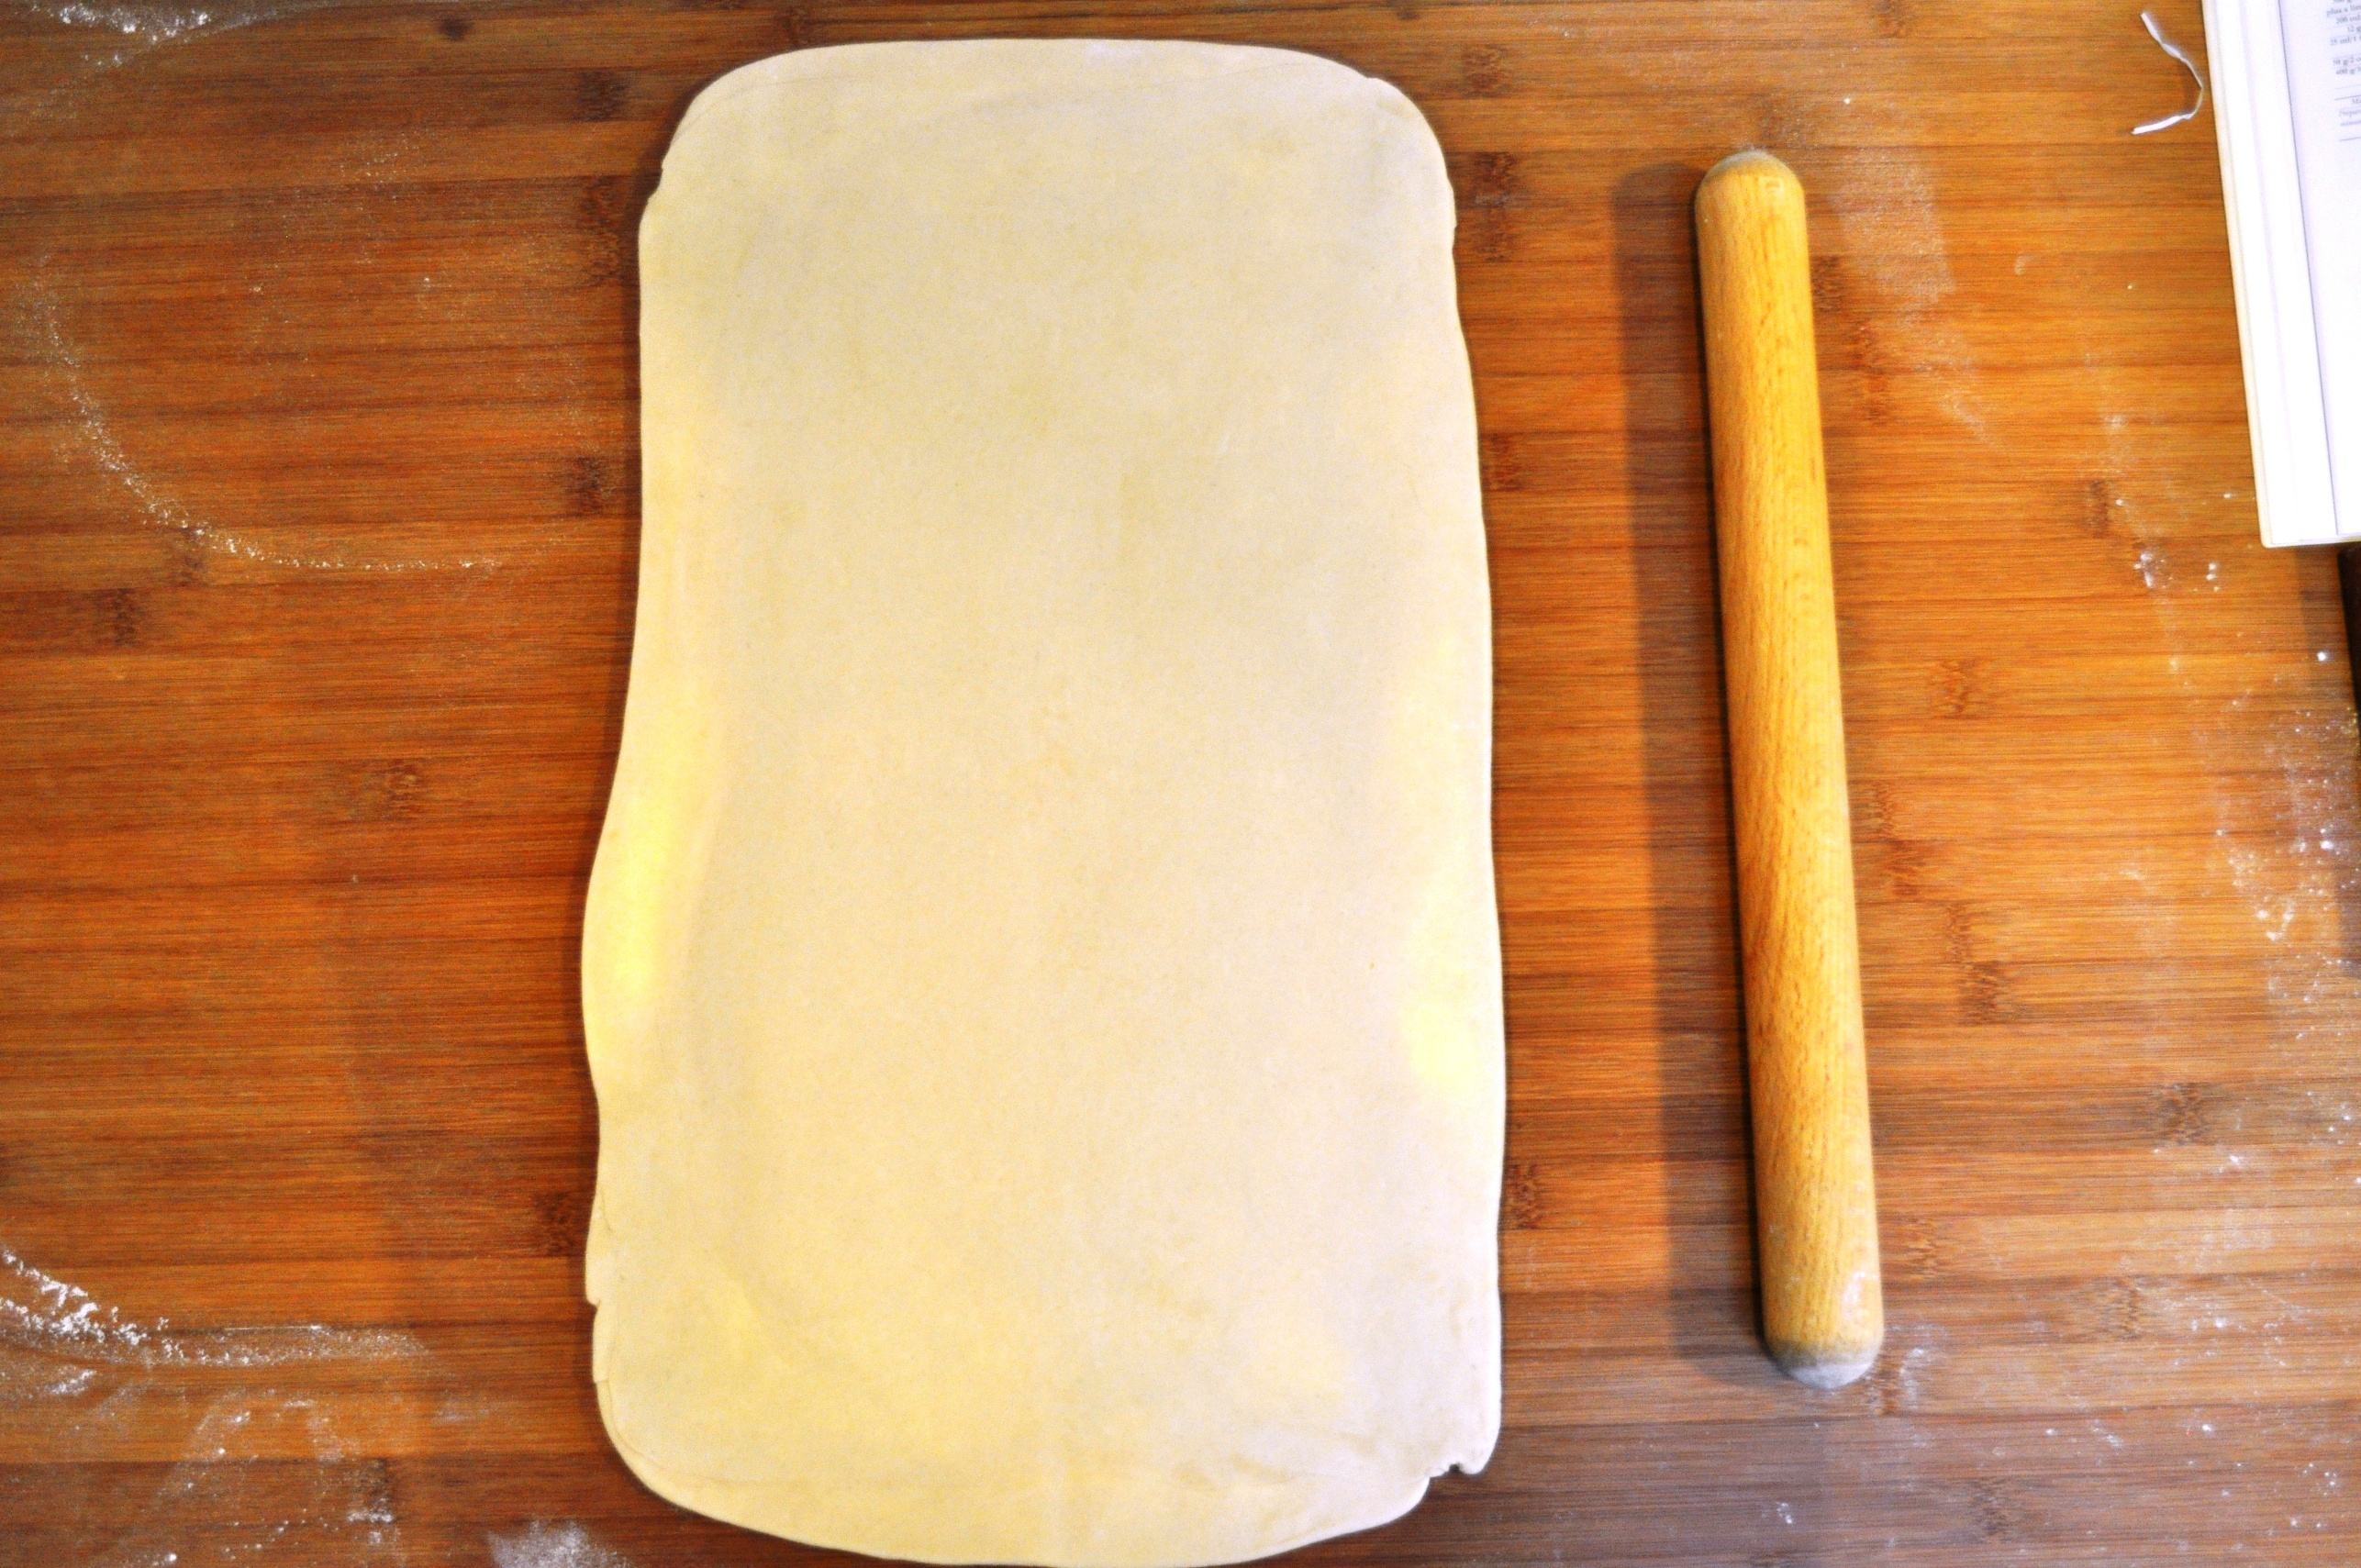
5. Roll out again, this time to a “long rectangle 5mm thick”.

GM7
GM8
GM9

6. “Fold the short ends to overlap in the centre, like a business letter, to make a smaller rectangle with 3 layers.”
7. Chill 15 minutes.
8. Roll out again and repeat.
9. Chill 15 minutes and “Do this six more times”, this is called six more turns.
10. “After the sixth turn the pastry is ready but the more turns you do, the more layers the pastry will have.”

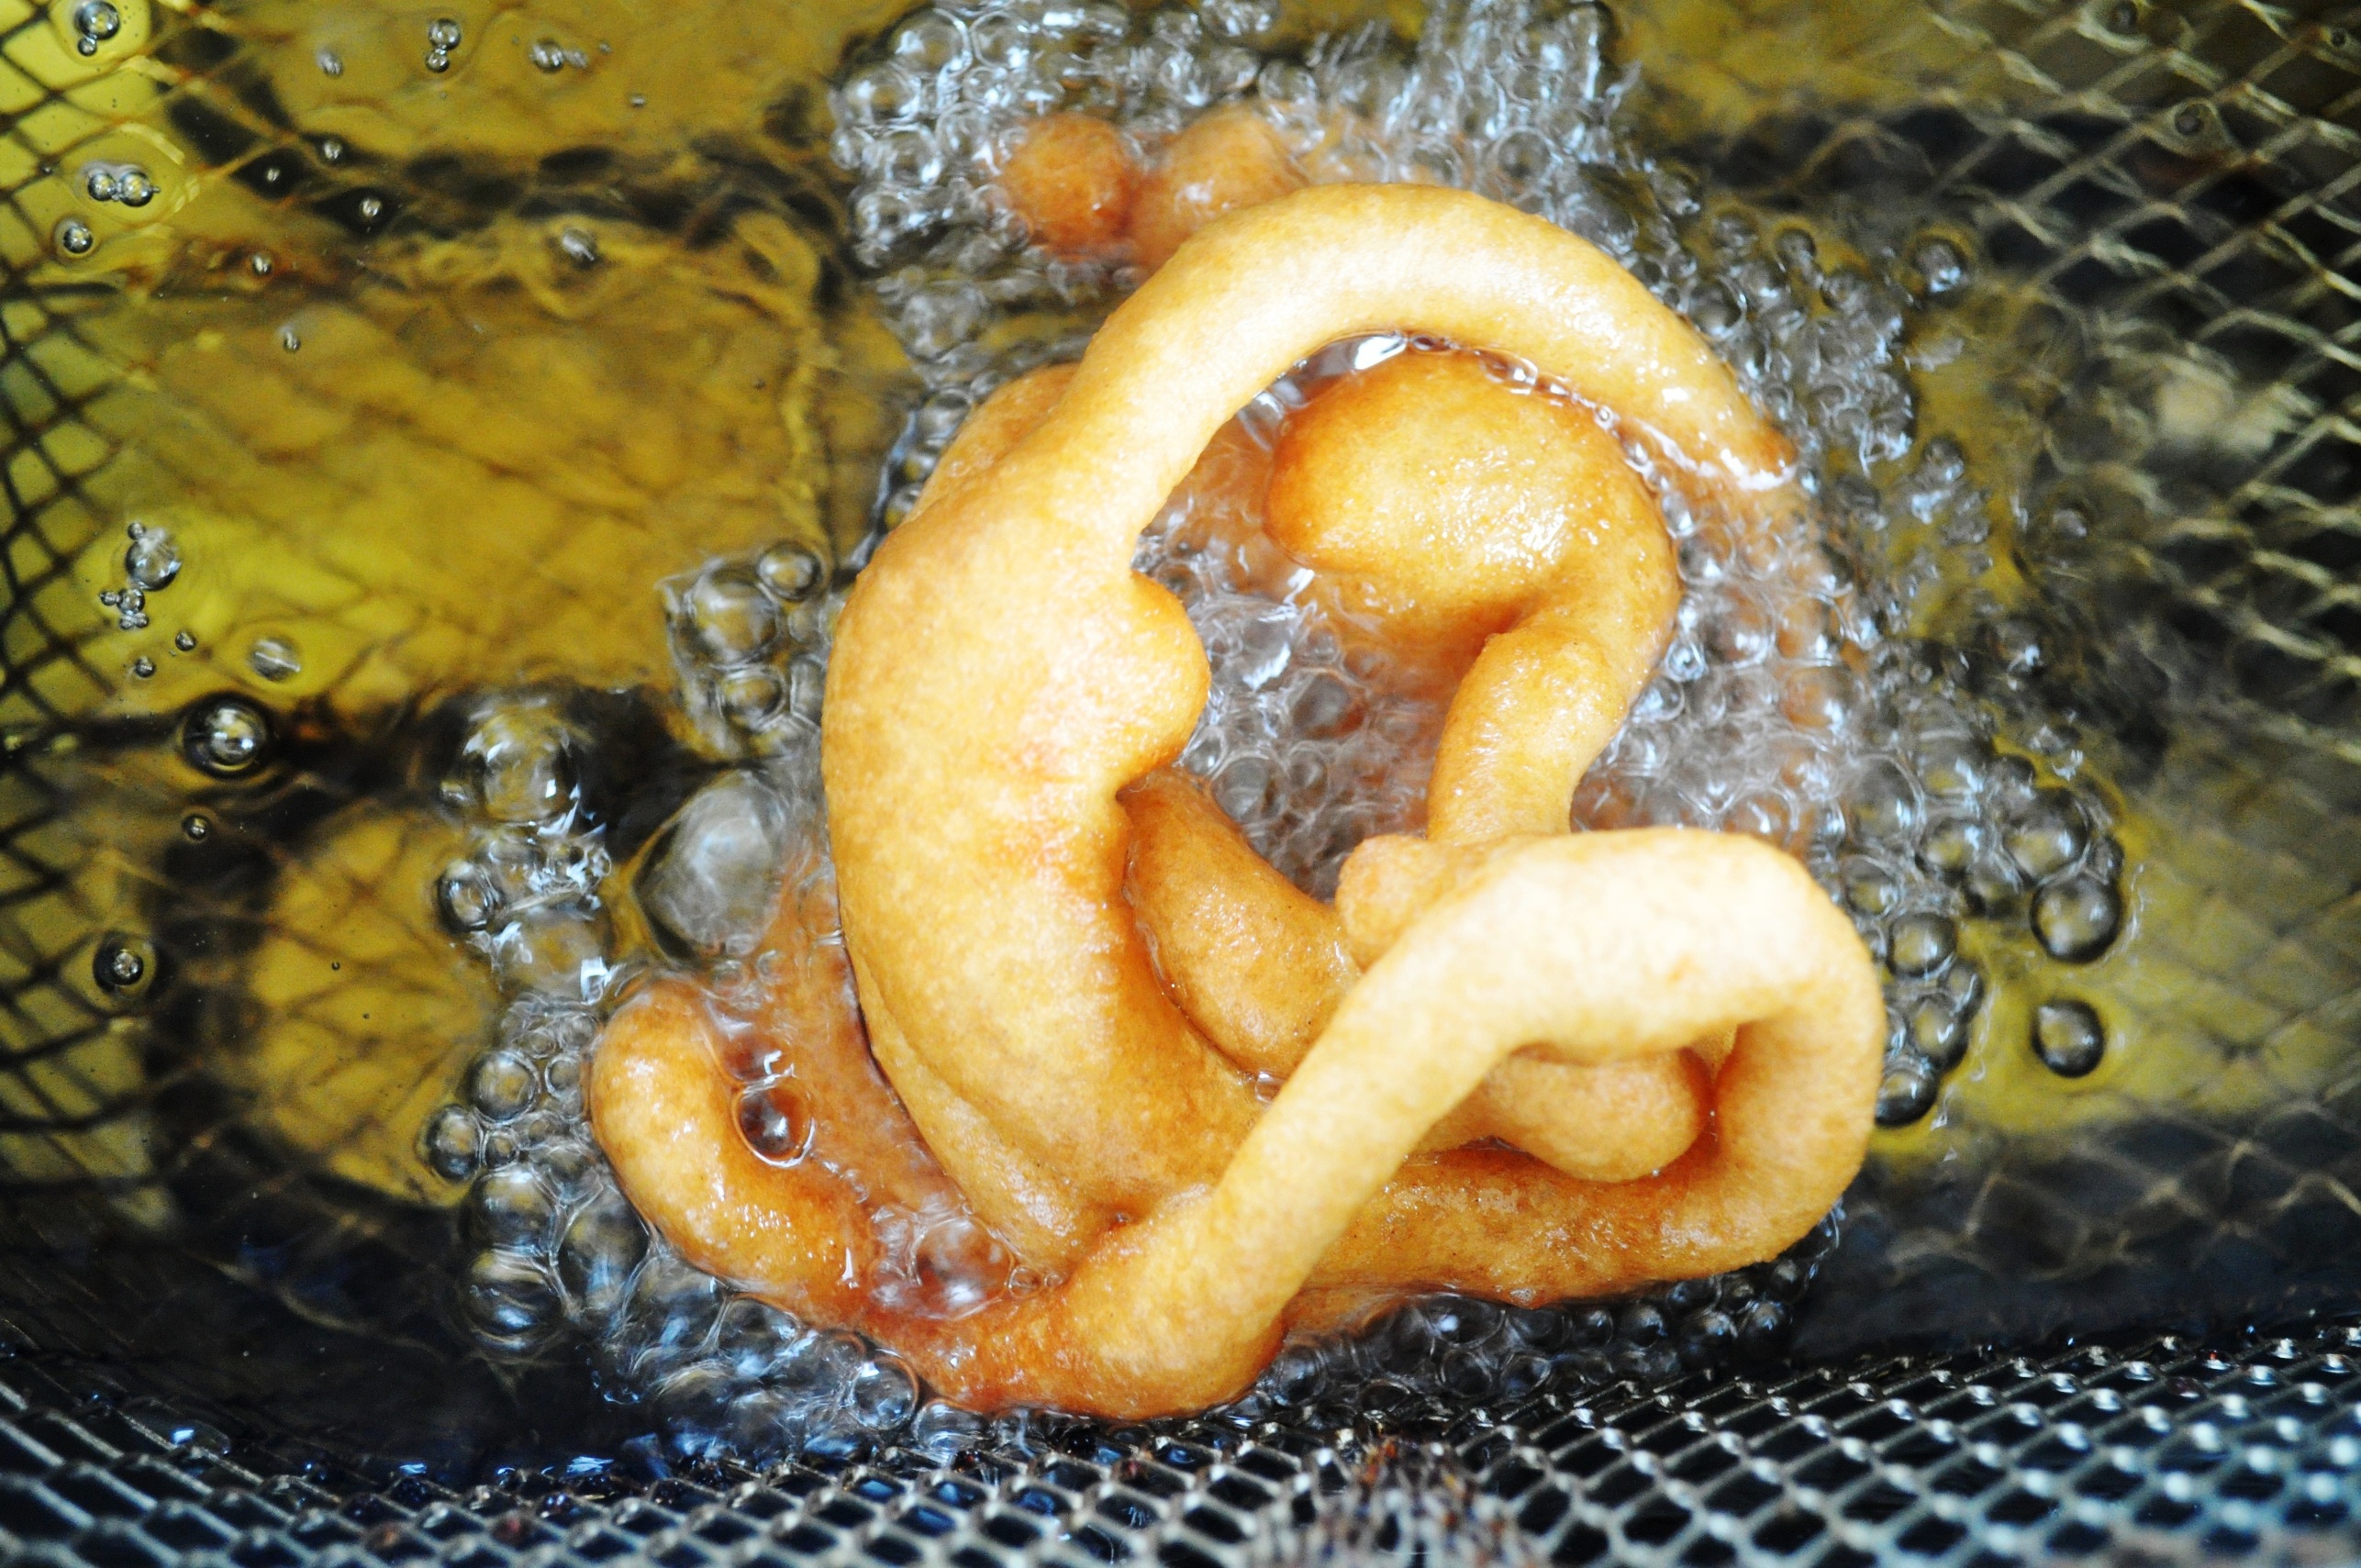
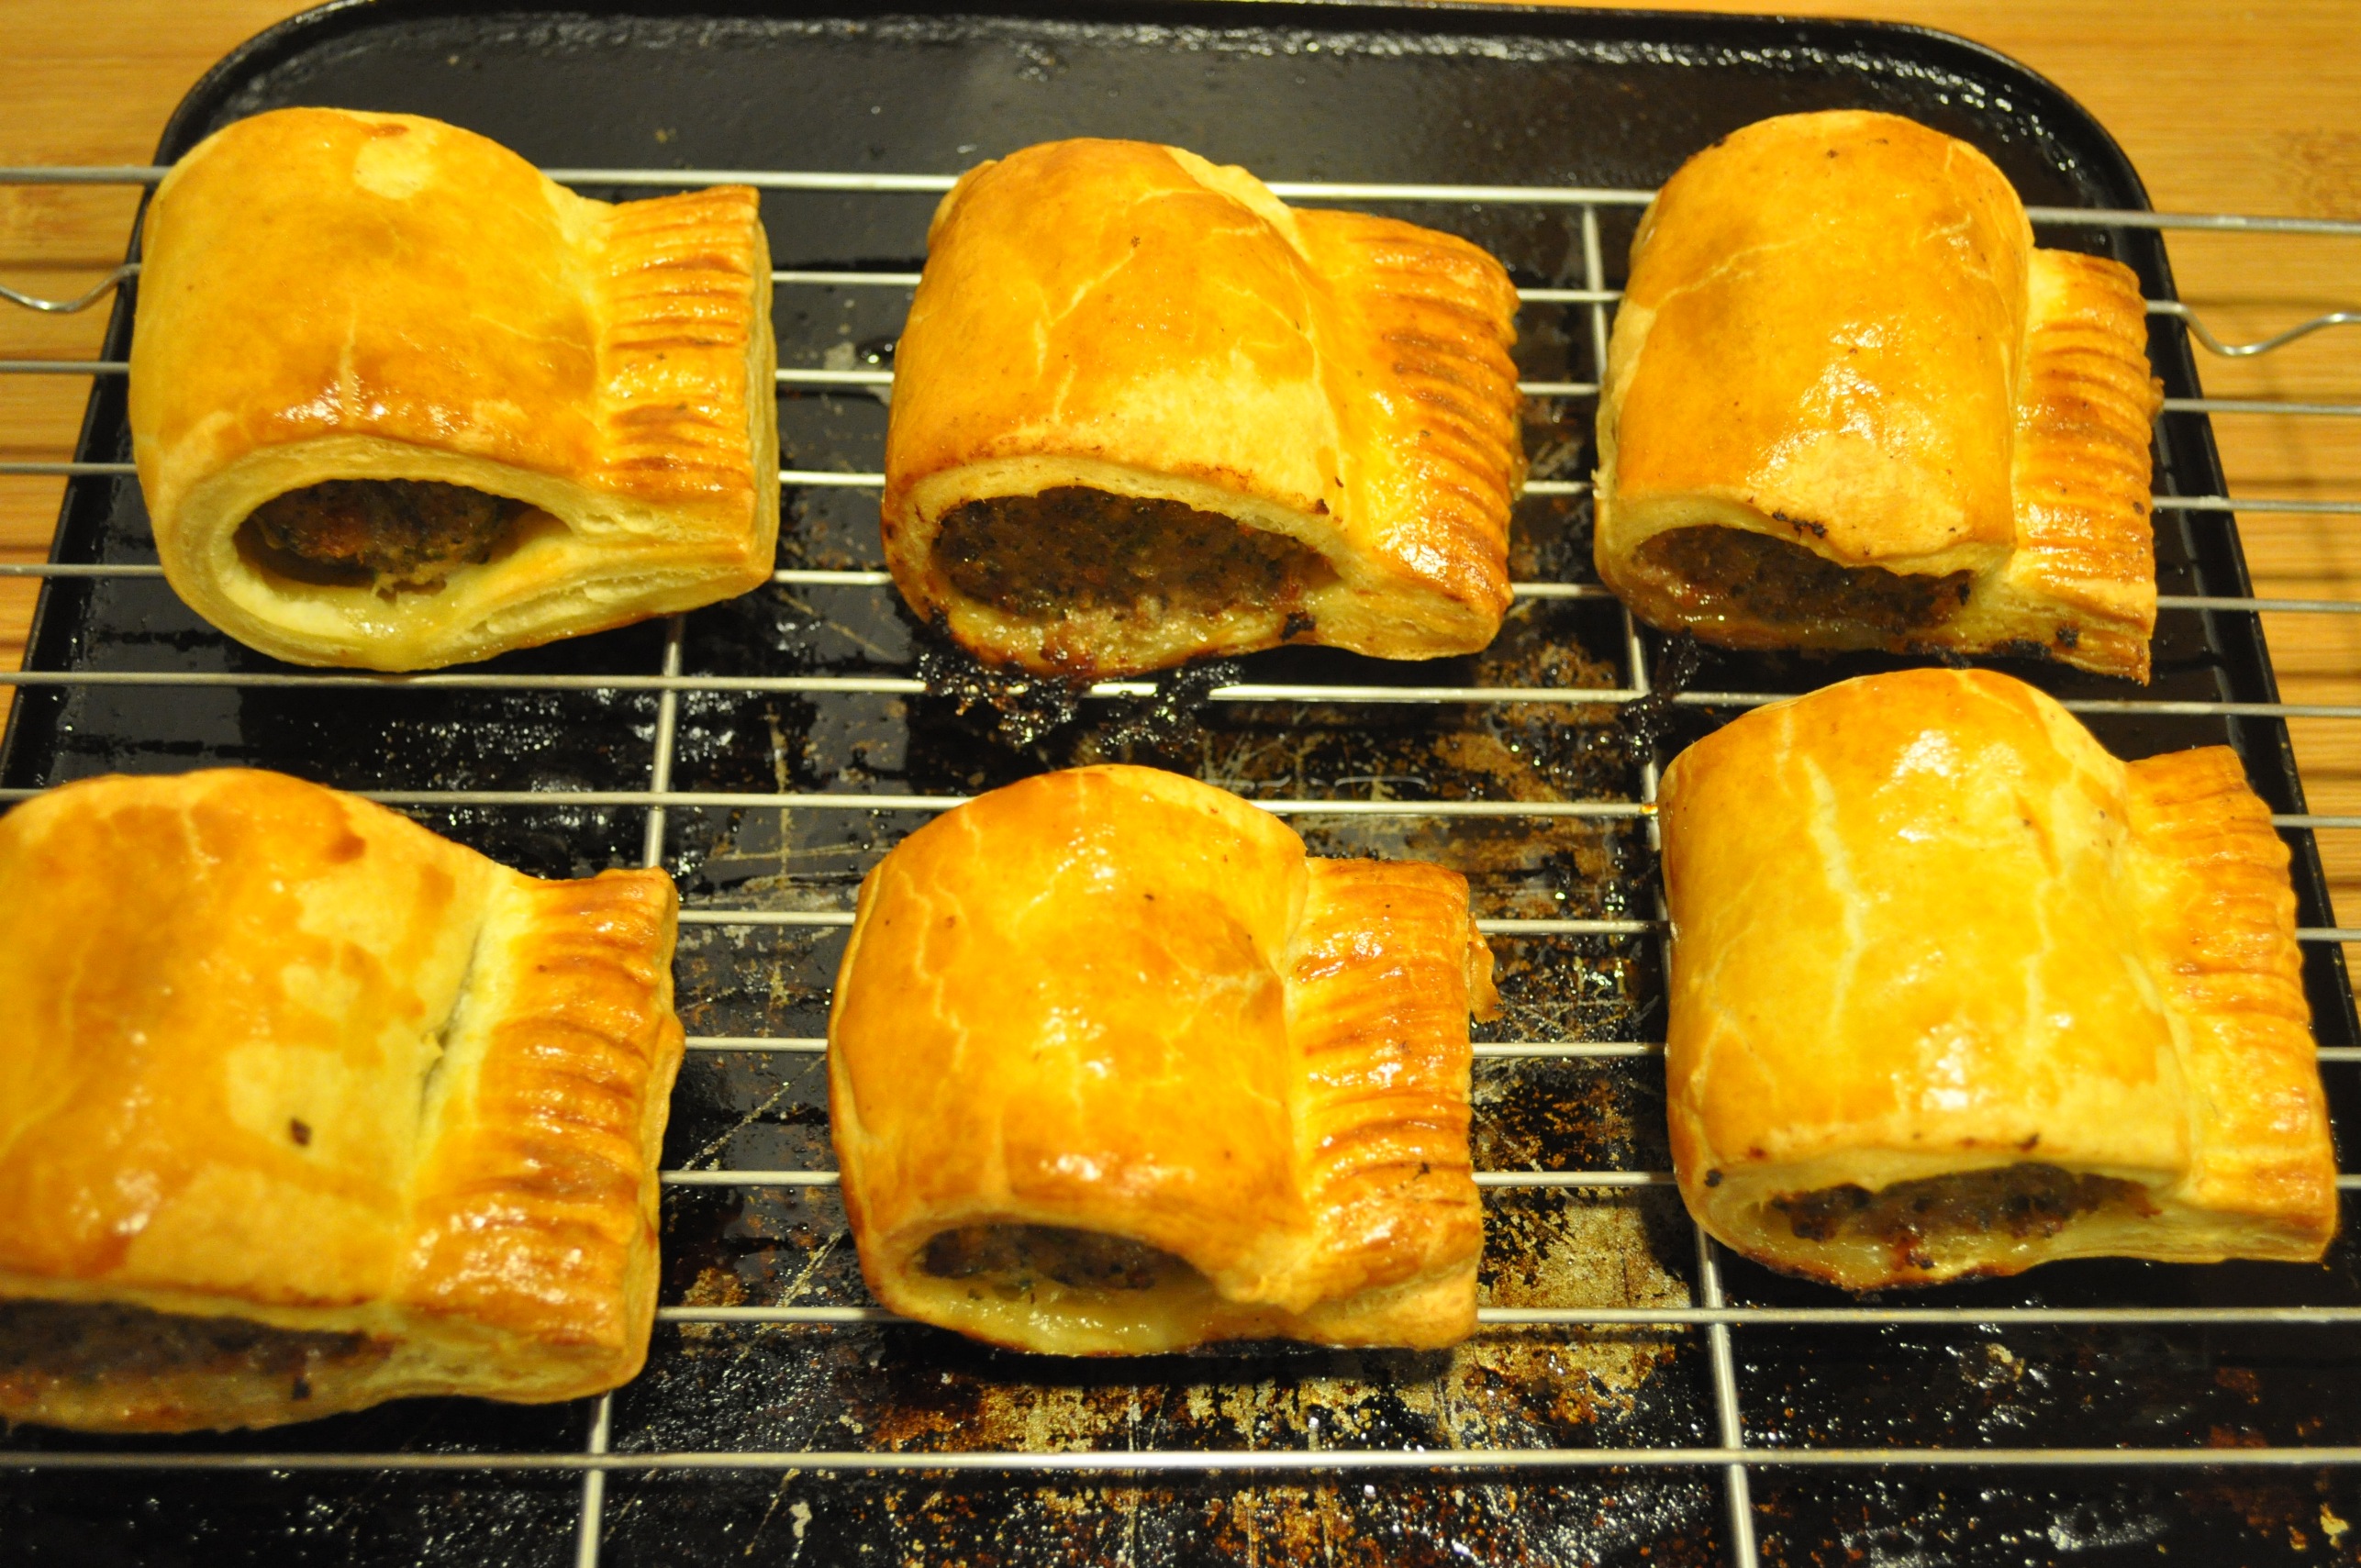
This is the most basic recipe in terms of a straight détrempe and beurrage. I found it didn’t puff up that well but that may have been partly to do with my learning curve, as you can see from the pics this wasn’t the most refined batch. I did it again, more neatly but it still didn’t puff up that well, though it made for some delicious sausage rolls.

Sausage rolls

All-butter English puff pastry from Short & Sweet by Dan Lepard

Short & Sweet collects Dan Lepard’s essential recipes from his run in The Guardian. You can find a version of this recipe here, though I highly recommend the book, which includes a tweaked version containing egg.

Dan L writes “this recipe is based on an old English method from the late 1800s that varies from the French puff pastry recipes from that era, in that it adds more of the butter when mixing to the dough.” He says this makes it easier to roll, and “very delicate and tender” once baked. What interested me here was a Britain-based Australian baker doing an old English recipe from probably only a few decades before the French Mathiot recipe.

Dan L puff 1

275g plain flour
275g strong white flour
1 tsp fine salt
550g butter, “cold but pliable”
2 tsp lemon juice
1 egg yolk
175g cold water

Dan L puff 2
Dan L puff 3

1. Sieve the flour and salt into a bowl and add 125g of the butter, cut into small pieces and rub in fully.
2. Beat together the water, lemon juice and egg yolk then add this to the flour and “knead to form a consistent dough.”
3. Wrap and chill for 30 minutes.
4. Roll out to about 50x30cm.
5. Slice the butter and lay this over two-thirds of the dough. Fold down the unbuttered third, then fold up the buttered third at the opposite end. So you are doing a single book fold again, just adding the butter in a different fashion.
6. Roll the top slightly to press out any air bubbles.
7. “Seal the edges with a sharp thwack of the pin” then wrap and chill for 30 minutes.
8. Roll out again to 60x20cm and fold the thirds again, so the parcel is about 20x20cm
9. Cover and chill again.
10. Roll out again, repeat. Chill, repeat – giving four more “turns”, resting between each.

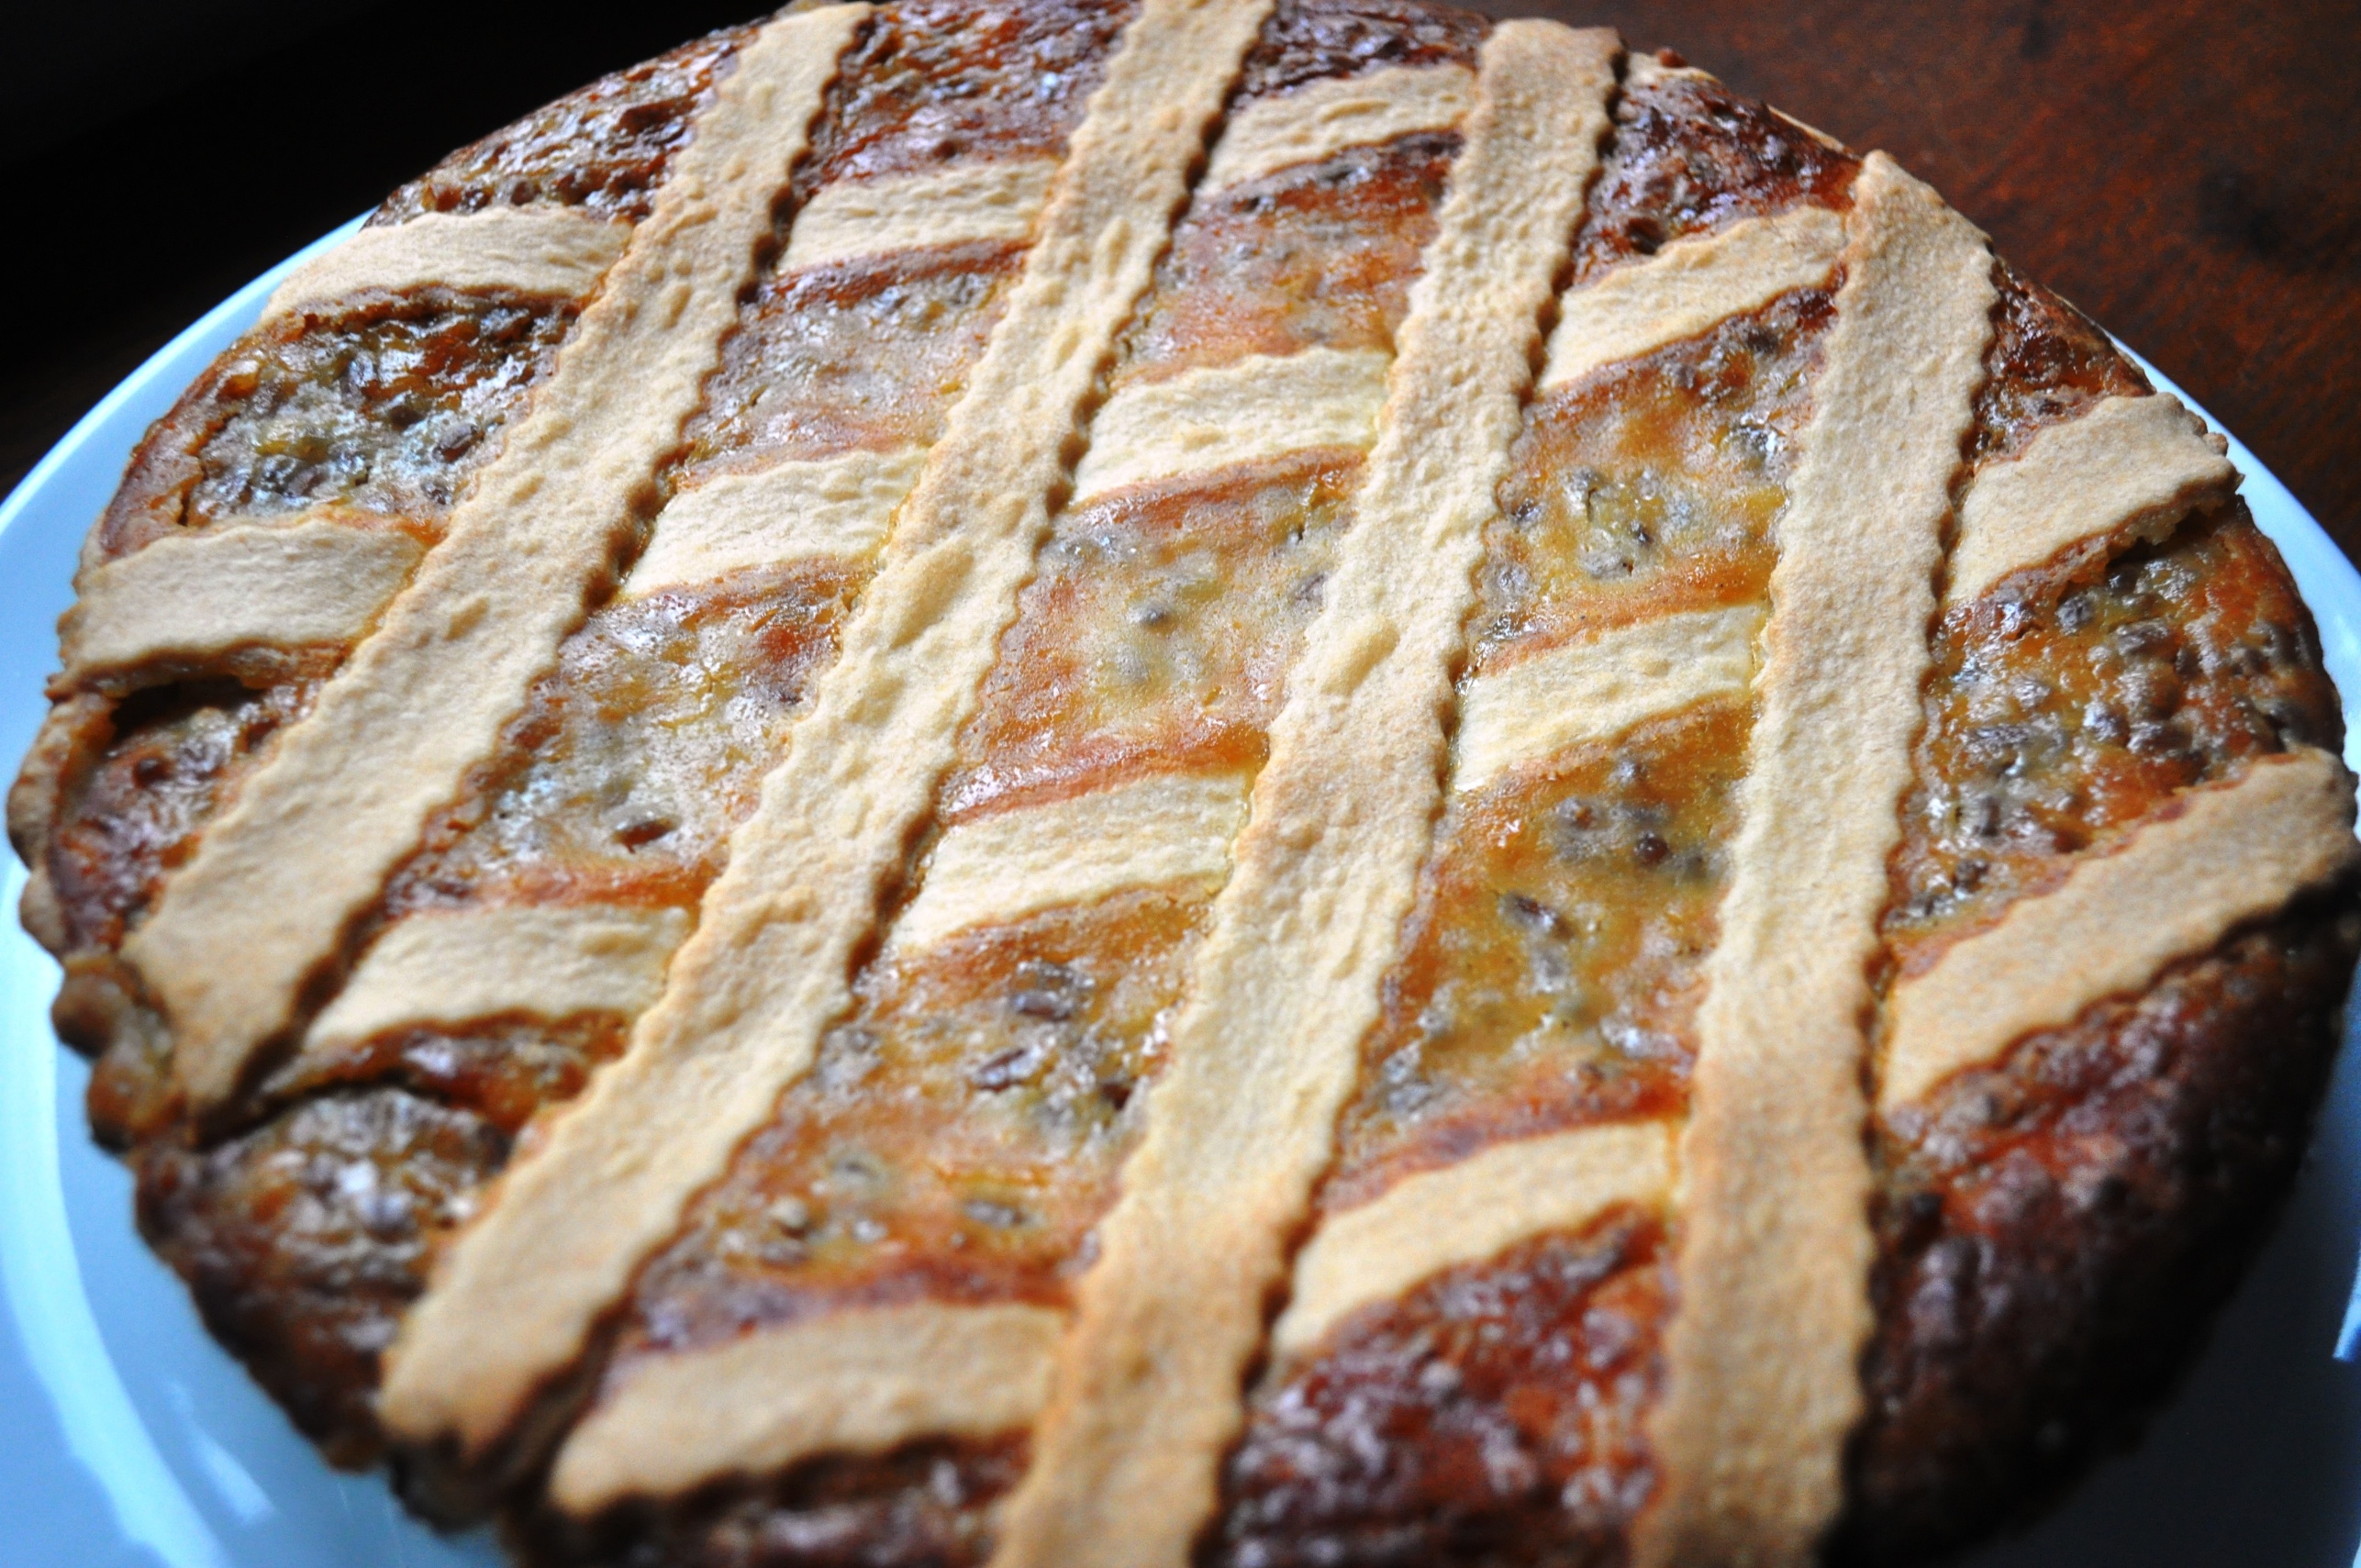
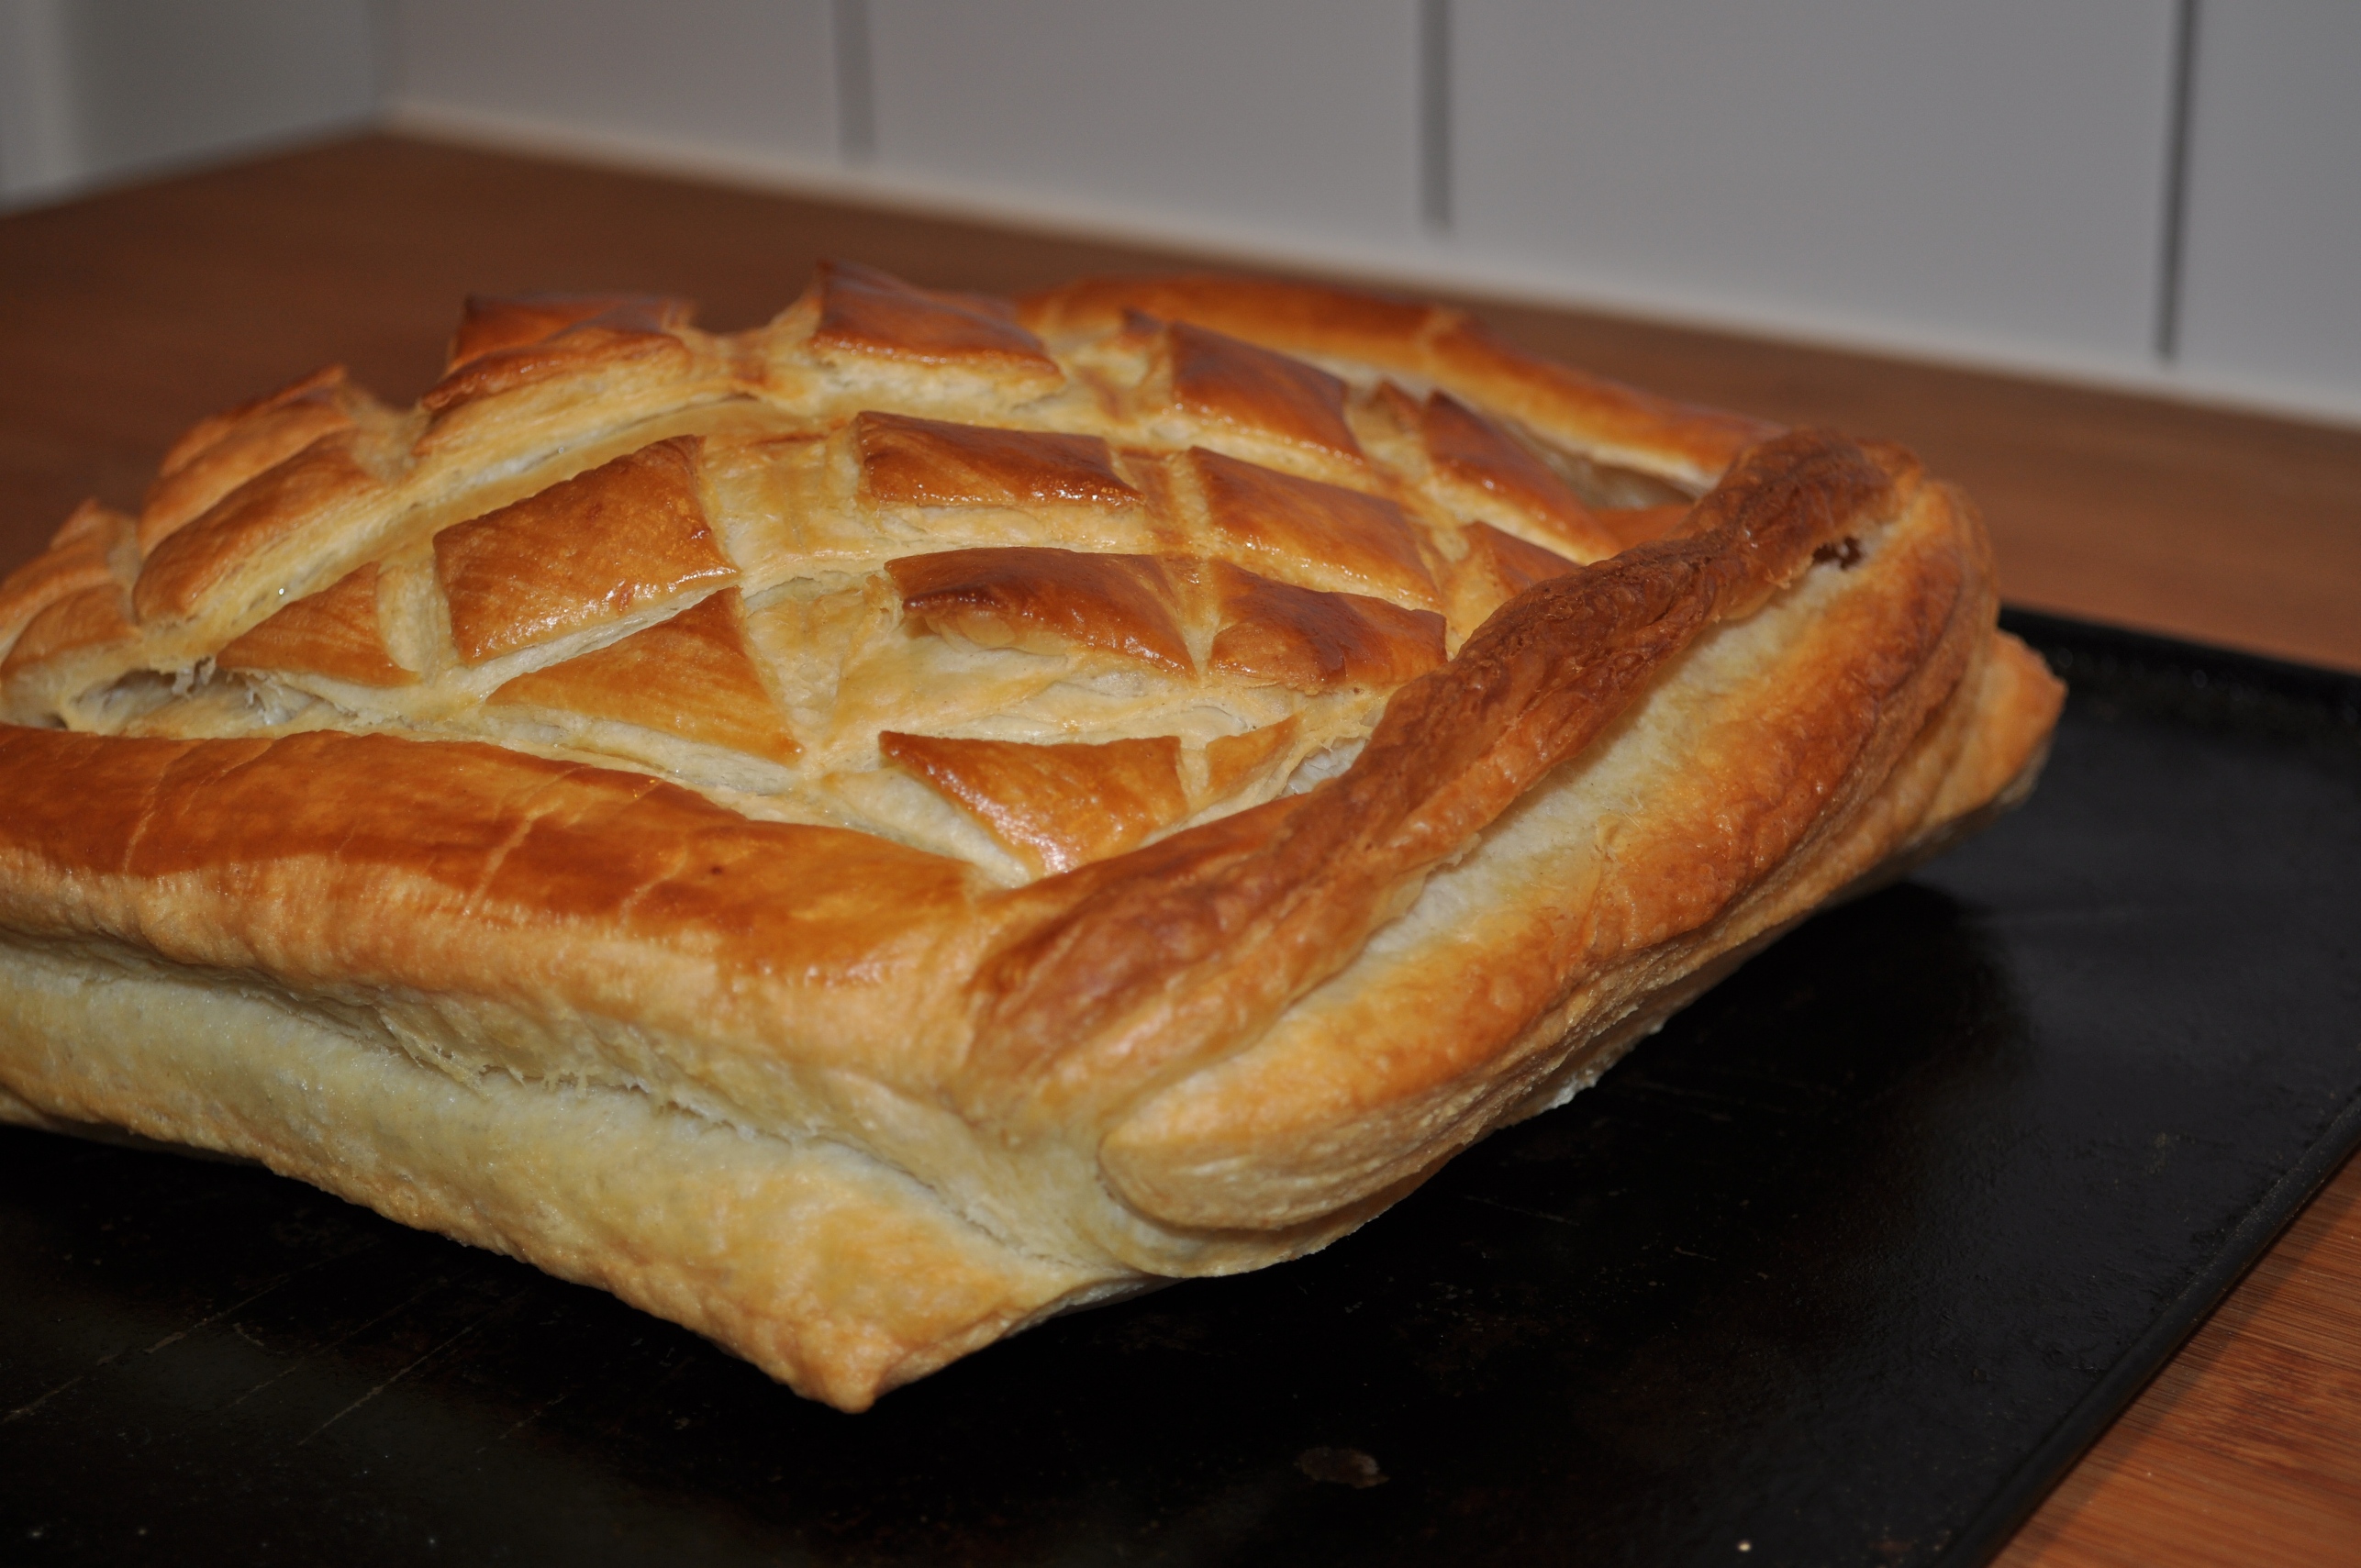
As with so many Dan Lepard recipes, this one just works. There’s enough detail to explain, but not so much you get boggled. I used some to make a pie (main pic, above) and it puffed wonderfully.

Feuilletage Jean Millet from The Roux Brothers on Patisserie

The essential text The Roux Brothers on Patisserie was published in 1986, reprinted in 1991 and given to me as a Christmas present by my parents in 1995. I’ve enjoyed a lot of challenges from it over the years, and plenty of delicious results. I’d not tried their puff before though. They credit it to “our friend Jean Millet, the president of the Confédération de la Pâtisserie, Confiserie, Glacerie de France and MOF in patisserie,” which isn’t intimidating at all.

500g flour
200g water
12g / 1.5 tsp salt
25g white wine vinegar
50g butter, melted
400g butter, well chilled

Roux 1

1. They combine the liquid into the flour working it on a work surface. I just used a bowl – flour, salt, then add the water, vinegar and the butter (which I allowed to cool a bit after melting). “When all the ingredients are well mixed, work the dough with the palm of your hand until it is completely homogenous, but not too firm.”

Roux 2
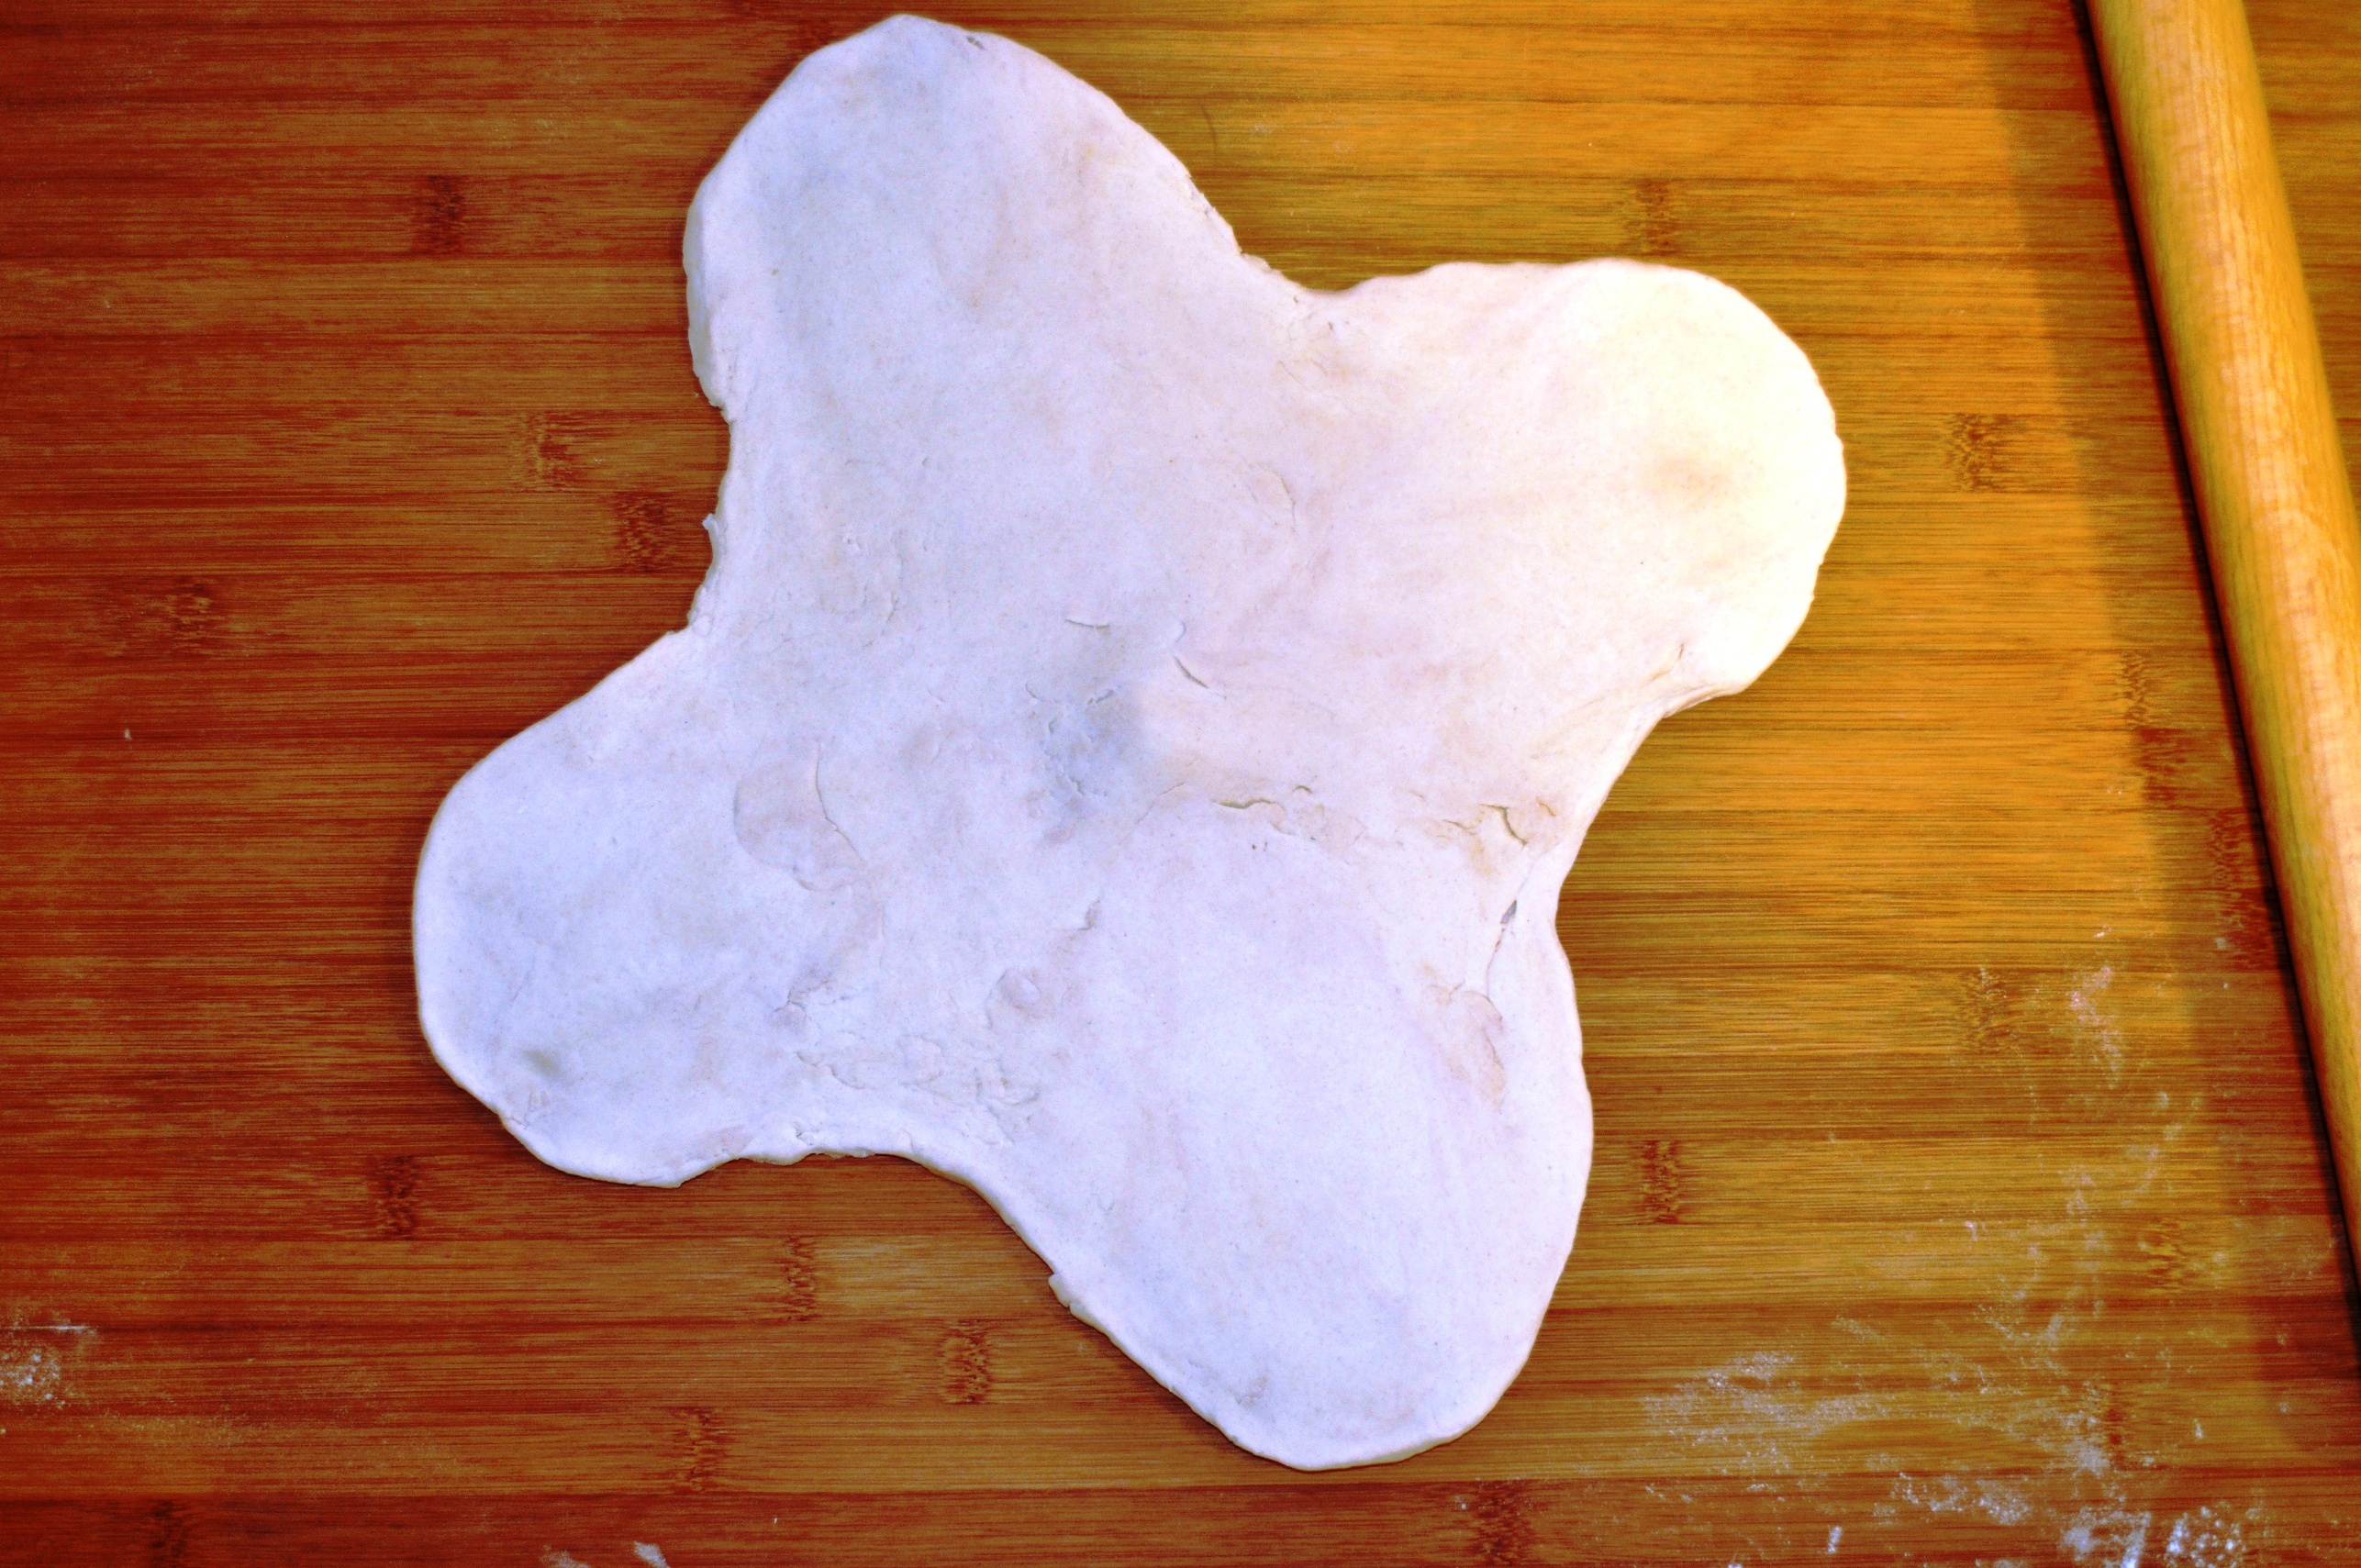
2. Form a ball and cut a cross in the top.
3. Wrap and chill for 2-3 hours.

Roux 3
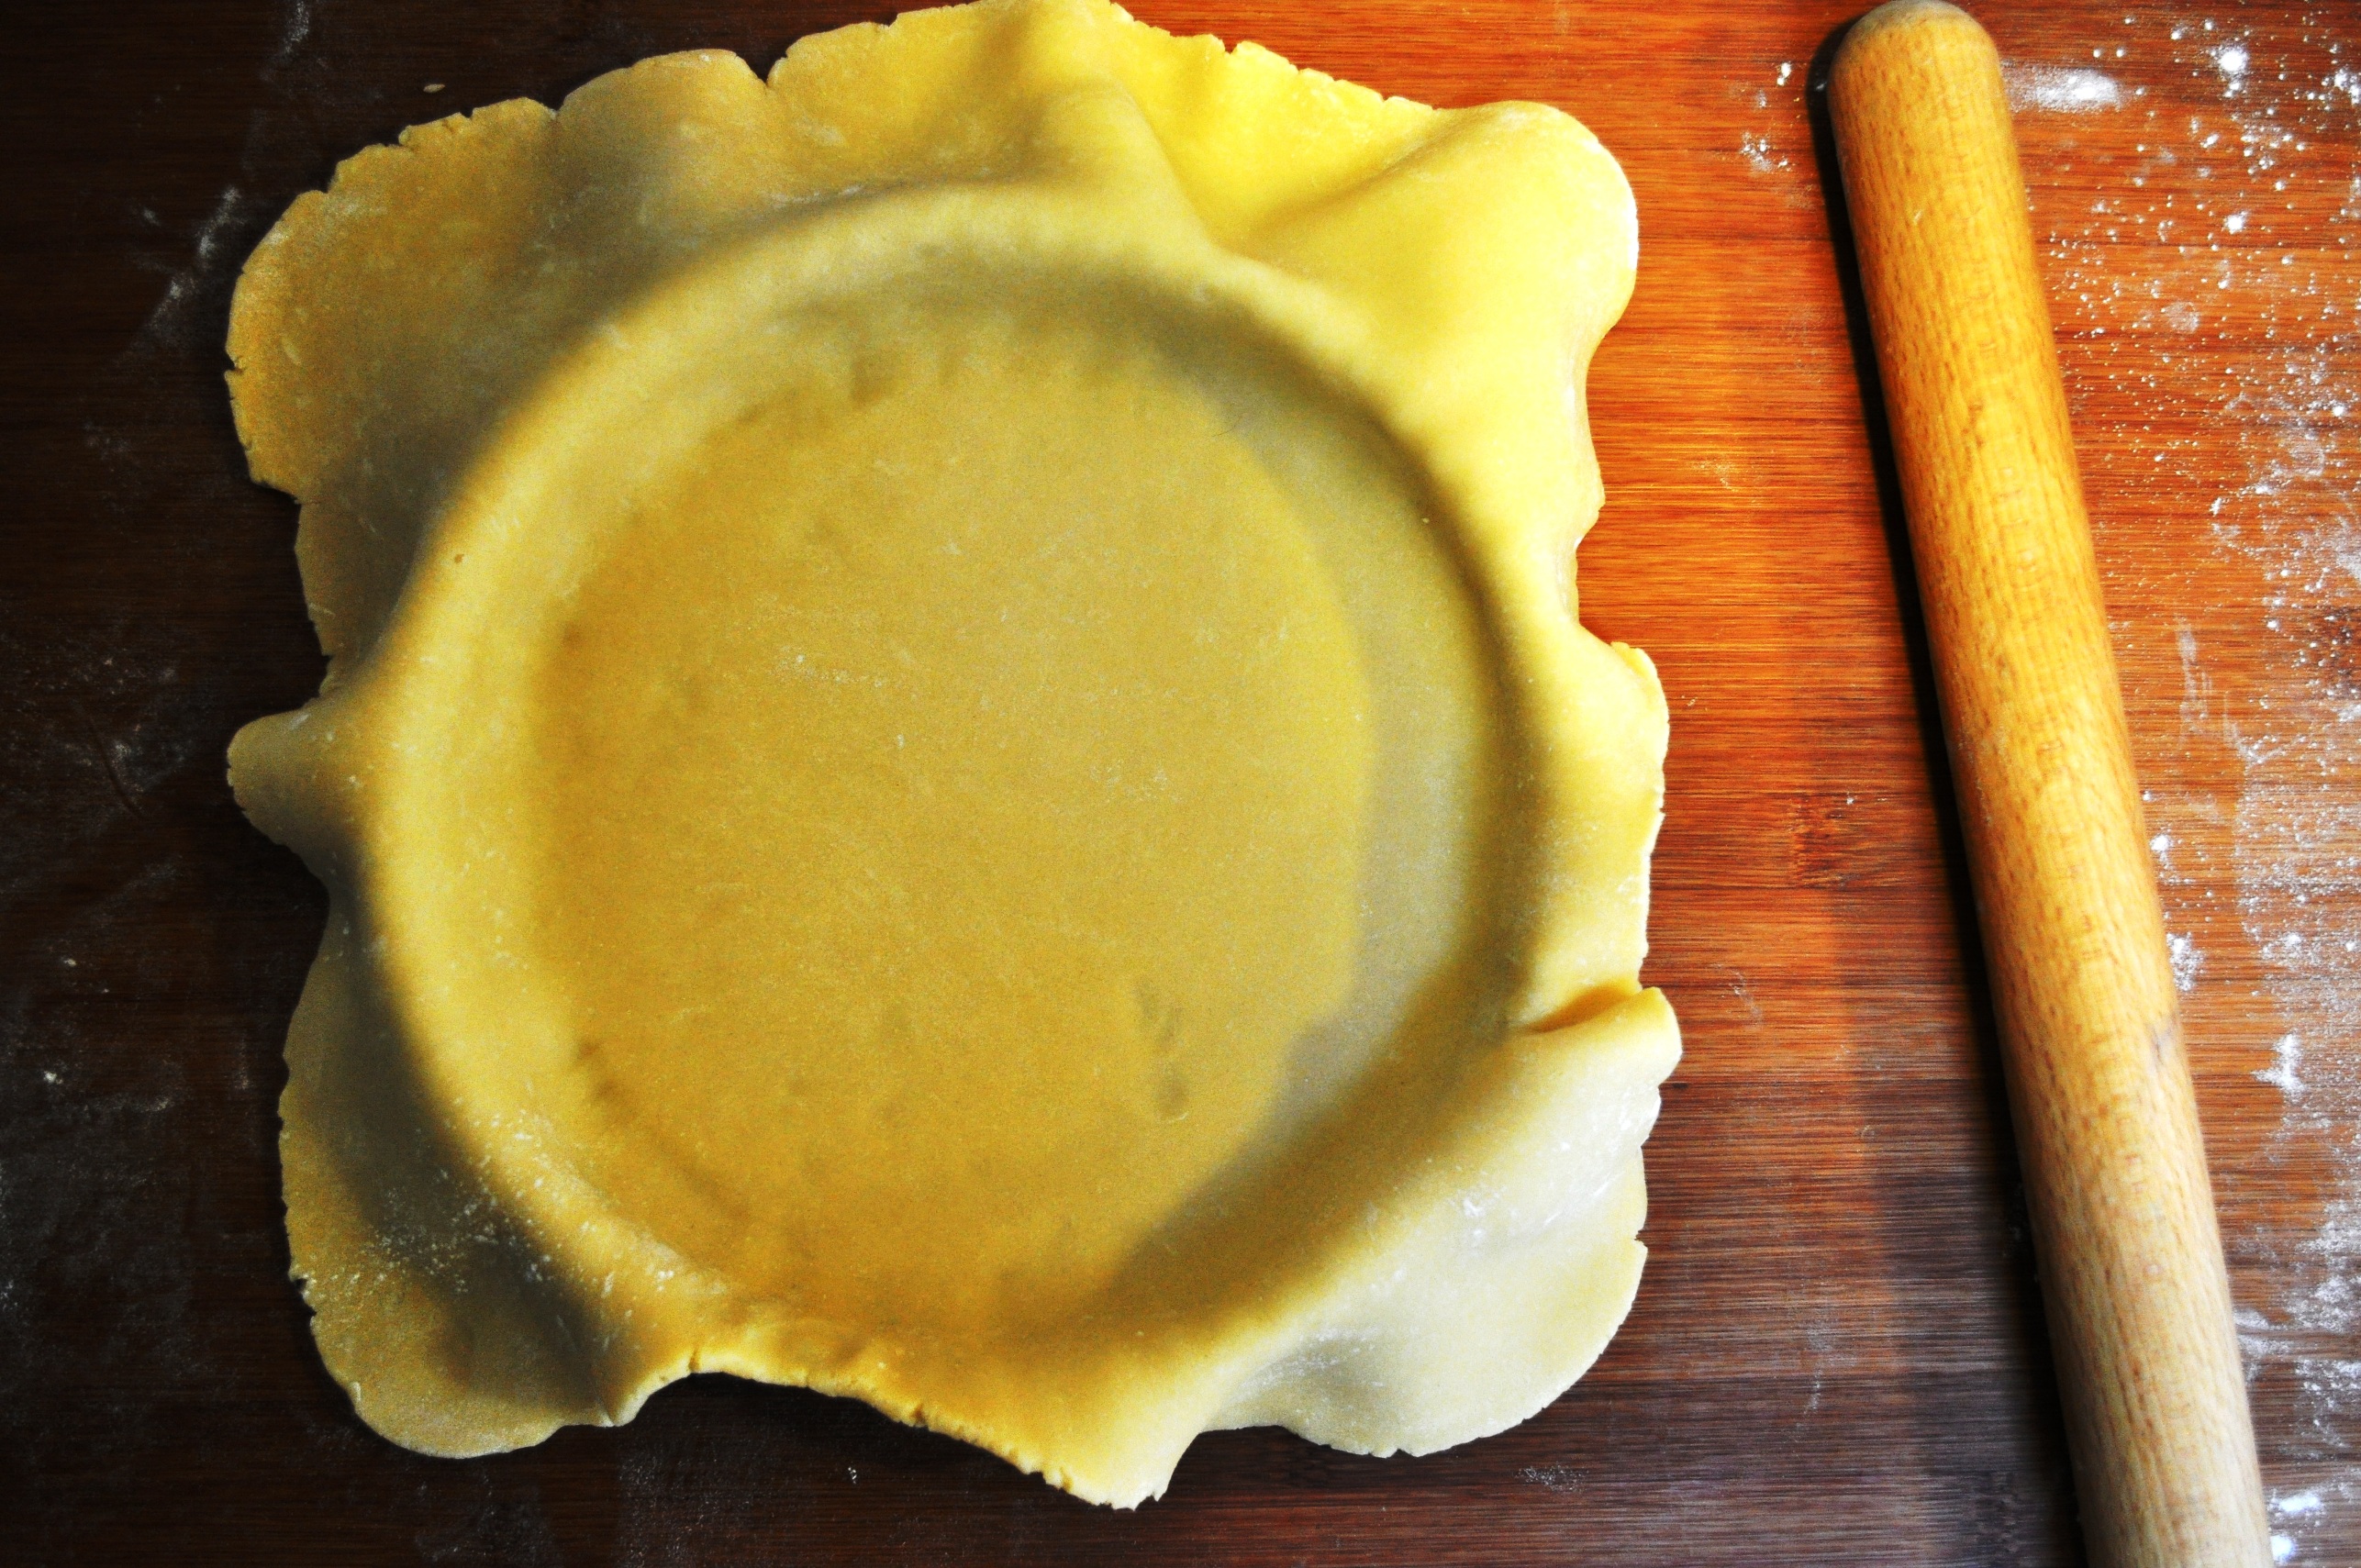
4. On a lightly floured surface, roll out – extending the quarters formed by the cut to create four ears, with a small mound in the middle.

Roux 5
5. Put the chilled butter between two sheets of parchment or plastic and hit with the pin, “so that it is supple but still firm and very cold.”

Roux 6
6. Place the flattened butter in the middle of the dough then fold over the ears to enclose it.Roux 8
7. Wrap and chill for 30 minutes “to bring the butter and dough to the same temperature.”

Roux 9
8. Roll out to about 70x40cm. “Fold over the ends to make 3 layers. This is the first turn.” Ie, you’re doing another single book fold.
9. Roll out and fold again. “This is the second turn.”
10. Wrap and chill 30 minutes.
12. “Make 2 more turns” then rest for 30 minutes to hour in the fridge.
13. “Make 2 more turns bring the total to 6.”

This worked well too. As with Dan L’s, you incorporate some of the fat into the détrempe, making it easier to handle. As with Dan L’s it also makes quite a lot – about 1.2kg. So you can cut it into portions and freeze them.

Roux 10

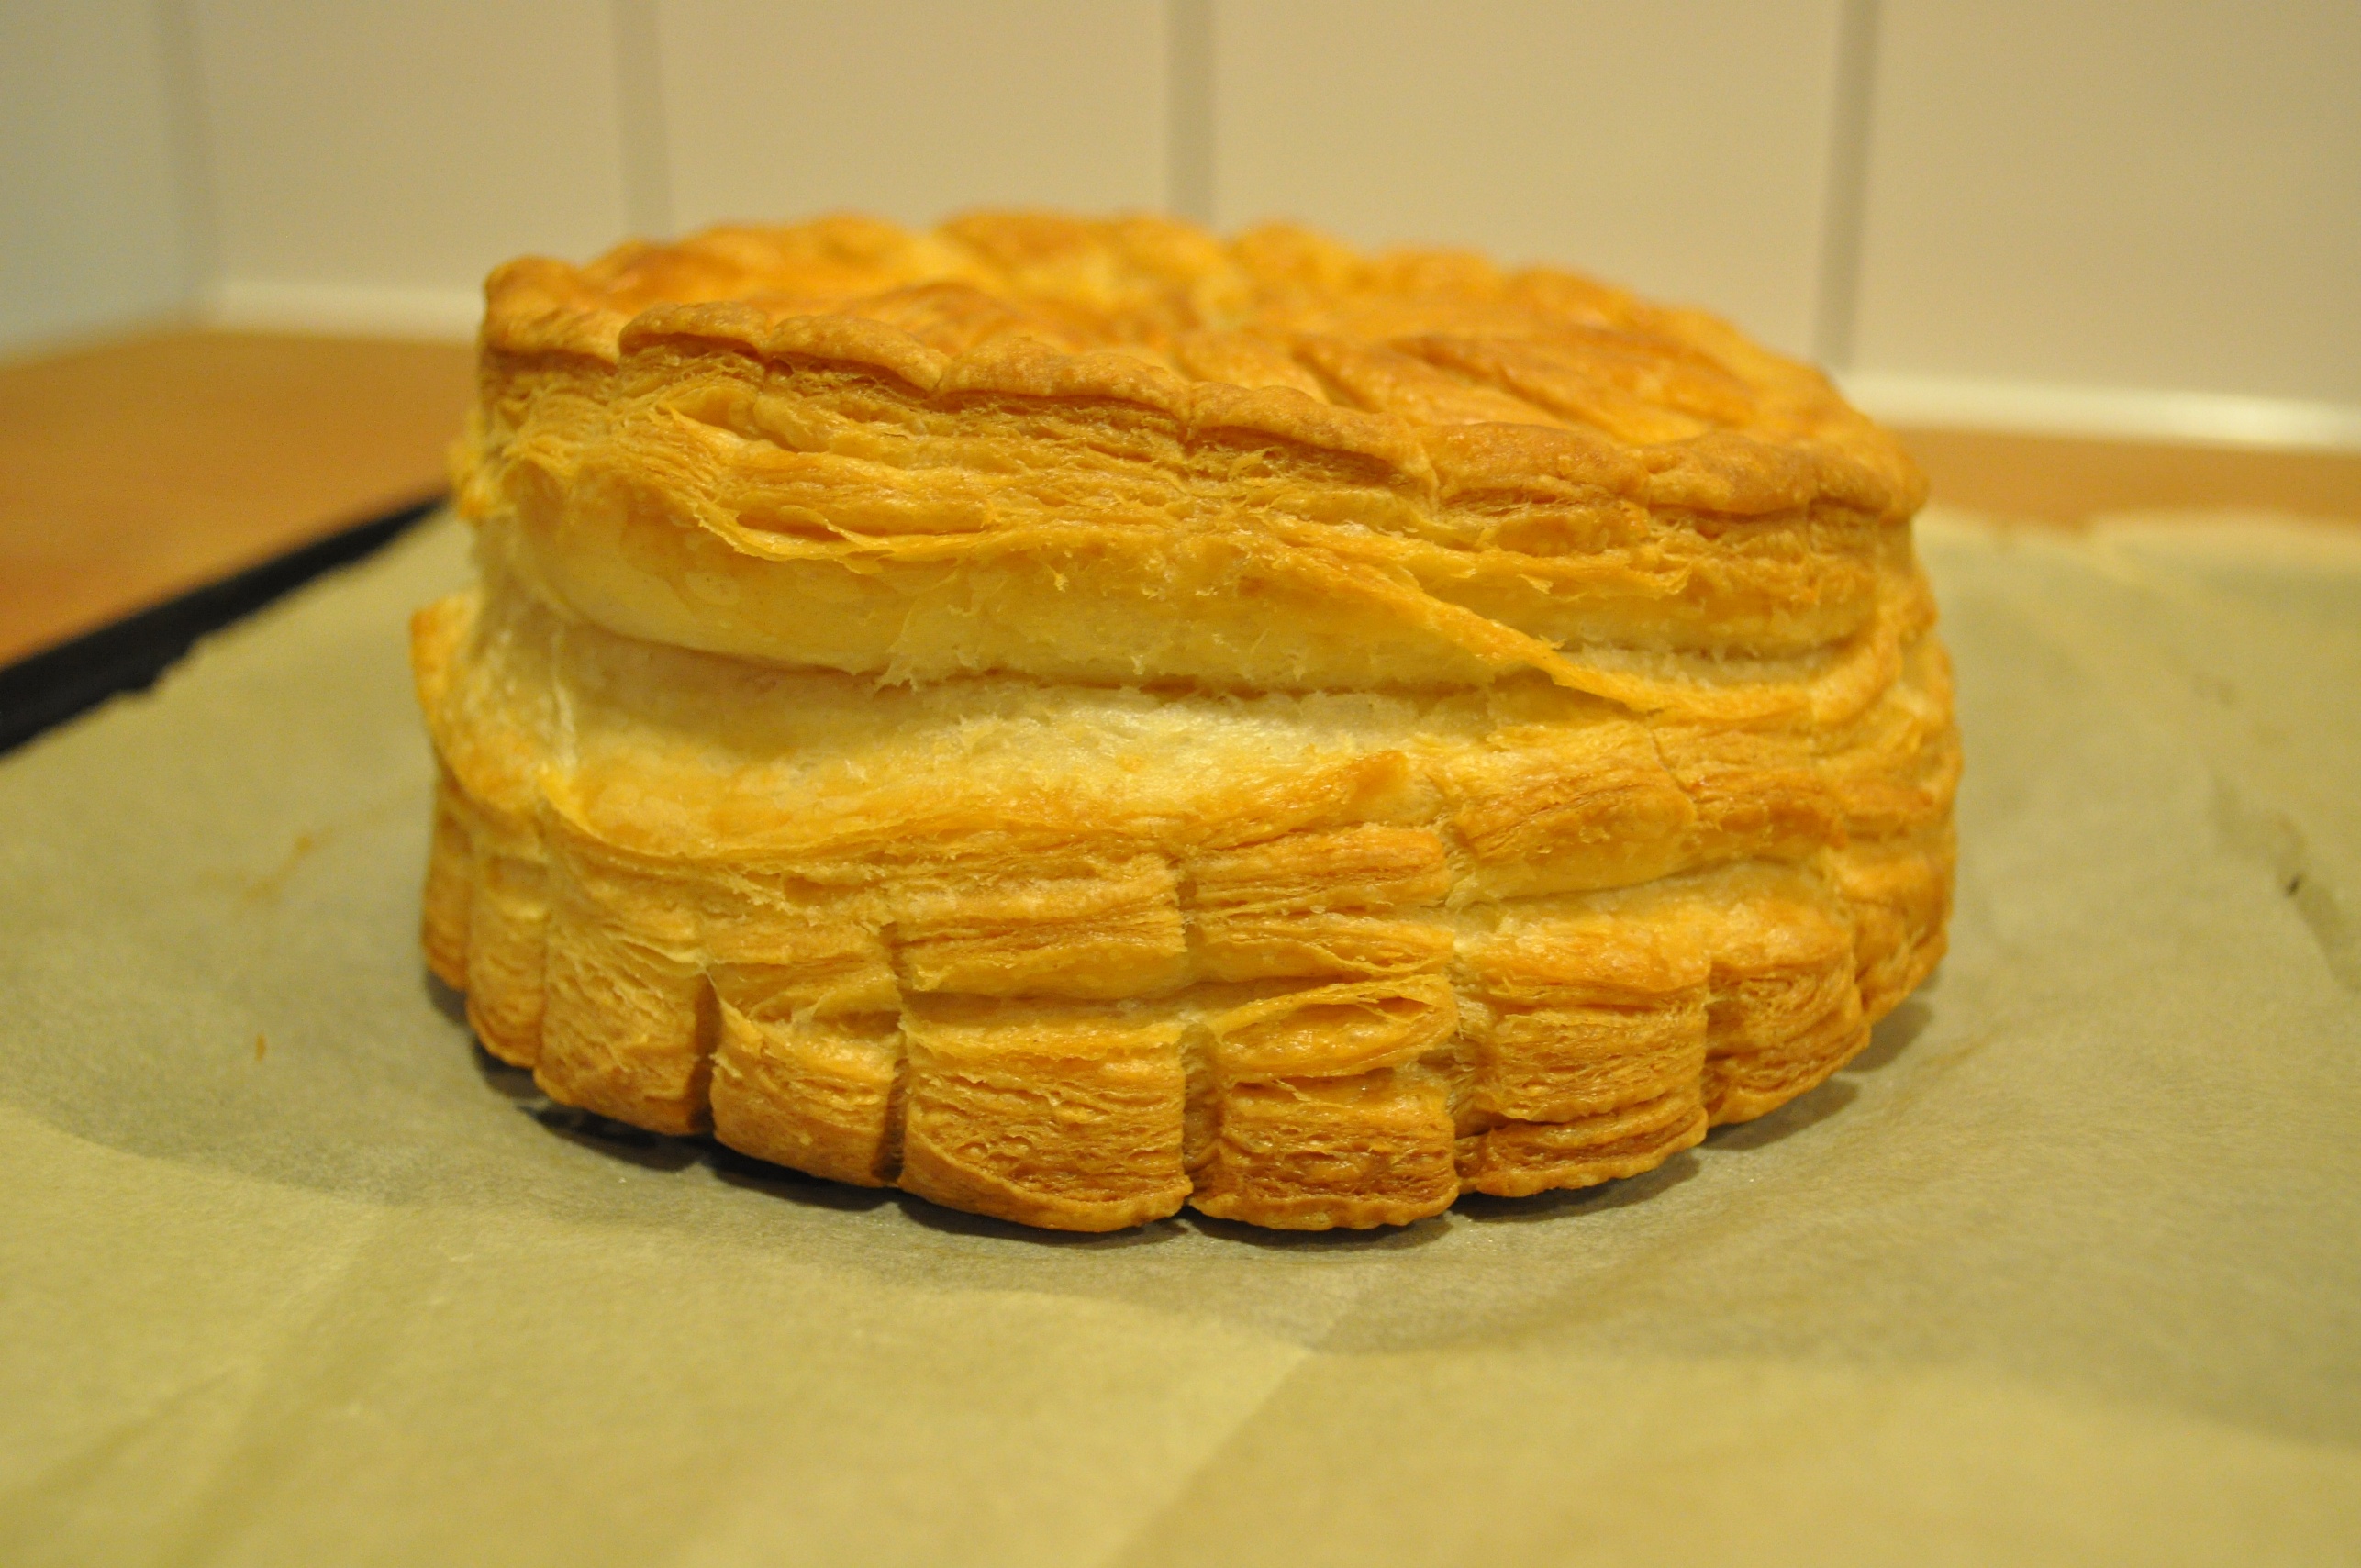
This is the batch I used to make my pithivier. I’ll include this pic again, as it show very clearly some great puffing action.

Baked, sugar, side

Observations and tips

Flour – Mathiot stipulates plain flour (equivalent to all-purpose in the US), while Dan L uses a mixture of plain and strong, and the Roux brothers don’t specify. My old teacher said to use all strong flour. Stron (higher protein) flour is more resilient to all the manhandling and manipulation involved and will also give more lift in the oven. Plain (lower protein) flour will give a shorter texture, so will aid the melt-in-the-mouth quality. Always one to try and find an amenable middle ground, I’d recommend Dan L’s half-half approach.

Fat – proper puff pastry needs butter. This can be problematic for people on certain diets, but personally I don’t want to eat “pastry fat” – which is made from hydrogenated vegetable oils. The body simply cannot metabolise hydrogenated fats. Plus, butter simply tastes better, and doesn’t leave the iffy dry mouth-feel of some more processed fats.

Always make sure the fat you’re using is at a similar temperate to the paste, the détrempe. This means cold but pliable. As for the type of butter, Dan L says “You get the lightest pastry using a butter with a low moisture content, like Lurpak or Président” (ie Danish or French) but as I prefer to use local produce, I wanted to at least use English butter; Yeo Valley organic seemed to work well too. Oh, and generally unsalted makes most sense, as it’s more versatile for sweet or savoury products.

Combining – cutting the cross and making the ears is known as the French method. Slicing up the butter and laying it on two thirds of the rectangle is known as the English method. I found it easiest to handle the butter, and start the folding, when it was beaten with the rolling pin, as opposed to cubed or sliced, which seemed more likely to cause breaches. So when I tried Dan L’s I smeared the slices a bit to take off any sharp edges.

Acid – as these three recipes have shown, some call for lemon juice, others vinegar, while Mathiot’s contains neither. My online travels showed me that Richard Bertinet, Anna Olsen and Joe Pastry, among others, include lemon juice. Paul Hollywood doesn’t include any acid. The only explanation of the acid I can find is that helps prevent the pastry from oxidising and turning grey and helps tenderize it. In my case, I tend to use stoneground flours, rather than shiny bleached flours, so my doughs are always off-white anyway. Once baked, I don’t think it makes much difference with pastry, especially if you glaze it.

Resting and temperature – you have to rest the dough when you handle it a lot. This is for two reasons. Firstly, you don’t want to melt the butter or it’ll just blend with the paste, destroying the layers, so it’s always best to keep it below about 16C. Secondly, if you overwork the paste or dough, it’ll toughen up; resting it allows the gluten to relax and stay pliable. Resting times really seem to vary in these recipes, but I found Mathiot’s too short and more than 30 minutes potentially tricky, as if you fridge is at 4C, it’ll get too cold, reducing that pliability again, meaning you’ll probably need to let it warm up again before pinning it out. If it’s too cold, the butter can break through the layers of paste. That said, you may need to leave it in the fridge longer to fit in with your other commitments!

Folds and turns – when you roll it out and fold it up, that’s a turn. There are different techniques. I just stuck with the technique of folding the rectangle in thirds. You can also quarter the rectangle, folding both ends in towards the centre, then folding again in the centre, as if it’s the spine of a book. This immediately creates more layers. There seems to be some confusion over the names of these techqniques. Some call the former a half-turn or single book turn, while others called the latter a book turn or a double book turn. I’m not going to try and authoritatively name either.

Pinning out – when you pin it out, make sure you have the open ends of the parcel in the direction you’re rolling. Try to keep your piece of pastry in a rectangular shape, with straight-ish edges and square-ish corners. This takes a little practice, you can straighten up the edges with your rolling pin and stretch or pin out the corners. Also, when you fold it, take care with any air bubbles. You can press these out, or even jab then with the point of a knife, though this isn’t ideal. You’re trying to build up consistent layers.

Using it – it keeps well in the freezer, or for up to about 3 days in the fridge. When you’re using it for pastries, or pies, or tarts, it always benefits from being washed with whole egg or yolk, but when you do try to avoid any edges or it’ll seal them up and stop it rising and puffing nicely. Before baking, let it rest again, for more than 20 minutes and even overnight, as this will prevent it from  distorting when it’s put in the oven. Dan L even freezes his again before using, once it’s pinned out. Bake it at a hot temperature, 200C plus.

Conclusion
Unless you’re some kind of pastry purist, I’d recommend a recipe that incorporates a bit of the total fat into the détrempe. I’ve even seen recipes that incorporate a bit of the flour into the beurrage but I’m not sure that’s really necessary. I’d also recommend the recipes with a higher fat: flour ratio. The Mathiot recipe seems a bit meagre and modest with, in baker’s percentages 100% flour to 50% fat, when the Dan L is 100% fat and the Roux-Millet is 90% fat. Technically the Mathiot can be called a “half-puff” while Dan L’s is “full-puff”. As many chefs will tell you, fat is flavour, and good butter is delicious, never mind how it helps give that wonderful flaky, delicate, melty texture to the pastry.

I realise this is probably the longest post on this blog, but I hope a few get to the end and find it useful. I haven’t got into any maths [l = (f + 1)n] or mentioned the “Dutch or Scottish method”, but maybe I’ll talk about that in another post on rough puffs at some stage.

Baked crumbly puff pastry


* The French word pâte is related to the English words paste and pastry and the Italian words pasta, impasto, pastella etc, and they all come from the Greek for stewed barley, via the Latin. Feuille means leaf or sheet, and like the English folio or Italian foglia and foglio comes from the Latin.

13 Comments

Filed under Baking, Pastry, Recipes

A Pithivier

Baked, sugar, side

In my last post about galette des rois, I mentioned that this French Epiphany pie is basically a form of Pithivier. These are puff pastry pies that may well originate in the town of Pithiviers in central France. Indeed, in French the pies are known as Pithiviers, but us foreigners lop off the final s. Don’t ask me why.

Unlike the galette des rois with its sweet frangipane filling, Pithiviers can be sweet or savoury. As I had some more frangipane, and have been making a lot of puff pastry lately, I thought I’d make a Pithivier – a sweet one that was basically a mini galette des rois without the requirement for it to be eaten on a feast day.

I also wasn’t happy with how I’d bodged the edge of my galettes des rois, crimping it like a pasty rather than leaving it free to expand. So I was determined to finish this one more neatly.

Traditionally both the galette des rois and Pithiviers have a kind of scalloped edge, like the petals of flower petals. This can be achieved by using a semi-circular cutting edge, for larger scallops, or by simply cutting into the edge slightly with the blade of a knife, or indeed the back of the blade of a knife, which is what I did.

So, as with the galettes des rois, I rolled out some puff pastry (about 300g in this case), and cut two discs (in this case I used a 16cm diameter side plate). I then put the frangipane in the middle of the bottom disc, leaving a rim of about 25mm, which I brushed with egg wash. I then put the top disc on, and pushed it down firmly to seal.

Pithivier, unbakedPithivier, baked

I then egg-washed the whole thing, scalloped the edge as described above and cut curved lines in the top, radiating out from the centre. I baked it at 200C for about 25 minutes. After baking, I dusted it with icing sugar and put it under a hot grill to caramelise slightly (top pic, above).

In this case, the edge puffed up very satisfactorily.

Baked, side

My next post will be all about my puff pastry experiments. I’ve been obsessing slightly as you may be able to tell if you follow my Instagram


5 Comments

Filed under Baking, Pastry, Pies & tarts