Tag Archives: Dutch oven

Semi-sourdough, no-knead, casserole-baked bread

No knead, semi sourdough crumb shot

Purists will disdain it, but I’ve not got a problem with using a combination of sourdough starter and commercial yeast. This is semi-sourdough baking. The sourdough gives some depth of flavour while the addition of the yeast helps a baker of my middling ability to control the timings better.

It’s a technique I learned from the essential book The Handmade Loaf by Dan Lepard. It’s a technique that stands me in good stead as, honestly, I never mastered getting satisfactorily consistent sourdough loaves. I probably could master it if I had a real push but it’s not really where I’m at these days. Indeed, mostly I just make a fairly basic tin loaf these days for toast, something my family Hoovers at breakfast time. It involves yeast and a mixture of stoneground strong white and wholemeal wheat and spelt flours.

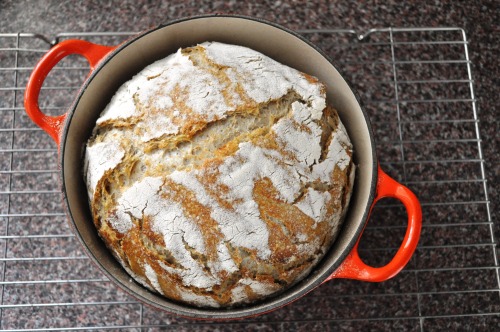
When I want something a bit more interesting, I reach for the sourdough. This is what I’ve been making recently. It involves the no-knead and Dutch oven techniques. The latter means baking it in a preheated Dutch oven, cast iron casserole dish or even a terracotta chicken brick. I’ve got one called a knuspertopf, my mum’s got one called a römertopf. My German-speaking father tells me topf means pot, while knusprig means crisp or crunchy. Römer means Roman, apparently. They all work well, retaining the moisture, adding some steam to the bake.

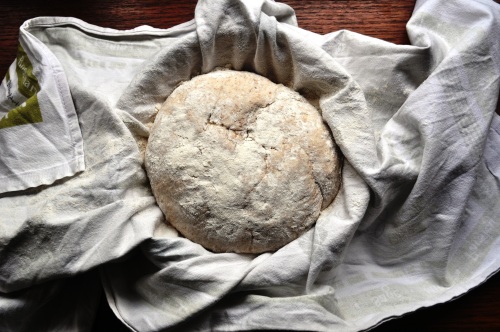
Knuspertopf no knead loaf

Combine to make a preferment
100g of sourdough starter at 100% hydration (ie, refreshing it with equal quantities water and flour)
2g active dried yeast or 4g fresh yeast
100g stoneground wholemeal wheat flour
100g water

I don’t worry about the temperature of the water. Leave this mixture at room temperature (about 19C in our place now) for about 6-8 hours. One good option is to make it at lunchtime.

After the allotted time, when the preferment is bubbling nicely, make the dough by adding
500g flour (I used a 50/50 mix of stoneground white wheat and wholemeal wheat)
400g water
7g fine sea salt

1. Just beat it all together until it clears, that is, until the flour is fully mixed with the water and there are no dry bits left. It’ll be a sloppy, wet dough. For those interested in bakers’ percentages, this works out at about 85% hydration. Ie, the total flour comes to 650g, the total water comes to 550g; 550/650 x 100 = 84.61.
2. Cover the bowl; I use a floral shower cap but a plastic bag is fine. Leave the dough for about 12 hours. I’ve been putting it in the fridge for about 10 of that. Overnight is good.
3. Remove the dough from the fridge and allow it to come back to room temperature. I’m not sure how important this is and haven’t scientifically investigated it yet. Some suggest a cold dough is good for oven spring, but I’m not convinced about that, it’d just be a sluggish spring.
4. Set your oven to maximum. Sadly, my electric Rangemaster only musters about 220C, at best. Put your chosen casserole dish in and heat it up for about 20-30 minutes.
5. Using a dough scraper, carefully remove the dough from the bowl onto a floured worktop. Handling it gently so as not to deflate it or damage it structure too much, fold one side into the middle, then the other, like a letter, to form a rough loaf shape.
6. Take the hot, hot dish out of the oven, remove its lid and, gently as you can, er, drop the dough into it. Put the lid back on, put it in the oven and bake for about 40 minutes.
7. Turn the oven down to 180C and bake for another 10 minutes.
8. Take the dish out, turn out the loaf, then return it to the oven for another 10 minutes. One risk with a dough this wet is that it may not cook all the way through. It should do with the preheated dish and a baking time this long but if you’re not sure, over-baking won’t do too much harm, other than thickening the crust a bit.
9. Remove from the oven and cool on a wire rack.

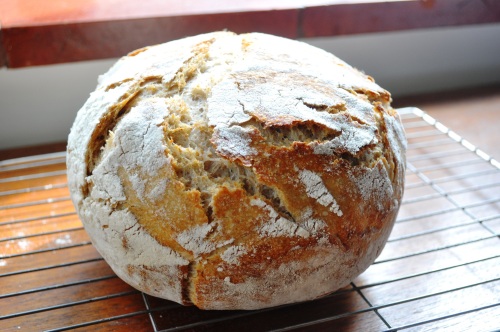
Casserole no knead loaf

Now, this is a pretty easy way to make fairly satisfying loaf. It’s got a good chewy crust and a reasonably open crumb structure. My only criticism is that it can feel slightly rubbery, if that makes sense. It’s definitely worth a try though, for that artisan vibe, and it makes cracking toast. Even if kids do fuss about the crust. Honestly, some mornings it feels like all I eat for breakfast is rejected crusts…

7 Comments

Filed under Baking, Breads, Recipes

Le Creuset-baked sourdough

Sourdough baked in Le Creset, straight out of the oven

This is a technique I’ve been wanting to try for ages. Since last year, in fact, when still living in Rome. There, I encountered the blog of another ex-pat baking enthusiast, Krumkaker. She made several of her loaves in a casserole dish. It’s also a technique demonstrated by the ever-enthusiastic Vincent Talleu here.

I didn’t have my Le Creuset, or similar, with me while living in Rome, but now I’m home, I’ve found it. (Though we’ve lost a load of other baking kit in our double move. Particularly sad is the loss of an Eiffel Tower-shaped cake mould Fran bought in Paris with our dearly missed late friend Sara.)

Anyway. I’m not sure baking in a cast iron casserole, or Dutch oven, or Le Creuset, is a Scandinavian technique. It’s likely something that just evolved before Europeans had ovens, and would bake in pots, initially earthenware.

Cracks

On the road
The only other time I baked in a Dutch oven was in New Zealand, 1989, when I was on the road with my old friend Stephen McGrath, his Clydesdale horses and an elaborate caravan of wagons and carts. I made an enormous, heavy-duty loaf in a massive Dutch oven, baking it in the embers of our campfire.

Me driving wagon through Westport, New Zealand, 1989

The logic of baking in a casserole dish is that the cast iron is not only nice and hot – you preheat it – it also traps the moisture of the dough, effectively steaming the bread as it bakes.

Steam is how you get a crisp crust on bread, and can be difficult to create in a domestic oven. Professional baking ovens have steam injectors, but domestic techniques using misting sprays or trays of water are never quite as good. I can’t remember the qualities of my campfire loaf all those years ago (25!!!), but certainly this loaf has a lovely crust – though it wasn’t the crispest I’ve managed over the years in a domestic oven.

It also has a very satisfying shape, and the dish constrains any dough flow if I hadn’t moulded the ball well enough. (I hate it when I make a round free-form loaf, forming the dough into a ball, then it flows out into a discuss shape when it take it out of the proving basket; shaping nice tight balls can be surprisingly tricky.)

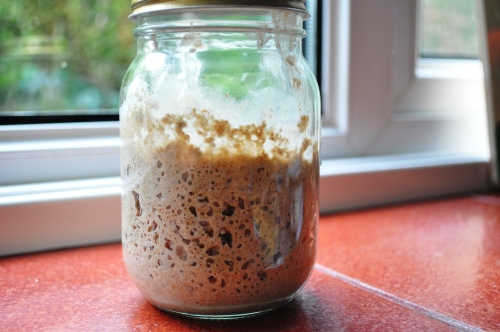
My leaven / sourdough starter, healthy again

Rude health
This loaf is also my first sourdough for a while. Although I’ve been making most of my own bread since we got back to England at Christmas, I’ve been neglecting my leaven somewhat.

Now about five years old, my leaven is well-travelled and much changed. It was born in London, then moved to Sussex, then it moved to Italy with us. There, it was fed on many and varied Italian flours – wheat, rye and various things referred to by the much misunderstood term farro.

Then it moved back to Britain. And I abandoned it for a few months. While we visited friends and family in the US and NZ, the sourdough lodged with my mother. Who’s a great cook, but not a bread-maker – she’s doesn’t make bread with easy yeast, let alone have any experience with sourdough.

So the past few months I’ve been nursing it back to health. I fed it rye, and local stoneground wheat flour, and filtered water. Finally I introduced some other leaven, from third generation baker Michael Hanson of The Hearth in Lewes. This could be seen as cheating, but I see it more like a kind of marriage. The yeasts and bacteria in my (puny) leaven mixing with those in Michael’s leaven. And after weeks of TLC, it’s finally back in rude health.

Mad science
As with much of my bread-making, this is kinda experimental, not a recipe as such.

I made a sponge with:
300g water
80g wholewheat leaven (at 100% hydration)
200g strong white bread flour
All mixed together, and left, covered with a shower cap – another technique I learned from Krumkaker.

I left it all day, for about seven hours, while I went off and worked in The Hearth.

In the evening, I made up a dough, with a further:
100g white bread flour
150g wholemeal wheat flour
10g salt.

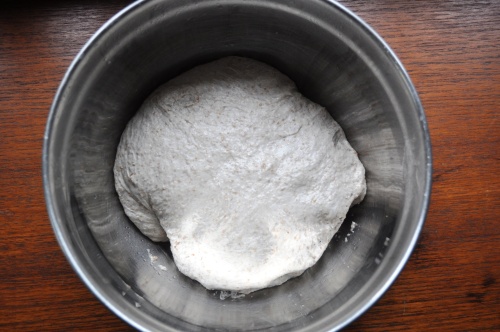
I gave it a short knead, formed a ball, then let it rest for about 10 minutes. I then gave it another short knead, another 10 minute rest, and repeated this a few more times. I then left it an hour, at room temp (about 18C). I then gave it a fold then put it back in the bowl, covered it, and left it in the fridge overnight (4C).

Dough

In the morning, I gave it another fold, resting it at room temp for another hour, then formed a ball, rested it 10 minutes, tightened up the ball, then put it in a basked and gave it a final prove in the airing cupboard (about 24C).

Final prove

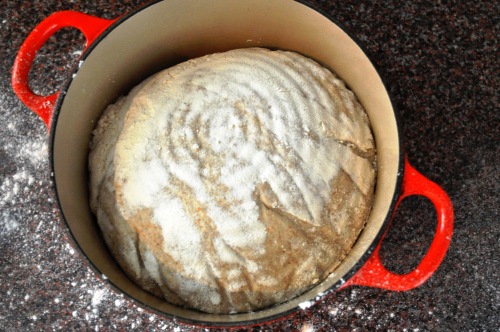
I then preheated the oven to 250C, with the Le Creuset inside. After about 20 minutes, with the oven at heat, I turned the well-floured dough out of the proving basket and dropped it into the hot dish – taking care not to roast my knuckles. I didn’t slash the top –  because I wanted to see how it cracked. Or because I forgot.

Before baking

The lid went back on and I baked it for about 25 minutes at 220C. I then took off the lid, dropped the temperature again to 200C, and baked for another 20 minutes or so.

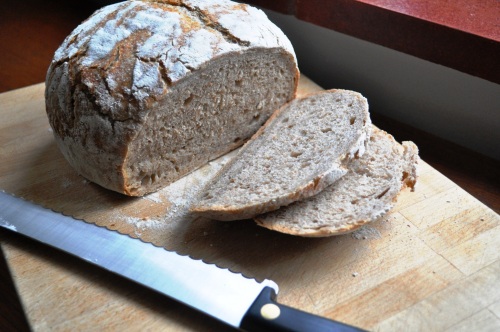
Cut

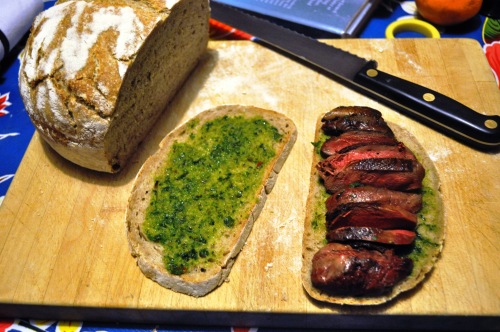
The results were good. The crust is more chewy than crisp, the crumb soft and moist. We had some for dinner, when I did wood pigeon breasts with a pancetta, thyme and juniper berry red wine sauce. We didn’t eat all the meat, so Fran used the leftovers for a sandwich for work, with a smear of wild garlic sauce. I bet no one else had that posh flavour combo sarnie* for their work lunch today.

Sandwich


* Any US readers, “sarnie” is British English – possibly even English English – slang for sandwich.


27 Comments

Filed under Baking, Breads, Flour & grain, Recipes