Hande’s pear, chocolate and hazelnut cake

Pear, choc, hazelnut cake, with clotted cream

Hande Leimer is the founder and owner of Vino Roma, a wine studio – with an absurdly historic cellar – located in the centre of Rome. Not only is she an expert sommelier and polyglot wine educator, she’s an excellent cook too. And baker. When she posted a pic of her pear, chocolate and hazelnut cake on her Instagram a few weeks ago, I had to try it.

These three ingredients make for a classic combination. I’ve always loved pear and chocolate, and indeed pear with chocolate sauce was a pudding I grew up with. But I also love anything made with ground nuts, so this really was a cake for me. Furthermore, Hande developed the recipe with the aim of balancing them, so no flavour dominated the other but each was clear and evident. The individual flavours are sharpened and delineated further with the judicious inclusion of some hot spice.

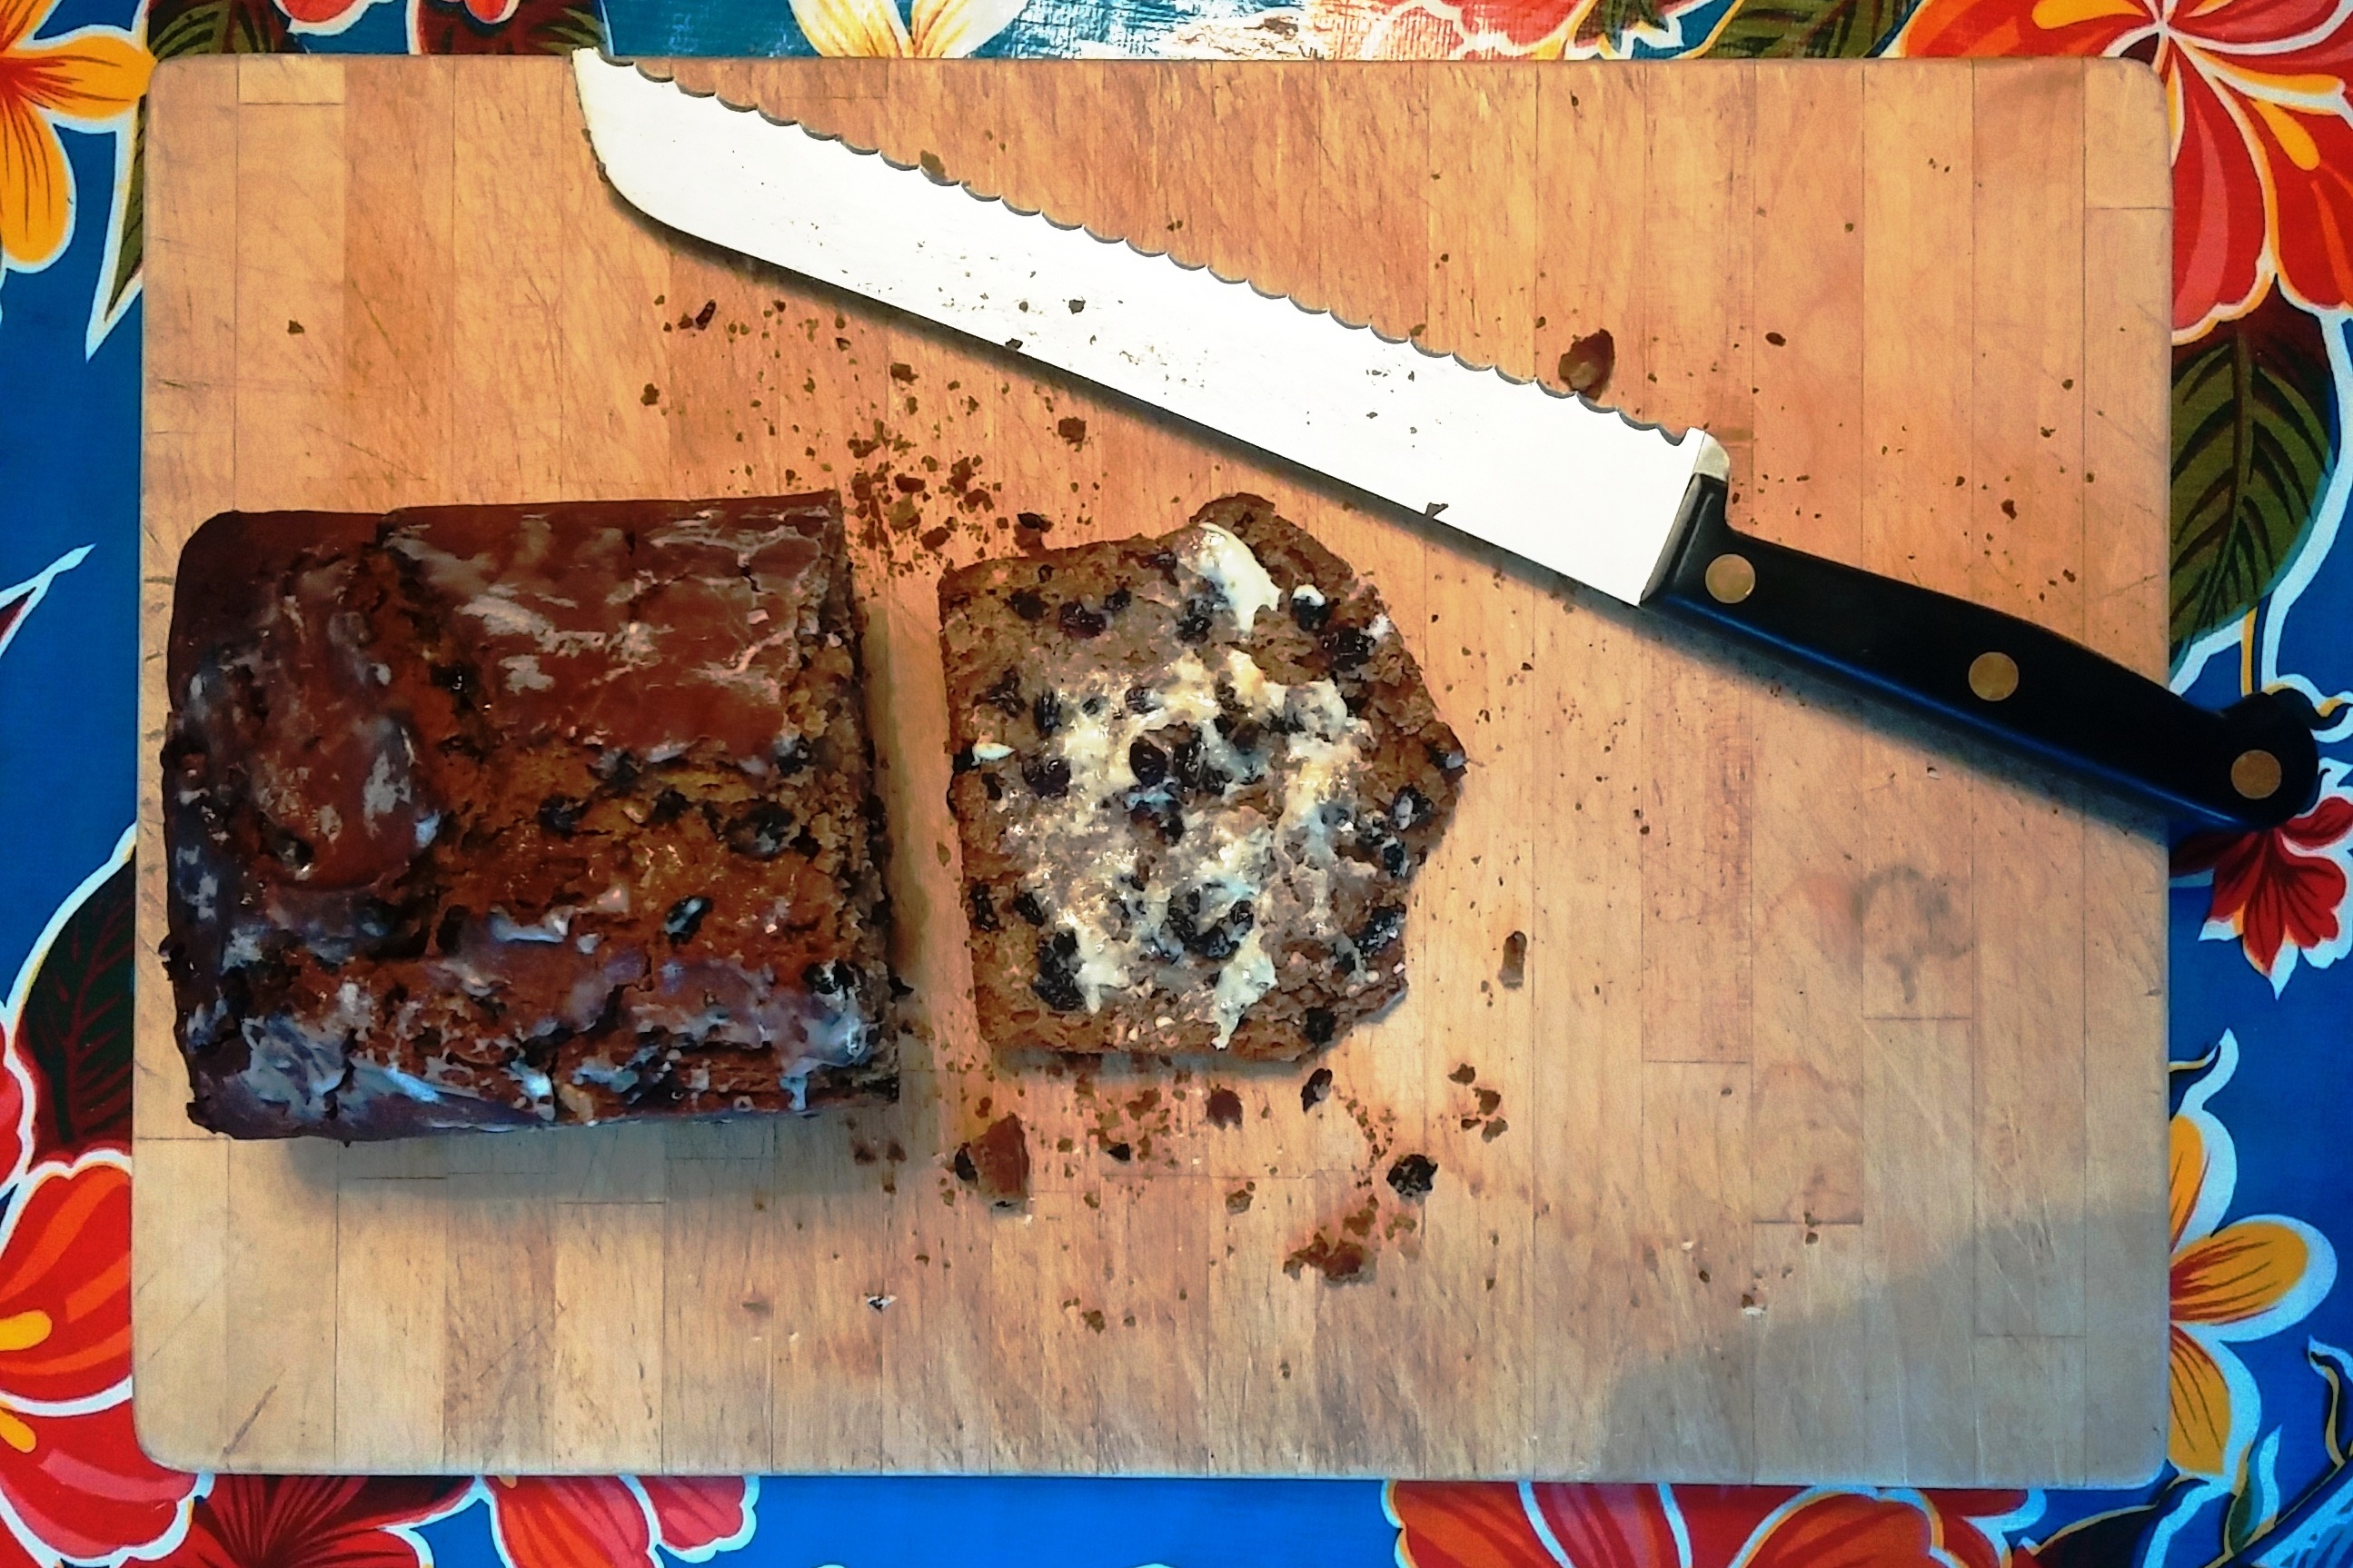
She included piment d’espelette / esplenette pepper, but as that’s not easy to source in the UK, changing that is one of the tweaks I made. I think Hande also made hers in a loaf tin, but I favoured a round tin.

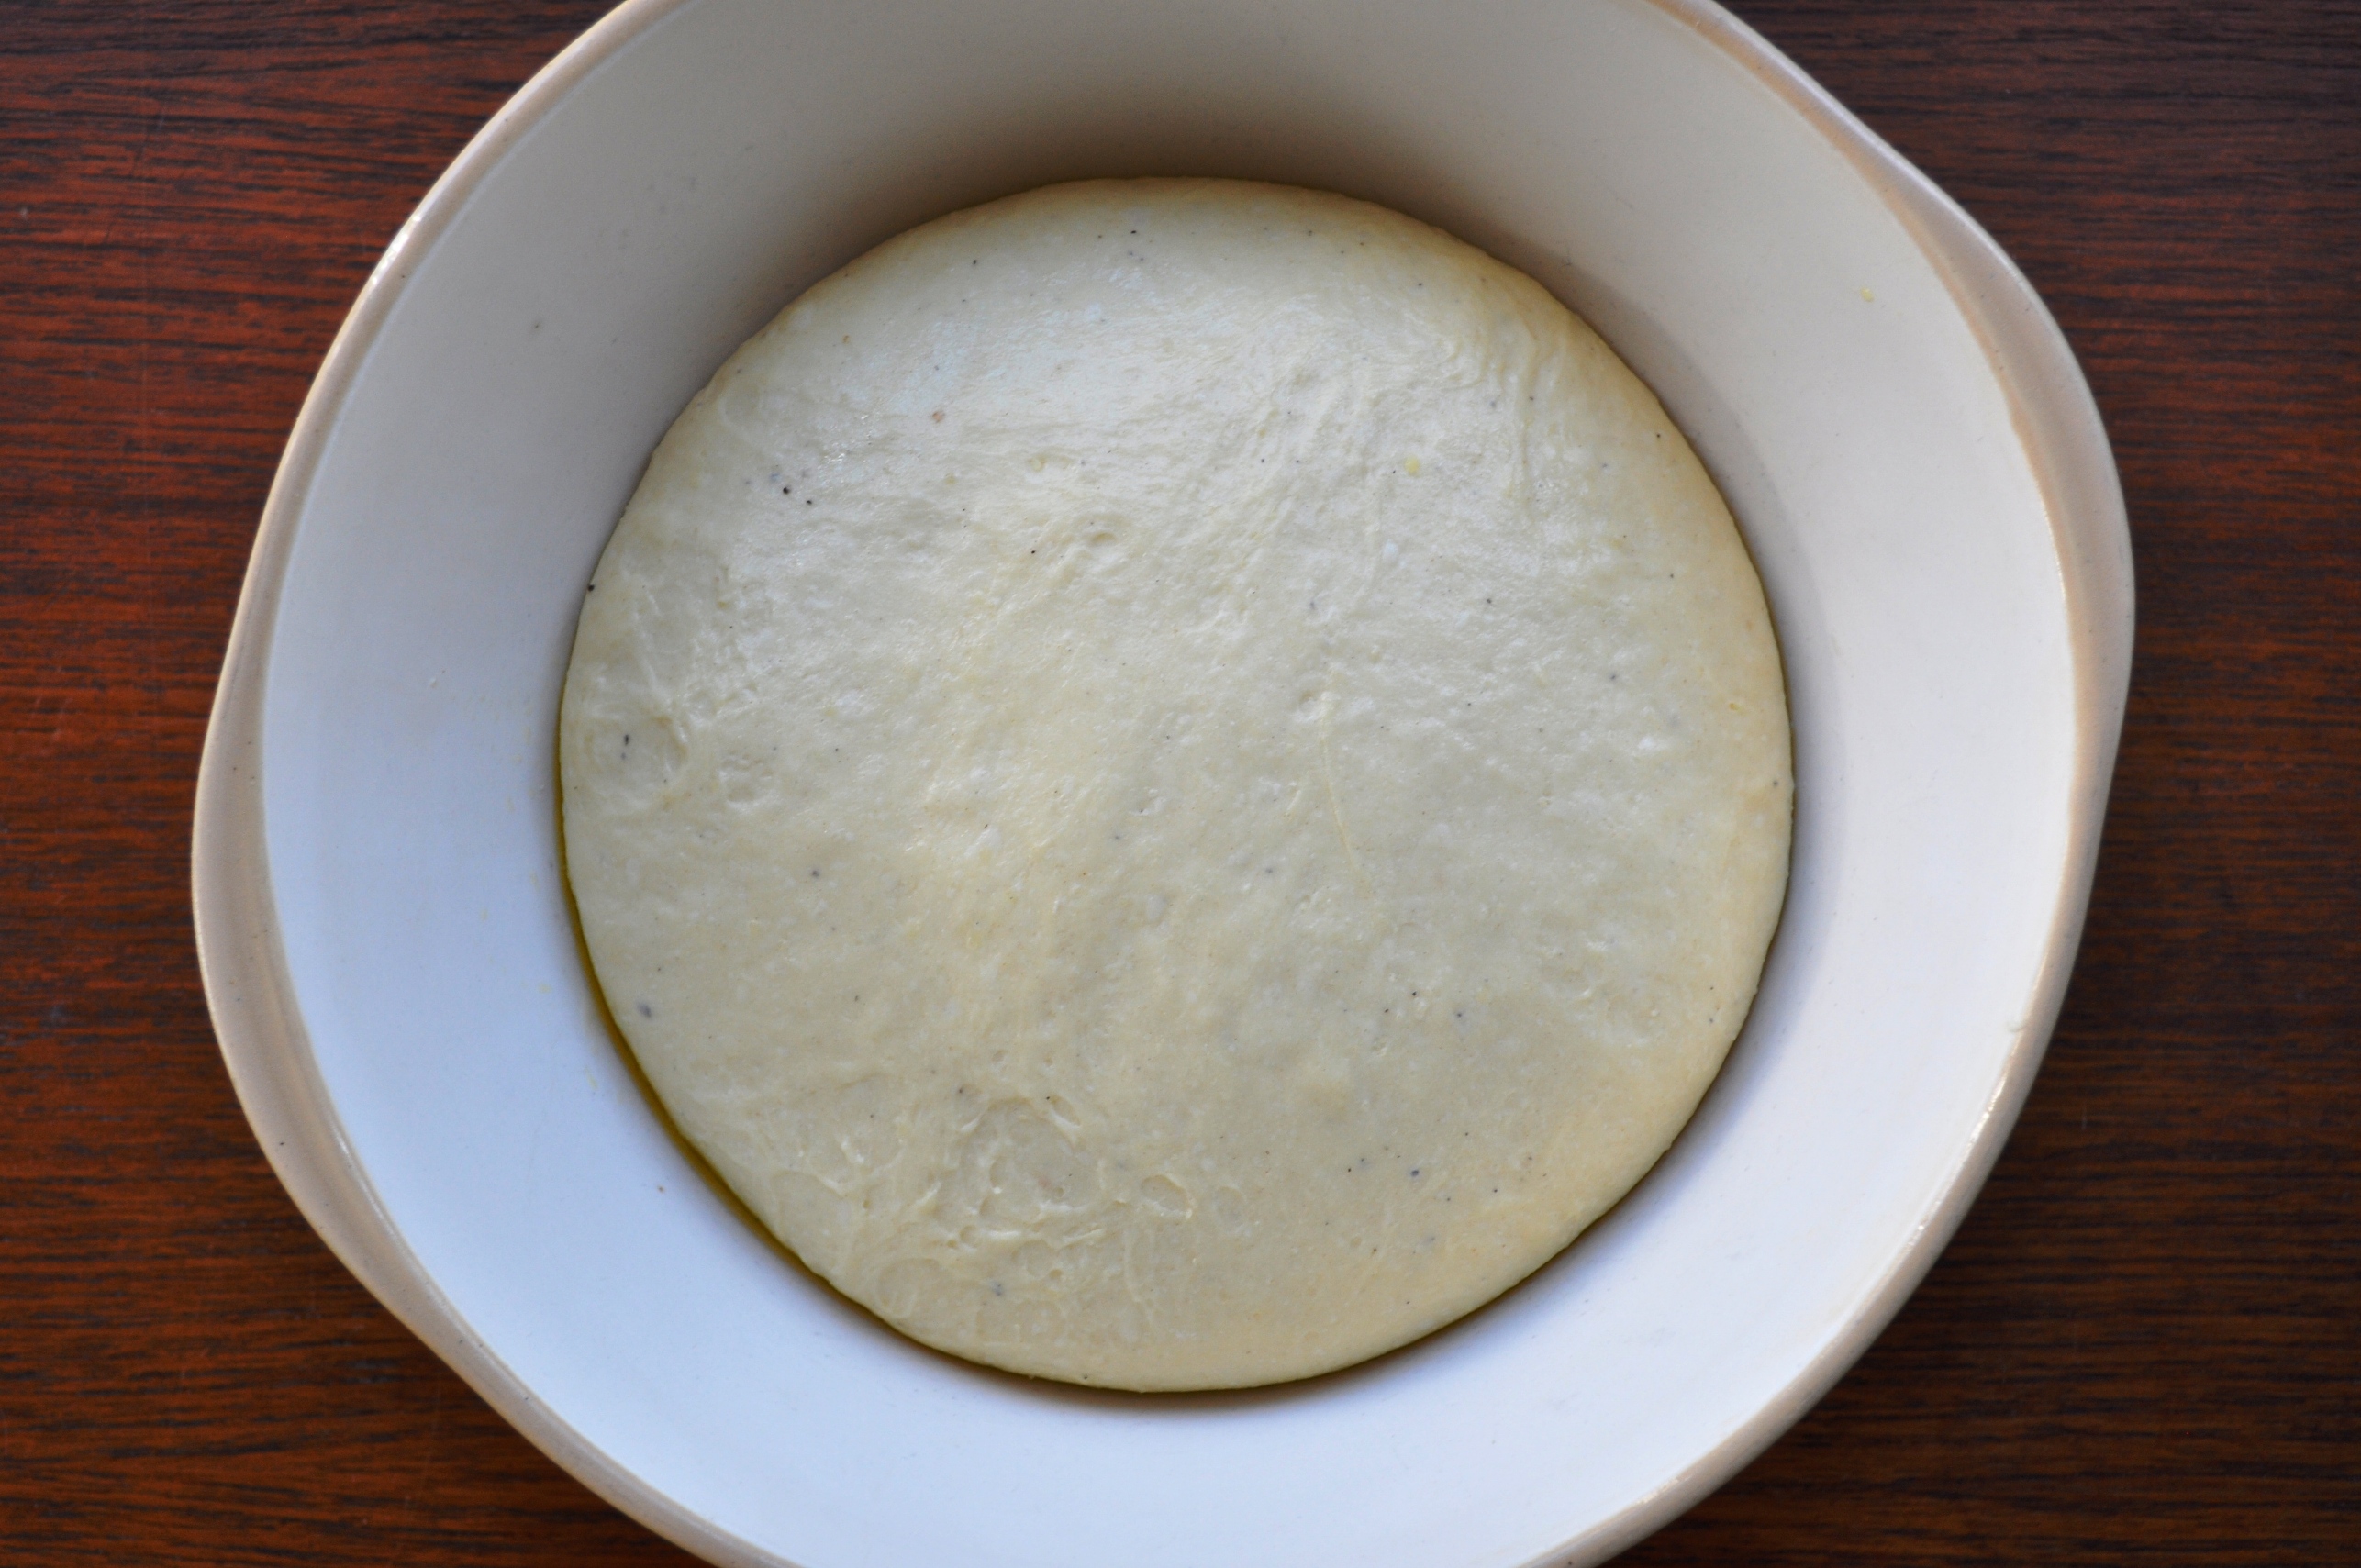
I suspect my version is a little moister than Hande’s. I used local Concorde pears (a hybrid of Conference and Comice), which were firmly ripe, but still added a fair bit of moisture to the mix. Hande said “I aimed for a batter that is not too runny but not too stiff either, when you pour it into the pan it does hold for a couple of seconds before gently flowing to all corners”, giving an optional 1 tablespoon of breadcrumbs if your batter was too runny. I didn’t do this, but instead increased the flour slightly.

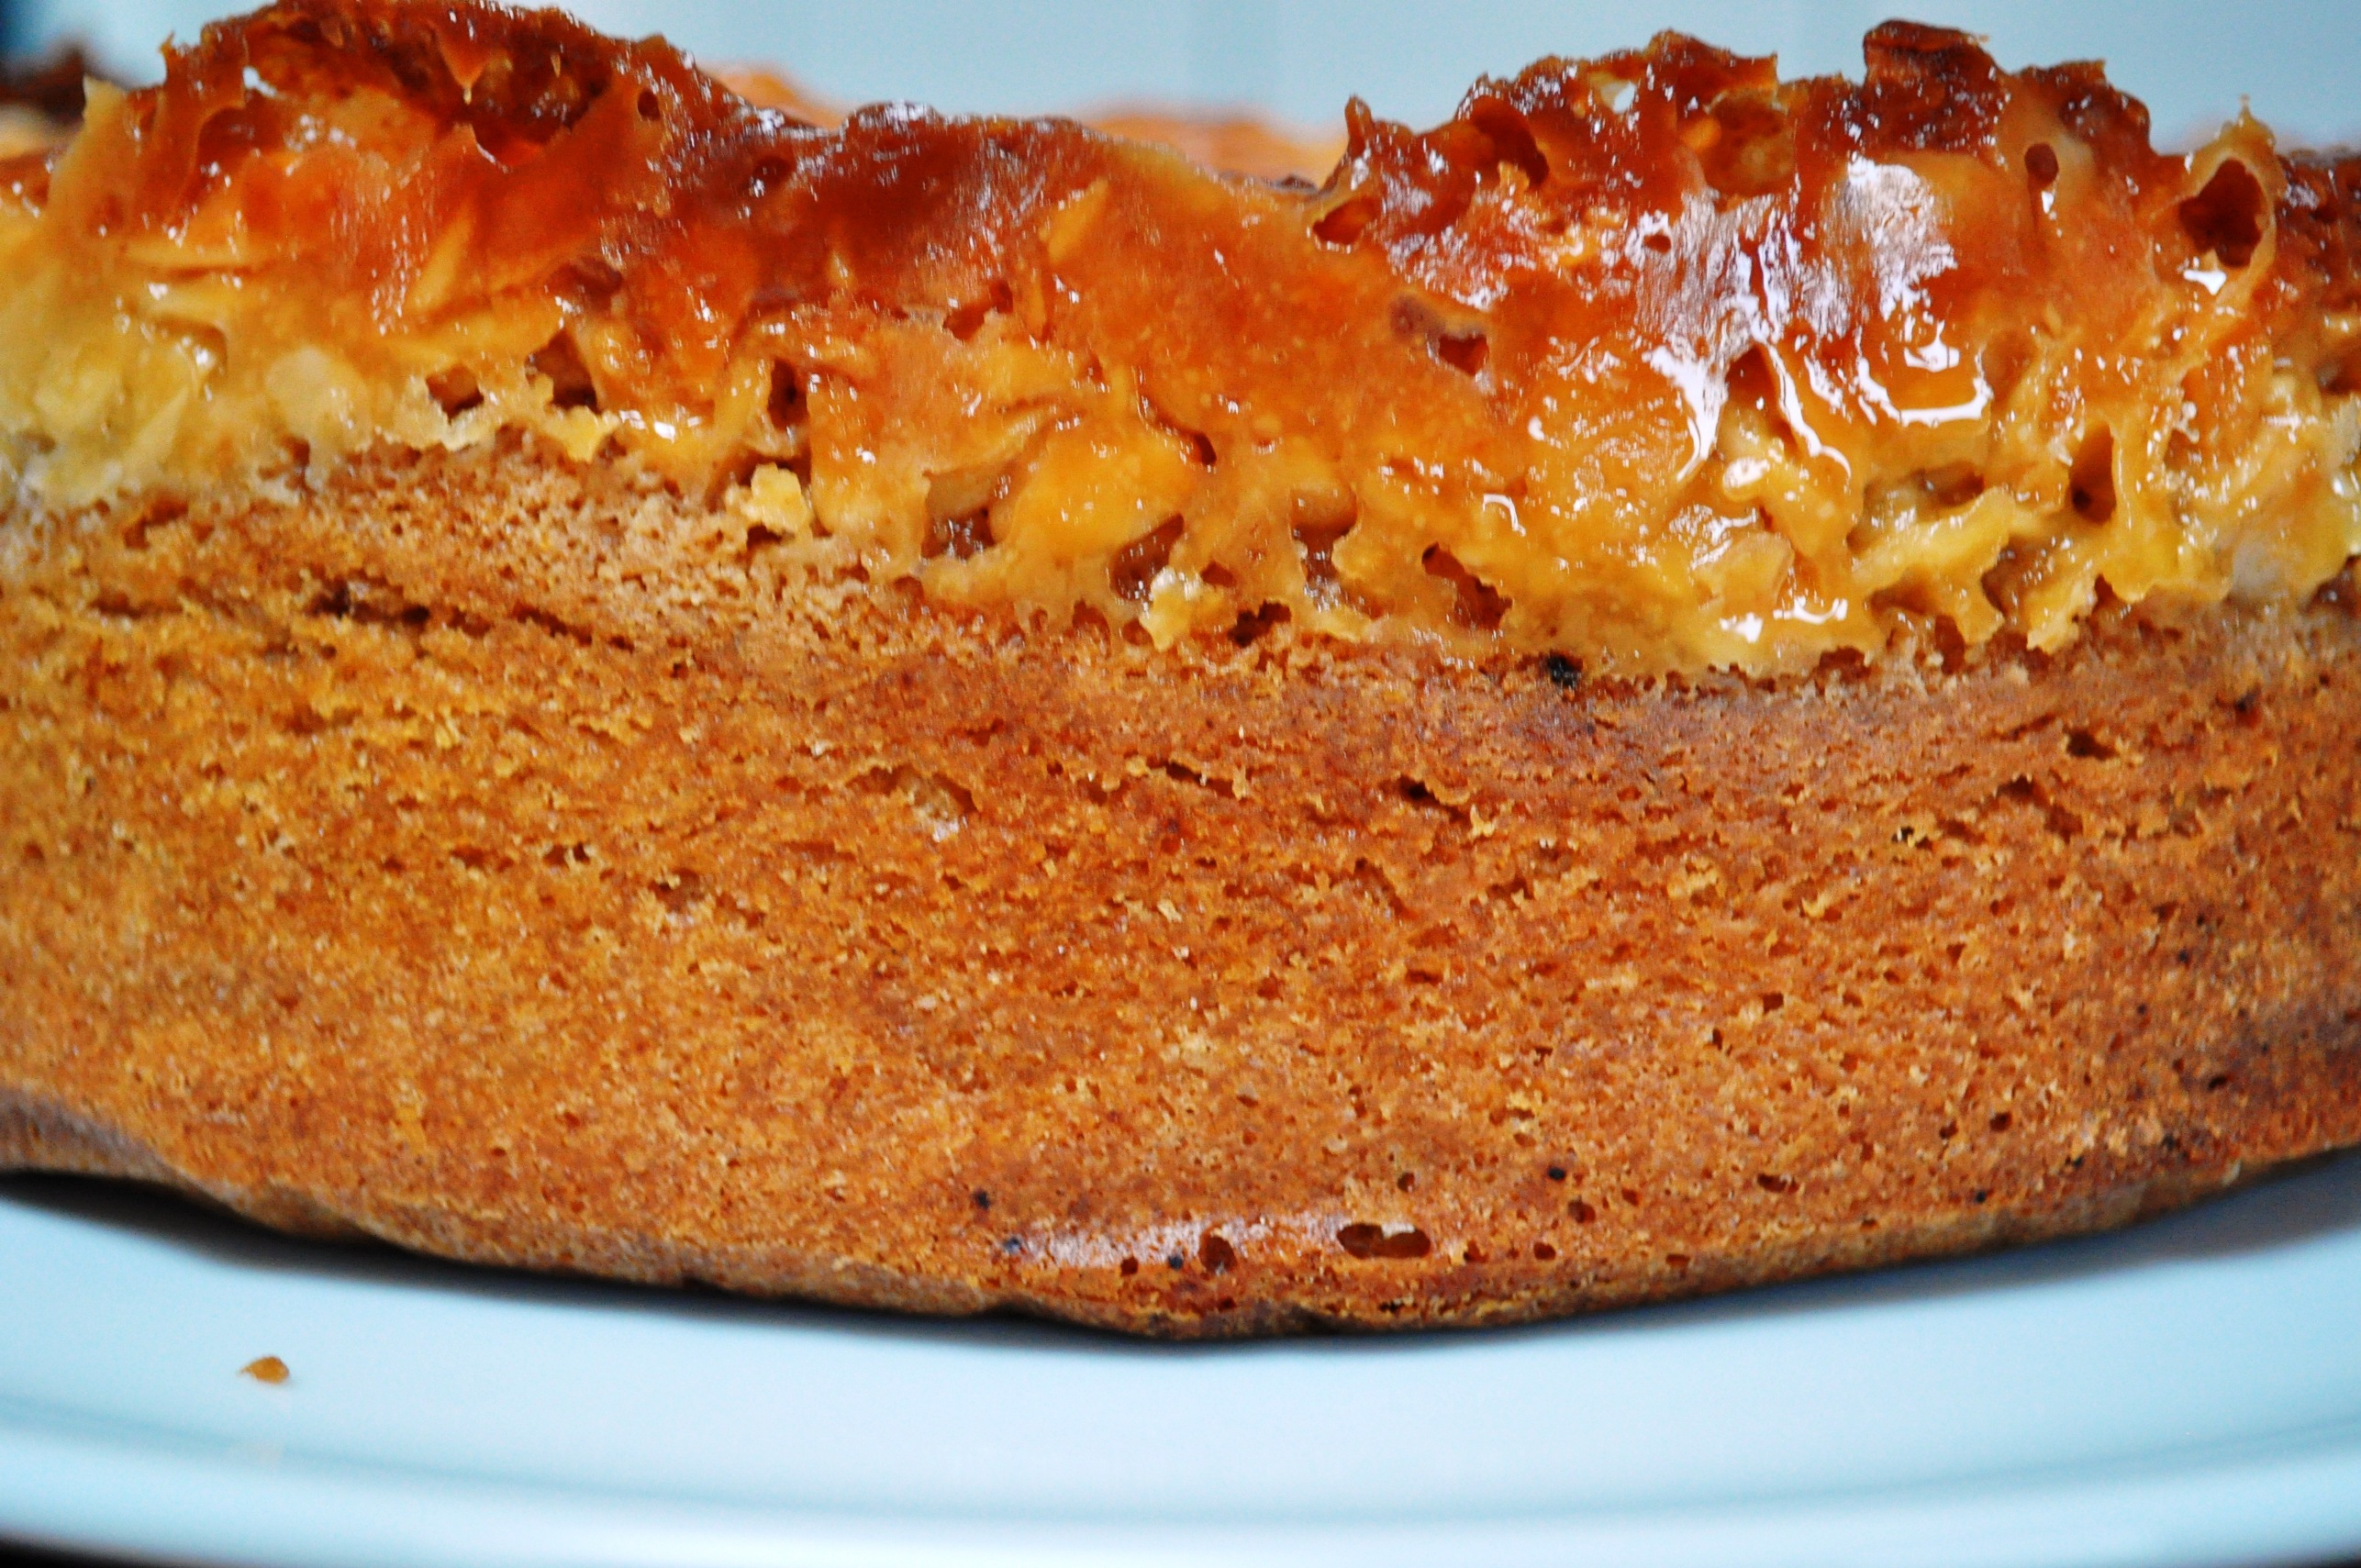
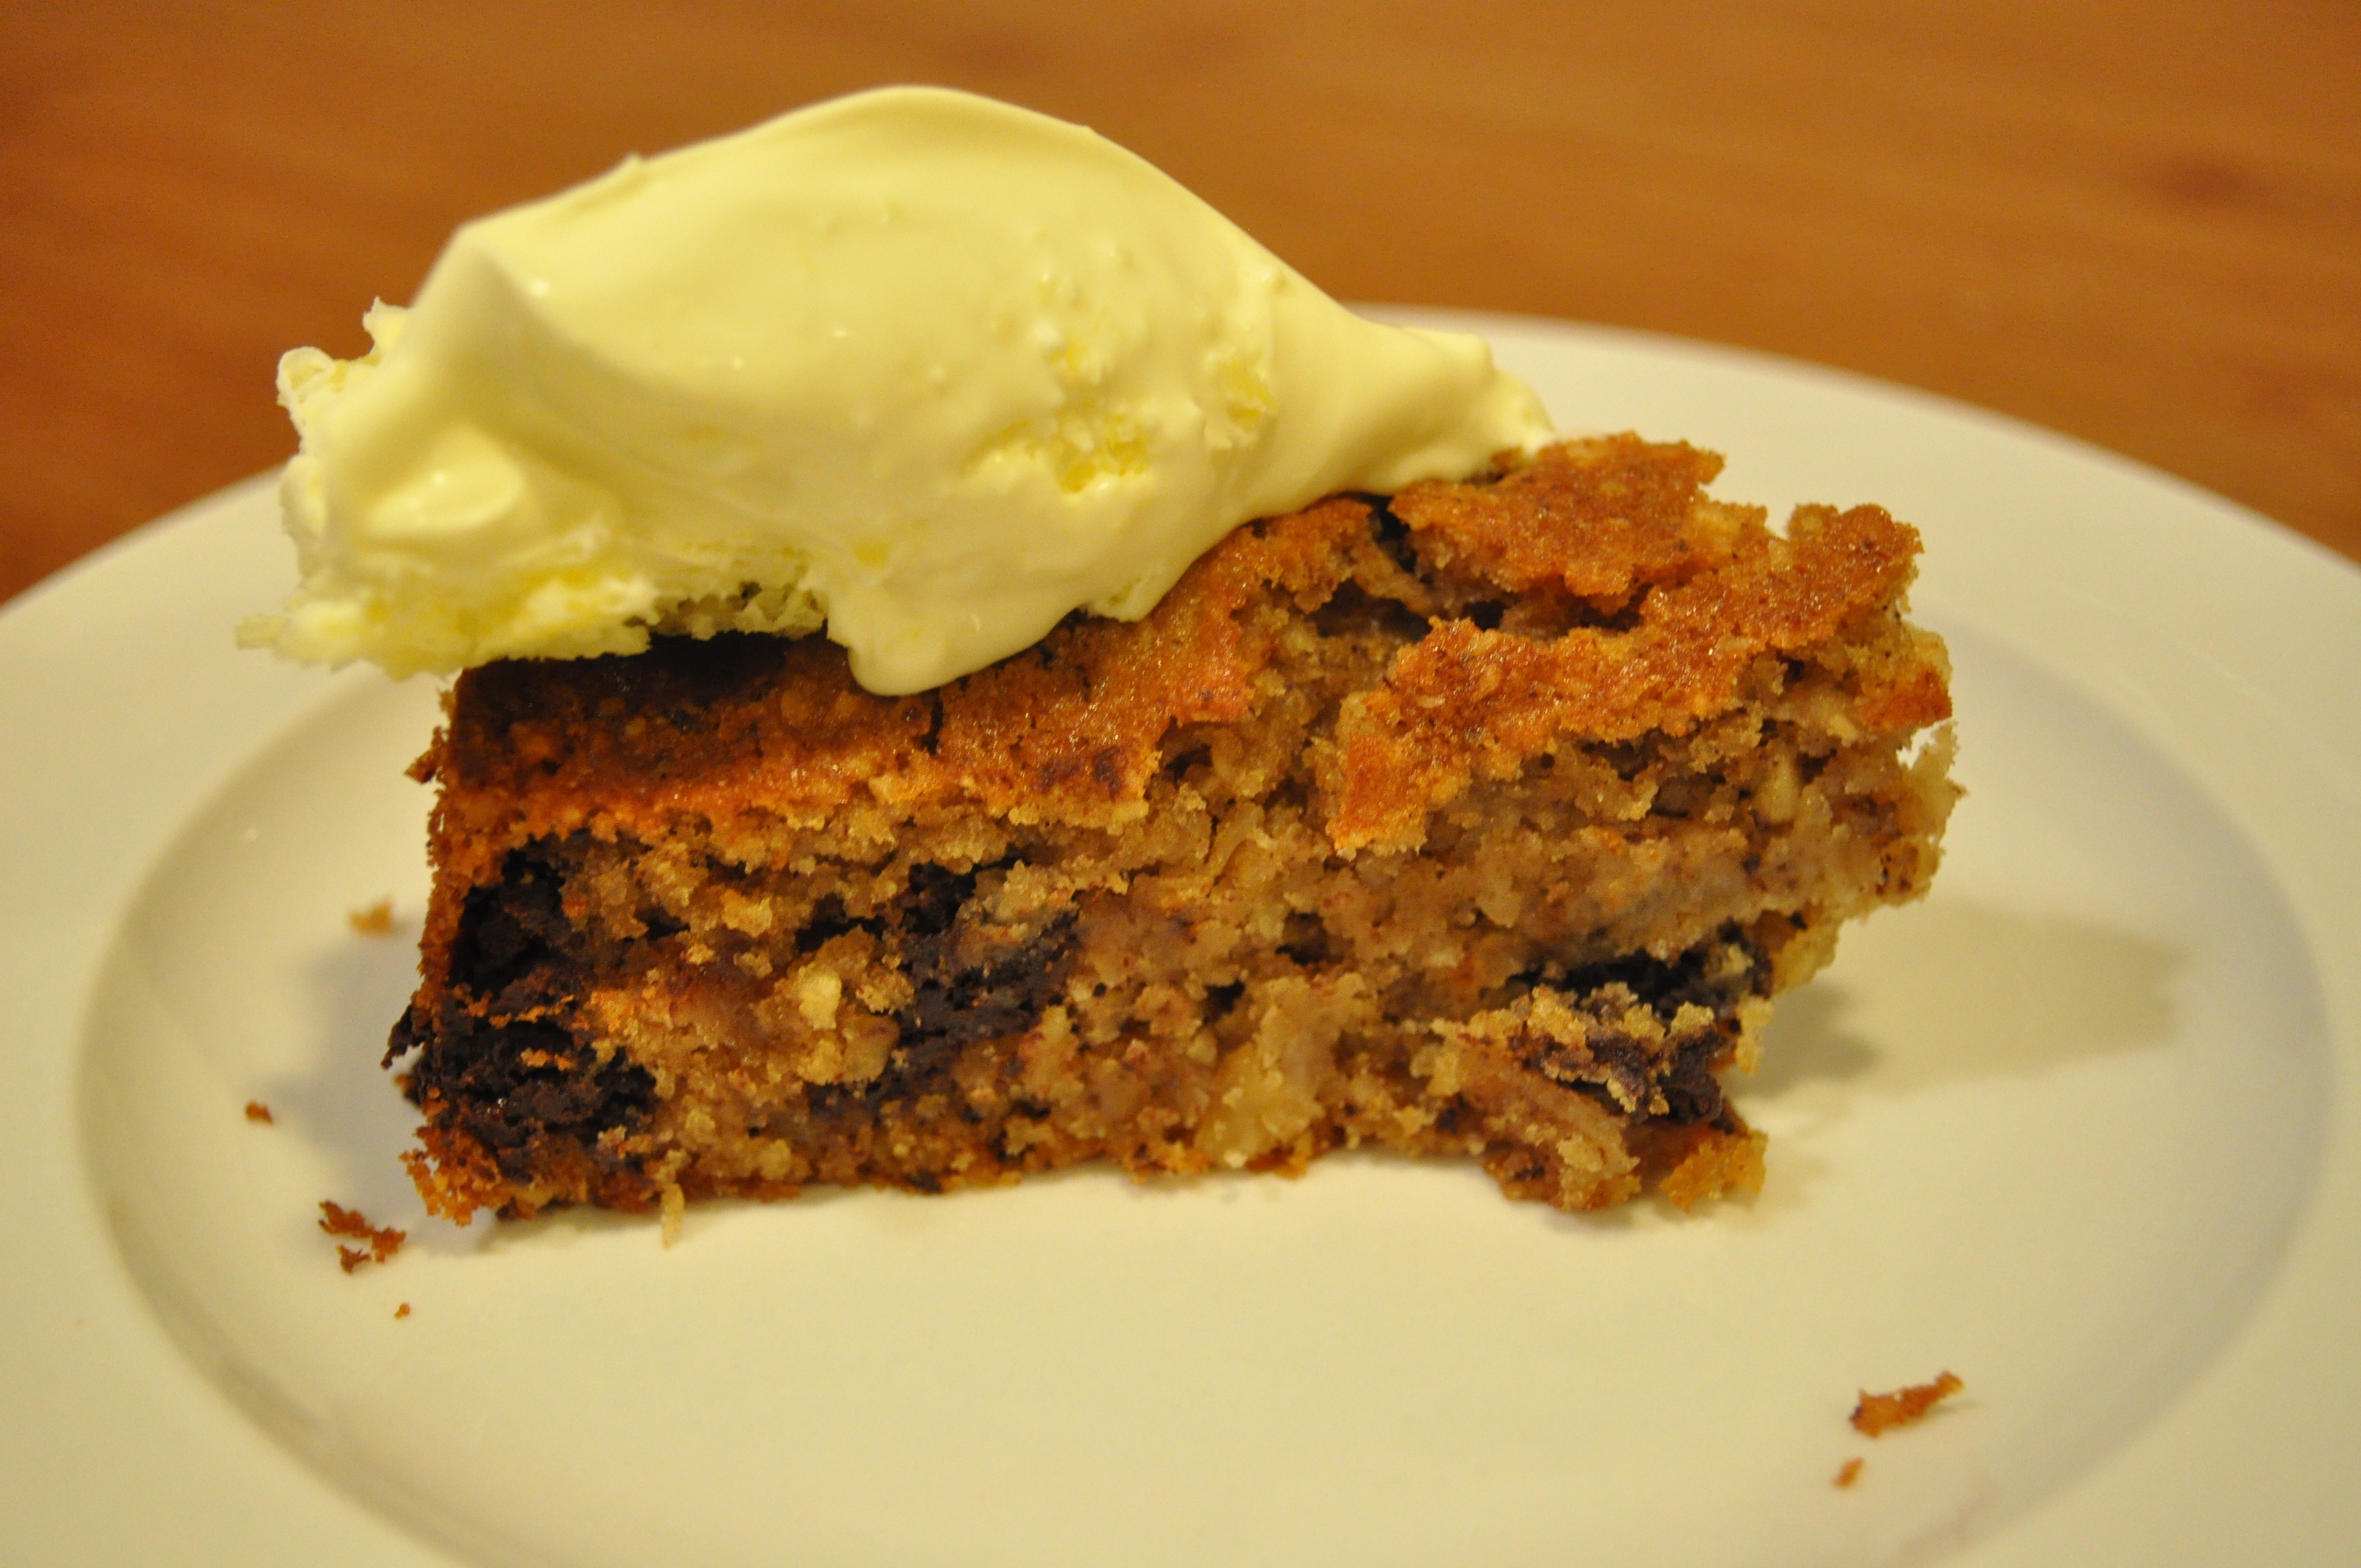
I also suspect I assembled mine in a different manner to Hande, but it’s one of those forgiving batters where the ingredients could be combined in various orders. It’s not the sort of cake where you’re trying to achieve a super-light texture, instead it’s got a texture that’s defined by the nuts – crunchy, slightly oily – and the pears – moist, with the whole concoction shot through with bursts of dark chocolate.

500g pear
125g hazelnuts
100g dark choc (at least 70% cocoa solids)
115g unsalted butter, melted
70g light muscovado sugar
40g caster sugar
1 egg
2 tsp vanilla extract
Pinch salt1
1 tsp cinnamon
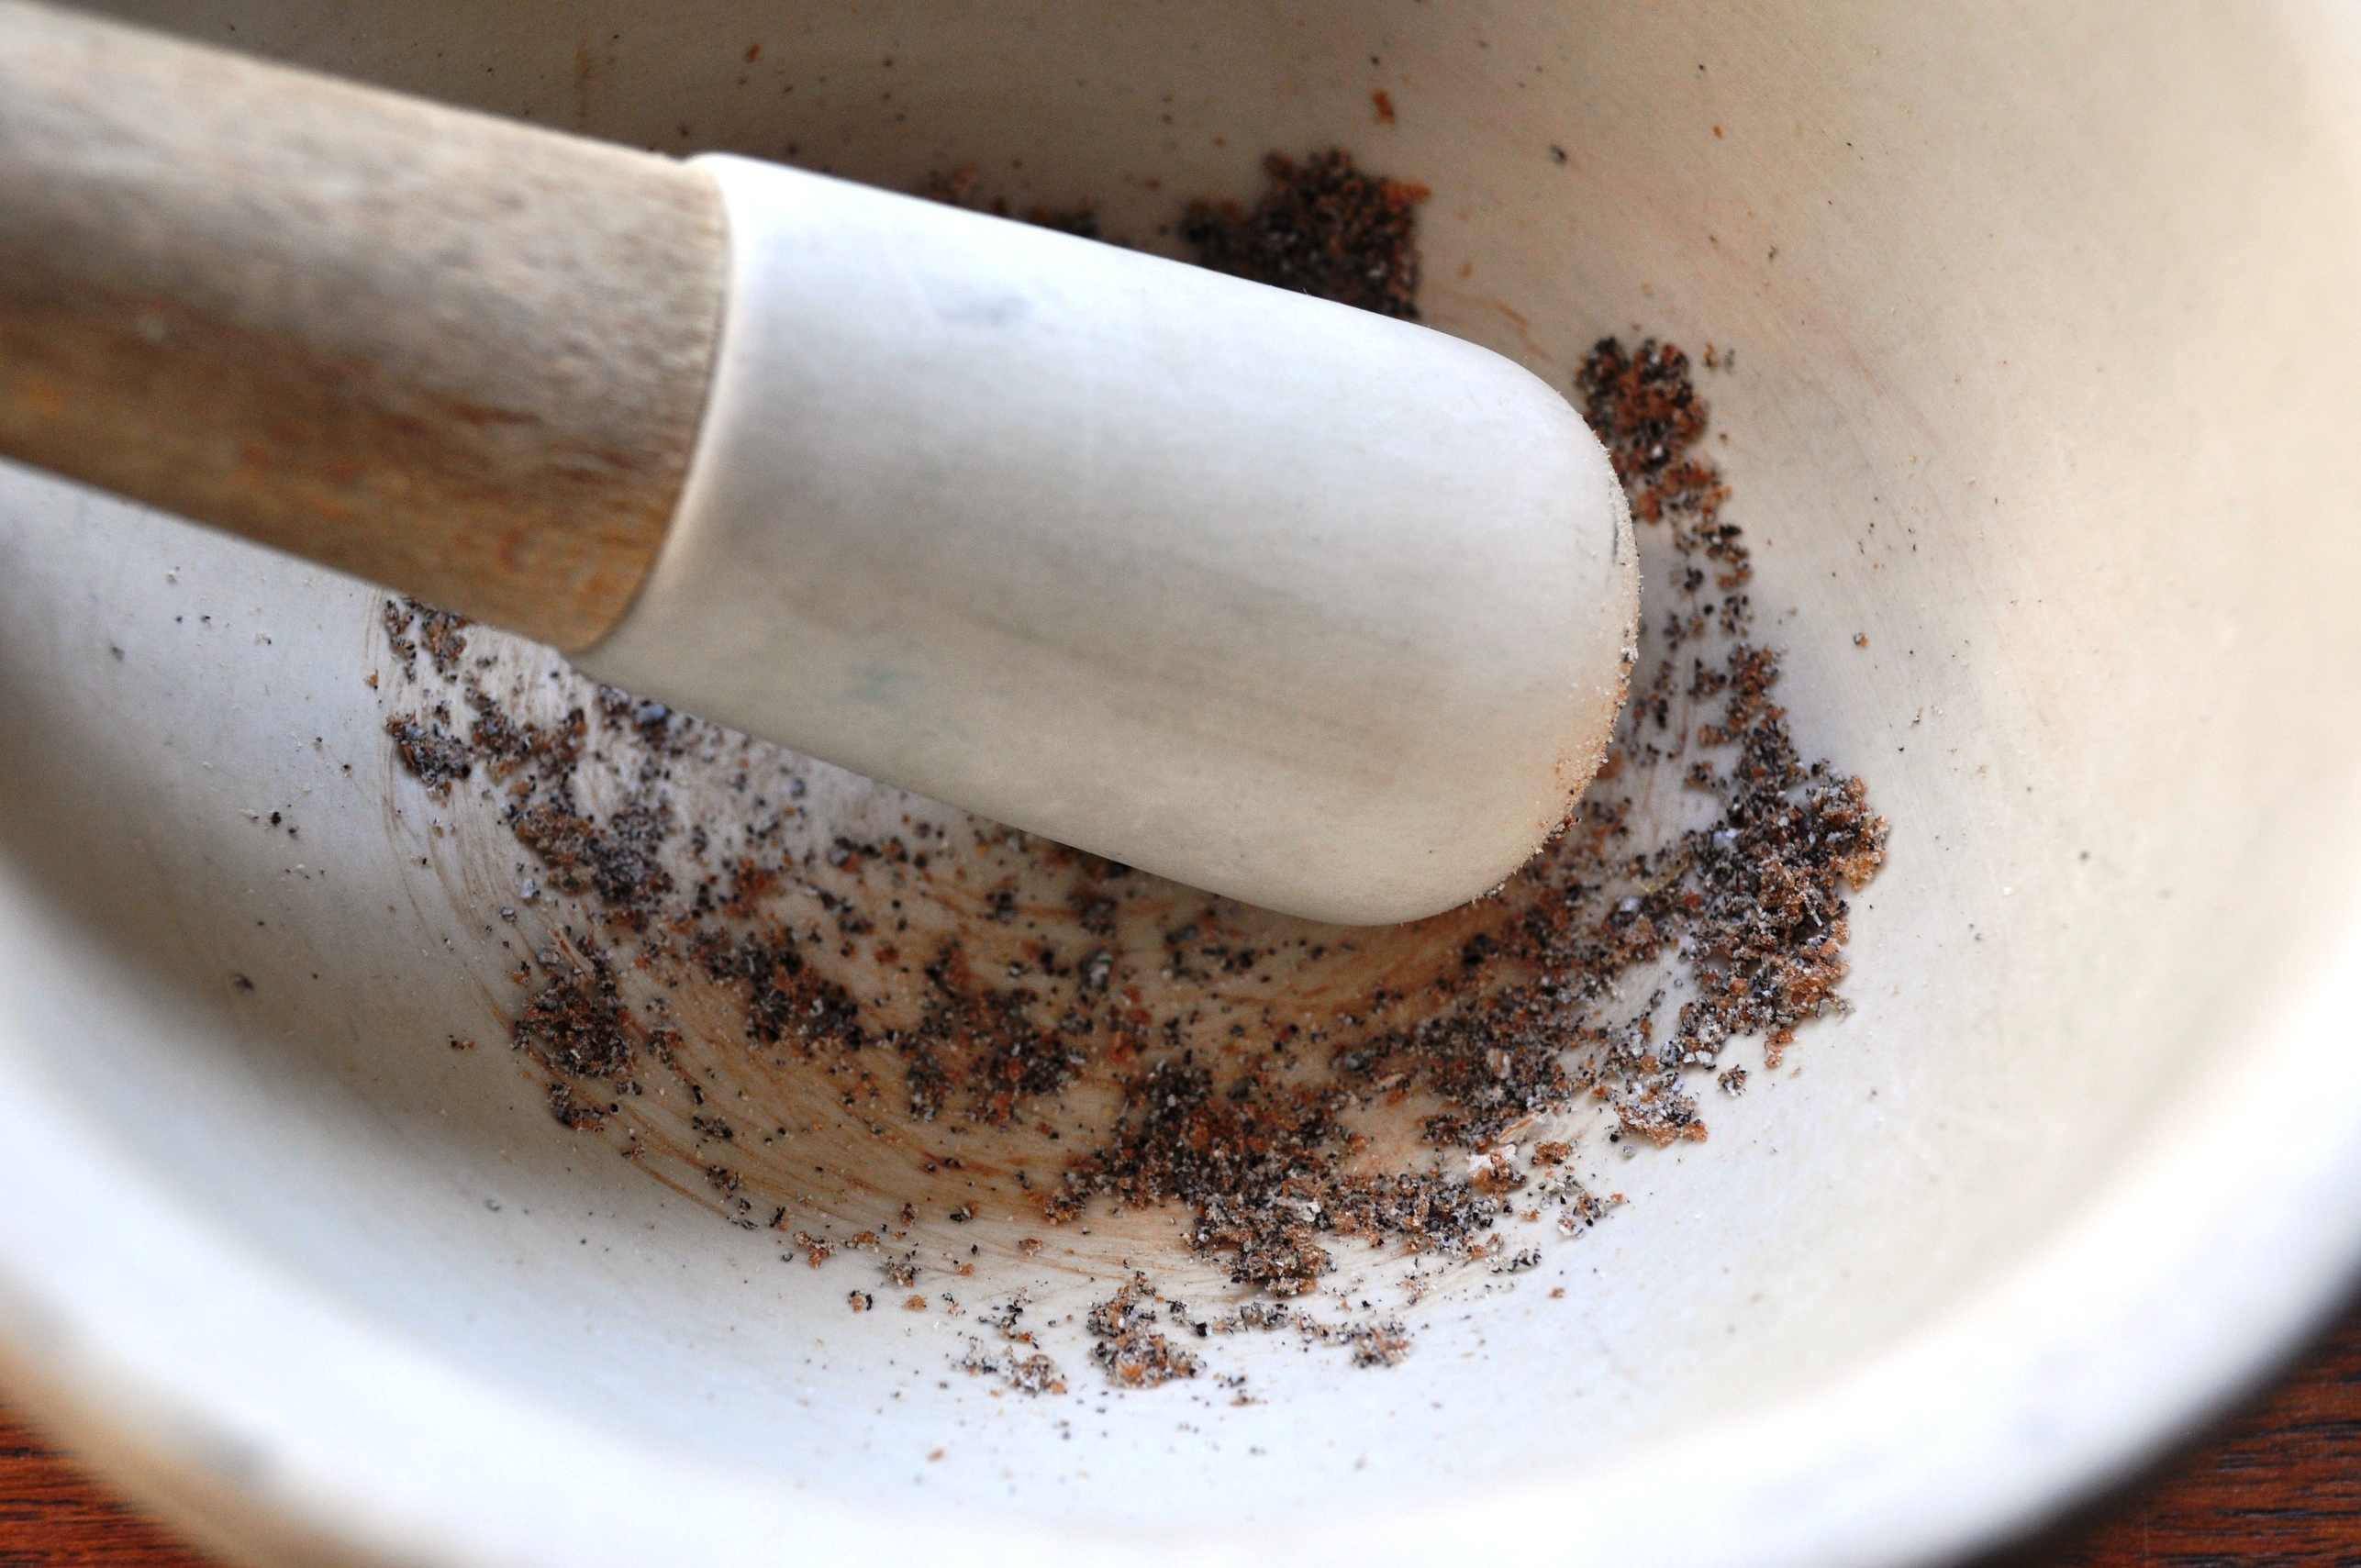
Pinch of cayenne pepper and a few grinds of black pepper
130g plain/all-purpose flour, or low protein 00
2 1/2 tsp baking powder

1. Grease and line a 20cm round tin.
2. Preheat oven to 180C.
Skinning hazelnuts
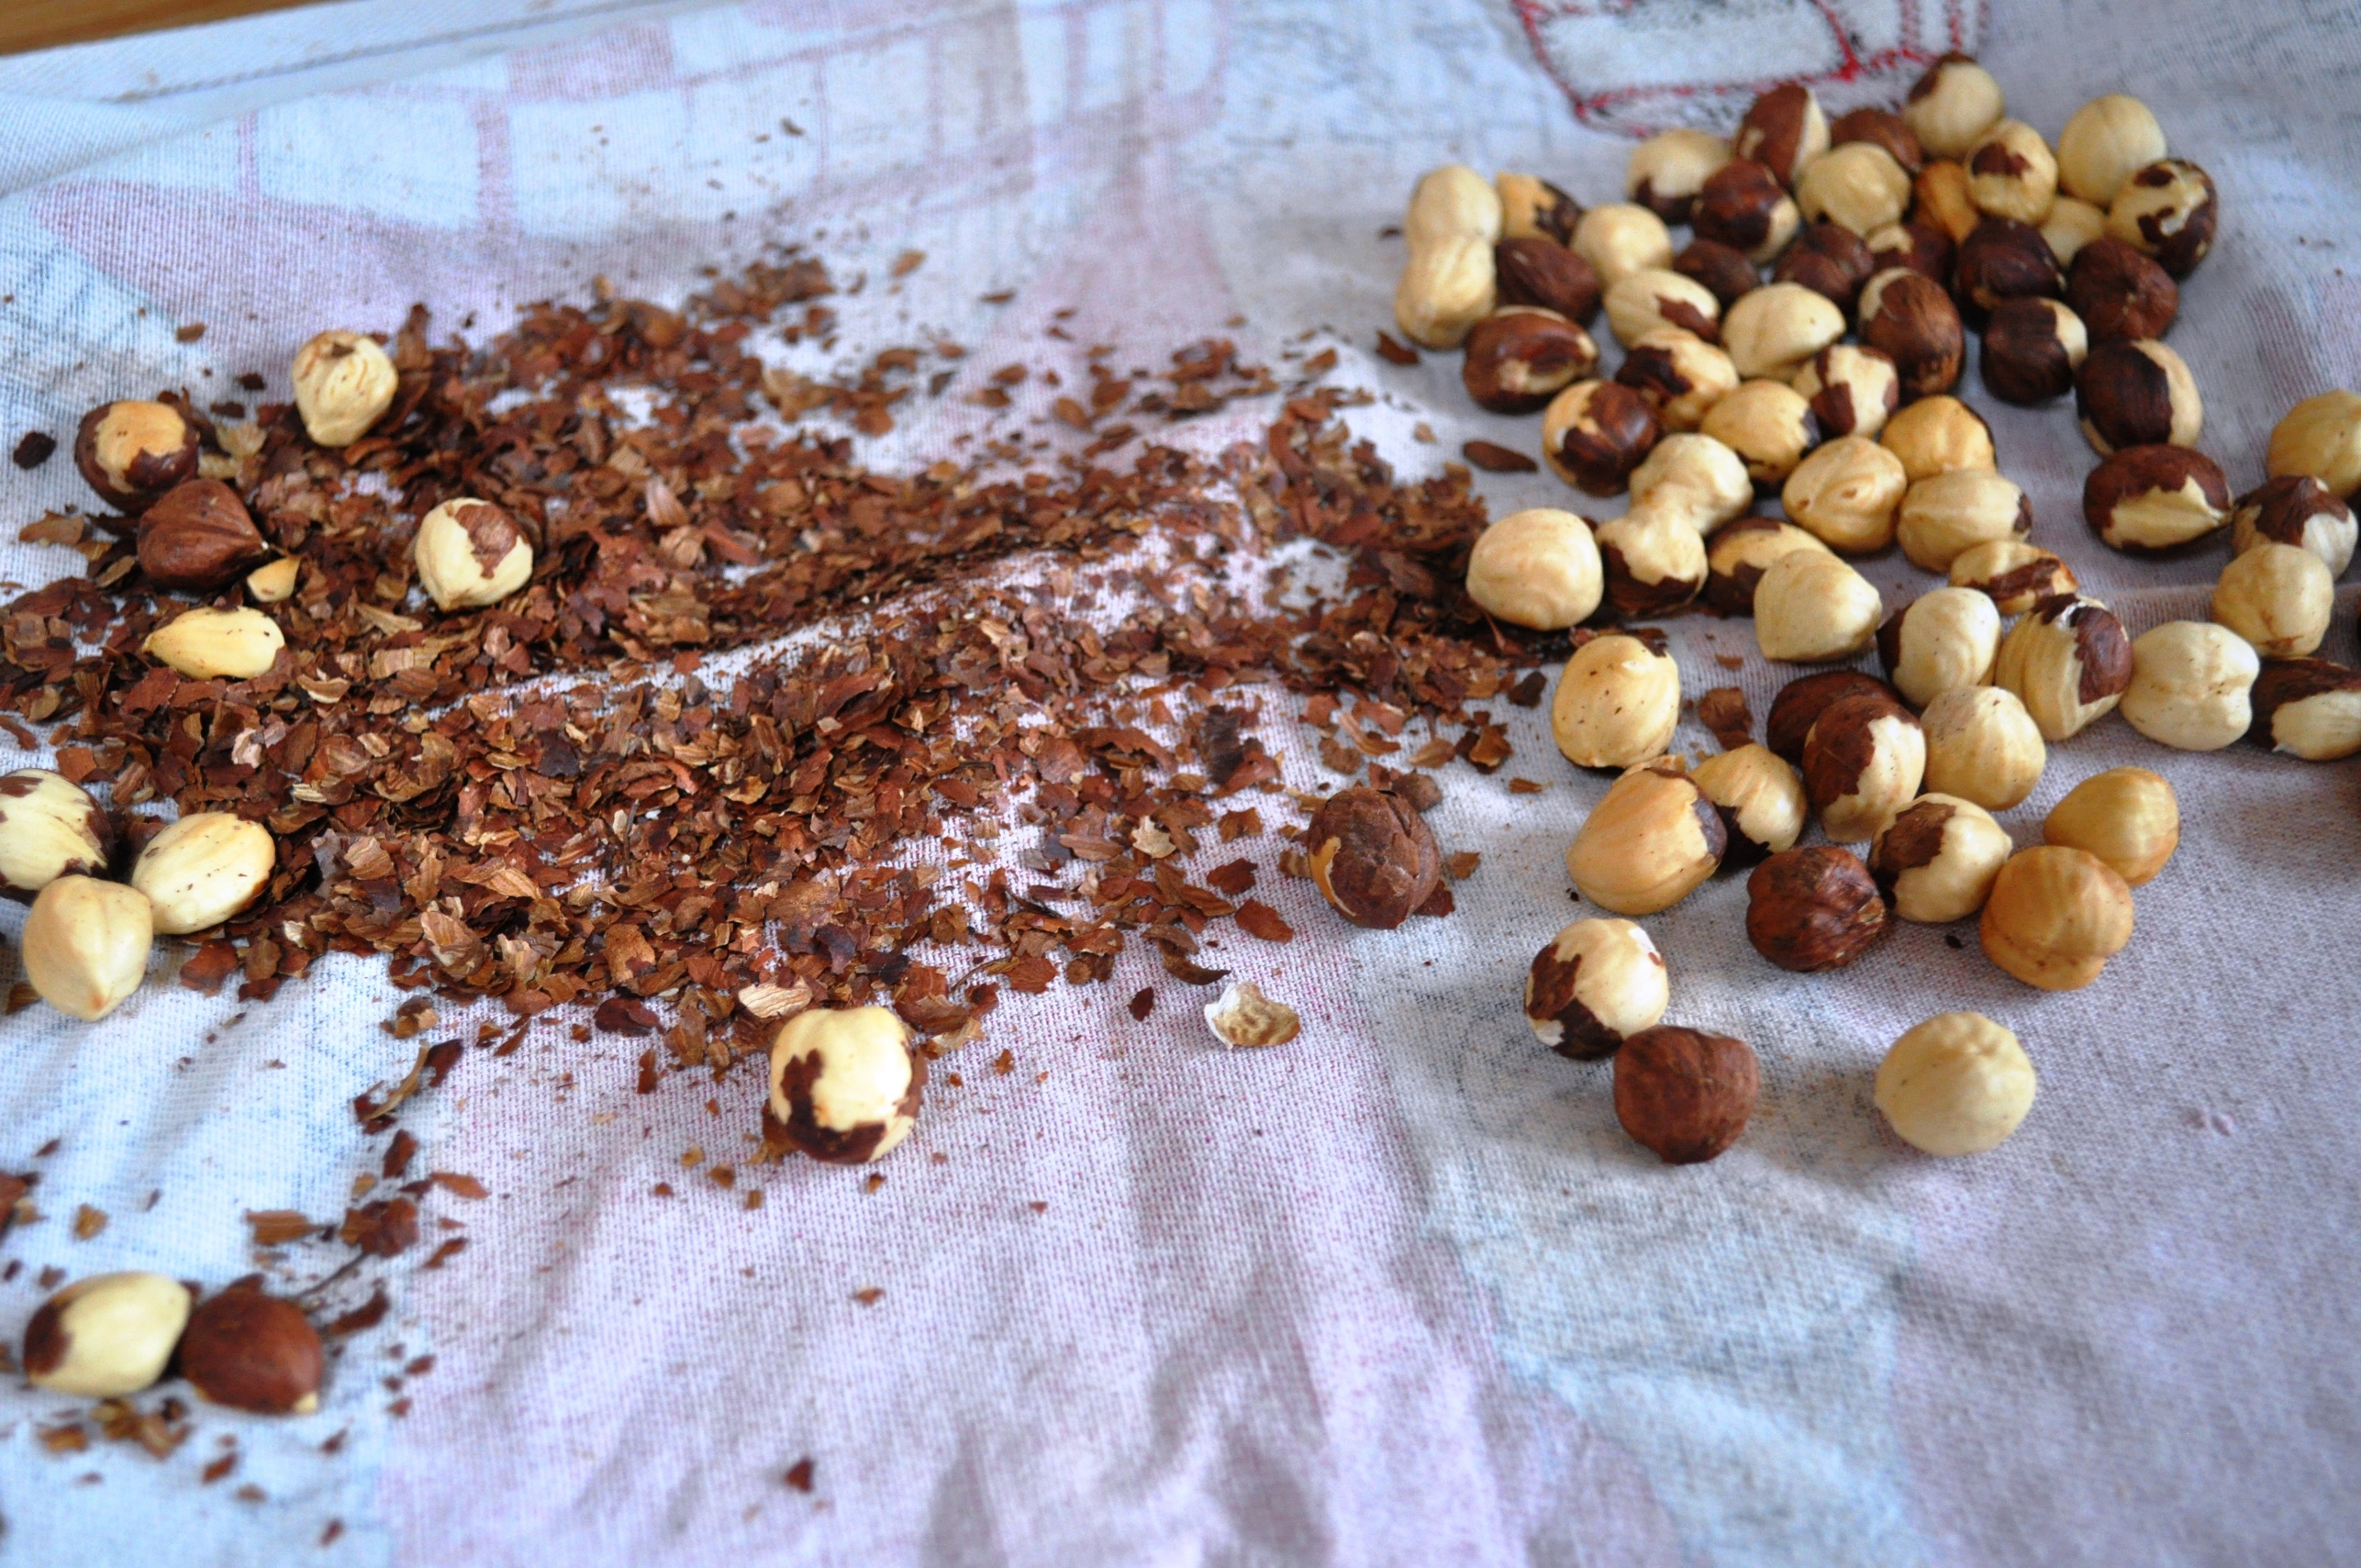
3. Lightly toast the hazelnuts, rub off the skins (using a tea towel or cloth; I wasn’t too assiduous about this – too many skins can be bitter, but a little adds flavour) and grind in a food processor to a medium meal.
4. Coarsely chop the dark chocolate.
Peeling pears
5. Pear, core and coarsely grate the pear.
6. Sieve together the flour, baking powder and spices to mix.
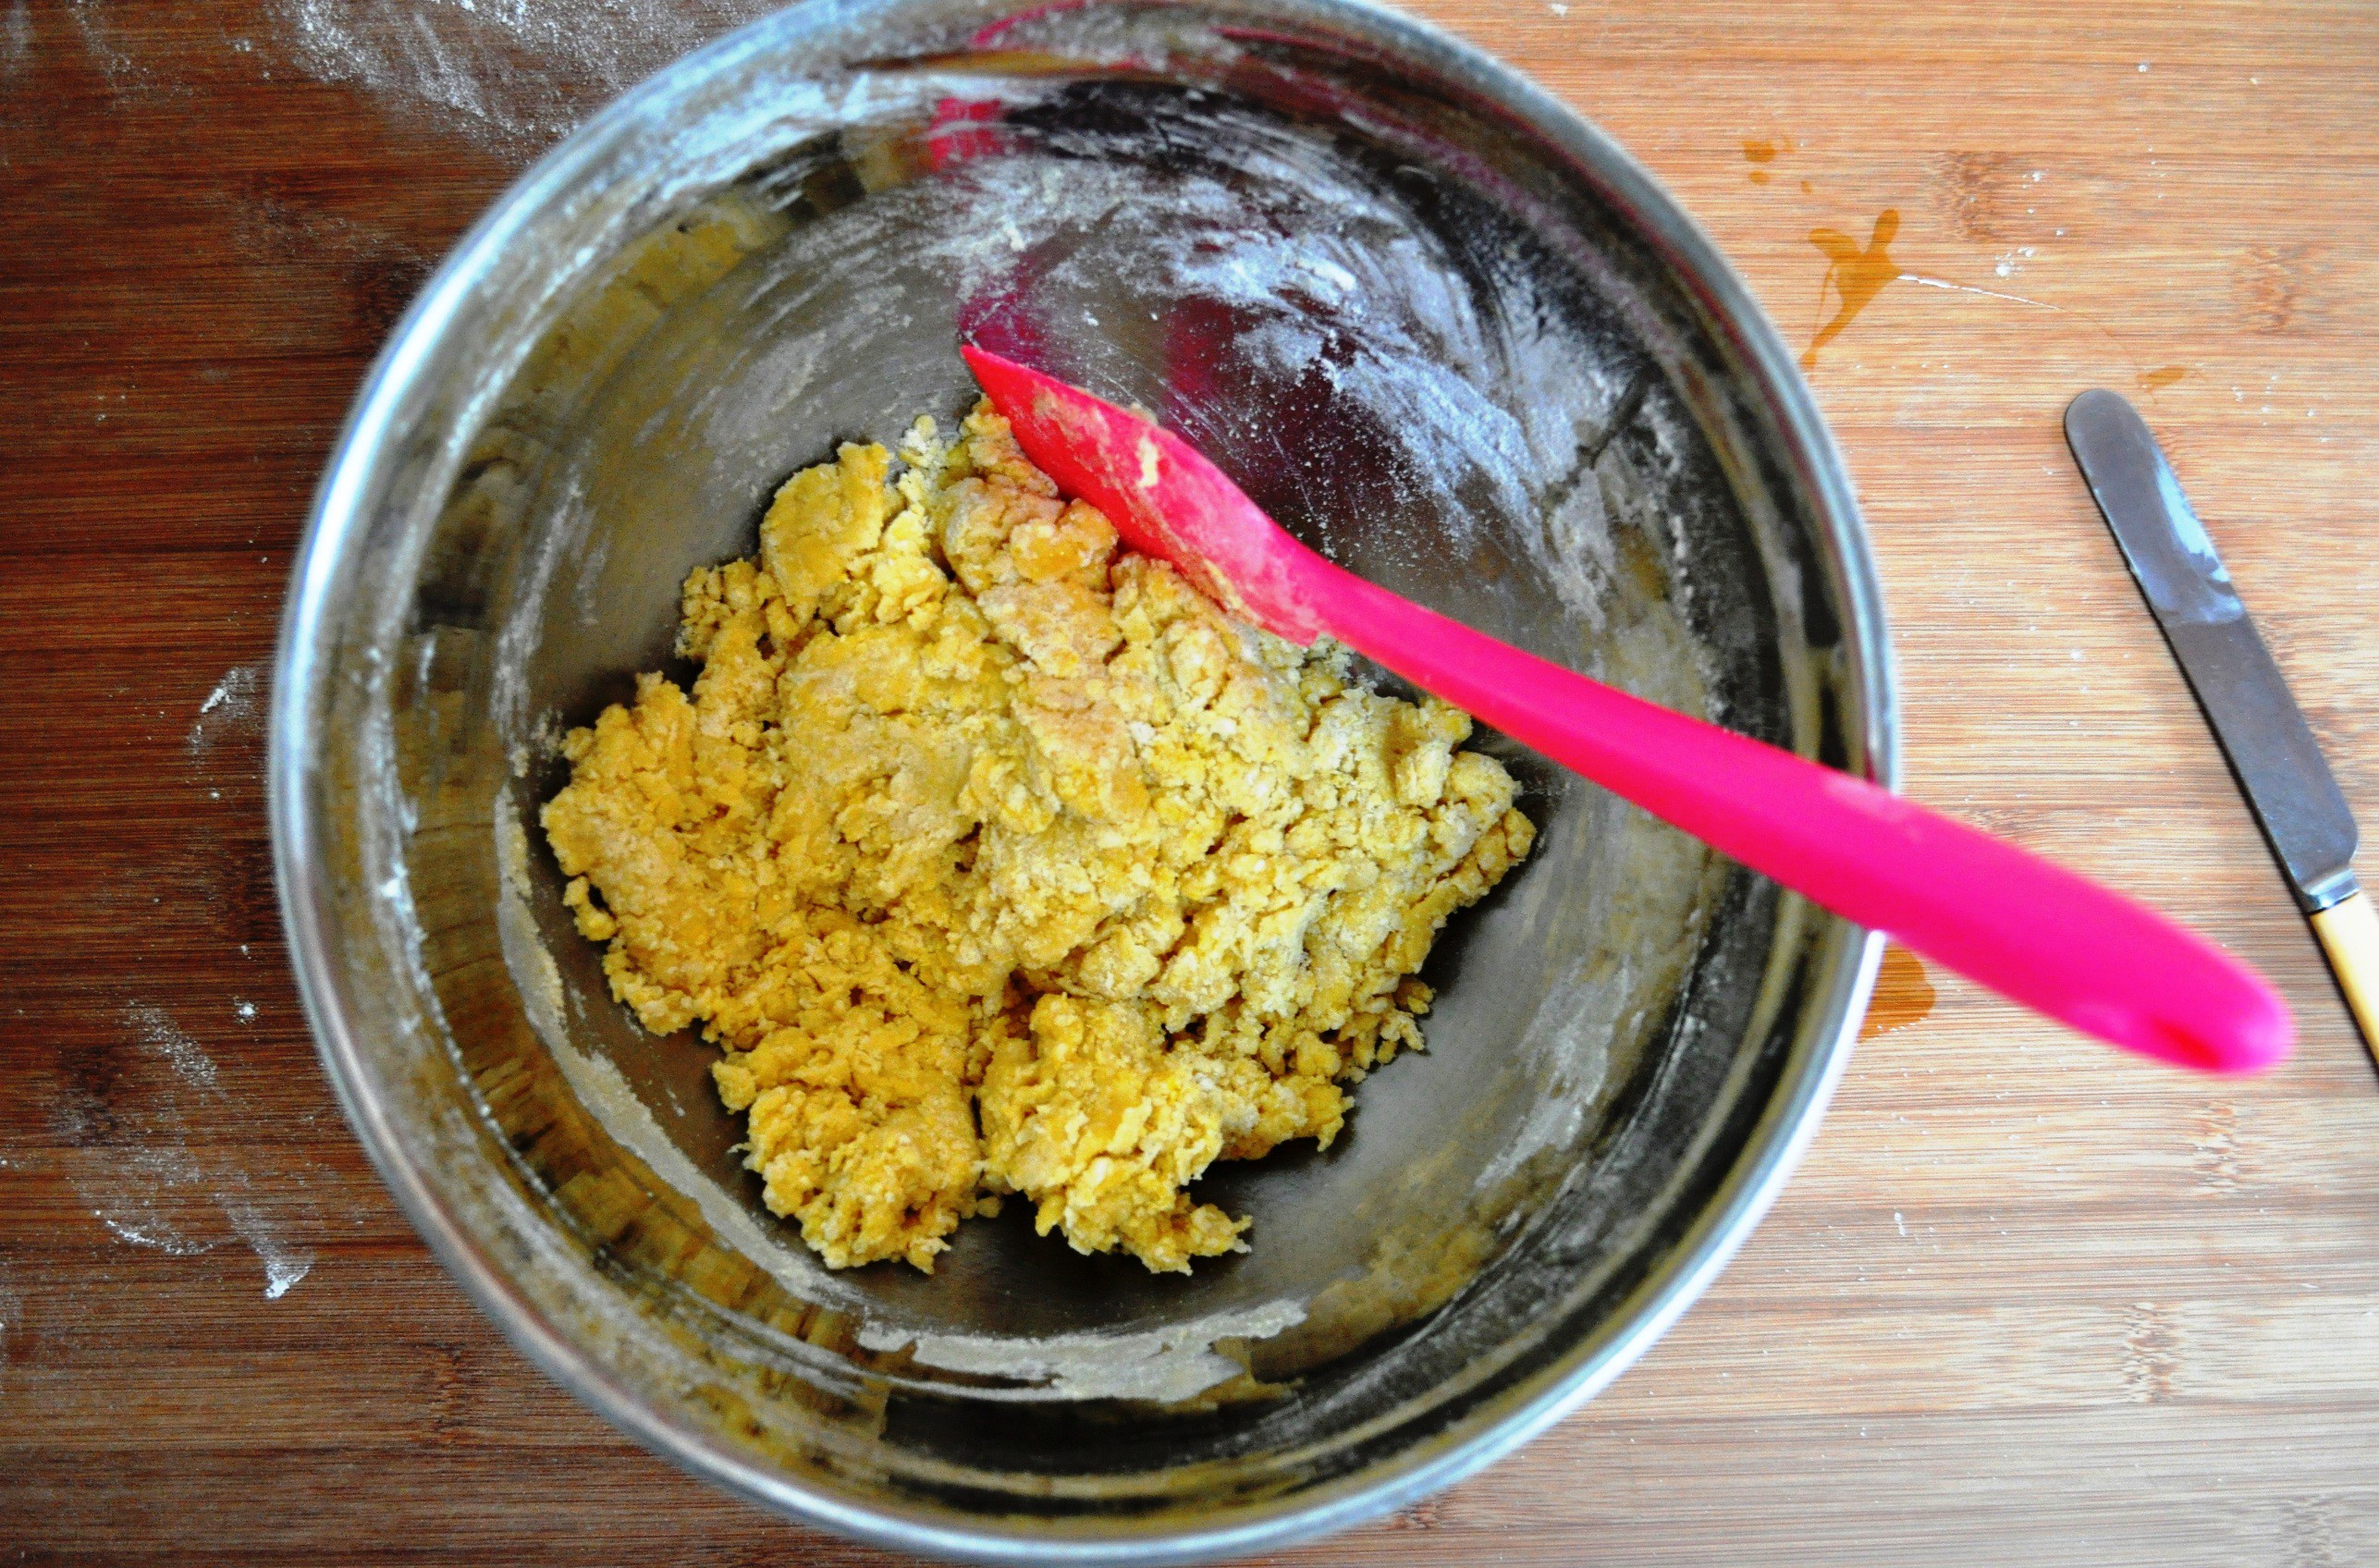
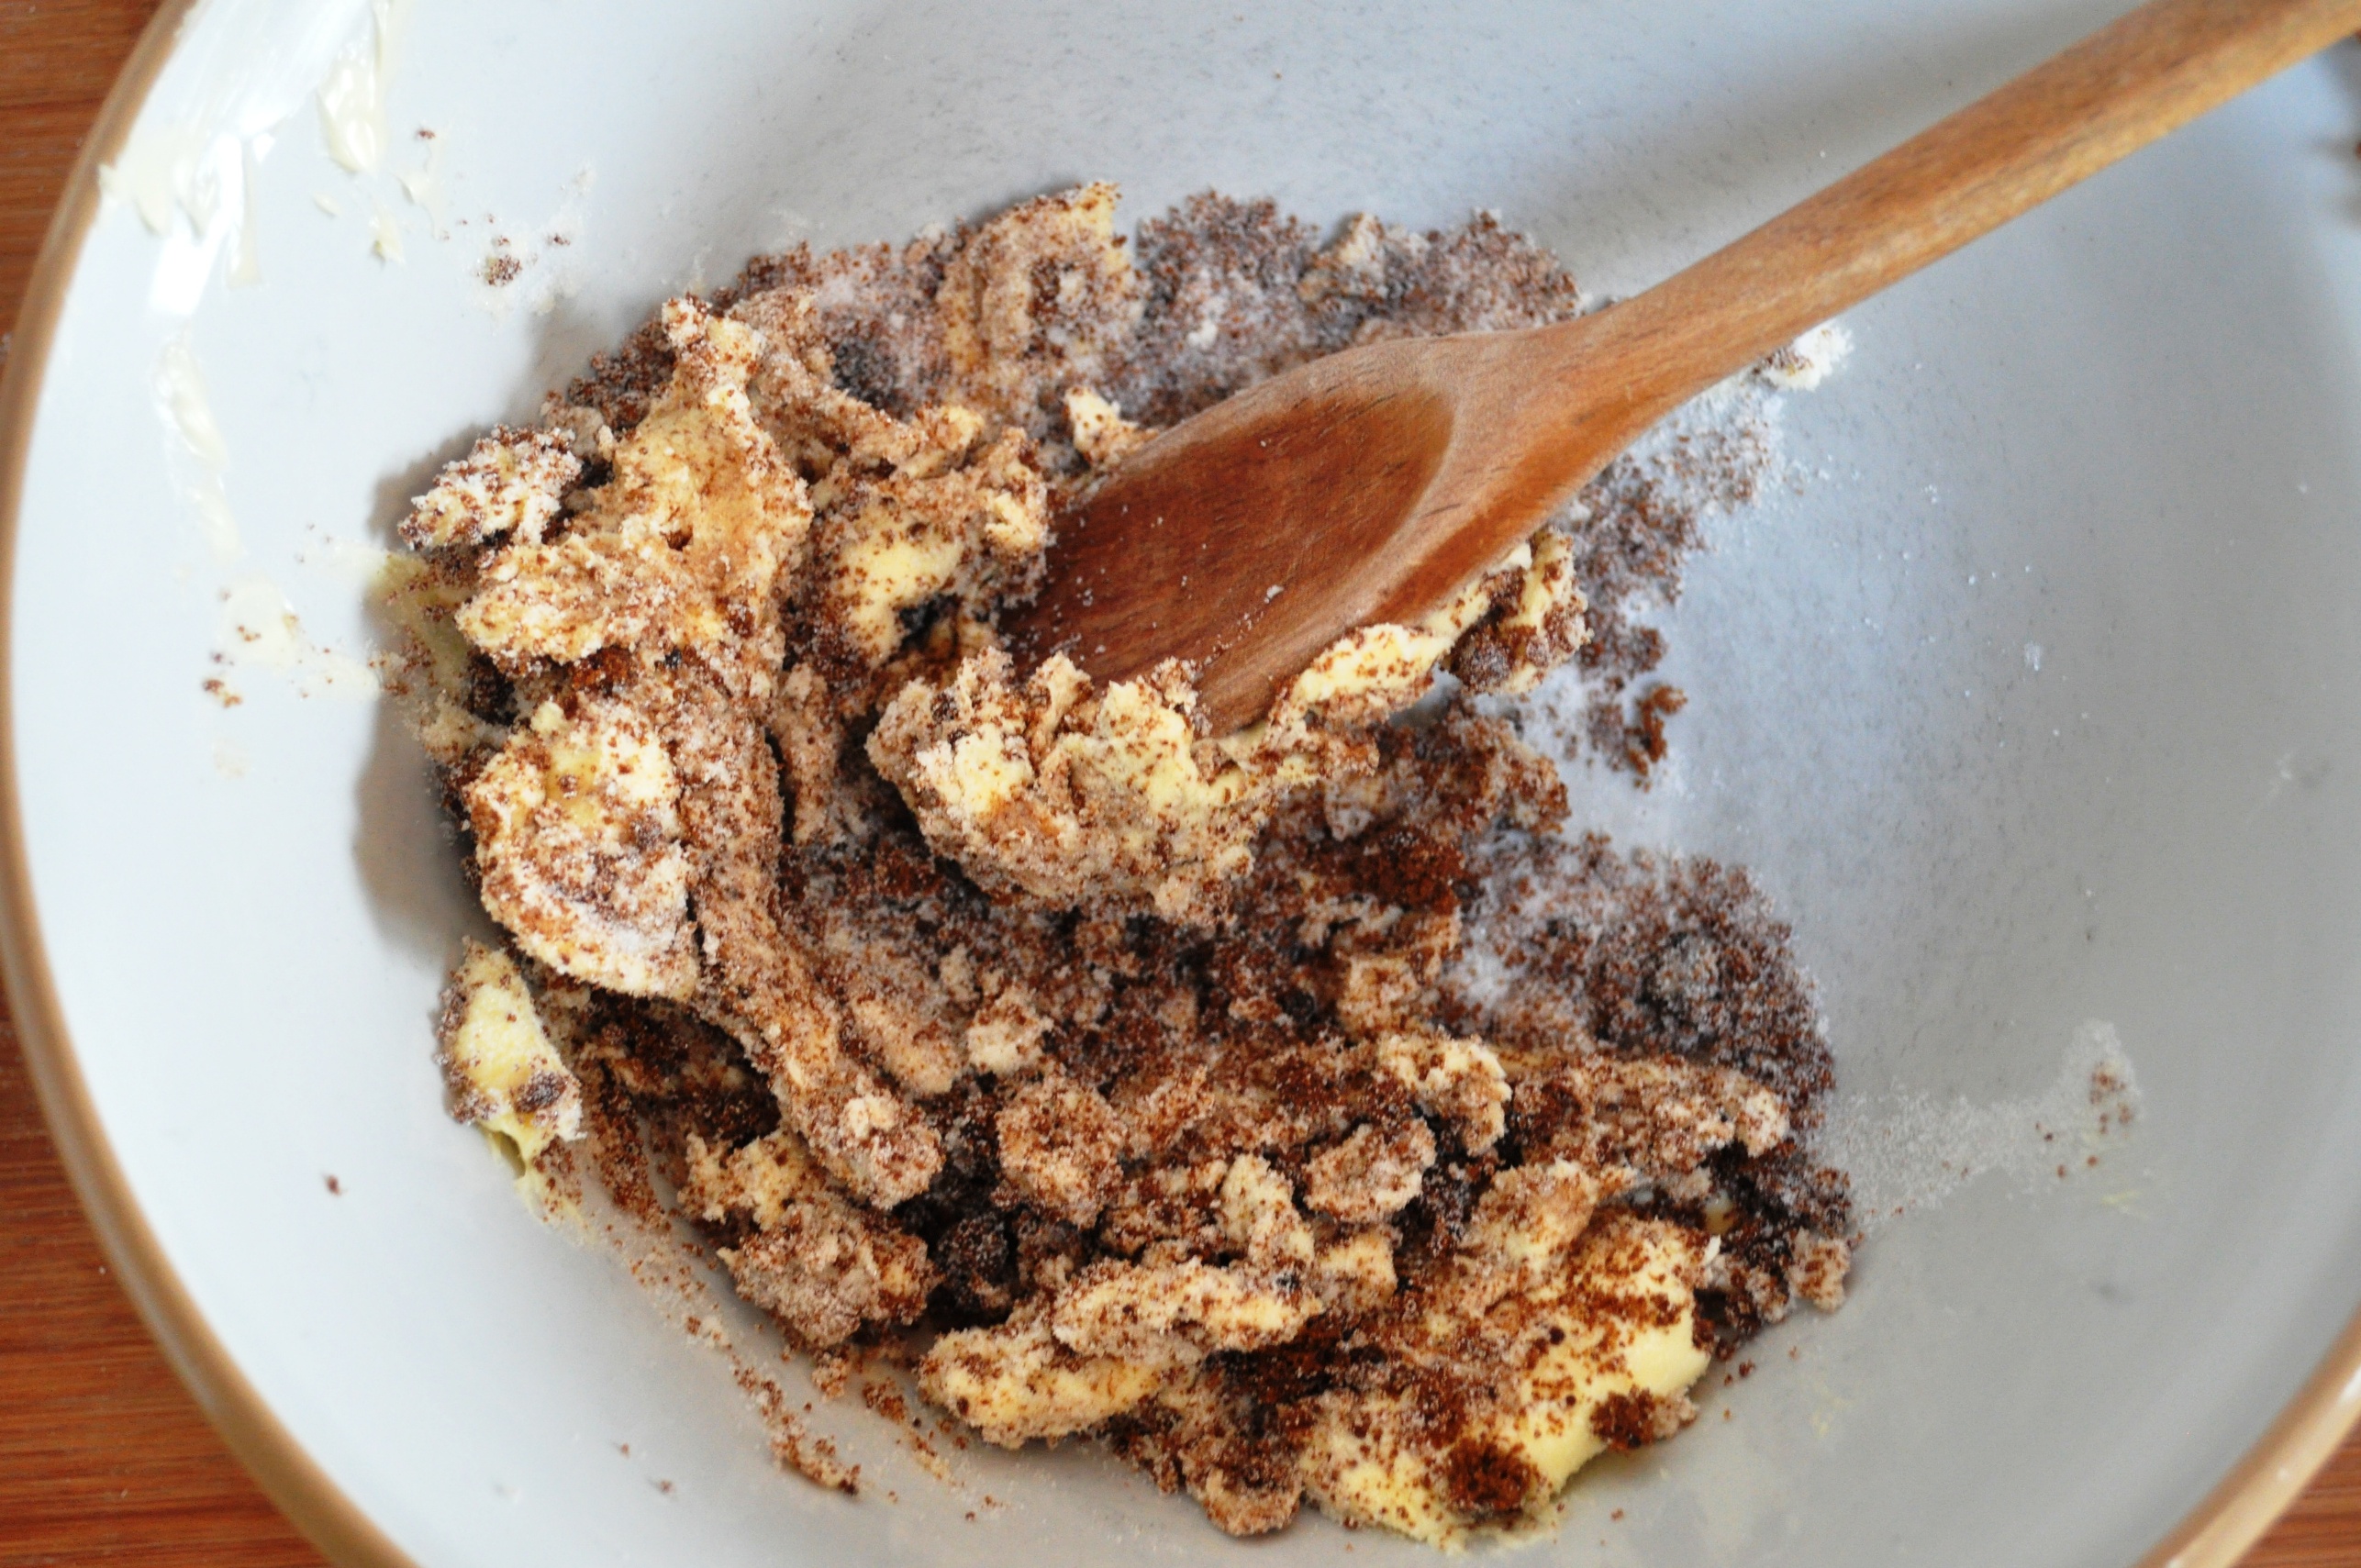
7. In a large bowl, beat together the sugars and melted butter. Add the egg, vanilla and pinch of salt and beat again to blend.
8. Add the nut meal, pear and chocolate to the bowl and combine.
9. Fold in the flour.
10. Pour the mixture into the prepared tin.
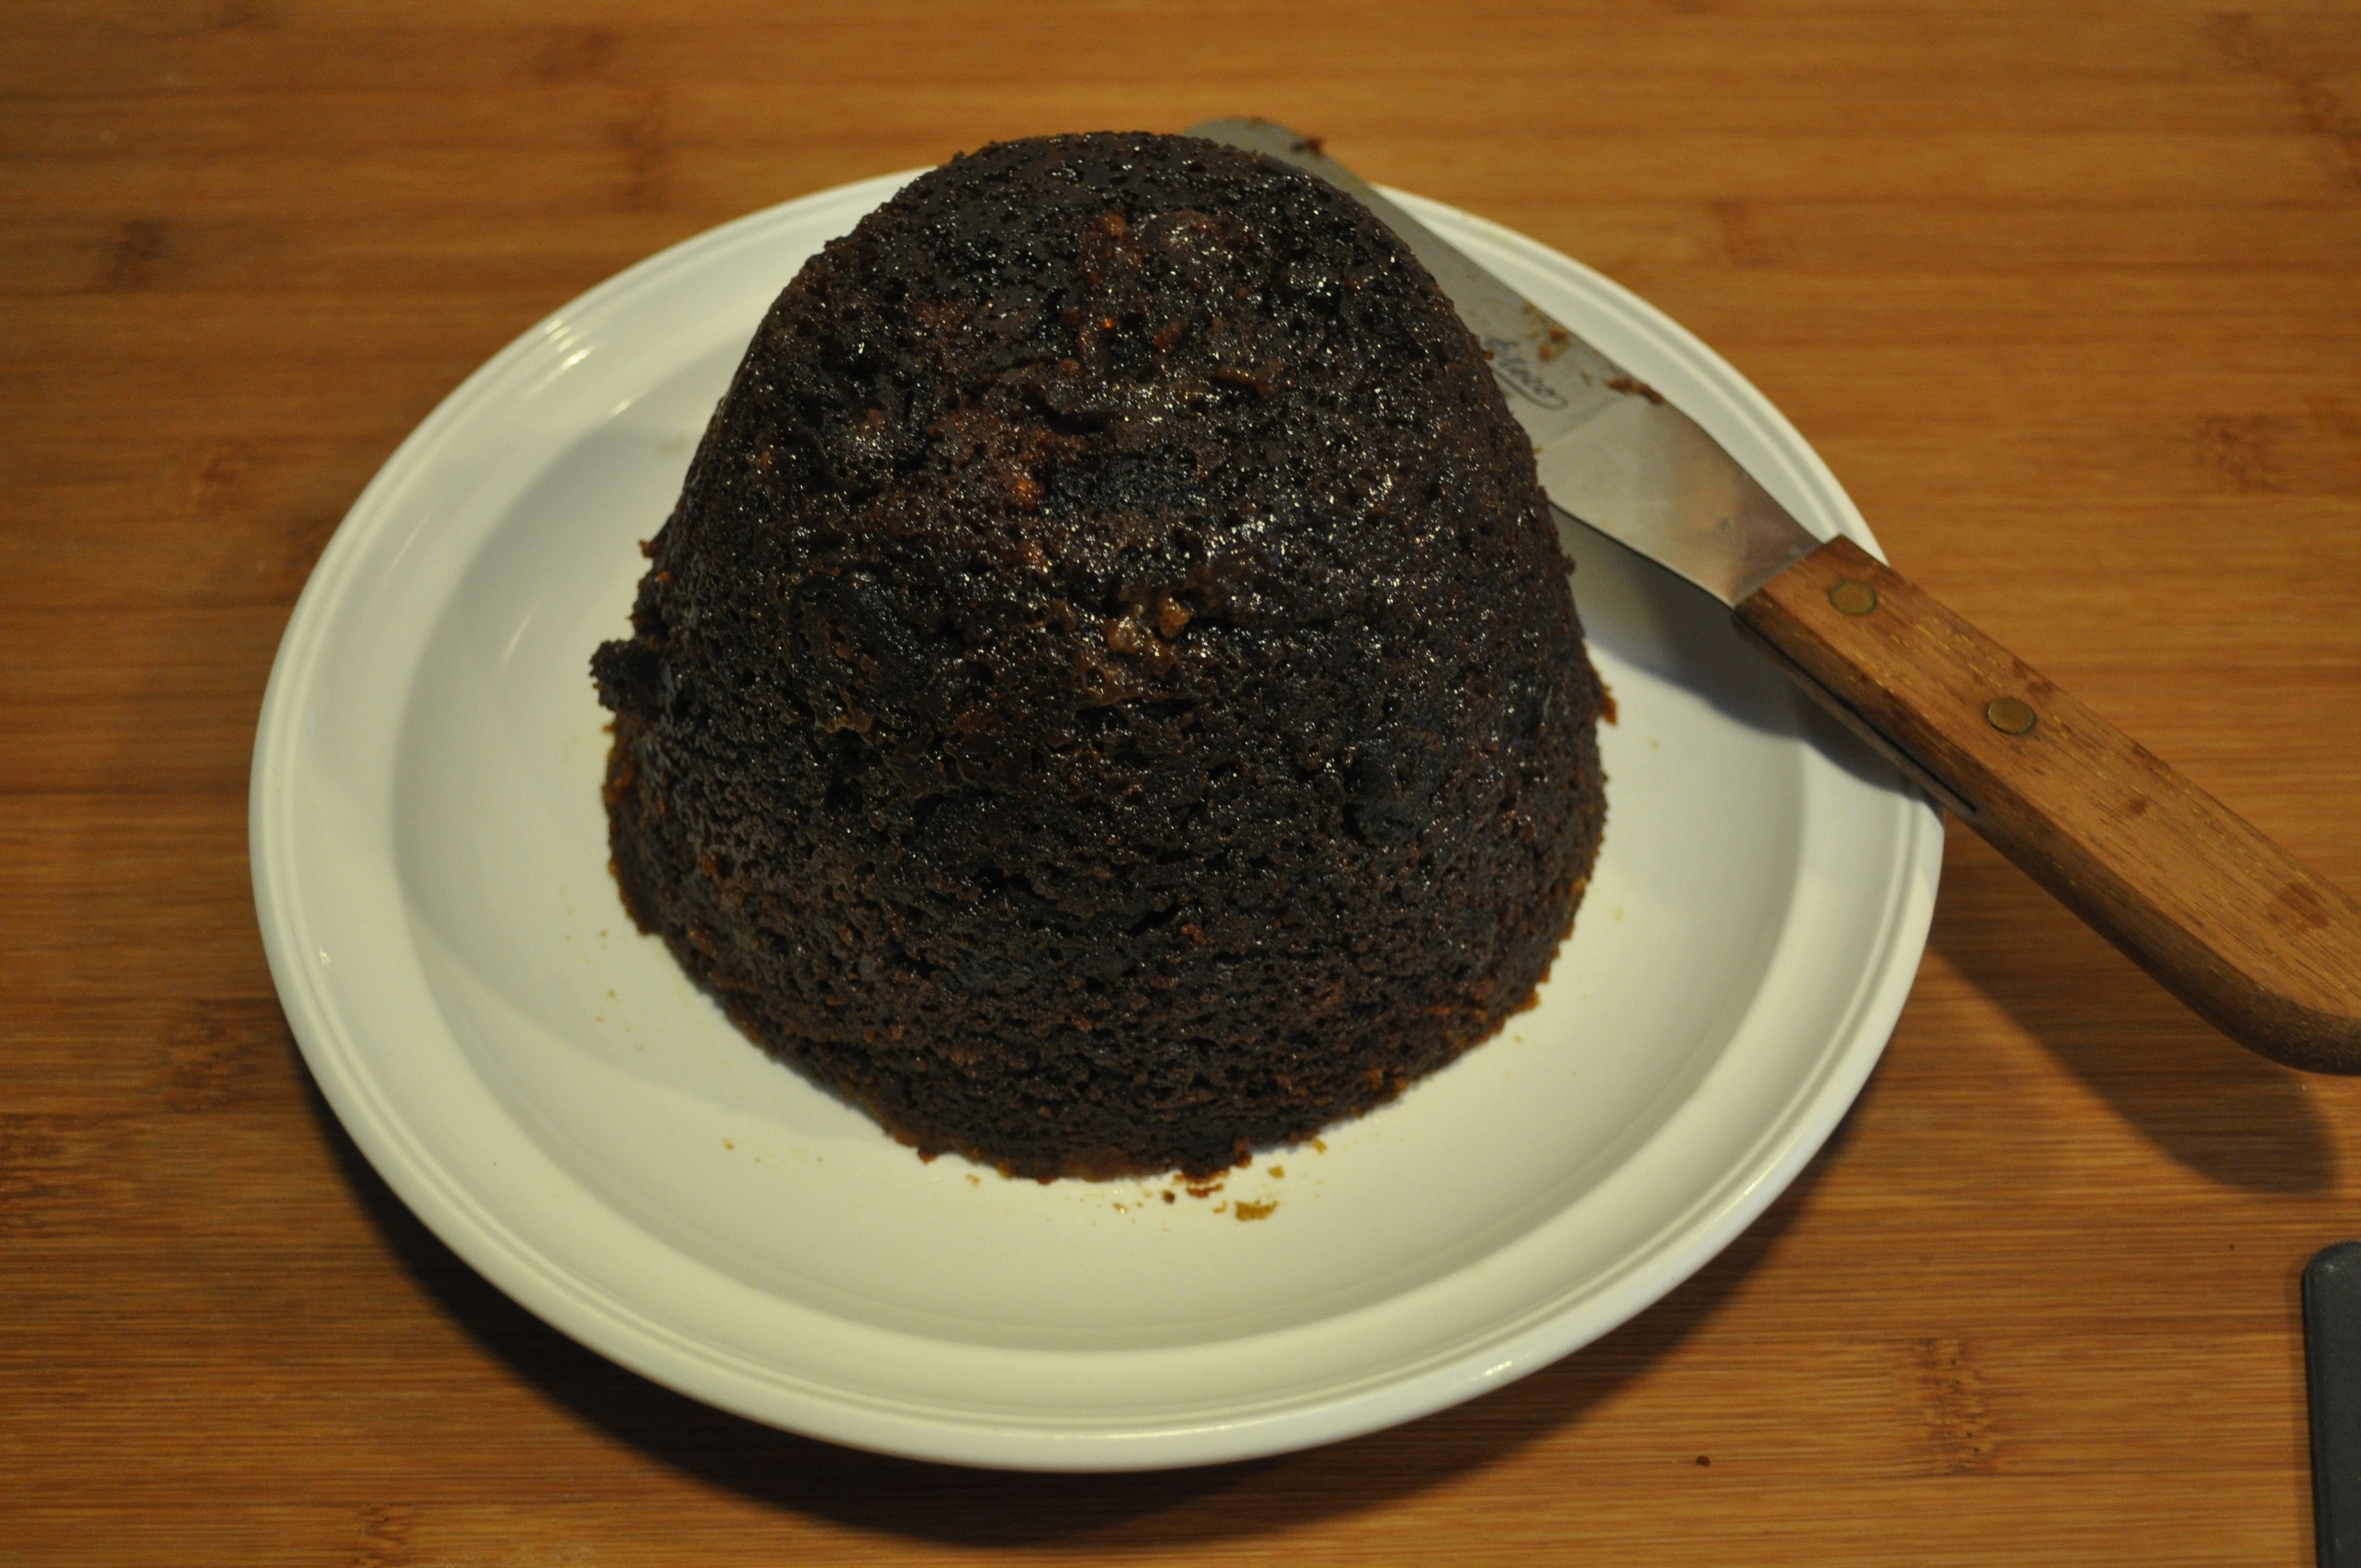
11. Bake for about 45 minutes, or until firm to the touch and lightly browned.
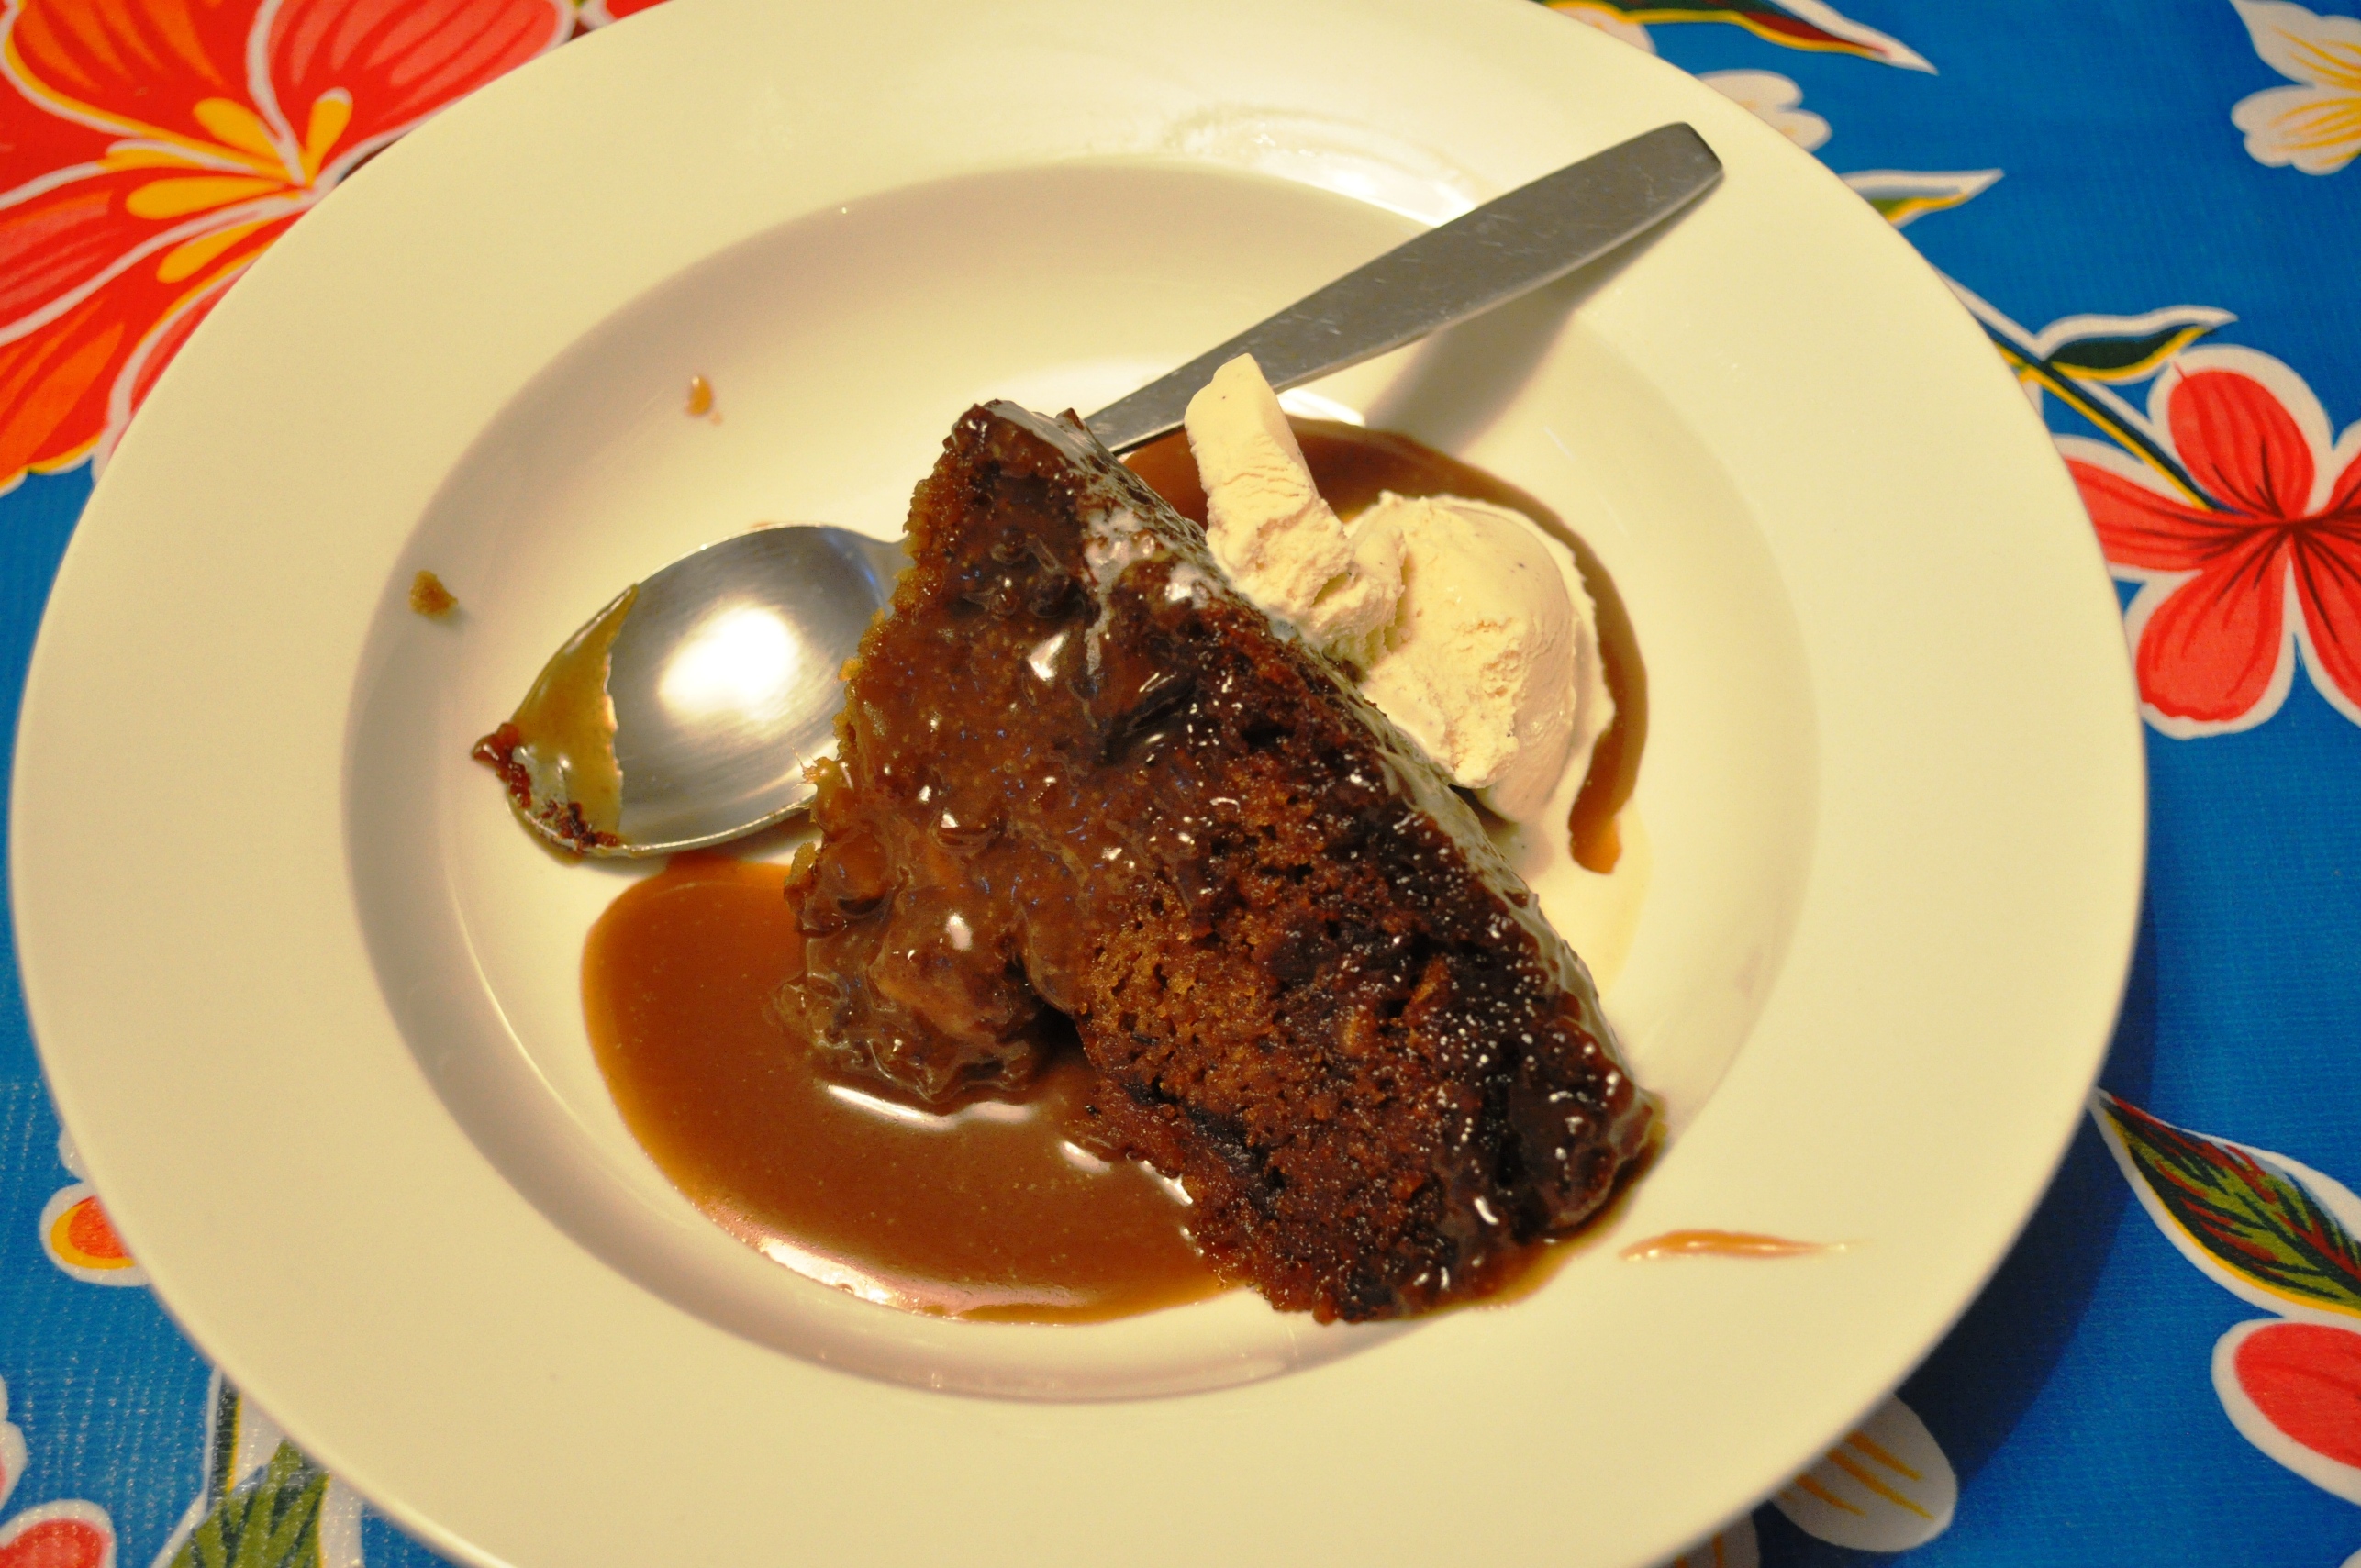
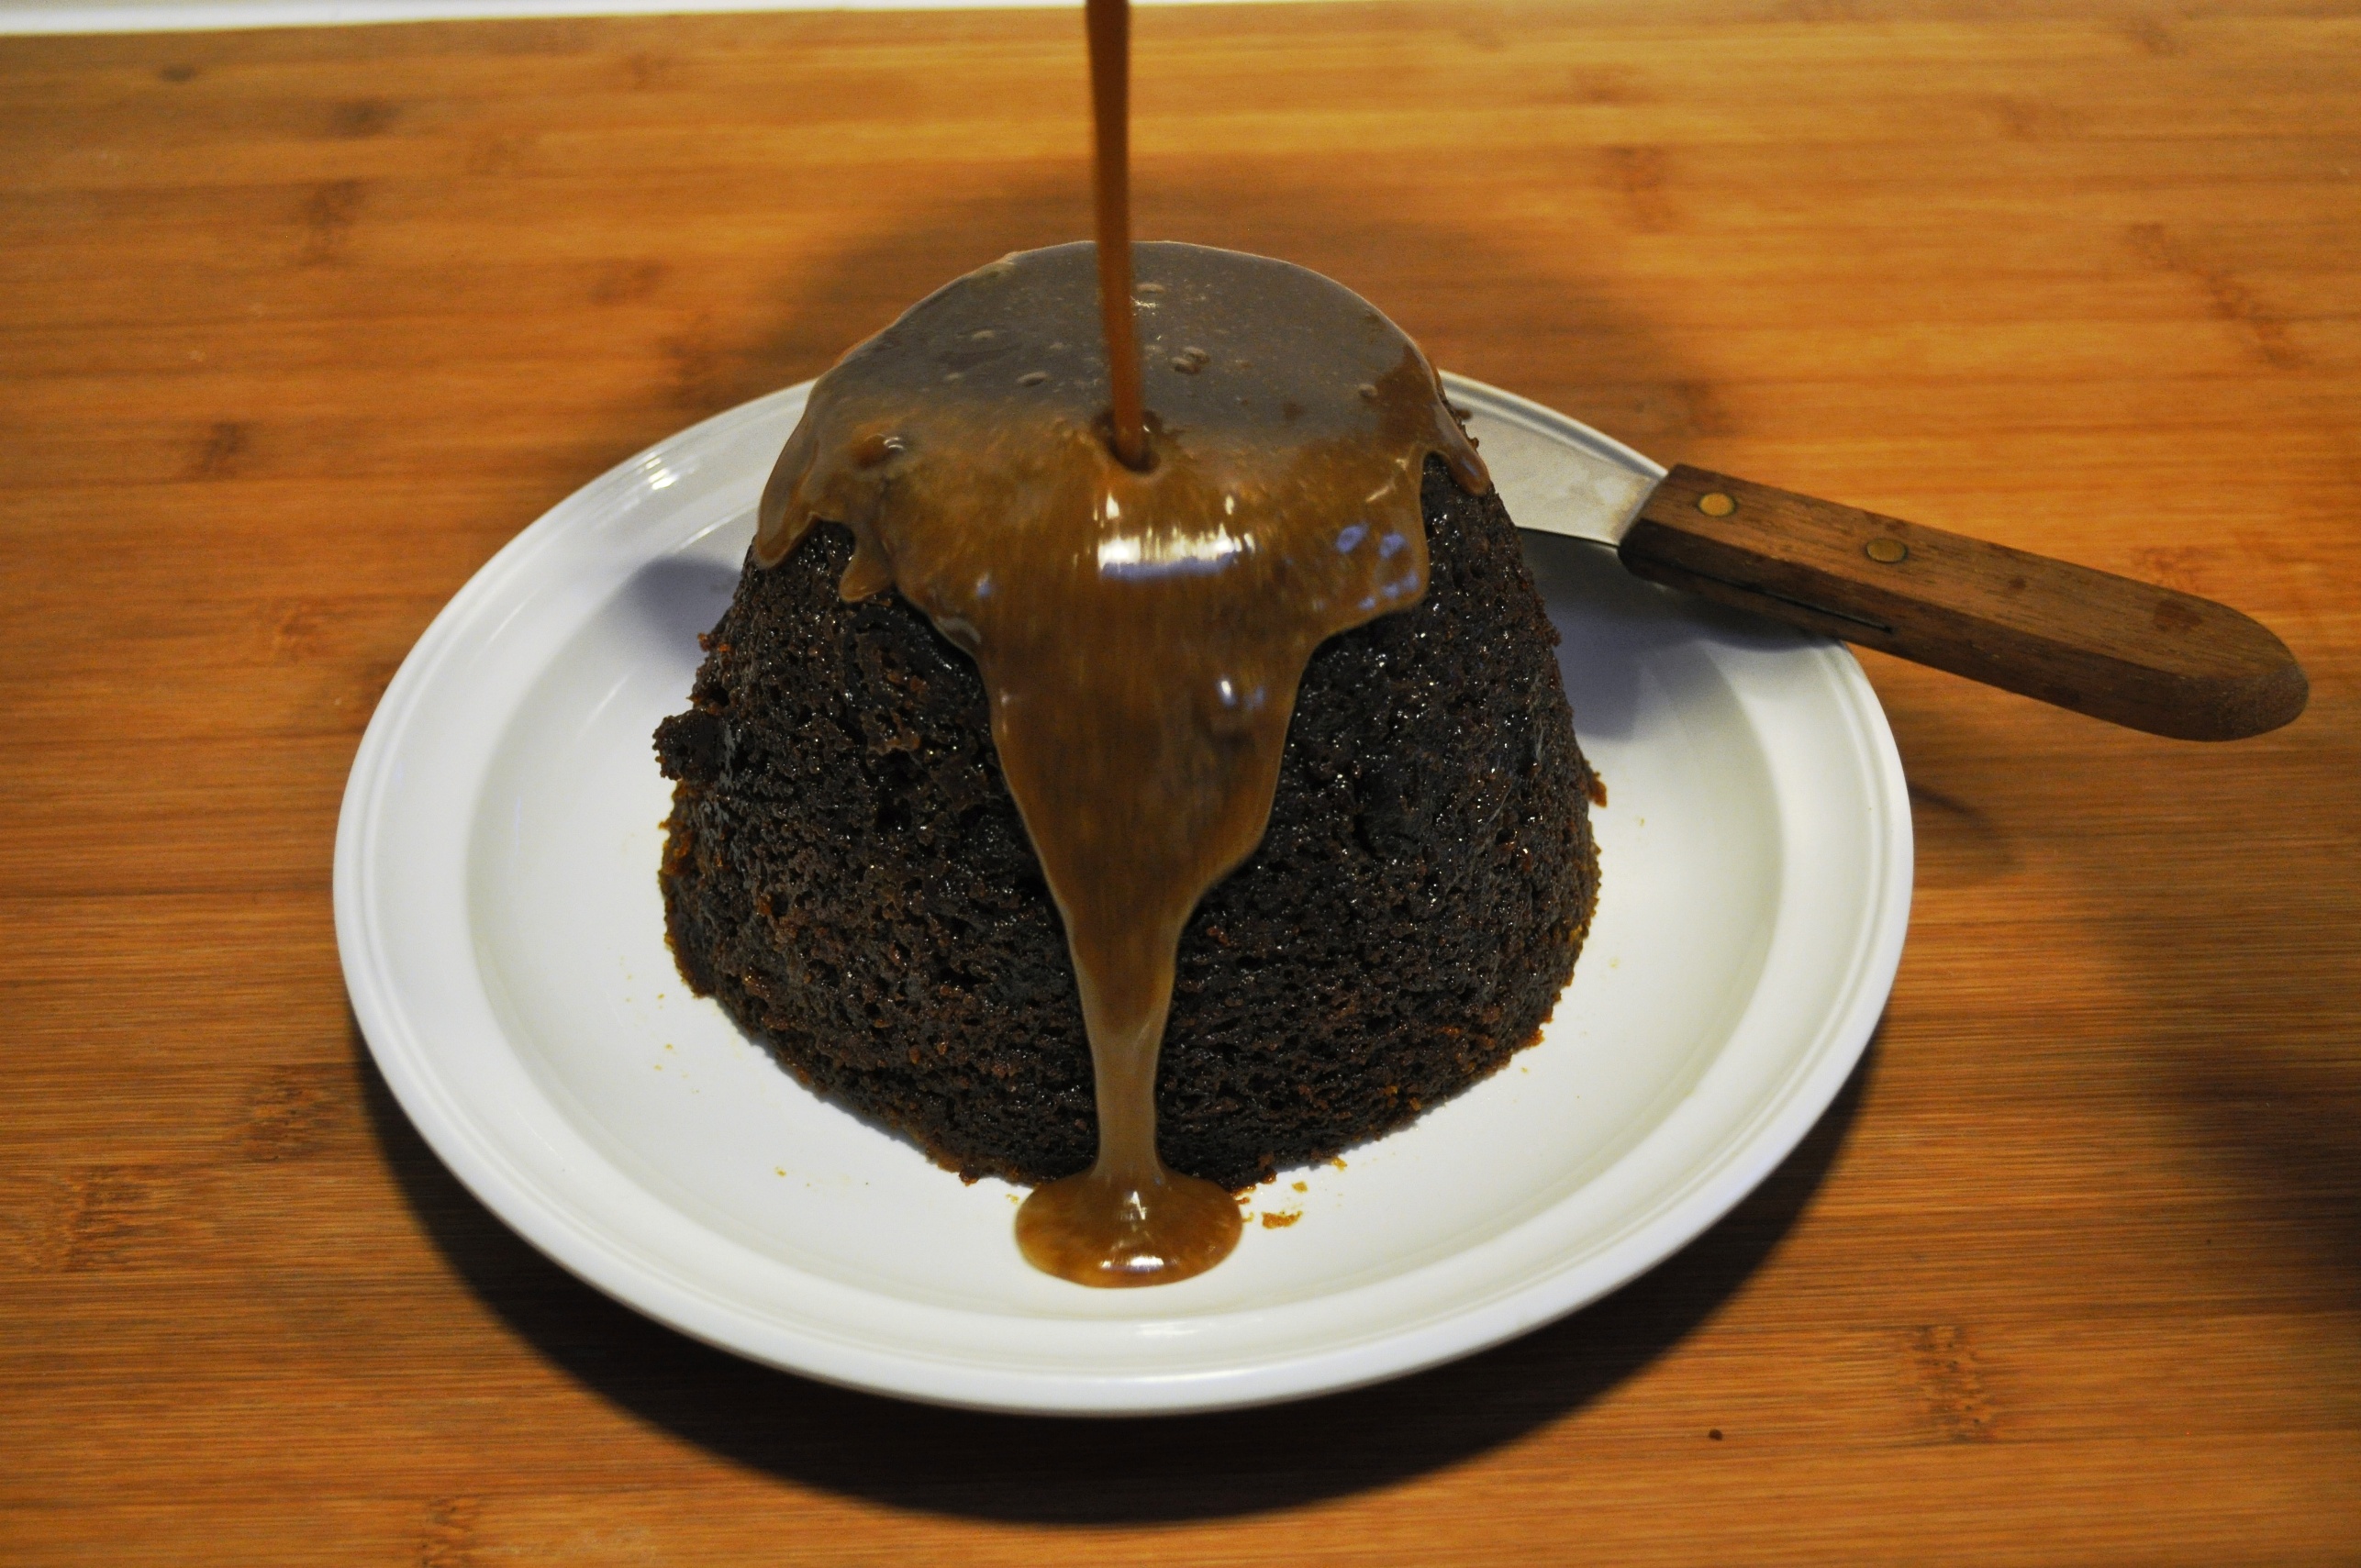
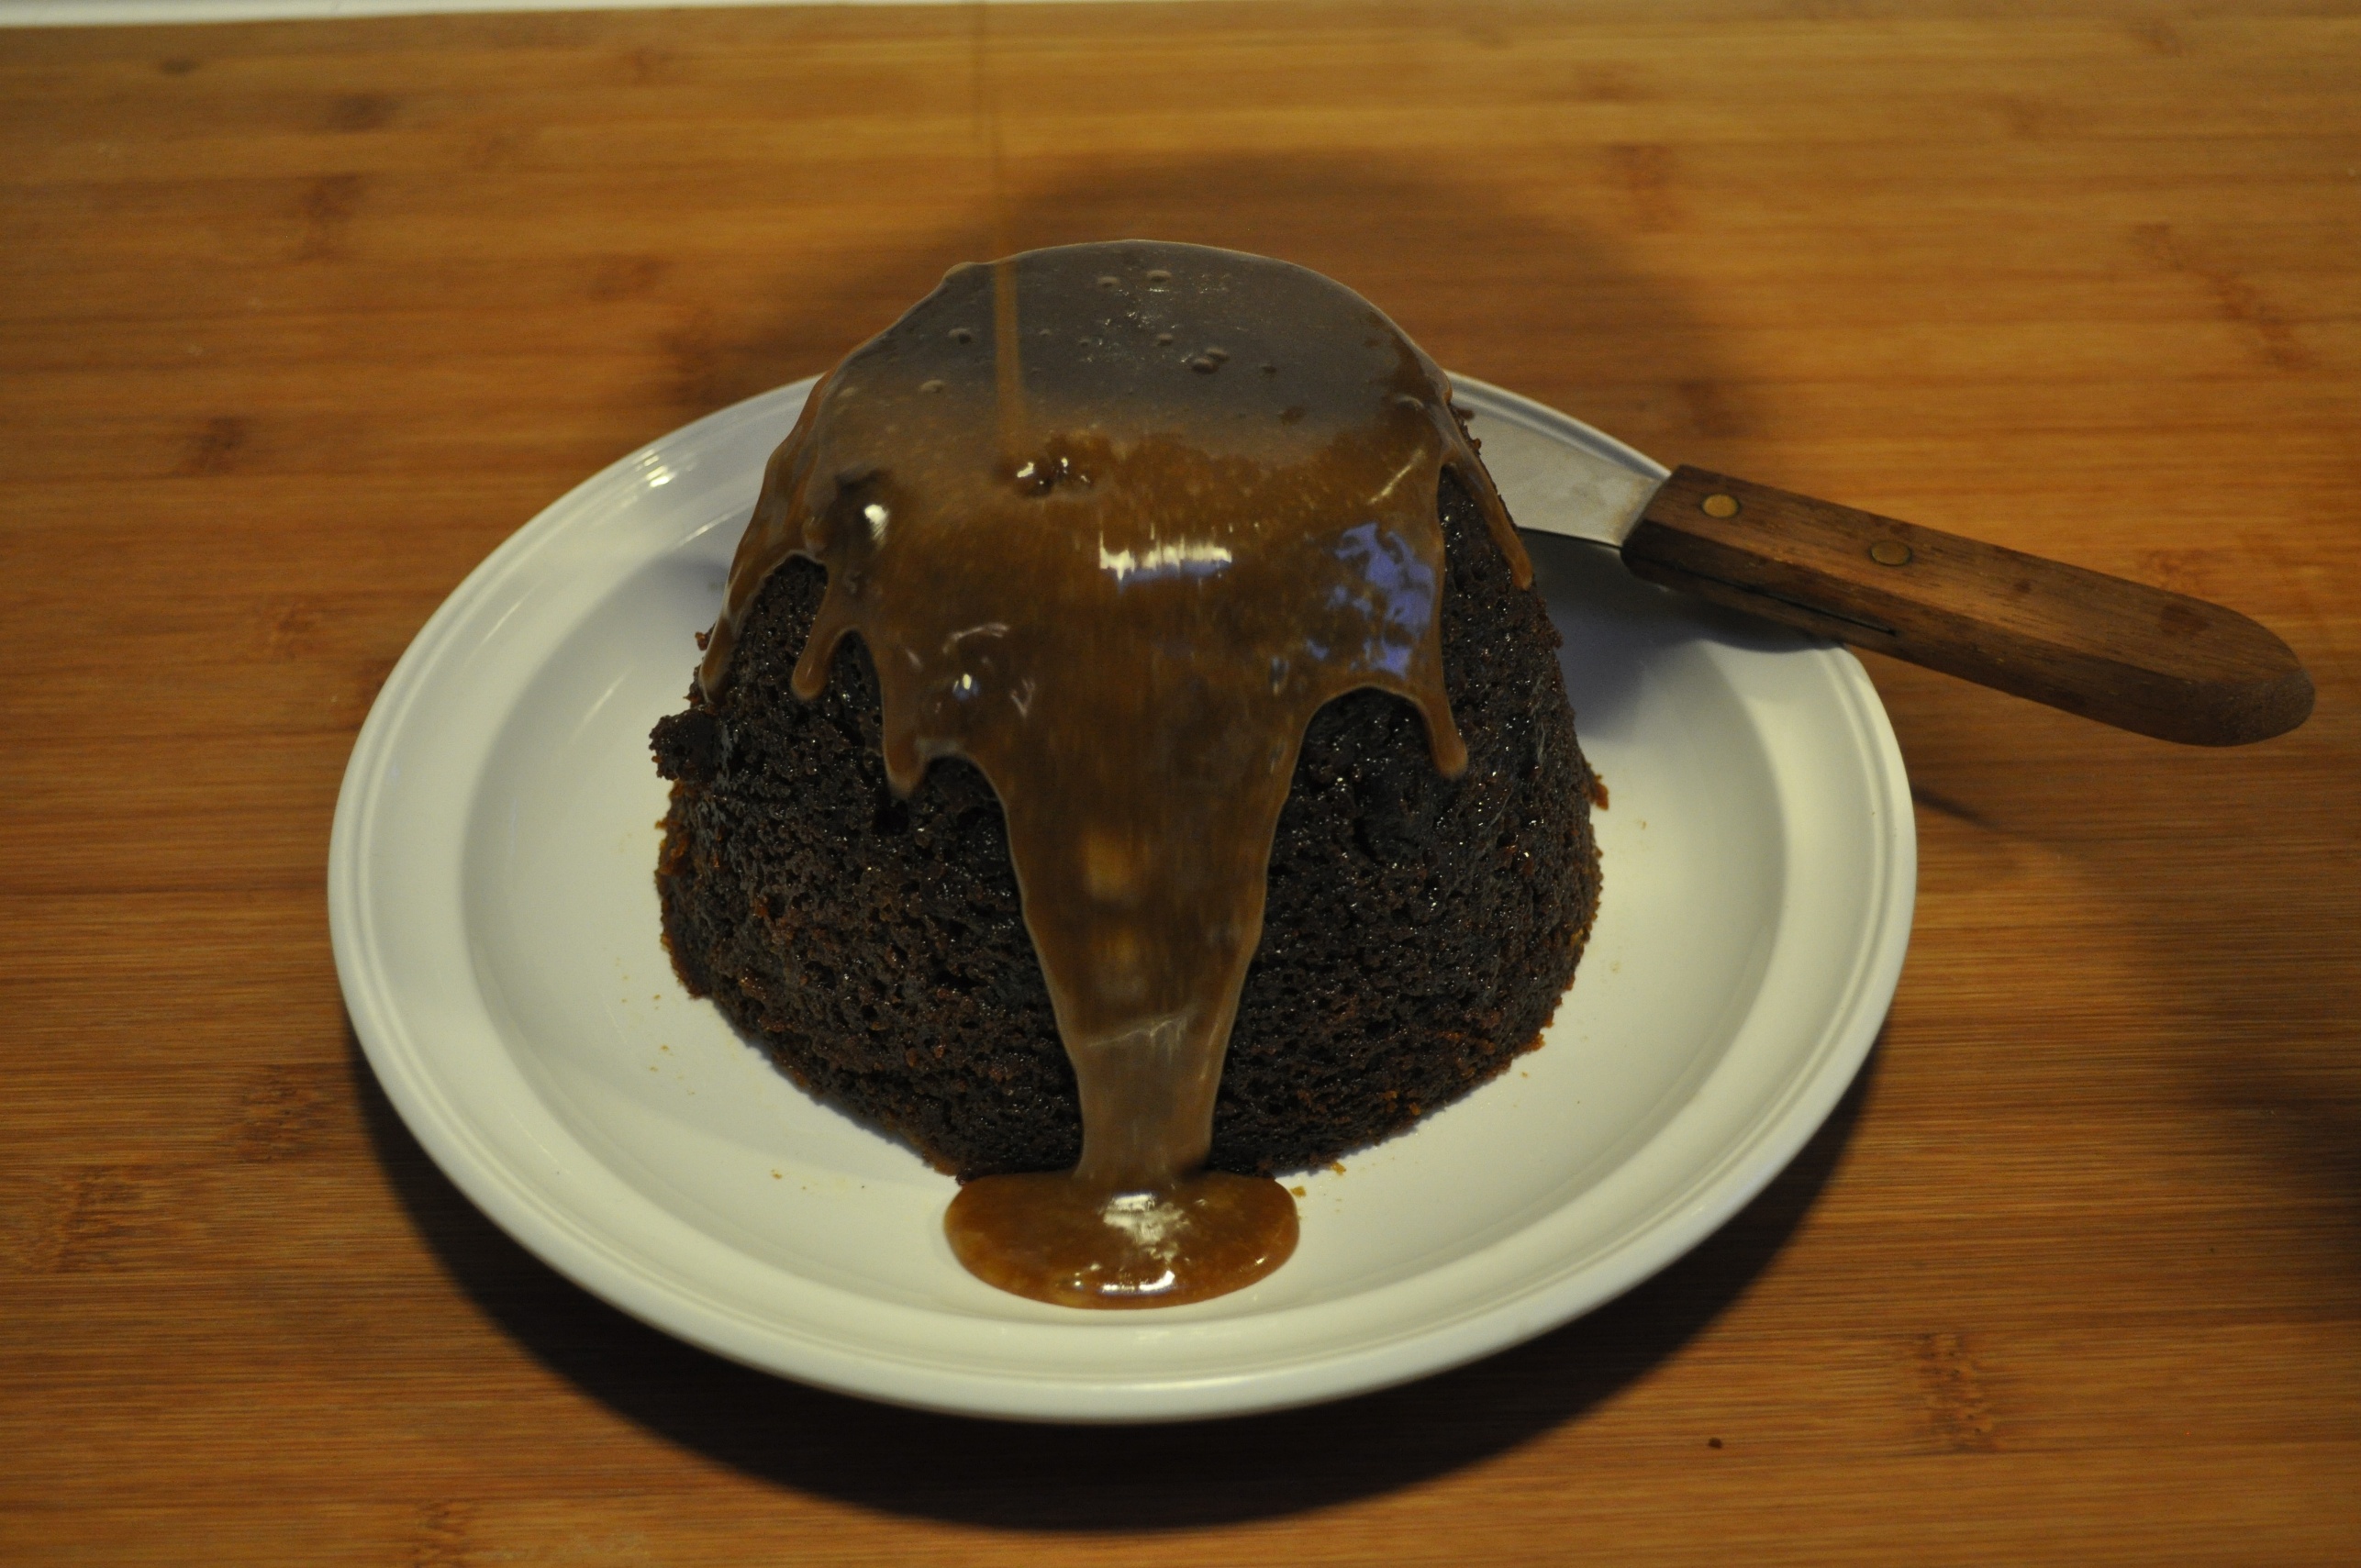
12. Cool in the tin for 10 minutes then turn out. Serve warm with cream2 or ice cream, or allow to cool completely. Hande had hers for breakfast. But then she lives in Rome and the sort of cake us Brits would treat as a tea-time treat or pudding gets eaten for breakfast there.


Notes
1 So yes, I’ve made a point of saying “unsalted butter” then added a pinch of salt. Why? Well, salt is essential for all foods, unless you have no sense of taste or somehow like your food bland. Put simply, it’s the ultimate flavour enhancer, so even sweets – especially sweets like this with a variety of flavoursome components – benefit from a bit of salt. A pinch. Too much and you may get a salty taste, but too little and it won’t be there to do its work. In the words of renowned London-based chocolatier and pâtissier Paul A Young salt “lifts and balances the sweetness and brings out other flavours.” I have used salted butter in cakes in the past, especially when I’ve not got any unsalted, but the problem with that is that you can’t control the quantity effectively as you can’t be sure how much salt is already in the butter. So it might seem perverse to use unsalted butter then add salt to the mix, but there’s a logic to it!
2 We had clotted cream. I could eat the stuff every day… if I was a bit more blithe about my arteries.

17 Comments

Filed under Baking, Cakes, Recipes

Simnel cake, Mothering Sunday and mutating feast days

Simnel cake slice

Simnel cake is the traditional British Easter cake. Or is it? Laura Mason and Catherine Brown write in The Taste of Britain that this light fruit cake with marzipan “was originally associated with a Mid-Lent Sunday when the Lenten fast was relaxed to allow the consumption of richer foods, adding variety to an otherwise monotonous diet. This was known as Mothering Sunday…. Later the holiday developed into the secular festival of Mother’s Day.”

I’m not sure it developed into, but it’s certainly been conflated with Mother’s Day, a 20th century North American celebration. Both are moveable feasts, but while the North American Mother’s Day is usually the second Sunday in May, the older Mothering Sunday is based on the date of the spring or vernal equinox and this year is on Sunday, 15 March.1

Like so many Christian feast days, Mothering Sunday, or Laetare Sunday (from the Latin “rejoice”), may have its origins in pre-Christian celebrations. At the spring equinox the ancient Greeks celebrated the mother goddess figure they called Kybelis, who originated in what is today Turkey, but who migrated across the Mediterranean to become the Romans’ Cybele, with the feast day of Hilaria2.

As they do, the traditions evolved and migrated further over history, but the “mother” aspect was retained, getting tweaked into signifying the “mother church” for Christians.

Cake, boiled and baked
The tradition of eating something called simnel cake on this feast day emerged in Medieval England. Initially it was an enriched, yeasted wheat bread. Indeed, the word simnel may derive – like the Scandinavian semlor – from the Latin simila: fine wheat flour. But no one is sure.

The early modern versions, according to Mason and Brown, were a dough enriched with fruit, almonds and spices then “enclosed in a pastry crust and… boiled before being painted with egg yolk and baked, giving a very hard exterior.” Feast Day Cookbook by Katherine Burton and Helmut Ripperger mentions such a cake was so hard it gave “rise to the story of a lady who used one for years as a footstool”.

In English Bread and Yeast Cookery, Elizabeth David writes “At one time simnel cakes were… baked with a layer of almond paste in the centre of the cake.” She they says they these were “gradually superseded by ordinary cake batters and the strip of almond paste or marzipan moved from the centre to the top of the cake, which was originally made for Mothering Sunday.” In the 19th century, servants and apprentices were allowed Mothering Sunday off to visit their families – and take a cake to their mothers.

Burton and Ripperger describe simnel cake as “a yeast cake very yellow in colour because of the saffron and candied peel it contained”. I can’t find other mentions of saffron being an essential ingredient, though I suspect it would have been included in some parts of the country, possibly where saffron was cultivated such as Stratton in Cornwall or the famously named Saffron Waldon in Essex.

Indeed, different parts of the country had their own variations, most notably the towns of Devizes (“which produced a star-shaped version without marzipan”3), Bury (“Where a rubbed-in mixture, giving a result rather like a very rich scone, was baked in a long oval”4), and Shrewsbury. This regional varation, still so common in countries like Italy, is something that was largely lost in the era of industrialisation, neutralisation and homogenisation that’s defined British food that past 70 or so years.

Simnel cake hyacinths

Balls not eggs
The best known form today, developed from the Shrewsbury type, is decorated not just with a coating of marzipan but with 11 balls of almond paste. These balls represented Jesus’ apostles. Sometimes there are 12 balls – to include Jesus himself. Both counts exclude the notorious Judas. I feel somewhat sorry for Judas. Some poor sod was fated to be the fall guy right? Lowest circle of hell seems a bit harsh, especially if you believe his role was predestined.

The final shift in tradition has occurred fairly recently. The cake is now largely made for Easter, and some prefer to see the balls as eggs. Easter eggs perhaps laid by the Easter bunny… Got to to love the mutability of tradition.

A hybrid recipe for a mutant tradition
This is a yeasted version. It’s a modernisation of the version in David. She based her version on one from Cassells’ Universal Cookery Book by Lizzie Heritage, published first in 1894. I wanted to incorporate both traditions of the marzipan layer in the middle and grilled marzipan balls on top.

One batch of marzipan, about 400g-500g. See my recipe here.
15g fresh yeast / 8g active dried yeast (or 6g instant yeast. See instruction 5 below)
180g milk
200g strong white flour
250g plain/all-purpose flour
1/4 tsp salt
80g caster sugar
3 medium eggs, beaten (about 160g beaten egg)
125g butter, softened
160g currants or raisins
60g candied peel
1 tsp cinnamon and 1/2 tsp freshly ground nutmeg (or 1 1/2 tsp mixed spice)

1. First make your marzipan. You could buy some but it really is easy to make.
2. Grease a 23cm round tin, ideally springform.
Simnel cake ingredients

3. Warm the milk slightly, then add the yeast (if using fresh or ADY) and a dessertspoon of the sugar.
4. Allow this mix to sit or until frothy and lively.

Simnel cake dough 1Simnel cake dough 2Simnel cake dough 3
5. Add the yeast mix to the flour, along with the salt, the caster sugar, and the egg. (If you’re using instant yeast, mix it with the flour at this stage.)
6. Bring to a dough, turn out onto an oiled or lightly floured work surface and knead until well combined. It will be quite sticky5, but try to use extra flour sparingly as adding too much extra will make for a dry, dense cake.
7. Form the dough into a ball, put in a clean bowl, cover and rest for about 10 minutes.
8. Give the ball another quick knead then allow it to rest again for another 10 minutes. Repeat this once more.
9. While the dough is resting, mix together the softened butter, fruit and spices.
10. Take the dough out of the bowl and stretch it out.

Simnel cake dough 4
10. Smear the buttery fruit mix over the stretched out dough, then wrap the dough around and carefully knead it all together to combine. Again, it will be sticky, but try to be sparing with any extra flour. A dough scraper is your friend.
11. Form the dough into a ball again and put back in a clean bowl.

First prove
12. Cover and leave to rise, until doubled in size.

Simnel cake, divide in two
13. Take the dough out of the bowl. It should weigh about 1250g. Divide into two equal pieces, and form these into balls.
14. Leave the balls to rest for about 10 minutes, covered, then squash them down into discs.

Simnel cake dough and marzipan discSimnel cake second disc
15. Put one of the discs of dough into the bottom of the tin and cover it with a disc formed of less than half of the marzipan, rolled and cut out, using the tin as a template.
16. Put the other disc of dough on top.
17. Cover and leave to rest again, until nearly doubled in size.
18. Preheat your oven to 200C.
19. Bake for about 20 minutes then turn the oven down to 180C. Continue baking for another 20-25 minutes. If the top starts to brown too much, cover it with foil.

Simnel before bakingSimnel after baking
20. Remove from the oven and allow to cool in the tin for about 10 minutes, then remove and cool completely.

Simnel after baking, side
21. When cool, brush the top with warmed apricot jam.

Brush and balls
22. Roll out the marzipan, keeping a bit back, and make another disc for the top. Brush with beaten egg.
23. Use the remaining marzipan to make balls (mine weighed about 10g each), placing them in a circle on the top of the cake. Brush with more beaten egg.
24. Preheat your grill or light a blow torch, and brown the top marzipan and balls slightly.
25. Take the cake to your mother, or enjoy with friends and family, hopefully welcoming the spring with a sunny day.

Simnel cake grilled

Notes
1. The Spring/vernal equinox itself, when the sun is over the equator and the lengths of day and night are roughly equal, isn’t until Friday 20 March 2015. In Western culture, its annual celebrations have been moved around between the date fixed by the ancient Romans, in the Julian calendar, then the later Gregorian Christian calendar, which most of the world uses today. Pope Gregory XIII introduced the latter because the date of Easter, which also takes it takes from the Spring equinox, was drifting and the Catholic church authorities wanted to recalibrate it. It’s quite a complicated issue, and still controversial among some Christians; read more here.
2. Hilaria means “cheerful” and relating to the modern English word “hilarious”.
3. and 4. Alan Davidson, The Oxford Companion to Food, p726 (2006 edition).
5. In terms of baker’s percentages, the 450g flour = 100%. So 180g milk = 40%. The beaten egg at 160g = 35%. So the hydration – treating the milk and egg combined as the total liquid – is 75%.

10 Comments

Filed under Baking, Breads, Cakes (yeasted), Feasts

Marzipan

This is something I’ve been wondering about for a while: what’s the difference between almond paste and marzipan? Both are made with sugar and ground almonds and some sort of binding agent – usually egg, possibly oil.

I would say that marzipan is a form of almond paste, and indeed Alan Davidson calls it “a paste of crushed almonds and sugar” in his essential Oxford Companion to Food. If you’re being thoroughly pedantic, however, one distinction seems to be that almond paste has a higher proportion of almond to sugar, whereas with marzipan the proportions are more or less equal.

In Britain, marzipan is mostly used as a covering for cakes – notably on top of our traditional heavy fruit Christmas and wedding cakes, with a layer of royal icing on top. It’s also used for as a filling for things like the German Christmas cake stollen, or as a kind of sculptural medium. It’s not something I do very often, but I’ve used it to make, for example, decorative fake pebbles (below, alongside the real ones).

Marzipan stones

In parts of Italy, Spain and Portugal, meanwhile, they’re big on using it to make imitation fruit, a sort of sweetmeat.

An older English name is “marchpane” and this referred to large sculptural sweets that would decorate feast day tables, right up until the 18th century. These showstoppers were the ancestors of our modern wedding cakes. The word marchpane may also relate to the Italian marzapane, which can be translated as “March bread” – but the etymology is confused. Indeed the Latin root marci panis, Davidson says, means “the bread of St Mark”, (the Latin for the month of March is Martius). While one dictionary says it’s “perhaps” from the Arabic mawthabān meaninga seated king”.

Davidson also talks about a distinction between French and German marzipan, with the production of the former involving a sugar syrup and the latter a mixture that is “dried over heat, cooked for a short time then poured onto a slab to cool”. The English version, however, generally isn’t cooked.

I’ve found one Delia Smith recipe that cooks it, but otherwise it’s a more basic concoction that relies on raw egg, one of those things we’re quite squeamish about these days. If, however, you do have a reliable source of eggs and aren’t squeamish – being unafraid of say, real mayonnaise – this is a great basic recipe that’s so easy you’ll wonder why you ever bothered to buy ready-made marzipan.

Sugar is a natural antibacterial, so the high level present is a preservative. The fresh mazipan will keep for a couple of weeks in the fridge, probably longer – but I’ve not done a controlled experiment.

175g ground almonds
175 g icing sugar, plus extra for dusting
1 egg, lightly beaten (approx. 60g of beaten egg)

Makes about 400g

Marzipan mix 1Marzipan mix 2

1. Put all the ingredients in a bowl and bring together, with a fork, palette knife or dough scraper.

Marzipan 3
2. Lightly dust the work surface with icing sugar and turn out the mixture.

Marzipan ball
3. Completely bring together and knead slightly, to achieve a homogenous dough. Do not overwork or it can become greasy.

Marzipan block
4. Form into a ball or block and wrap in plastic.
5. Store in the fridge.

Anyway, I’m blogging this as I seem to be using marzipan fairly regularly at the moment. It was in the semlor I made a while back, and I’m also using it for a simnel cake recipe, which I’ll post next.

9 Comments

Filed under Misc, Other food, Recipes

Types of yeast for baking

3 x yeast

From the left: fresh yeast, active dry yeast, instant yeast

One of the awkward things about writing recipes for baked goods leavened with yeast is that there are three different types of yeast available commercially. Each has a slightly different quality, each is used in a slightly different way, and there are several different names to boot. It can make for some convoluted recipe ingredient lists.

I wrote more here about the specific species of yeast that we use for foods and our relationship with them, but here I want to look at the types of commercial yeast and how you use them.

Leaving aside sourdough / natural leavens / wild yeasts, the three yeast products in question are: fresh, active dry yeast and instant yeast.

Fresh yeast

Fresh yeast

Also known as cake yeast, compressed yeast and, in Italian, lievito di birra fresca (fresh beer yeast), fresh yeast is my preferred form. It is strangely both squidgy and crumbly.

In large scale bakeries, they may use 200g, 500g or 1kg blocks of the stuff, but for the home baker you may find it in 25g, 42g or 50g cubes or in the US I believe it comes in 2 ounce (57g) packs. Italian supermarkets stocked it, but most British ones don’t. I’ve heard that you can ask in in-store bakeries, but as these places are generally not actually bakeries – they mostly buy in pre-made dough and bake it off, rather than making it from scratch on-site – I doubt this. I get mine from a health food shop that sells it in 30g and 60g bags. You can buy it mail order easily enough (eg from Bakery Bits in the UK).

Using fresh yeast,  typically you activate it in your liquid – water, or perhaps milk if you’re doing an enriched dough. If the liquid is tepid, the yeast will form a froth after a short while. I prefer to use mine like this as I feel it makes it easier to distribute it into the flour, but Breton-born, Britain-based baker Richard Bertinet, for example, simply rubs it in as you would to add fat to flour. I’ve done this, and it works fine.

Fresh yeast is best stored in the fridge and will only last a few weeks, max. Then it’ll darken and go sludgy and not do you any favours.

Active dried yeast

Active dry yeast

ADY was the baking yeast I grew up with – small granules that sat in the fridge door in a jar or orange tin. It doesn’t need to be stored in the fridge, but arguably that way it’ll last for months, possibly even years, as it’s pretty much inert, the live component encased within the shell of the granules.

You do need to activate ADY to use it – again by adding it the liquid component of your recipe, and letting it froth up. Adding some sugar or honey to the liquid encourages this, as it gives the yeast some immediately accessible carbohydrates to start feeding on before it gets access to the carbohydrates in the flour.

Powdered yeast

Instant yeast

Also known as easy-blend, easy-bake yeast, fast action or quick, this is another type that can, confusingly, also be referred to simply as dry or dried yeast.

It’s similar to ADY but is finer, almost powdery. I don’t tend to use this, it’s just not something I learned to bake using, or have a particular affinity for, but it’s probably the most commonplace type of yeast available these days.

You can buy it in packs, such as these 125g ones from Dove’s Farm, but most typically you’ll find it in sachets of 7g (1/4 oz), which is about 1 1/2 teaspoons and is considered a convenient amount – you’ll often find recipes with 400g flour and 1 sachet, but recipes that rush the fermentation and proving times may do, for example, 500g and 2 sachets.

The big difference when using instant yeast is that you don’t need to activate it or mix it with the liquid first – you add it directly to the flour.

Compared to fresh yeast – which is essentially a product consisting of exactly the same commercially cultivated microorganisms – instant yeast will contain additives. Nothing too scary – just ascorbic acid and sorbitane monostearate (E491), an emulsifier. Though personally I would rather use a product that’s been industrially messed around with less, even if it’s just a little bit.*

Converting between types of yeast

As with all these things, if you look around online no one is quite in agreement about how to convert quantities of the different types of yeast, but a good rule of thumb is to use half the weight of fresh if converting to ADY, and a third of the weight of fresh if converting to instant.

So for example, a recipe that calls for 20g fresh yeast you could replace that with 10g ADy or 7g instant yeast. Or as percentages where fresh yeast is 100%, ADY is 50% and instant is 33%.

Of course, as you learn more about baking you’ll learn more about these variables – so for example, if you do a longer fermentation, you may be able to reduce the amount of yeast in a recipe and just leave the yeast to keep working. If you want a quick loaf (which I don’t recommend, because long fermentation = more digestible = less issues with wheat), a recipe may call for a much higher proportion of yeast.

My basic recipe made with commercial yeast works with these quantities:

1000g flour (100%)
350g water (70%)
20g fresh yeast (2%) or 10g ADY (1%)
20g fine salt (2%)

Addendum

If you’re interested in food history – as I am – Dorothy Hartley’s round-up for yeast types from her 1954 book Food in England is an noteworthy comparison. She lists five types of yeast:
Brewer’s Yeast – made by “the brewer’s wife; and sold to the farmer’s wife at market, to which it was carried in earthenware jars.” This is what we’d call barm, and something I’ve experimented with thanks to a supply from my brewer friend Michele.
Dry yeast – for storage or use aboard ships, “made by spreading the yeast out on a wide board, and more on top, over and over, as it dired, till it was a couple of inches thick.” It was then cut into pieces and stored, then reactivated in warm water as we commonly do with fresh yeast.
Potato yeast – potato boiled “and pounded up with some treacle and their own boiled water” with a little yeast added. So not really a type of yeast in itself, more of a medium. Although if left, such a mixture will develop its own wild yeast culture – this is the technique used for Maori rewena bread.
German yeast – imported from Hamburg then later Holland. “It was introduced in about 1850, and by 1866 we imported 5,735 tons in a year.”
Modern yeast – “obtained from a grocer will have a fresh clean smell, and be cool and firm.” She describes breaking it up and activating it in sweetened water, so it actually sounds like fresh yeast.

Possibly creating confusion, in The Last Food of England (2007), Marwood Yeatman says “Compressed yeast, known to the Victorians as ‘German’ or ‘dried’, and which we call ‘fresh’, is descended from brewer’s yeast.”


* All these yeasts are industrially cultivated of course, fed sugars and pushed through a series of tanks, vats and fermenters, sealed to prevent any contamination from wild yeasts. But it’s a matter of degrees and where you prefer to draw your line as the number of additives in our foods increases, even in tiny incremenents. I strongly believe the ever-increasing industrial processing and additives in our food are responsible for so many health and dietary issues and disorders.

When I was a kid in the 1970s, maybe one person in school (say 1%) had a food allergy or intolerance, now every second person has one.

Take wheat – a lot of people have difficulties with it today, or believe they do, hence the proliferation of gluten-free products (many of them hideously industrially processed) and gluten-free baking blogs and books. I ardently believe, however, that for most people (not all) the problem is more likely to be with the industrial “food” product and the ingredients, not with the grain itself. Human civilisation was largely built on wheat, at least in the Middle East and Europe.

If you eat a sandwich made of white sliced “bread” you may well feel bloated and sick; if you eat a sandwich made with real bread – made from just wheat, water,  salt and yeast (better yet, sourdough) and fermented for at least five hours, preferably more – you may not have the same reaction. I stopped  eating sliced industrial “bread” because it made me feel ill. This is what got me more interested in making real – really digestible, really nutritious – bread.

Humanity developed the skill of converting wheat into a nutritous foodstuff by giving it a long fermentation: a form of processing. And not packing the bread with additives. Sliced industrial “bread” may only be fermented for 20 minutes and is packed with additives. Is it any wonder modern “food” is making people ill when we so readily reject knowledge garnered and honed over millennia in favour of hubristic chemistry experiments?

8 Comments

Filed under Baking

Justin Gellatly almond cake

Gellatly almond cake slice

This is my first recipe from the book Bread, Cake, Doughnut, Pudding by Justin Gellatly, formerly of St John now of Bread Ahead bakery, London. It’s a book I needed on my shelf, really, given the overlap with my area of interest – and the name of this blog. So thanks Rachel for the gift.

Gellatly lists this as Swiss almond cake, but I can’t quite bring myself to do that. Thing is, I’m sure this is a version of toscakaka – a Swedish almond cake (here’s a version on Poires au Chocolat). Either way, it’s delicious. A huge, almondy beast with an absurdly rich, crunchy, buttery almond topping. As with the classic toscakaka, you partially bake the batter, then add the topping, then continue baking.

Topping mix
200g butter
200g caster sugar
4 tbsp milk (full fat)
40g plain flour
50g ground almonds
200g flaked almonds

Cake mix
200g unsalted butter
260g caster sugar
400g plain flour (I use Stoate & Sons stoneground, which isn’t that pale bleached colour of more mainstream flours)
1 tsp baking powder
100g double cream
1 1/2 tsp almond extract or essence*

1. Grease and line the base and sides of a 26cm springform cake tin.
2. Preheat the oven to 160C.
3. Make the topping mix by gently heating together the butter and sugar in a saucepan. When melted, add the milk, flour, ground almonds and flaked almonds and stir to combine. Put aside.
4. Make the cake batter, starting with melting the butter.
5. In a large bowl, beat together the eggs and caster sugar until the colour lightens and the mix is airy. (I reduced the sugar from 300g to 260g and it was still very sweet!)
6. Beat in the melted butter, then the cream and essence (or extract!).
7. Sieve together the flour and baking powder then fold this into the batter.
8. Pour the batter into the cake tin, then bake for 25 minutes.
9. Carefully take the cake out of the oven, and gently spread the topping on.
10. Increase the heat of the oven to 180C then put the cake back in and bake for another 40 or so minutes. It’s tricky to judge when this cake is done, as the skewer may come out of the cake itself clean, but the topping will still be smeary. You want the topping itself to be browned nicely.
11. Cool in the tin for 20 minutes then remove and either serve warm with cream or whatever you fancy, or allow it to cool completely.

Gellatly almond cake

Oh, and you might want to invite friends over to help you as it is substantial. The best bit is the edge of the topping where it’s caramellized against the tin. Good stuff, thank you Mr Gellalty.

Gellatly almond cake side

* I’m not going to try and explain the difference here, just use what you have – preferably a natural not synthetic product)

2 Comments

Filed under Baking, Cakes

Shrove Tuesday Scandinavian cardamom buns: fastelavnsbolle or semlor

Semlor, semla, fastelavnsbolle

I’ve never been to a Scandinavian country, but that doesn’t stop me enjoying their baked goods from afar.

I’ve had my eye on these cardamom flavoured buns filled with almond paste and cream for a while, but as the Christian Shrovetide, the three days before the pre-Easter fast of Lent, only comes round once a year, now’s my chance to make them. Yes, yes, I know I made some seriously sugary carby Italian Carnival treats yesterday, but it’s a busy time of year for indulgent foods. Indeed, Shrovetide is all about the indulgent foods, even giving Christmas a run for its money.

In Britain, the remnants of this tradition are our pancakes, with the secular name for Shrove Tuesday Pancake Day*. We used to have a tradition to eat slices of bacon – collops – on the Monday before Lent, but this seems to be all-but forgotten now. It’s all about the fatty, rich foods though, as commemorated in the more common international name for Shrove Tuesday: Mardi Gras, Fat Tuesday, Fettisdag in Swedish. The Danish and Norwegian name, meanwhile, is Fastelavn, which comes from older German and means “fast-evening”.

Versions of these buns are eaten throughout Scandinavia and adjacent areas, and go under various names: according to Wikipedia these are “semla or fastlagsbulle (Swedish), laskiaispulla (Finnish), vastlakukkel (Estonian) or fastelavnsbolle (Danish and Norwegian)”, with semlor the plural of semla, from semila, the Latin for flour (and related to the English and Italian grain-related words semolina, semolino, semola). Another Swedish name is fettisdagsbullar. So either “Fast-evening buns” or “Fat Tuesday buns”.

A common version of the bun these days involves filling it with almond paste and whipped cream. The almond paste form was first recorded in 1883, the cream supposedly came as a ration-busting celebration in Sweden after the First World War. In our modern world of more-is-more, both are combined.

Eaten without a filling, and instead sprinkled with cinnamon and served in a bowl of warm milk, they’re known as hetvägg. King Adolf Fredrik of Sweden purportedly died in 1771 after eating 14 but that may be one of those myths perpetuated by the internet. Not reading Swedish, I can’t confirm or deny it.

Almond paste

It’s very easy to make almond paste, marzipan or mandelmassa, but if you are intimidated it’s easy to buy too.

175g ground almonds
175g icing sugar (aka confectioner’s sugar, powdered sugar)
1 egg

1. Beat the egg slightly and combine with the ground almonds in a bowl.
2. Add half the sugar and bring together – either with a spatula or wooden spoon or by getting your hands in there – and form a sticky dough.
3. Sieve the rest of the icing sugar onto your work surface then turn out the dough, and bring together, incorporating the sugar.
4. Wrap in plastic and leave in your fridge until it’s needed. (Well-wrapped, homemade marzipan will last for a few weeks in the fridge.)

Dough and buns
1 tsp cardamom
75g butter, melted
300g milk
20g fresh yeast (or 12g ADY or 10g instant)
500g plain/all-purpose flour
1 medium egg, lightly beaten
50g caster sugar
5g fine salt

Semlor ingredients

1 extra egg, for glazing

Ground cardamom

1. Crack open a few green cardamom pods and grind the seeds to a powder in a pestle or mortar or spice grinder.
2. Combine the melted butter and milk, warmed to about body temperature.
3. Add the yeast to the milk and allow to sit and activate for a few minutes.
4. Put most of the flour, the sugar, the salt, the cardamom and the egg in a mixing bowl, then add the yeasty milk mix.

Dough, mixingDough, sticky
5. Stir to combine and bring together the dough. It will be pretty moist. (Say your beaten egg weighs 58g, along with the milk and melted butter that’s 433g of liquid, to 500g flour – ie about 87% hydration, though the butter will firm up somewhat.)
6. Put the rest of the flour on your work surface and turn out the dough. Bring it together and knead, trying not to add too much more flour – you want to keep it nice and moist, so the resulting crumb is light.
7. I gave mine a Dan Lepard style knead – that is, brought it together, formed a ball, let it rest, covered in a clean bowl, for 10 minutes then gave it another short knead. Then I repeated this 10 minute rest, short knead process twice more.

Dough close up
8. When you have a nice smooth dough, put it back in a clean bowl, cover, then leave to double in size. This will take an hour or two at room temperature (about 18C).

Dough pre first riseDough after first rise

ScalingForm balls
9. The resulting dough weighs 1kg, more or less. To make 18 medium sized buns, divide this into pieces scaled at 55g. You can go bigger or smaller – up to you!

Forming balls 1Forming balls 2

Forming balls 3Forming balls 3
10. Form these pieces into neat balls. I do mine two at a time, rolling them inside cupped hands. This technique works best if your surface isn’t floury, so the dough sticks just slightly. Even better if your surface is stainless steel or marble. As mine is bamboo, I oil it slightly first, which also works well for wood work surfaces.

Balls, final proveBalls, egg washed
11. Put the balls on lined baking sheets, leaving enough space for them to expand, then give them their final prove, again until about doubled in size.
12. Preheat your oven to 220C (I use an interior thermometer as you can rarely trust the temperature on the knob).

Buns, baked
13. When the buns are proved, brush them with beaten egg then bake for about 12 minutes, until risen and golden.
14. Cool on a wire rack, covered with a clean cloth.

Filling
200g marzipan
Crumbs from the buns
100g milk (QB – you may not need it all)

500ml cream, whipped

Buns, splitBuns, hollowed out

1. When the buns are cool, slice off the tops and scrape out some of the crumb with a fork or even a grapefruit spoon if you have such a thing. (I’ve got the remaining single one from a childhood set.) Put the crumbs in a bowl.

Marzipan, grated
2. Finely grate the marzipan then add to the crumbs.

Making the almond fillingMaking the almond filling 2
3. Add enough milk to form a thick paste by squishing it all together with a fork or spoon.

Buns, hollowed out 2Buns, filled
4. Put a blob of the paste in the cavities inside the buns.

All creamed
5. Pipe a layer of the cream on top of the paste, then put the lid back on. I only had a 250ml pot of cream, some of which I’d already eaten with another cake, so it’ll be much better with the 500ml I mention here. Shoddy. Sorry. But I wanted to get this post done today rather than rush off to the shop again.

To serve
Dust with icing sugar.
Enjoy. But don’t try eating 14.

Semlor, semla, fastelavnsbolle close-up

Personally, I’m not too fussed about calories and all that. As well as using the default human form of transport (brisk walking) or cycling when many modern slobs use their car, I also have a general principle that diet is about balance. So obviously I don’t just eat the stuff I write about on this blog. My weight naturally seems to wander about between 80 and 85kg. That said, during out building work last year, when we didn’t have a kitchen and I couldn’t bake, I was 80kg; now I’m 85kg. Methinks a few more brisk walks up our local hill are in order. Or some Lenten fasting. Hm.

13 Comments

Filed under Baking, Feasts, Recipes

Castagnole recipe

Castagnole

Lent this year starts this Wednesday, 18 February. (Making today Collop Monday in olde British parlance.)  Which means it’s still Carnival, Carnevale, and there’s time for a few more traditional treats of the season. Anyone who’s read my blog before will know I enjoy castagnole, the Italian Carnevale sweets that are basically dough-ball doughnuts. The name relates to the Italian for chestnut, castagna, as they’re of similar dimensions, and deepfried to a lovely brown colour but there’s nothing else chestnut related in the recipe.

I ate loads of them last week when we visited Rome, but here’s my own recipe, for those of us living in countries with a more miserably chaste take on Carnevale.

You can make castagnole without any leavening agent at all, or there are recipes that are leavened with yeast. But I found this worked well, resulting in the balls puffing up and cracking slightly when you deep-fry them, and a fairly open, spongy interior.

250g plain/all-purpose or low protein 00 flour
1 tsp baking powder
Pinch salt
50g caster sugar
Zest of half a lemon (optional)
50g butter, melted and cooled slightly
2 medium eggs, lightly beaten
1/2 tsp vanilla essence
Sunflower oil for frying*
Sugar for serving

1. Sieve the flour and baking powder into a bowl. Add the pinch of salt, sugar and zest.
2. Add the vanilla to the eggs and beat slightly, then add this along with the butter to the flour mixture.

Castagnole componentsCastagnole dough 1

Castagnole dough 2Castagnole dough 3
3. Combine all the ingredients, then turn out and work to a soft, smooth dough. Don’t overwork it.
4. Wrap in plastic and rest for half an hour.

Shaping castagnole
5. Divide the ball of dough up into pieces and roll these into sausage shapes.
6. Cut the sausages into small pieces, about 20g each.
7. Roll these piece between your hands to form small balls.

Frying castagnole
8. Heat oil in a large pan (to about 180C if you have a thermometer) then deepfry the balls in small batches, until golden, about 2-5 minutes.
9. Remove from the oil and drain on kitchen paper, to absorb some of the oil.

Castagnole cooling
10. To serve, liberally with icing sugar (aka powdered sugar, confectioner’s sugar) or roll in caster sugar. Or indeed both if you really like refined sugar. So healthy!

Enjoy… while you can. I mean, you can make them any time you like, especially if you’re not Catholic or are entirely nonreligious, but personally I like keeping seasonal specialities special by having them at the relevant time of the year. So that means I have to eat all these before Wednesday. It’s not like I’m religious and going to have an ascetic Lent, but I respect the principle.

Castagnole close up


* Italian recipes I looked at say “Olio di semi” – seed oil, ie sunflower seed oil – or simply “Olio per frittura” – oil for frying, while another says “strutto” – lard. We talked about this on our last visit to Italy, where people even use olive oil for deep-frying, something that’s contrary to what we’ve been told here in the UK. There are, however, a lot of arguments (smoke points, cost factors, etc) and a lot of myths (destruction of nutrients etc), which I won’t go into now. Suffice to say, I actually used a mix of sunflower oil and rapeseed oil, as the latter is something that’s produced locally to where I live, unlike olive oil, which, sadly, isn’t.

5 Comments

Filed under Cakes, Feasts, Recipes

Carnevale, castagnole and cocci

Valzani frappe and castagnole

We discovered the delights of the Roman Carnevale season in January 2012. We’d had our first Christmas in Rome, then a few weeks afterwards we saw some unfamiliar new items appearing in our local pasticcerie and bakeries. These were frappe and castagnole, with the first being a kind of sweet pasta and the second a kind of sweet dough ball.

Passi classic castagnole

These treats are part of the celebrations of Carnevale, the Catholic festive season that takes place immediately before the decidedly more restrained period of Lent. Although Lent’s timing is defined by Easter, which is itself a moveable feast dated in relation to the equinox and moon phases, Italian Carnevale is celebrated during February, or for the four weeks before Lent. Though frappe and castagnole may first appear in mid-January.

During Carnevale, children dress up and throw around confetti (cordiandoli in Italian). It was lovely to see Piazza Testaccio, until 2012 site of the neighbourhood market, finally re-opened with the wonderful 1927 Fontana delle Amfore (Fountain of Amphorae) at the centre, and children in their Frozen (naturally) and Batman outfits playing, and cheerily threatening passers-by with handfuls of coriandoli. I love this method of keeping winter at bay:  seasonal speciality foods, lively ceremonial activities in public spaces.

The fountain was originally designed for here, then it was moved to the edge of Testaccio, at the end of Ponte Subliccio, in the 1930s. So it’s a kind of homecoming . Designed by architect Pietro Lombardi it’s very much in a modernist-fascist style, though two of its four bas-relief shields are blank, presumably purged of fascist iconography. If you spend time in Rome, it’s a fun game to try and spot the other eight district fountains designed by Lombardi.

Piazza Testaccio Fountain of Amphorae

Talking of amphorae, on this visit we were also lucky enough to be able to go up Monte Testaccio itself. This little hill, also known as Monte dei Cocci (with coccio meaning earthenware, or shard), which rises to 35m and looms over the neighbourhood, is actually a garbage dump. For around two hundred years, used olive oil amphorae, broken into shards, were neatly stacked here by the ancient Romans. There are more than 50 million amphorae, it’s estimated.

Monte Testaccio used to be a public park, but was already closed off when we arrived in 2011, deemed unsafe. So I was really excited to get a chance to finally go up there. It was fascinating to be walking on these artifacts, to be able to pick up handles used, almost two millennia ago, to lift the amphorae full of olive oil imported from the Roman empire and offloaded at Testaccio’s quay. So a big thanks to local sociologist Iren Ranaldi for the tour, and Rachel for sorting it out for us.

Monte Testaccio amphorae shards

For the two Carnevali we lived in Rome, I obsessed over frappe and castagnole slightly, eating as many as I could from different places. Last year, our first Carnevale back in England, I made my first frappe. They worked surprisingly well, and you can find the recipe here.

We’ve just had another visit to Rome, and although I had a stinking cold it didn’t stop me sampling more frappe and castagnole. We stayed in Rachel’s flat in Testaccio, which is above one bakery, Panificio Passi, so that was the best place to start. Along with the frappe they had several types of castagnole: classic, plain; rum-flavoured; alchermes-flavoured; baked; filled with custard; filled with ricotta, all sold by weight.

Passi rum castagnole

We had classic and custard, and while they were very good, the ones we had from another bakery a few blocks away were better. This was Pasticceria di Zio, whose classic castagnole were larger, with a slight crunch to their crust.

Zio castagnole

I’ve not made castagnole, but as I’m a big fan, and we can’t just go to our local bakery or pastry shop in smalltown England and stock up, I’m going to have a go at a recipe. That should be my next post, as I really ought to do it during Carnevale, or at least the month of February. Even if Lent starts next Wednesday, 18 February.

Amphora handle, Monte Testaccio, Rome


2 Comments

Filed under Bakeries, Rome

Barm brack for St Brigid’s Day, or Imbolc

Barmbrack

Also called barmbrack, barnbreak, bairín breac or bairínbreac, this is the Irish cousin of the Welsh bara brith, with both names meaning “speckled bread” – bread dotted with speckles of dried fruit.

It’s traditionally eaten on Halloween as well as on 1 February, the feast day of one of Ireland’s patron saints: Brigid or Brigit of Kaldare.* This is one of those Christian feast days, in combination with Candlemas on 2 February, that was a rebranding of an older, pagan festival: Imbolc, the mid-point between winter and spring equinoxes. Indeed, although Brigid was nominally a historical figure who lived in the 5th-6th centuries, there was also an older, Irish, or Celtic goddess of the same name and the feast effectively amalgamates the two.

It’s not a big feast day for us Brits, but as Fran and myself both have Irish great-grandparents, it’s a good excuse to try a recipe.

Barm brack is one of the breads that originally would have been made with yeast from brewing, but these days you can either make a yeasted version, ie more an enriched bread, or a chemically leavened one, ie more a fruit cake. Several months ago I accidentally bought an 8kg sack of self-raising flour, so as much as I like yeasted breads, I made the latter, as part of my efforts to use it up.

If it’s not St Brigid’s Day or Imbolc or Halloween, don’t worry – you can still make this brack, and just call it a tea brack, a relative of the other similar baked goods known as tea breads in English.

Oh, and while researching recipes, I found some that were adamant you had to bake in a round tin, some that were free-form (yeasted) loaves, though the consensus seems to be to bake in a loaf tin, which makes sense as you can then slice it and spread it with butter and eat it for afternoon tea.

250g dried fruit – currants, raisins, sultanas or a mixture
300g black tea. We used Earl Grey for that citrus tang from the bergamot
1 medium egg
50g butter, melted
140g sugar, soft brown
270g self-raising flour, or 260g plain/all-purpose flour sifted together with 2 tsp baking powder
Some spice, to taste
Pinch salt
50g candied peel

1. Put the currants/raisins/sultanas in a bowl and pour over the hot tea. Leave it for a few hours, or overnight, so the fruit plumps up a bit.
2. Preheat the oven to 180C, or 160 if you have a fan. That said, my fan oven is pretty puny, so 170C seemed OK. Basically, a medium oven.
3. Grease and line a 900g/2lb loaf tin.
4. Put the flour in a large bowl, add a bit of spice if you like (I used cinnamon, a few grates of nutmeg and a pinch of black pepper, which is probably unconventional, but seemed appropriate) and the salt.
5. Add the sugar. I used soft brown and a bit of dark muscovado that was hanging around.
6. Add all the rest of the ingredients, and stir to combine. The resulting batter will be pretty sloppy.
7. Pour into the tin and bake for about one and a quarter hours, turning down the heat slightly and covering the loaf with foil if the top is browning too much.
8. When it comes out of the oven, you can brush it with a simple sugar syrup made from a few tablespoons of water and a few of sugar, dissolved then boiled quickly.
9. Turn out, allow to cool and serve.

Funny, I never much liked fruit breads and cakes, but I’m increasingly enjoying them, and this was lovely. We ate several slices, sitting around with our friend Liv, drinking gallons of tea. I was tempted to open an ale, as one source I read insists you have it with ale; which would make sense, but only a rich, malty ale, without too much newfangled hoppiness.

I’ll make a yeasted version come Halloween, but we’ve got spring and summer first, so I’m not wishing the year away on this cold late winter day.

Barmbrack 2

* Her name is also spelled Bride, and some suggest Saint Bride’s Well, and Bridewell Palace (mostly destroyed in the Great Fire of London) and St Bride’s Church in the City of London take their name from her too, possibly via Irish monks who came to England to convert the heathens.

7 Comments

Filed under Baking, Breads, Cakes, Feasts, Recipes

Sticky toffee pudding, two recipes

Sticky toffee pudding, vanilla ice-cream

The past three weekends I’ve done sticky toffee pudding for Sunday lunch. This is in part because it’s a delicious pudding, but also because, well, January is a horrible time of year in Britain: Christmas festivities are behind you, it’s cold, it’s dark, it’s dank. If there’s a time of the year when you can justify indulging in sweet stodge, it’s now, you need that carb comfort. Save your de-toxes and dietary self-deprivation for a nice time of the year – May or June say, when there’s new life, new growth, longer days, more light.

Sticky toffee pudding is usually made by baking a batter, which gets its character from the inclusion of dates that have been soaked in boiling water, with a toffee sauce poured over the finished cake. The past few weeks I tried Felicity Cloake’s recipe, which is great, but not perfect (there’s not enough sauce for starters) then my own baked version (below). But it got me thinking, what about a steamed version?

I grew up eating treacle sponge pudding, a steamed pudding where you put golden syrup into a pudding basin, then cover it with a batter and steam it. The result is genuinely sticky, and lovely, and a must in winter. I wanted to try the same with sticky toffee, putting some of the sauce into the basin before cooking to give a similar result.

Steaming is an old-fashioned way of cooking puddings that’s not that common now. It takes longer than baking, so make sure you check the timing of your meal as it’s always nice to serve a steamed pudding straight away, turned out and freshly oozing and steaming. When I made this on Sunday, to accompany a bonanza of pork smoked by Fran and her brother Al, I failed miserably with this as we were playing in the park and I left it too late. This one is made in a 1.2 litre pudding basin, so it takes a while for the heat to cook the batter all the way through: mine took four hours.

This sort of cooking is especially good if you have a range cooker or woodburner, where a pan can just steam away quietly with no extra energy demand. We’ve got an induction hob now, which is very energy efficient, so steaming is a good choice. On more conventional cookers, too, it’s no so bad, as it only requires a low flame.

Sauce
300g cream
100g caster sugar
100g dark muscovado sugar
100g butter

Batter
240g stoned dates, chopped
250g boiling water
1 teaspoon / 7g bicarbonate of soda

175g butter, softened
80g caster sugar
80g dark muscovado sugar
3 medium eggs, beaten
175g self-raising flour [or 170g of plain/all-purpose flour and 1 1/2 tsp baking powder*]
1 tsp vanilla extract
Grate of lemon zest

1. Grease a 1.2 litre pudding basin.
2. Put the dates and bicarb in a bowl, pour over the boiling water and leave to soak for at least 10 minutes.
3. Make the sauce by combining the cream, butter and sugars in a saucepan and heating slowly on the hob. When all melted, increase the heat to a boil and cook for 5 minutes.
4. Put about 4 tablespoonfuls of the sauce in the base of the basin and leave the rest in the pan for serving.

Cream butter and sugars

5. Make the batter by creaming together the butter and sugars until light.
6. Add the beaten egg, along with the vanilla and lemon zest, a little at a time. Add a little of the flour if it starts to curdle.
7. Sieve in the rest of the flour and fold it through.

Add the dates

8. Pour all the date gloop into the batter and blend. It’s not the nicest looking batter, but don’t worry, it’ll taste great.
9. Put this batter into the basin.

Seal the basin

10. Cover the basin with a piece of foil or parchment, with a pleat in it, and tie a piece of string around the rim, to secure.
11. To steam the pudding, I just use a vegetable steamer set over a pan over simmering water, but you can also use a large pan, with a heatproof plate set in the bottom, and filled with water to half-way up the pudding basin.
12. Steam for about 3 1/2 hours. If it’s not cooked through it can collapse, ruining your ta-da! moment, so take the basin out of the steamer, remove the string and check the mixture. You should be able to see very clearly if the batter hasn’t quite turned into sponge pudding yet. If it hasn’t reseal the foil and continue to steam.
13. When the pudding is almost cooked, warm up the sauce again.
14. Turn the pudding out onto a warmed plate, and serve immediately. Either pour the sauce over the pudding before cutting it, or pour the sauce over individual wedges. For added decadence, add a blob of whipped cream, clotted cream or vanilla ice-cream.

Invert the basin

Remove the basin

Sticky toffee pudding - drizzle with sauce 1

Sticky toffee pudding - drizzle with sauce 2

Sticky toffee pudding - drizzle with sauce 3

The result is good. It’s considerably more sticky than a normal, baked sticky toffee pudding, which relies on the sauce for any stickiness. This is sticky all the way through, it’s denser, gooey, oozey. I’m not saying it’s better, it’s just suprisingly different considering how the flavours are the same: it’s just a question of texture.

Baked version

Make them both, compare, enjoy the sugary, stodgy winter foods!

Batter
240g stoned dates, chopped
250g boiling water
1 teaspoon / 7g bicarbonate of soda

120g butter, softened
80g caster sugar
80g dark muscovado sugar
4 eggs, beaten
1 t vanilla essence
Grate of lemon zest
240g SR flour

Sauce
300g cream
100g caster sugar
100g dark muscovado sugar
100g butter

1. Preheat the oven to 180C.
3. Put the dates and bicarb in a bowl, pour over the boiling water and leave to soak for at least 10 minutes.
3. Cream the butter and sugars, then add the beaten egg, along with the vanilla and lemon zest, a little at a time. Add a little of the flour if it starts to curdle.
4. Sieve in the rest of the flour and fold to it through.
5. Pour all the date gloop into the batter and blend.
6. Put the sloppy batter in a 22cm-ish square tin lined with parchment and bake for about 50 minutes or until risen and firm and a skewer comes out clean. If it’s starting to brown too much but not baked through, cover with foil and leave in the oven some more.
7. Meanwhile make the sauce by combining all the ingredients in a saucepan, heating them to melt. When all melted together, bring to the boil and cook for about 5 minutes.
8. When the cake part is baked through, remove from the oven.
9. Serve the cake warm, cut into chunks, with the sauce poured over and a blob of thick cream, ideally clotted cream, or with vanilla ice cream.

Enjoy!

Oh, and for any North Americans struggling with my British English use of the word “pudding”, check out this post.

* Converting plain/all-purpose flour to self-raising involves replacing 5% of the flour with baking powder. I wrote a whole post on it here. As 5% of 175g is 8.75g, which is a bit awkward. So as a teaspoon is 5 ml, or effectively 5g of powder, let’s just call it 1 1/2 teaspoons (sure, that’s closer to 7.5g, but it’ll be fine when steamed. If you’re fussed, just heap up your teaspoon a bit).

20 Comments

Filed under Baking, Puddings & desserts, Recipes