Category Archives: Recipes

Maize bread, pane di mais

sliced

Maize, mais, Zea mays – the cereal cop mostly commonly known these days as “corn”. Although my brain still can’t quite embrace that as in British English “corn” is a more generic word for cereal grain, specifically in England it’s traditionally used to refer to wheat grain. Etymologically, it apparently comes from the old Germanic and Norse word korn meaning “grain”.

The word corn still makes me think of corn dollies – forms and figures woven in Britain from the harvest’s last sheaf of wheat, ryes, oats or barley. Although wonderfully pagan (they were believed to contain the fertility of the grain over winter, before being ploughed back into the ground with the sowing of the new season’s crop), they were still making these things for harvest festival and including them in displays in church during my Christian upbringing.

Meira flour

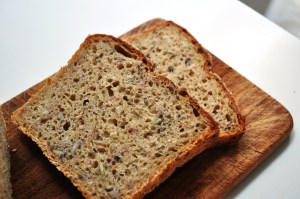
Anyway, here’s a maize bread. It’s not a cornbread, as that name’s already taken by a staple of the US South, and, well, this is a very different proposition. This one is based on a Dan Lepard recipe in his essential baking book The Handmade Loaf. Apparently Lepard was inspired by pane di mais of northern Italy. Which doesn’t surprise me, given the importance of maize and polenta up there, but I’ve never encountered a maize bread down here in Roma. He also talks about it being a “yellow bread”, but I made mine using Mulino Marino‘s ‘Meira’, which is surprisingly pale and white. With rustic dark bits – it’s an organic wholegrain (integrale) flour, made with maize dried by the wind and sun and stoneground, according to the spiel on the label.

Incidentally, some of the Mulino Marino range is now available in the UK through the excellent Bakery Bits online shop. I’ve got mixed feelings about this as I’m increasingly trying, as much as possible, to use the produce of the area I’m living in, or at least the country, as food transportation is a serious contributor to climate change. Although the 2006 book is dating, I highly recommend Michael Pollan’s The Omnivore’s Dilemma, which talks a lot about the fossil fuel factor in food production and transportation, and also goes into the horrifying story of how, at an industrial scale, maize has become an insanely inefficient and illogical (in calorie terms) primary crop. Indeed maize is the second biggest agricultural product in the world, with much of it used to produce high fructose corn syrup, a key driver of the obesity epidemics of the US and UK etc.

forming dough maize loaf

I’d like to imagine the maize that was used to make my Meira flour is a world away from the quietly apocalyptic industrial plains of maize in the US Midwest, China and Brazil. Certainly Italy’s not a major maize grower – despite the historical role of polenta here, the country is too generally mountainous to be caught up in modern industrial agricultural practises on the epic scale found in these larger nations. (In 2011, it produced around 9.7 million tonnes, compared to 313 million tonnes grown in the US. Source: FAOSTAT)

So yes. When I’m living back in the UK, the whole locavore thing is going to be an interesting challenge after living in Italy, place of eternal citrus and a umpteen flour varieties. (I am genuinely worried – the British weather was always haphazard, but climate change is really affecting it, with 2012 apparently devoid of a summer, and much of the British grain harvest ruined by the damp. “It’s been a soul-destroying year for farmers growing crops.”)

Anyway.

Back to the bread.

dough ball

I’d made a version of this one before, almost exactly three years ago. That time, I used a Mexican style maize flour – masa harina. Reading about it all now, I realise that although masa harina and farina di mais are both basically flours made with maize grain, they’re very different propositions. The former has been made with grain that’s been “nixtamalized”: soaked with slaked lime. This alkali liquid changes the molecular structure and means the resulting flour is easier to make into a dough (notably a corn tortilla dough). It’s all a bit technical for me. I’m sure Jeremy Cherfas could explain the chemistry properly.

well risen

The Meira flour is more for polenta, I believe, and needs to be cooked up with water. Which I didn’t exactly do. Food for thought for next time. The bread turned out okay. Even if I’m still really annoyed with myself for losing my moulding mojo. A lot of the freeform bread I’m making at the moment just collapses when I take it out of the proving bowl or basket. This one was no exception. Furthermore, I’m not getting great oven spring. Grrr. Annoyed.

bloody discus

But it tasted good. And, Googling pane di mais now, even one of the Italian versions I found had the old discus form factor, so I’m not the only one (see this fairly low hydration one, made with 500g grano tenero 00, 300g maize flour and 450ml water). Another other Italian one, here, seems to be 100% hydration – 500g maize flour, 500ml water – though it appears to be tin-baked, with some nice oven spring. If it the one on the left of the pic. Not sure. Then there’s a very different version here, made in more of a challah form and flavoured with rosemary.

Anyway. Again. This post is getting long. People tell me not to write long and ramble, but sod that. If I can’t do it in my own blog post, and can’t me my true side-tracking self, what’s the point in blogging?

bloody discus baked

The recipe:

1. Mix together 50g polenta flour / farina di mais and 100g water.
2. Cook it together in a pan, stirring, then turn out to cool.
3. Crumble, squish and squash the polenta up into 300g warm water.
4. Add 60g yogurt and stir.
5. Add 15g fresh yeast (lievito di birra) and stir well.
6. Stir together 200g maize flour (in this case, Meira farina di mais), 300g strong white bread flour and 8g fine sea salt in a large-ish bowl.
7. Add the liquid to the flour and bring to a dough.
8. Knead reasonably well and bring to a ball.
9. Rest for about 10-15 minutes, then give it another knead.
10. Repeat this process 5 times, then leave the dough to prove for about half an hour, until doubled in size.
11. Gently form a ball.
12. Line a 25cm (10 inch) bowl with a cloth, rubbed with flour. Put the ball of dough, seam-side up, in the bowl and cover with the cloth. You can even use a shower cap over the bowl to keep the nice warm healthy fermenty atmosphere in, a tip I learned from my fellow ex-pat Roman baker Krumkaker.
13. Prove again until doubled in size.
14. Preheat oven to 220C.
15. Gently turn out the dough onto a baking tray lined with parchment sprinkled with more farina di mais or polenta.
16. Cut a grid pattern into the dough with a sharp knife or lame.
17. Bake for around 50 minutes. I turned my oven down to 200C after around 25 minutes, but every oven is different.
18. When baked, cool on a wire rack.
19. Eat – with lots of salad and your finest local cheeses. We had some great sheep and goat milk cheeses from the farmers’ market near the Circus Maximus. I always think of Charlton Heston and Ben-Hur when I’m down there, even if in that film the race took place in another circus, in Jerusalem, and even if Rome’s Circo Massimo is basically just a scrappy field with very little in the way of remaining structure.

crumb CU

2 Comments

Filed under Breads, Recipes

Beer-battered fish and chips with mushy peas and tartar sauce

aerial photo

This post perhaps takes the blog on a slight tangent, but what the heck. It involves beer. And the project was an excuse to buy a selection of beers from a new shop on Viale Quattro Venti in Rome (number 265; it’s a branch of the small chain Gradi Plato). It’s one of a crop of shops that’s been springing up in the time we’ve lived in Rome that specialise in selling international and craft beers.

This guy had a global selection, so I asked him for something Italian, and light and golden, as I wanted to use it to make batter… and drink. We discussed various things, and although he didn’t really seem to understand the term “golden ale” (though I have seen it on other beer menus here), we bought a pils (that is a Pilsner lager), an APA and a wheat beer.

lineup9 md

Now if only I could remember the name and address of the shop. I can’t. But it’s here on streetview, the righthand closed shutter.

Anyway. As strangers in a strange land, we occasionally crave the foods of home. In this case, we’re Brits, and I’ve been craving fish and chips. You could say that the Roman filetto di baccalà when served with patatine fritte is basically the same thing, but… well, no. Just no. Filetto di baccalà is made with salt cod, and while it is battered, it can be made too far in advance meaning the batter can be flaccid, the fish mushy. Plus, I just need my condiments and sauces. It always bemuses us that while Romans have such a passion for deep-fried goodies – fritti – they tend to eat them dry and unaccompanied. A plate of fritti like suppli (rice balls with mozz in the centre, coated in breadcrumbs and deep-fried), fiori di zucca (zucchini/courgette flowers stuffed with mozz and anchovy, deep-fried in batter), and various fried animal bits like animelle (sweetbreads) really ought to be eaten with a nice tangy sauce, something involving tomatoes and peppers, like a tangy chili jam. Even ketchup would be nice. But no.

This craving for fish and chips means I’ve been experimenting with making it at home. I’d only tried this a few times when we lived in the UK as, frankly, why bother in a land of chippies and gastropubs selling fish and chips?

I read around for good recipes and then broadly went with Felicity Cloake’s advice from her “How to cook the perfect…” column in the Guardian. Though her recipe makes too much batter for my needs. And I forgot to chill the flour. Apparently having all the ingredients as cold as possible makes for a lighter batter, but mine sufficed just with cold beer. Of the three beers I bought, I used the pils, reasoning that it was more effervescent, and would help keep the batter light. Plus, I don’t actually much like pils to drink so was more keen on drinking the other two.

I used a Madonna Pils from Free Lions in Tuscania, near Viterbo, Lazio, a brewery founded by Andreas Fralleoni after a career in the banking industry. Leaving behind the evils of banking to make craft beers? Well done that man. (They only have a holding page online at the moment, but it features their funny little logo.) So while I found this pils a bit acrid and hoppy to drink, it made an excellent batter ingredient.

whisking batter

Beer batter recipe

This makes enough for about 4 medium sized fillets.

200g plain / all-purpose / 0 or 00 flour
1/2 teaspoon baking powder
1/4 teaspoon fine sea salt
280g cold beer – preferably something light with a good sparkle

1 Preheat the cooking oil. I used sunflower oil. The fat you fry in is a whole other argument. A true fish and chip aficionado would say it has to be beef fat/dripping, but, well, sod that. Sunflower oil is fine and doesn’t conflict with the flavour of fish.
2 Sieve together the flour and baking powder and add the salt.
3 Whisk in the beer to achieve a thick, creamy consistency.
4 Batter the fish and deep-fry straight away.

5 Fry for about 8-10 minutes. This will depend on the thickness of the fillets. You want a nice golden-brown, crisp batter.

deepfrying

The last time we experimented with this, Fran was in charge of buying the fish. As the names of the fish on our local market stall remain such a challenge (she clearly didn’t refer to my handy list of fish names in Italian, English and Latin), when she explained what she wanted the fillets for they persuaded her to buy palombo. Which was unfortunate as this may well be small, potentially endangered species of hound shark.

This time round, I was in charge. Buying “sustainable” fish is always a tricky proposition, and frankly something that’s subject to a lot of greenwash and disinformation. My loose rule of thumb is to avoid tuna species, avoid monkfish species, avoid cod, and generally stick with things like anchovies and mackerel, ideally caught by small, local fishing boats.

In this case, I ended up buying some fish the vendors referred to as “local”: musdea, aka mostella, which I believe is a type of forkbeard, a relative of cod, Phycis phycis or Phycis blennioides. Although neither are on the IUCN red list (they’ve not be assessed yet), the latter species is listed as one to avoid on the UK’s Marine Conservation Society site. Hopefully it’s not been so overfished in the Med, but I know that’s a vain hope. The only consolation is that we don’t do this too often. Sustainability is of course about making the right choices, but for a society like ours, predicated on over-consumption, realistically it’s also about doing the wrong things less frequently.

Anyway. After I’d fought the fillets to remove the bones, this forkbeard fried up really well. I don’t have an oil thermometer (though I would like one of those fancy IR guns, available from a corporate tax-dodger not very near you), so I just played it by ear. I did three batches, with the second two pretty much perfect. Apparently you want 185C or thereabouts for deep-frying fish in batter.

Fish & chips and ale

It went down very well with the other beers I’d purchased: La 68 from Math brewery in Florence, Tuscany, and Runner Ale from Pontino brewery, which seems to be part of All Grain SRL in Latina, southern Lazio.

Math don’t have a proper site up yet, and I don’t know anything about them, but I love their style already. The design is cool and La 68’s label includes a funny little fellow with a speech bubble with this beguiling epigram: Il disordine é l’ordine meno il potere, “Disorder is order without the power/means/ability” The beer itself was a fresh summer beverage: a 5% wheat beer whose ingredients also include spezie, “spices”. I’m not sure which, but it had a nice limey flavour and subtle hoppiness.

La 68

Like La 68, Runner Ale isn’t in my Italian craft beers guide, but it’s similarly very drinkable: notably because, unlike many of the Italian craft beers I encounter, it’s not overly strong, at only 4.5% ABV. It’s an (Italian) American Pale Ale. APA style beers seem very popular in the Italian microbrewery scene and, despite me being British, it’s a style I’m really enjoying at the moment. Italian APAs are often light yet full-bodied, tasty without being aggressively bitter or hoppy. And as with the La 68, the Runner Ale’s bottle also comes with a quirky quote, in this case Come tuo avvocato ti consiglio di andare a tavoletta. It’s attributed to Dr Gonzo, Hunter S Thompson’s creation, and I think it means “As your lawyer, I advise you to go to the bar.”

runner ale

Sides and condiments

As you can see, I went the whole hog here and did chips, tartar sauce and mushy peas. I’ll admit the chips were not proper chips. As I don’t have a proper deep-fat fryer or even a pan with a frying basket, I couldn’t be bothered. I’d read up Cloake and discussed proper chips with friends (the knowledgeable Oli Monday saying they were best when “oil-blanched”, frozen, then deep-fried a second time) for my last experiment, but this time I just cut chip shapes and roasted them, without any pre-cooking, with plenty of sunflower oil and salt. They tasted good even if they weren’t proper chips.

nice spread

As for the tartar sauce. I just had to. As I said above, fried food needs condiments. One of things that drives me made about British pubs is getting tartar sauce in those tiny sachets. I need about 10 per meal. So here I made a decent bowlful for the three of us.

Tartar sauce ingredients
1 egg yolk
1 cup / 240g oil (half-half sunflower oil and extra virgin olive oil)
1 teaspoon of Dijon mustard
A good handful of cornichons or gherkins, roughly chopped
A good handful of capers, rinsed, soaked, drained, squeezed out and roughly chopped
A good handful of parsley, roughly chopped
Some water, lemon juice and salt and pepper

1 Put the yolk in a bowl and whisk it a little with the Dijon.
2 Start adding the oil, whisking constantly, starting with just a few drops.
3 When the oil and yolk starts to emulsify, you can pour in the oil, whisking continuously.
4 When the mayo starts to thicken, thin it down with lemon juice and water, to taste.
5 Add the cornichons, capers, parsley and taste – your capers could be quite salty still, so you might not need to add more salt.
6 Add more lemon juice to taste.

And last but not least: mushy peas

Years ago, there was a great ad campaign in Britain that called some industrial brand of mushy peas “Yorkshire caviar”. Funny, if not entirely true. The industrial stuff, made with dried marrowfat peas (that is, big old starchy peas, Pisum sativum) rehydrated and dyed green, can be pretty nasty. Homemade mushy peas, however, are delicious.

To serve 3-4

1 About four good handfuls of peas. I used half-half frozen and freshly podded. (It’s the end of peas season here; if it’s not pea season, just use frozen peas.)
(Yes yes, I’m not being very accurate here but I didn’t bother to weigh any of these things. Say about 350-400g)
2 Place the peas in a pan with a good knob of butter, say 30g.
3 Add a handful of fresh mint, roughly chopped.
4 Add enough water to cover then bring to the boil and simmer for about 10 minutes, until the peas are tender.
5 Drain (keeping the cooking water) then puree with a zizzer (er, hand-blender), food processor, or just mash with a work to the desired consistency, adding more of the cooking water as necessary.
6 Add a bit more butter if you fancy it and season to taste with salt. You could add black pepper, but frankly with something so lovely and pea-y and minty, I don’t think it’s needed.

Serve it all together, warm and lovely. With good quality craft beers – chosen according to your taste and the season, naturally.

9 Comments

Filed under Ale, beer, Other food, Recipes

Durum wheat bread with linseed and farro grains

grano duro, farro, linseed bread

Another one of my bread experiments. For some reason I’d ended up with two packets of farina di grano duro – that is, flour made from Triticum durum wheat (with duro meaning “hard” in Italian and Latin respectively.) It’s more typically used for making pasta, but it seems to be a reasonable bread component too and is used fairly widely. I have used it in the mix with good results before, such as in my Absurdly wholesome multigrain, multiseed loaf, but this one made with a much higher proportion of farina di grano duro.

So anyway.

100g farro grains. I used farro perlato. With farro here meaning farro dicocco (Triticum dicoccum), also known in English as emmer. You could use any type of wheat grain (such as spelt grains), or even, say, pearl barley.
50g linseed (“good for you mane and tail” as my friend Stephen McGrath of Newton Livery, NZ, once told me)
8g fresh yeast
300g cooking liquid from the grain (see below)
80g leaven
100g strong white flour (I used what’s known as “Manitoba” in Italy)
400g farina di grano duro / durum wheat flour or fine semolina flour
10g fine sea salt

1. Cook the farro grains in water until they’re soft but a little chewy. This can take around 20 minutes, but will more likely be more. Keep tasting them to check.
2. Strain the cooked grains, reserving the cooking water.
3. Weight out 150g of the cooked farro grains. (You can use any leftovers for other breads, or add them to salads.)

Cooked farro grain
4. Grind the linseed to break it up a bit but don’t completely pulverise. You can use a pestle and mortar, coffee grinder or even a liquidiser goblet.
5. Cover the broken linseed with a little of the cooking water. (This will help soften it up slightly before it’s added to the dough, but arguably isn’t strictly necessary.)
6. Combine the yeast, 300g of the grain cooking water and leaven and whisk together.
7. Put the flours and salt in a large bowl and mix slightly to distribute the salt.
8. Add the yeasty mix to the flours and bring to a dough.
9. Turn out onto a lightly oiled work surface and knead to combine. As this bread is using so much durum wheat, the dough won’t be as springy and stretchy as one made with a strong white bread flour.
10. Form a ball and return the dough to the bowl (cleaned). Rest for ten minutes, then knead again briefly. Repeat this process once more.
11. Gently stretch out the dough, then add the seeds and grains. Knead to combine.
12. Leave the dough to prove in a bowl covered with a clean cloth until it’s doubled in size. Times will vary, according to the temperature and the liveliness of your leaven.
13. Once the dough has doubled, take it out of the bowl and knead briefly and gently before forming a ball. Cover and rest for 10 minutes.
14. Tighten up the ball, then place in a proving basket or bowl lined with a floured cloth, with the smooth surface downwards and the “tucked” surface upwards.
15. Cover and prove again until doubled in size.
16. Preheat your oven to 220C.
17. Turn out the dough on onto a lined baking tray.
18. I brushed mine with egg white as I had some spare, but you could use whole egg or milk to give slightly different glazes.
19. Cut a cross.
20. Put in the oven and bake for 20 minutes, then turn down the oven to 200C and bake for a further 20 minutes.
21. If it’s baked enough (tap the bottom, check the colour; don’t be afraid to overbake a bit more if you’re not sure it’s done), take out and cool on a wire rack.
22. Eat as you see fit.

Prosciutto sandwich

Leave a comment

Filed under Breads, Recipes

Lemon kumquat cake with citrus curd and mascarpone

Okay, okay – I know it’s been pretty quiet round here lately but I’ve been busy working in the kitchen of the American Academy in Rome. Three intense, informative months at the Rome Sustainable Food Project came to a close last Friday. So without long days podding fava beans and agonising over the perfect cacio e pepe, some life will now return to Bread, Cakes and Ale.

As the RSFP was founded by renowned US chef and activist Alice Waters it seems only fitting that my first post in a while is based on one of her recipes. Given that I’m a cake obsessive, the first recipe I tried from The Art of Simple Food just had to be her core cake – the 1-2-3-4 Cake, which she says is the sort of simple, flexible recipe that can be manipulated to various ends: “Unadorned, it makes a simple tea cake perfectly suited for a garnish of fresh fruit; decorated, it can be anything from a birthday cake to a wedding cake to individual cupcakes.”

Also, as the RSFP is predicated on the ideas of a diet based on local, seasonal food, as well as not wasting food (all logical principles that our greedy, deluded species needs to acknowledge more), my version involves a few relevant twists.

Lemons are available pretty much the whole year in Italy, thanks to different varieties with staggered seasons. So lemons played a part. Also, we have a kumquat tree in our garden, with the fruit coming into season, so they’re in there too. Plus, I used some of the kumquats a year or so ago to make a flavoured vodka. Although the booze itself is long gone, the steeped zest has been hanging around in my kitchen looking for a purpose in life, so that played a part too.

Finally, though, before the recipe, a gripe. The Art of Simple Food is a beautiful book, essential reading for anything interested in food who wants to commit more to sustainable eating. However, all its recipes are in cup measures. This frustrates me. Cups are awkward and inaccurate – just Google around for conversions, and you’ll find they vary according to source. Only by a few grams here and there, but it’s enough to mess up the chemistry of something that needs accuracy like a cake recipe.

Cups are especially baffling when talking about things like butter – a cup of butter? How does that work? Do you have to melt it, fill the cup, then let it set up again? Or just squash a load of grease into a cup, then painstakingly scrape it out again? (Okay, I’m half-joking.)

I’ve said it before, but will say it again, grams (aka grammes) make life so much easier. For consistency and for scaling up recipe when necessary you can’t argue with a decimal system.

Yes, yes, I know that the cake is named a 1-2-3-4 cake for the quantities of ingredients, and yes yes, I can imagine a frontier mom in her gingham apron making it thusly with an old tin cup, but it’s the 21st century people. Electronic scales. Grams. Simple.

So anyway, I found an actual cup in our kitchen that conforms to the standard US cup, which is half a US pint or 236.59ml, then went through the ingredients weighing them on an electronic scale. (Again, I do liquid measures in grams too – it’s consistent, it’s more accurate, and it’s easy with a jug, electronic scales and a tare function.)

Having said all that, things like half a teaspoon of a powder don’t convert so well so I’ve included them in both formats.

Okay. The recipe(s).

The cake

Ingredients
4 eggs
240g milk
375g plain (all-purpose) flour
4 teaspoon (20g) baking powder
1/2 teaspoon (2.5g) salt
400g caster sugar
225g unsalted butter
Grated zest of 3 lemons
Grated zest of 5 kumquats
Finely chopped zest of 5 kumquats soaked for a year in vodka with cinnamon and sugar. (Okay, you’re very unlikely to have this ingredient. Don’t worry… just leave it out!)
Juice of half a lemon, around 20g

Preheat the oven to 180C.
Grease and base line two 21cm cake tins.

Method
1. Sieve together the flour and baking powder.
2. Separate the 4 eggs.
3. Beat together the sugar and butter until light and fluffy.
4. Gradually beat in the egg yolks.
5. Beat in all the zest and lemon juice.
6. Alternately fold in the flour and milk, though don’t beat or over-mix.
7. Whisk the egg whites to soft peaks.
8. Add a third of the egg whites to lighten up the mixture, combining well but again without over-mixing.
9. Gently fold in the rest of the egg whites.
10. Divide the mixture between the cake tins.
11. Bake for around 35 minutes. The cakes should feel firm to the touch and a skewer or cocktail stick should come out clean when inserted.
12. Cool in the tins then turn out onto a wire rack and cool completely. Wrap them if you want to use them the next day. The baked cake keeps well.

The filling

250g mascarpone
Citrus curd made with another recipe from The Art of Simple Food. Read on…

Ingredients
3 lemons, washed and dried
5 kumquats, washed and dried
2 eggs
3 egg yolks
2 tablespoons of milk
65g caster sugar
1/4 teaspoon salt
85g unsalted butter, cut into small pieces.

Method
1. Zest and juice the citrus fruit. You probably won’t get much juice from the kumquats, but don’t worry, a hint is fine and the oils in the zest are doing much of the work anyway.
2. Lightly beat together the other ingredients, except the butter.
3. Stir the juice and zest into the beaten mixture.
4. Add the butter and put into a small, heavy-bottomed non-reactive saucepan (eg stainless steel, ceramic or glass; not aluminium or copper)
5. Cook the curd mixture very slowly, stirring continually, over a low heat. Do not overheat or let it sit too long without stirring or the egg will start to curdle. If it starts to curdle, you can plunge the (bottom of) the pan into a sink of cool water to cool it off, then press the mixture through a sieve or fine strainer and continue. I know this because it’s what I did… Curds aren’t really my forte, but this one worked well in the end.
6. Cook until the mixture starts to thicken and will coat the back of a metal spoon and a line drawn with a (clean) finger will hold its shape. This is called a nappe. I didn’t know that word until yesterday, so thanks to Cameron for the education.
7. Pour the curd into a bowl, jug or jar to cool. It’ll thicken when it’s cooled further in the fridge. As you can see from the photo, mine was still a little runny, but it was pretty good after a few hours more in the fridge.

Assembly

I think I fell at the final hurdle slightly. I wasn’t very refined with the mascarpone, so I’ll write here what I should have done, not what I did.

1. Beat the mascarpone slightly to soften it up. If by any freak chance you have any kumquat liquor, you could beat a little in. Or use a little limoncello.
2. Spread the top of the lower cake with curd. You can slice off the top if it’s peaked too much in the oven, to make a more level surface. I used about half of the curd I made from the above recipe.
3. Spread the undersize of the upper cake with mascarpone.
4. Sandwich the cakes together.
5. Sprinkle the top with sifted icing sugar (aka powdered sugar, confectioners’ sugar or zucchero a velo – “veil sugar”)
6. Eat large slices. You can serve with extra curd too, or make a swoosh on the plate if you’re that way inclined.

5 Comments

Filed under Cakes, Recipes

Torta Caprese

I see a lot of sachertorte in Roman pasticceria, but the other day I spotted a torta Caprese in the window of a place that seems to just be called Pasticceria Trastevere. It’s a pasticceria. In Trastevere. Not very imaginative. (Specifically, it’s on Via Natale del Grande 50, opposite the wonderful Cinema America building. Currently Occupato).

It’s not a cake I’ve encountered before, oddly considering I love chocolate cakes. And love cakes made with ground nuts. (And considering even a certain middle-class UK supermarket even does a brand version, I discover now.) My friend Rachel described it – and frankly it sounded much like a sachertorte, but without the apricot jam and chocolate glaze. That is a rich, flourless chocolate cake made with ground almonds.

Now that was something I had to try. And make. Without ever having eaten it before.

Pasticceria Trastevere

Some considerations

I scoured the internet for recipes, mostly in Italian. There seemed to be a some variation, notably in the question of what sort of almonds to use. Some used pre-ground almonds (or farina di mandorle – almond flour), some used blanched almonds that you then ground, others used skin-on almonds that you blanched and peeled yourself (a labour intensive job) before grinding, and others used skin-on almonds, ground as is.

Almonds

I liked the idea of the latter, not just as it’s less labour intensive, but because the skins add depth of flavour. (Much like I prefer my peanut butter wholenut, not skinned. Even though peanuts aren’t nuts, of course.)

Almonds, ground

The other key factor with a cake like this is the egg whites. The most important thing is to get the egg whites whisked to soft peaks, then be very gentle when you add the egg white to the nut/choc/fat/sugar/tuorli (egg yolks. Such a nice word. Sounds a bit like “twirly”). Seriously: be gentle when you fold in the egg whites, as this is only your way of lightening the cake, as there are no raising agents and it’s full of fairly dense ground nuts. Sure it’s going to be a fairly heavy cake, that’s the nature of nut-based, flourless cakes, but you don’t want it totally dense and biscuit-like.

Adding the egg whites

I have seen a few recipes with some baking powder, but it shouldn’t really be necessary for a cake with whisked egg whites. Plus, if you’re hoping to make a gluten-free cake, adding baking powder can be problematic. Why? Because baking powder often contains some starch, which absorbs moisture during storage. This can be from potatoes, or corn/maize, but it can also be from wheat. The stuff I’ve got in my cupboard, is clearly labelled: “Ingredients: Disodium Dihydrogen Diphosphate, Sodium Hydrogen Carbonate, Wheatflour (contains Gluten)”.

The other variable is how the other ingredients are combined. Obviously. This is interesting as frankly, I’m not sure it would make much difference if you did any of the following – as long as things are well mixed and you were gentle with the whites.

So, the recipes I read involved these various approaches

1 melting together the butter, chocolate and sugar, then adding the ground nuts, then beating in the egg yolks, and folding in the egg whites.
2 melting just the chocolate. Creaming together the sugar and butter, then adding the egg yolks, then the nuts, and melted chocolate, then the whisked egg whites. (This is how it’s described on English Wikipedia, but not in the majority of the Italian recipes I’ve looked at.)
3 melting together the chocolate and butter, beating together the sugar and yolks, then adding the ground nuts, then the liquid chocolate and butter, then folding in the whites.
4 Reversing the addition of liquid choc/butter and ground nuts. Theconcern here is that if the melted liquid is still hot, it could cook and scramble the egg yolk, unless you’ve cooled it somewhat first. So I’ve plumped for 3.

Some observations

The torta Caprese in Pasticceria Trastevere had slightly sloping edges – ie, it’s not baked in straight-sided cake tins. I was planning to use a 20cm straight-sided cake tin for this, to make a deeper cake, but my wife had left it at work. Which turned out to be helpful in the end, as I looked around for other tins and found one (not mine I believe, but belonging to our landlady) that seemed more appropriate, despite being somewhat shallow. I suppose it’s more like what we’d call a flan or pie tin in the UK, though it’s not got fluted sides.

Components 2

Also, the version I saw in Pasticceria Trastevere had flaked almonds on the top. Though this top was clearly the bottom, which was then inverted for serving. This seemed like a lovely idea, though I didn’t really use enough almonds, so I also decorated the finished cake with some icing sugar, which seems to be the norm.

Use good dark chocolate, at leat 65% cocoa solids. I used Venchi Cuor di Cacao 75%. Serious stuff.

Serious chocolate, chopped

One final note. Some of the recipes also call for some Strega (“witch”), a digestivo liquer traditionally made with herbs, but these days is probably mostly just made with E-numbers (as most of the “traditional” liquers seem to be). Not many of the recipes I’ve looked at, and indeed none of the Italian ones, include it. So I’m not bothering.

The recipe

4 eggs, separated
250g almonds, shelled but skin on
200g butter
200g dark chocolate
170g caster sugar
A good handful of flaked almonds

Preheat the oven 180C.

1 Grease and line the base of a 22cm round tin.
2 Generously sprinkle flaked almonds in the base of the tin.
3 Grind the whole almonds to a coarse powder in a food processor. (If you’ve not got a food processor you could, for example, use half ground almonds and half whole almonds that you’ve chopped… fairly comprehensively.)
4 Melt together the chocolate and the butter in a bowl suspended over a pan of gently simmering water.
5 Beat together the sugar and egg yolks. It’s quite a thick mix, but beat until creamy.
6 Beat the ground almonds into the sugar and egg yolks.
7 Add the melted chocolate and butter to the eggy-almond mix and beat.
8 Whisk the egg whites to soft peaks. That is, when you lift up the whisk, and a peak is formed, it sags over slowly.
9 If the main mixture feels particularly stiff, you can beat in one tablespoon of the beaten egg whites. Gently fold in the egg whites.
10 Gently pour into the prepared tin.
11 Bake for around 45 minutes, until firm to the touch. This time will vary according to the character of your oven. With a fan oven, you might want to lower the temp to 160C.
12 Leave to cool in the tin on a wire rack.
13 Turn out and serve inverted. Decorate with sieved icing sugar if you like.

Enjoy.

Addendum, 27 Feb 2013.
I want to try this again, but with an extra egg. Not sure I’ll have time for a while though, as I’ve started volunteering on the Rome Sustainable Food Project, and it’s pretty full-on, hours-wise. After separating four eggs for this recipe the other day, yesterday I seperated 120 for 6kg of pasta… My home baking will be a bit of a back burner for a few months, so the blog might be a bit quiet.

11 Comments

Filed under Cakes, Recipes

Chestnut flour pancakes

Smooth batter

Since discovering chestnut flour for sale here in Rome, I’ve been enjoying experimenting with it. I’ve made some okay breads like this one and this attempt at pane di San Martino. I’ve also discovered it makes a very nice pancake (or crepe, if you prefer). And seeing as yesterday, 12 February 2013, was Shrove Tuesday, aka Pancake Day, it seemed like a good excuse to make a batch.

Chestnut flour (farina di castagne) is surprisingly sweet and apparently it’s also known as farina dolce in Italy (though I’ve never heard that in Rome). Also, as it has nothing to do with wheat or any grain, it’s also gluten-free. I have used some plain flour in the mix here, but that’s partly because I ran out of chestnut flour; the recipe works well with just 220g chestnut flour.

Whisking

I’ll say here and now that pancakes are, of course, hardly sophisticated fare, and furthermore they didn’t photo very well, but, honest, this is  a nice recipe, for both savoury and sweet pancakes.

This makes about a dozen.

2 eggs
280g milk (or ml if you haven’t got electronic scales)
20g (or ml) water, approximately
160g chestnut flour
60g plain flour
Pinch salt
1/2 teaspoon bicarbonate of soda
2 tablespoons of vegetable, oilseed or olive oil

1 Lightly beat the eggs together and add the oil.
2 Sieve together the flours and baking soda, and put in a bowl.
3 Add a pinch of salt.
4 Add the eggs and oil to the dry mix.
5 Add the milk and whisk to combine, adding a little more water if necessary. You want a consistency like single cream.
6 Fry ladlefuls of the mixture in a hot, greased pan. (Thanks to the wife for womanfully managing this step.)

Chestnut pancake

We filled ours with a mushrooms and cream cheese, grated Emmental, and – on a more Italian note – prosciutto. (And although they may look a bit burnt in the below photo, they weren’t – I blame the dark batter and the electric lighting.) Then I finished them off for breakfast this morning with yogurt, banana and honey. But go for your life with fillings – whatever you fancy. What we didn’t do last night was the old-school English pancake day variant of lemon juice and sugar. I think we were too full of the savoury ones.

Savoury pancakes

2 Comments

Filed under Recipes

Absurdly wholesome multigrain, multiseed bread

Multigrain, multiseed wholesome bread
I had a load of cooked farro grains left over, and needed some bread, so this came into being. It wasn’t an entirely happy experience. The dough was very moist and sticky, and I’ve really lost my moulding mojo recently, so there was a bit of a (one-man) scene in the kitchen. Then it didn’t really have much in the way of oven spring*, hence the slightly sad shape. BUT, and here’s the important thing, it tastes great.

It’s a ridiculously wholesome loaf that would make a spongey British “Granary” go and hang its head in shame. It’s firm, moist, with a good crust and eminently satisfying to bite. Great with cheese or for a peanut butter sarnie.

And yes, I might be a food blogger based Rome, but this isn’t a Roman bread. I made it up, in part inspired by Dan Lepard‘s Five-grain loaf (in The Handmade Loaf). As Mr Lepard spent a lot of time in Italy learning his trade, I suspect he took his inspiration for that loaf in part from Italian multicereali (multigrain) breads. So this is a distant cousin to, say, the wonderful multicereali that you can get from Roscioli, or the multicereali I got last week from the Testaccio Ex-Mattatoio farmers market, which the baker called Pane di brigante. He explained he called it that as his area, in the hills south of Rome, used to be full of brandits, brigands.

As I made it up on the fly, these quantities can’t pretend to be exact. You want a nice moisty dough, but don’t get yourself in a lather (like I did). If it feels too wet, add some more flour. And use whatever seeds you have to hand.

400g cooked spelt grains (Dry grain simmered in water until soft, then drained – reserving the cooking water. I used farro perlato.)

Mix in a large bowl:
300g white spelt flour. I used stoneground organic farina di farro bianco.
300g fine durum wheat flour. I used a stoneground organic farina di grano duro.
10g sea salt

Combine in another bowl:
15g fresh yeast, crumbled
100g leaven (100% hydration. I’ve done it with leavens fed on emmer, spelt or modern wheat)
50g honey
350g grain cooking water (tepid, not hot), made up with ordinary water if necessary

Combine in small bowl and add a little water (to soften):
20g linseed (broken up slighty with a pestle and mortar or in a coffee grinder)
20g  poppyseeds
20g  sunflower seeds
20g pumpkin seeds
20g sesame seeds

1 Make the dough by adding the ferment (yeast, water, leaven etc) to the flours and salt mix.
2 Mix well with a spatula or spoon, then turn out on to worksurface.
3 Knead until well combined.
4 Stretch the dough, add the grain and seeds.
5 Fold over the dough, then gently kneed again to combine the grain and seeds.
6 Adjust the dough if it’s too wet or indeed too dry by adding more flour or liquid accordingly.
7 Form into a ball, then leave to rest in a bowl covered with a moist tea towel.
8 After 10 minutes, give it another knead.
9 Rest another 10 minutes.
10 Give it another gentle knead.
11 Return to the bowl, cover and prove until doubled in volume.
12 Turn out the dough, and press it out to equalise the gas pockets. (We always called this “knocking back” in British baking, but that encourages unnecessary violence towards your tender dough.)
13 Weigh dough and divide into two equal portions, each around 850g.
14 Shape each portion into a ball, then leave to rest for 10 minutes, covered.
15 Shape as you like. I was planning batons, but after my tantrum I went with the easy option: tin loaves.
16 Preheat oven to 220C.
17 Prove again until ready to bake: the dough should be wobbly, plump and soft.
18 Brush with beaten egg, sprinkle with seeds. Cut along the length (my cut was pathetic).
19 Bake 20 minutes, then turn down the heat to 200C.
20 Remove from the tins then retun to the oven for another 10 minutes or so. (As the dough was damp, and contained the moist farro grains, I reasoned it could do with a little more time to bake through.)
21 Cool on a wire rack.
22 Enjoy.

(Part of the reason I’m pleased with this one is that it reminds me of the bread made by my friend and sometime cooking mentor Nadia, all the way over there in New Zealand. It looks quite similar to her bread, and even tastes similar despite the distance and different provenance of the ingredients. Arohanui to Nadia and all the Aotearoa whanau!)

Addendum
Making this again today, 6 February 2013, and noticed a few errors, now amended. I also thought it was about time I added bakers’ percentages. So here we go.

Note, the seeds are soaked in water to soften them slightly, but I think the amount is negligible so I’ve not factored it in.

Basic percentages (ie not factoring in the leaven composition)

Ingredient Weight Bakers’ percentage
Spelt grains 400g 67%
Flour 600g 100%
Salt 10g 1.7%
Fresh yeast 15g 2.5%
Leaven (at 100%) 100g 17%
Honey 50g 8.3%
Water 350g 58%
Linseeds 20g 3.3%
Poppyseeds 20g 3.3%
Sunflower seeds 20g 3.3%
Pumpkin seeds 20g 3.3%
Sesame seeds 20g 3.3%

Percentages factoring in the leaven composition (100g at 100%, ie add 50g to water weight, 50g to flour weight)

Ingredient Weight Bakers’ percentage
Spelt grains 400g 62%
Flour 650g 100%
Salt 10g 1.5%
Fresh yeast 15g 2.3%
Honey 50g 7.7%
Water 400g 62%
Linseeds 20g 3%
Poppyseeds 20g 3%
Sunflower seeds 20g 3%
Pumpkin seeds 20g 3%
Sesame seeds 20g 3%

It doesn’t seem like a very high hydration recipe, but bear in mind it contains a lot of cooked spelt grain: and this is very moist.


* Oven spring – the final burst of growth made by bread dough when it goes into the oven. It’s caused by the heat exciting the yeast, which gets all hyperactive, farts out more gas, causing the dough to rise rapidly. Then the yeast dies is killed, when it gets heated over around 60C. Boo hoo. And gets eaten. The horror! You can get better oven spring with steam (it moistens the dough, conducting the heat into it more efficiiently). However, getting reliable steam in a domestic oven is a bit hit and miss, despite what people suggest about pouring boiling water into trays anor using a mister-spray.

2 Comments

Filed under Baking, Breads, Recipes

Mocha ricotta marble cake

Marble cake 2 slices

I don’t drink coffee. There, I said it. I live in Italy, but I don’t like the national drink/quotidian drug. It’s a slight problem for me, as really, the caffè (café) is all about the caffè (coffee), right down to sharing the same word. Having said that, I don’t mind a little bit of coffee flavoured cake-action. I think it’s a fond memory of my grandmother’s coffee-walnut cakes, which I’d happily eat as a small child, while never actually developing a taste for the actual drink.

Oddly, though, I do like really bitter ch ocolate, and other bitter flavours. People have told me this is silly, as the bitterness of a serious dark chocolate is not unlike the bitterness of a good coffee. (My favourite chocolate at the moment is 73 percent cacao with cacao bean nibs.) Although I realise I miss out on a major factor in the Italian socio-cultural dynamic, in many ways it’s good I never developed a taste for it: I’m a fairly twitchy person and a bad sleeper at the best of times. A caffeine habit wouldn’t help.

Anyway. One of my Christmas presents was Short & Sweet, a collection of baking recipes by Dan Lepard, some of which from his ever-reliable column in The Guardian. I had some butter than was threatening to go rancid, so I had to bake something, subito! (Which is Italian for “immediately”, even though in English we use the Italian word pronto – meaning “ready” – to mean “immediately”. How did that switcheroo happen?) It was unsalted, and I suspect they hadn’t washed the buttermilk off the fat sufficiently well.

uniced 2

Browsing the book, I found his Coffee and ricotta marble cake. There’s something eminently satisfying about the mottled crumb of a marble cake, plus coffee and ricotta are quintessentially Italian. We have some wonderful fresh ricotta available to us here. At the farmers’ market in the Ex-Mattatoio in Testaccio (open 9am to early evening Sat, 9am to around 2pm Sun), you can get sheep, cow or goat milk ricotta. Possibly even buffalo ricotta, as you can get buffalo mozzarella (bufala) – the best type, ahead of cow’s milk mozzarella, which is distinguished by being called fiore di latte, “milk flower”.

Dan L’s recipe divides the mixture, and mixes one with strong coffee, the other with marsala or rum. Given my attitude to coffee, I wasn’t entirely convinced by this, especially as I didn’t think it’d make the sponge distinctly dark enough, so I made a coffee/cocoa mix instead. Hence it’s a mocha ricotta marble cake. Which, frankly, has a lovely ring to it too. I knocked back the sugar in his recipe too as quite so much didn’t seem necessary.

Recipe
10g ground coffee
10g cocoa powder
25g boiling water
125g unsalted butter
175g caster sugar
200g plain flour
150g ricotta
3 medium eggs (about 50g each)
2 teaspoons baking powder
25g marsala or rum

1. Preheat the oven 180C.
2. Grease and line a deep loaf time, around 18cm long.
3. Pour the boiling water onto the coffee and cocoa powder.
4. Cream together the sugar and butter.
5. Add about 50g of the flour to the sugar and butter mixture and beat in.
6. Sieve together the remaining 150g flour with the baking powder.
7. Beat the ricotta into the sugar and butter mixture.
8. Beat in the eggs, one at a time.
9. Gently beat the remaining flour/BP into the mix.
10. Divide the mixture in two. You don’t have to weigh it unless you’re especially pedantic.
11. Mix the mocha liquid into one half, the marsala into the other.
12. Put alternating spoonfuls of the mixtures in the tin, smooth down the surface with wet knuckles, and run a skewer or spoon handle through the mixtures to create some marbling. .
13. Bake for around 50 minutes, or until a skewer comes out clean.
14. Cool in the tin for around 20 minutes, then remove and cool on a rack.

To serve
You can serve it dusted with icing sugar or drizzled with a smooth basic water icing made with around 50g icing sugar and cold water. Add the water in tiny amounts and blend until you have a slightly runny consistency.

I did my icing  with a small paper piping bag. They’re nifty little items. This video shows you how to make them, but I would say divide the initial triangle into two smaller triangles as you only need a small bag for such a small amount of icing. Also, for small bags (I’m talking about the length of a finger), you don’t need a nozzle either, just snip the very end off to make a whole of around 2mm and it’ll be perfect for drizzling.

4 Comments

Filed under Cakes, Recipes

Spelt experiments, or When bread goes wrong, and the dilemma of blogging the failures

So I was feeling experimental this week. I’d been both looking at old photos of breads I’ve made the past few years and browsing my favourite baking book, looking for inspiration. One of the breads I liked but haven’t tried too often is a 100 percent sourdough with some potato in the mix. I’d had great results once – a bread with a great, irregular crumb, which is something of a holy grail for bakers like me. It requires a high hydration dough and, generally, a natural leaven. It’s not something I’ve had much luck with lately, but I had done back in Blighty with a better kitchen and more familiar ingredients. I can’t find a photo of the bread in question, but here’s one with the kind of crumb I mean.

Okay, thought I, I’ll try that again – but with farro flour. Indeed, I’m going through a bit of a phase trying to use farro bianco all over the place, where, if I was still living in the UK, I’d use strong white or even plain flour.

I revived my leaven over a few days, then got stuck in. Feeling optimistic, taking photos to record the process, thinking I could proudly blog the results, imagining cutting open a loaf with a crunchy crust and finding that wonderful irregular crumb structure again.

Except it didn’t go well. The bread is borderline terrible. Dense, heavy, and clearly lacking in life, with no oven spring. It tastes strangely like a teabread.

This left me with a dilemma. It’s one that’s probably faced by anyone who likes to make food and blog about it. If you make something, and it’s crap, should you blog about it? You of course want you food to look marvellous when you shove it out here on the interweb. But then I thought, Hang-on, this isn’t a glossy magazine or a recipe book, it’s a blog. It’s record of my endeavours, and not just the successes. So why shouldn’t I blog the failures? Or at least talk about the agonies of deciding whether to go public with the failures. And if by some miracle this is read by experts, perhaps that can give advice. (Yeah, right. Ed.)

So anyway, this is the recipe I used, a variation on Dan Lepard’s Crusty potato bread
250g leaven (mine was fed with farro, 80% hydration)
280g water
25g honey
75g unpeeled potato, scrubbed and grated
500g farro bianco flour
10g fine sea salt

1 Combine the leaven, water, honey and potato.
2 Add the flour and salt and blend to create a wet, sticky dough.
3 Rest for 10-15 minutes.
4 Turn out onto a lightly oiled work surface and give it a brief knead.
5 Return to a lightly oiled bowl and rest for around 10-15 minutes.
6 Repeat this process (it’s Dan L’s process, developed while he worked in a busy kitchen. In some ways it’s irritating – kneading, cleaning up, waiting, kneading, cleaning up, waiting – but in others it’s great. It seems particularly good for handling wetter doughs).
7 Repeat again 2-3 more times, then leave the dough covered for half an hour. Give the dough a fold if you like.
8 Divide the dough into two equal pieces and shape each into a ball.
9 Rest the balls, again covered, for about 10-15 minutes.
10 Shape batons, then place then in proving baskets lined with floured clothes, or if you ain’t gone none, place side my side on floured clothes, covered.
11 Leave again until doubled in size. This will vary according to the temperature of your room, but if it’s warm (around 20C) it’ll be around 4-5 hours.
12 Heat oven to 220C.
13 Turn out the loaves onto a baking sheet lined with parchment and dusted with semolina.
14 Bake for 20 minutes, then turn down the oven to 200C and bake for another 20 minutes.

So anyway, after all that, mine didn’t work. But if you use strong white flour instead, there’s a chance yours could. And if they do, it’s a lovely lovely bread.

Now for some diagnosis, some thoughts about why my bread didn’t work
1 The recipe really doesn’t like spelt flour. Although spelt has a not dissimilar proportion of protein to a strong white bread flour (around 14-15%), it has different proteins, which some sources refer to as “extremely fragile”. Compared to modern wheat varieties, it has less gluten, particularly gliadin, the protein that is integral to making easy stretchy white doughs. I’ve made plenty of decent loaves with spelt in the mix recently (like this one), but I think this is my first 100 percent spelt, 100 percent naturally leavened.
Which leads me to…
2 The leaven wasn’t sufficiently active. I perhaps should have fed and refreshed it over a few more days. Or maybe its current residents just aren’t happy with their conditions. It is Rome after all – so maybe it’s some kind of yeasty sciopero.
3 Or if I didn’t refresh it enough, I should have at least left the dough fermenting longer. It’s the winter, and our kitchen isn’t that warm, probably only around 15C (until I put the oven on). So yes, if it’s cold, it’ll take longer to ferment.
4 Except I also worry that if I left it fermenting too long, the yeasts would finish gorging themselves and any rise achieved would collapse back in on itself.
5 Some sources also talk about how you have to adjust the water. Well, I reduced it slightly from Dan L’s original recipe, and the dough did feel pretty good while I was working it. I dunno though , this place says “Too much [water], and the dough is sticky and weak and will not be able to hold the gasses that are produced during the fermentation process.”
6 Some other random factor. Like some unprecedented chemical reaction between the spud and the spelt. I know not.

Anyway, if you are a baker, and have any thoughts about what might have gone wrong here, please share!

In the meantime, I have to decide whether to continue my spelt experiments (I also used them in some brownies yesterday) or retreat to the comfort of strong white bread flour, or Manitoba as it’s known here in Italy, with its reliable if dietarily dubious gliadin and glutenin content.

Addendum

Here’s the recipe as baker’s percentages. I’m doing this partly because I’m getting out of practice and partly in response to talking to Jeremy.

250/500 = 0.5 x 100 = 50% leaven
280/500 = 0.56 x 100 = 56% water
25/500 = 0.05 x 100= 5% honey
75/500 = 0.15 x 100= 15% potato
500/500 = 1 x 100 = 100% flour
10/500 = 0.02 x 100 = 2% salt

Or if we’re getting serious (and it looks like we are), and factoring in the leaven… 250g leaven at 80% hydration = 112g water + 138g flour (rounded), so the total water is actually
392g, and the total flour is 638g.

392/638 = 0.61 x 100 = 61% water
25/638 = 0.039 x 100 = 3.9% honey
75/638 = 0.118 x 100 = 11.8% potato
638/638 = 1 x 100 = 100% flour
10/638 = 0.015 x 100 = 1.6% salt

12 Comments

Filed under Breads, Discussion, Flour & grain, Recipes

Chocolate fudge pudding. Aka self-saucing chocolate fudge pudding

My current city of residence Rome might reach temperatures of around 40C in August, but that doesn’t mean it’s entirely lacking in the winter department. This time last year we had a dump of snow, and this year we’ve had several weeks of cool, wet weather, with some mornings starting just above freezing. Sure, it’s not winter like Moscow or Owen Sound, ON., but that’s still quite a notable temperature differential. Never mind the fact that our flat is all stone floors, white walls and seriously draughty shutters. Ergo, I feel perfectly justified in indulging in some classic, hot, stodgy British winter puddings.

This is one of my life-long favourites. It’s one of those things I simply have to eat when it’s cold and gloomy and damp.

There are several recipes knocking around, which all use the basic variant of a sponge batter with some cocoa, and a unprepossessing looking liquid made using sugar, more cocoa and hot water that is poured onto the batter before baking. It’s one of those processes where it’s hard to believe it’ll work. But work it does. The batter bakes into a lovely sponge, enriched by the sauce that, if you don’t over-bake it, pools in the bottom of the dish as you scoop the pud out to serve.

The recipe we use in our family is from The Times Cookbook (published 1972) by Katie Stewart, a cookery writer whose reputation is undergoing a well-deserved resurgence since her recent death. That cookbook was an important part of my cookery education as a kid, alongside the more successfully branded Delia Smith’s Complete Cookery Course (1978-80). Both were very reliable. Indeed, this chocolate fudge pudding recipe seems to be one of the most reliable. I’ve tried or read a few more, and some of them just seem a bit strange. For example, this one from Lisa Faulkner, says “Cover with cling film and put in the fridge overnight to set.” Why would that be necessary? And the overnight delay really just doesn’t cut it when you’ve got the specific craving and need the hot chocolaty hit in less than an hour.

So. For the batter you need:
85g self-raising four (or 82g plain and 3/4 a teaspoon of baking powder), sieved
25g cocoa
112g butter
112g caster sugar
2 eggs
1/2 t vanilla essence
50g chopped walnuts (or pecans, or whatever nut you like)
50g chopped chocolate (optional. Dark is classiest, white can be a nice surprise, milk is dandy)
1-2 T milk

For the sauce
112g soft brown sugar
25g cocoa
285g hot water

Heat the oven to 180C.

1. Cream together the butter and sugar until light and fluffy.
2. Beat together the eggs, add the vanilla, then gradually beat this into the creamed mixture.
3. Sieve together the flour (or flour and baking powder) and cocoa.
4. Beat in a little of the flour. (This helps it stop curdling.)
5. Add the rest of the flour/cocoa mix and fold it in.
6. Fold in the nuts and chopped chocolate.
7. You want a “medium soft” batter. Add some milk if it’s too thick.
8. Put the batter in a greased baking dish (volume around 1 litre/2 pints).
9. Make the sauce by combining the sugar and cocoa, then adding the hot water and stirring well. Don’t worry if it’s a bit gloopy.
10. Pour the sauce over the batter.
11. Bake for around 40 minutes.
12. Serve hot with vanilla ice cream, or whipped cream, or even clotted cream. Something that’s denied to me living in Rome. *Sob*
13. Feel warm and contented.

BTW, these photos are of two different puds made over the last few weeks. Most of them are from a pud that contained some white chocolate and is served with ice cream. The last pic is of a version that contains hazelnuts, and is served with whipped cream. If I’ve was forced to decide, I’d say my favourite variant is walnuts-dark choc chunks-served with vanilla ice cream.

9 Comments

Filed under Puddings & desserts, Recipes