Category Archives: Recipes

Real beer barm bread

Beer barm bread

Once Upon A Time
Once upon a time, breweries and bakeries lived side-by-side harmoniously. Brewers merrily went about their noble work, mashing, sparging, fermenting. One blessed by-product of the process was a foam that frothily formed on top of the fermenting liquor. The dusty baker from next door would welcome consignments of this malty foam – barm – and use its natural yeastiness to leaven his dough.

And so it went for long ages.

Until some learned men in the late 18th and 19th centuries improved humankind’s understanding of bacteria and yeasts. By the late 19th century, yeast specifically cultivated for bread-making had become commercially available in block, then in dry, granulated form. And slowly, sadly, the close bond between breweries and bakeries faded away.

This idea of bread being made with brewery by-products has intrigued me for ages, but not having had a ready supply of barm, I’ve never actually tried it before.

A Dan Lepard beer bread

Beer breads
Dan Lepard in ‘The Handmade Loafʼ does a loaf he calls “Barm bread”, but it’s made using a bottle conditioned beer, that is then heated. This seems counter-intuitive, as it kills the yeasts in the beer, but apparently it’s to cook off some of the alcohol, which retards the action of any yeast in the mix. Lepard was effectively using the beer as a flavouring, and then re-introducing yeasts, I believe; so however lovely the results were, it wasn’t a genuine barm bread. (One of my attempts using his method a few years ago is picture above.)

My recent enjoyment of Game of Thrones and the Song of Fire and Ice novels, the source for his great HBO TV series, lead me to the Inn At The Crossroads. This inspired blog features involves real-world interpretations of the fantasy world foods mentioned by George RR Martin in his books, and it got me thinking again about pre-industrial yeast bread-making.

Westeros’ finest
Specifically, I was checking out The Inn At The Crossroads’ bread recipes. They have a few for Martin’s black bread, with the second version made using dark ale, stout or porter. Okay, thought I, that looks fun. But I had one criticism. Surely in Martin’s quasi-Medieval world, they wouldn’t have had “1 packet yeast”; bread would surely have been made with the barm method.

I made a comment along these lines, and one of the site’s creators, Chelsea Monroe-Cassel replied, saying “I agree that this would be the very best way to make this bread!” She also said, “I’ve made several trub breads, with great success.” I’d not heard of trub bread too, but this one is made using the sediment from the fermenter.

Beer barm

My project slightly moved away from the black bread theme, though, as initially I just wanted to make a bread with barm, and with flour with older grain – ie arguably more medieval – varieties.

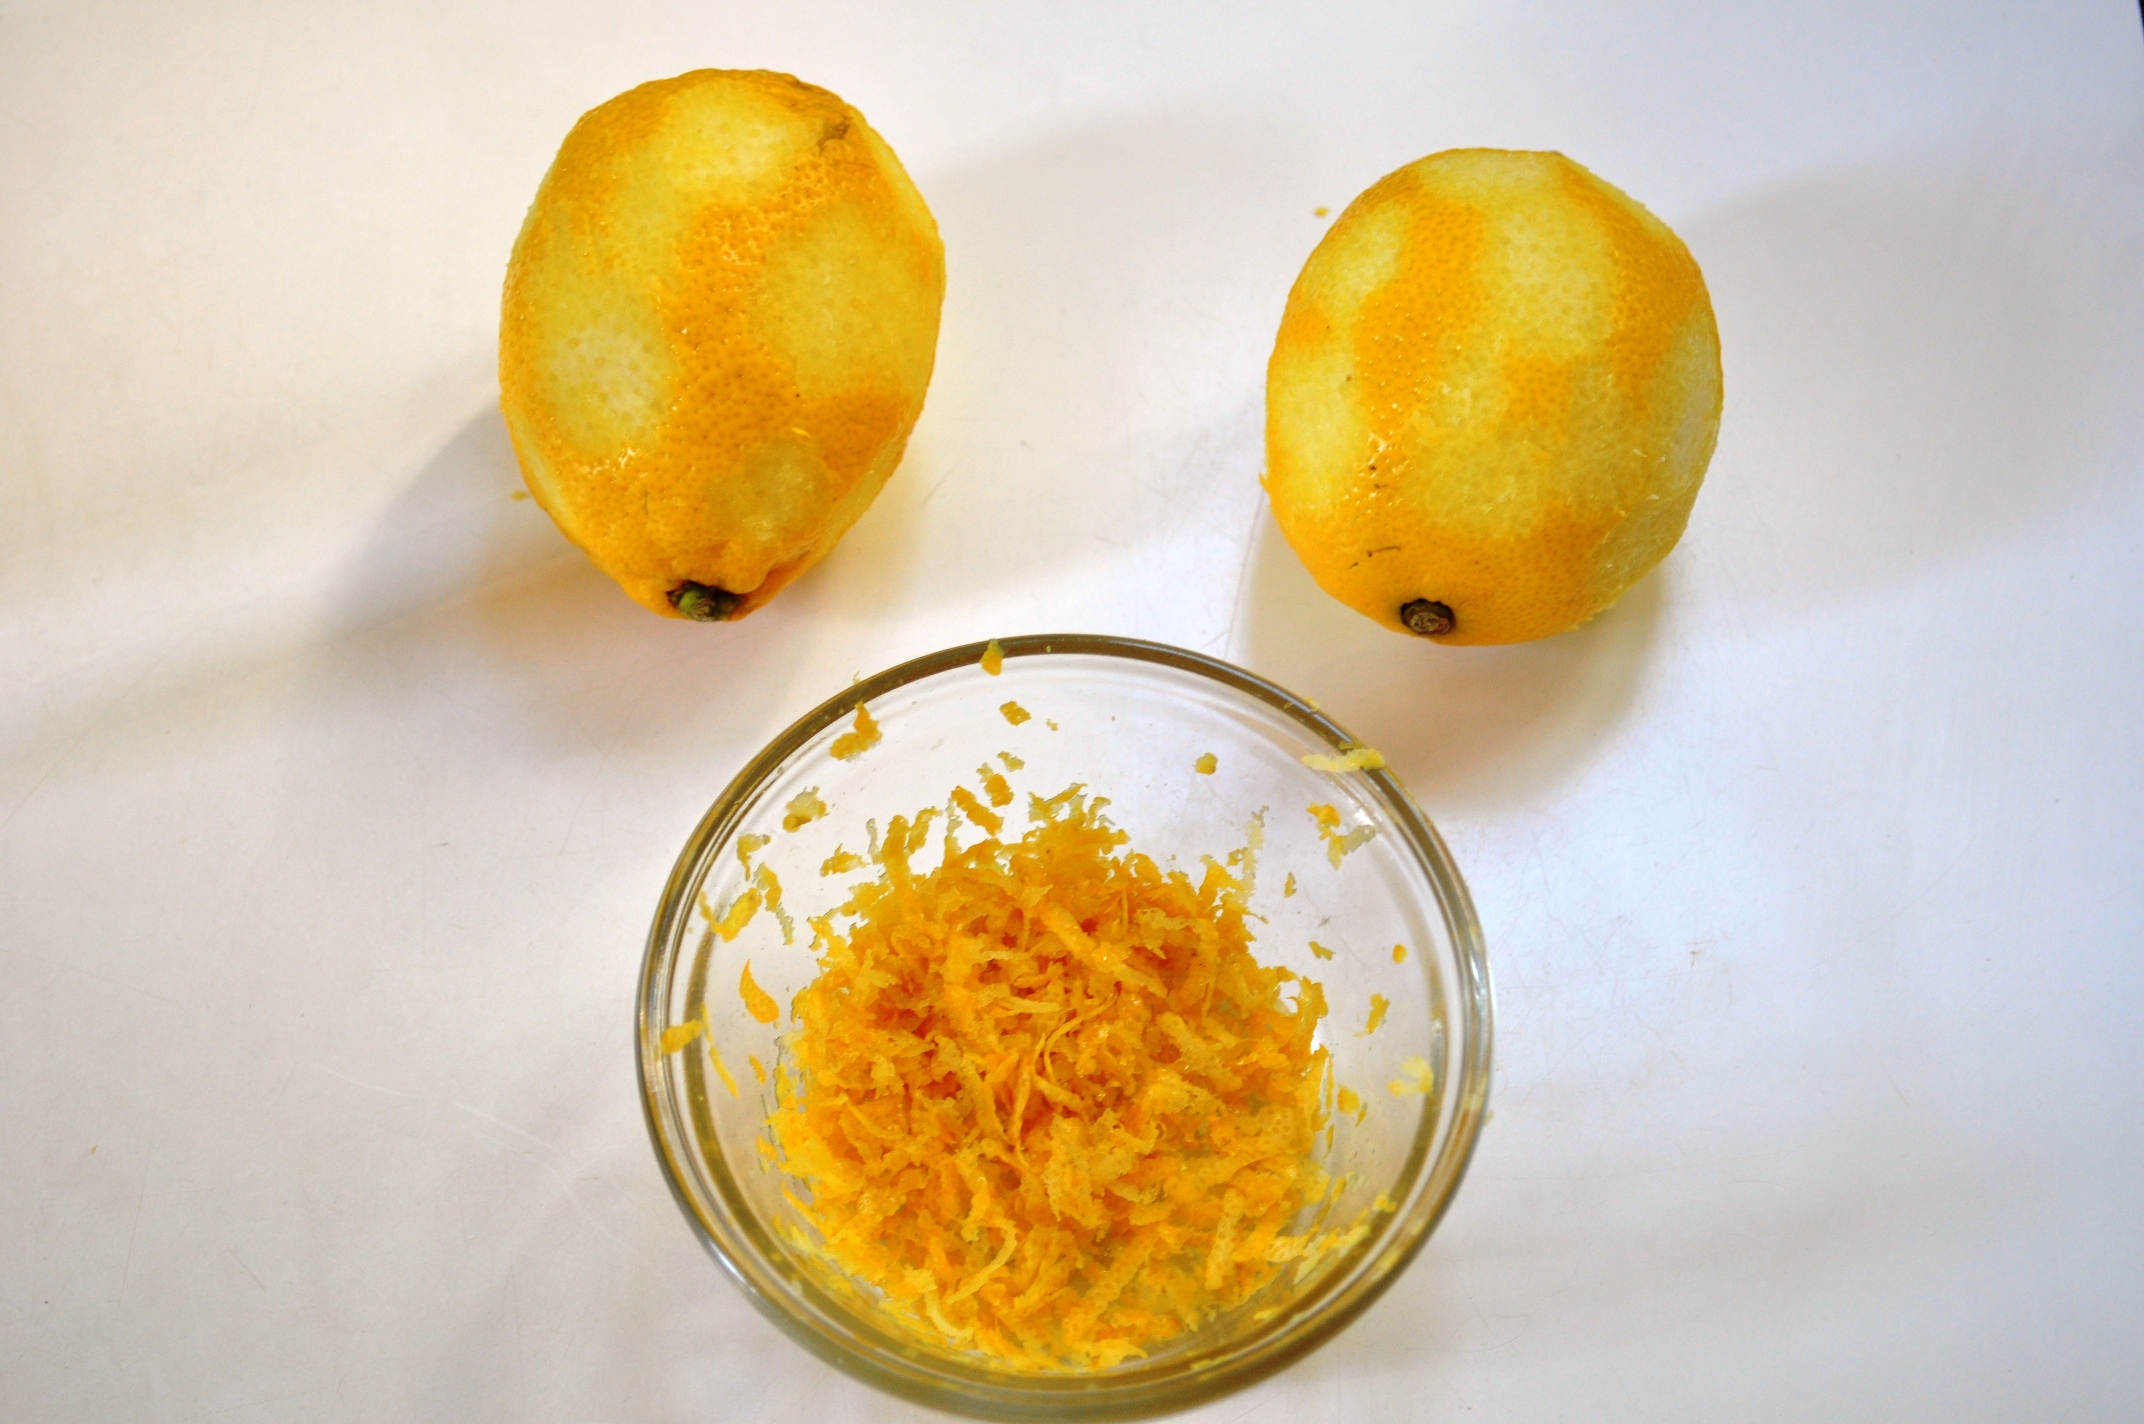
I bought some Mulino Marino Pan di Sempre, a stoneground organic flour that is made with a blend of Triticum aestivum (that is, common bread wheat), Triticum spelta (spelt wheat) and Triticum monococcum (einkorn wheat).

My friend Michele Sensidoni, a brewer, kindly furnished me with a bottle of barm. It wasn’t very prepossessing stuff: gloopy, brown and malty, separating slightly, but it was exciting to finally get my hands on the stuff.

Beer barm and Mulino Marino Pan di Sempre flour

So:
100g barm
100g flour
Mixed and left overnight. My kitchen was at around 23C. The next day this was clearly alive, and reasonably vigorous. Here’s the before and after shots:

Beer barm leaven Beer barm leaven

I formed a dough with:
200g barm leaven (ie, all of the above)
500g flour
10g salt
300g water

Adjust the water if necessary; you want a nice moist dough.

Beer barm bread, dough

I then put all this in a container and left it in the fridge for 24 hours.

I then took it out of the fridge, and let it come back to RT (again, around 23C).

Beer barm bread dough, before final prove

After a few hours, I formed a ball, and put it in a proving basket lined with a floured cloth.

I let it prove again at RT for around 9 hours.

Beer barm bread dough, proved

I preheated the oven to 230C.

Beer barm bread, pre-bake

When the dough was nice and swollen and soft, I baked it for 20 minutes, then turned down the oven to 210C and baked for another 20 minutes.

Beer barm bread, fresh from oven

The results are very pleasing. It’s got a chewy crust, a reasonably open crumb and a taste that’s subtly sour. Yay.

Crumb CU

Oh, and for etymology geeks (like me), the British English word barmy, meaning a bit bonkers, crazy, comes from barm. As a barm is the foamy scum that results from fermentation, someone who is barmy is a bit bubbly, excitable, unpredictable and possibly even frothing at the mouth. Don’t worry though, making and eating this bread won’t have that effect on you. [insert suitable smiley here to compensate for lame attempt at humour]

29 Comments

Filed under Ale, beer, Breads, Recipes

Ricotta and cinnamon pizza

Cinnamon and ricotta pizza

Ricotta. Generally, I don’t know what to do with this classic Italian “recooked” whey cheese. I’ve used it in cheesecakes before, and it is delicious eaten for breakfast with a drizzle of honey. But the sheer scale of its presence in Rome, where fresh stuff arrives by the tonne every day, indicates it’s used very widely indeed.

Shops like the likeable Antica Caciara in Trastevere have an entire window dedicated to baskets of the stuff. Farmers markets’ also tend to have several stalls selling bucketloads of the stuff. Since our farmers’ market was shifted out of Testaccio, and as it’s August and most of Rome’s markets are closed anyway, we’ve been frequenting our new Punta Vendita Aziendale (direct-from-farm shop) near Ponte Testaccio. (Actually, it’s three outlets in one venue. See Info, below). They have a lot too, and on a couple of occasions when we’ve been stocking up on other goodies, they’ve given us some. It’s all about the freshness with Roman ricotta, so I suppose they just don’t want it hanging about – and they want to encourage our loyalty.

So what else do people do with the stuff? Well, I’m slowly discovering.

Fresh ricotta

It’s used in a few classic, simple pasta dishes, but to be honest, I don’t much like them; even with excellent quality ricotta such dishes seem oddly bitter to me. There’s a kind of cappuccino di ricotta according to ‘Cucina Romana’ by Sara Manuelli1, but I’ve never seen that. Manuelli also gives a recipe for ricotta condita that just involves the cheese, egg, sugar, cocoa and some booze. It sounds like a kind of trifle or tiramisu, but without any sponge. Other versions, such as in Oretta Zanini di Vita’s ‘The Food of Rome and Lazio’2 use finely ground coffee instead of cocoa.

When I got the cookbook ‘La cucina di Roma e del Lazio’3, one thing that caught my eye straight away was the budino di ricotta (ricotta pudding, or ricotta cake), which they make in a handsome ring form. So I gave it a go. It seemed simple – just ricotta, sugar, lemon zest, a little booze and some eggs, some separated, with the whites whisked to give the pudding some lightness.

Ingredients for ricotta and cinnamon pizza. Ricotta, sugar, cinnamon, dough. Basta.

It all seemed to go well. Until I turned it out of the tin. It deflated a bit. Okay, fine. But then I ate some. Really not my bag. I’m sorry to say I found it oddly nauseating, just unpleasantly whey-y, so I won’t be repeating the recipe here. I should have known really, as I’d made a baked ricotta pudding before, using ‘Cooking Apicius’ – recipes based on a collection from the late classical period4. That one involved lots of bay leaves and at first bite was amazing, but at second bite was exotically disgusting.

So I was back to square one with my slightly vexed question of what to do with ricotta.

Ricotta and cinnamon pizza, before baking

And then Azienda Agricola Fratelli Nesta, one of the abovementioned three outlets, went and gave us another couple of etti5 of ricotta.

Luckily, ‘La Cucina di Roma e del Lazio’ has several other ricotta-based recipes. One of which is so absurdly simple I had to give it a try. It’s a sweet pizza, and would you know, I had some spare pizza dough.

According to authors Marie Teresa di Marco and Marie Cécile Ferré this is a “super-simple sweet that you can often find in the bakeries of Tuscia”. Tuscia is the historical region of the Etruscans (the Tusci in Latin), a large area of central and western Italy that now corresponds with most of Tuscany, northern Lazio and parts of Umbria. The recipe in is specifically called “Pizza ricotta e cannella di Tarquinia”. Tarquinia is an ancient Etruscan town near Viterbo, north of Rome.

I can’t find any mention of a ricotta and cinnamon pizza from Tarquinia or Tuscia,  or anywhere for that matter, online, but then, Italy hasn’t poured all of its vast and varied (food) culture onto the internet. So I’ll just give the two Maries the benefit of the doubt.

Anyway, I’m not going to mess about trying to put it in grams or whatever as it really is simple and flexible. It’s all about the “qb”, the quanta basta, the “how much is enough”. That is, the right amount according to your intuition and inclination.

You just need to make some basic white bread or pizza dough; I won’t give a recipe here, as there are numerous recipes in other sources. Just find one that suits you. I’d recommend one with a nice long fermentation.

Ricotta and cinnamon pizza

The ricotta and cinnamon pizza recipe isn’t even a recipe per se, it just says:

Bread dough
Ricotta
Sugar and cinnamon
Extra virgin olive oil

Then mentions the bakeries of Tuscia, where “the bread dough often comes in a thin form, covered with ricotta, sprinkled with sugar and cinnamon, then drizzled with extra virgin olive oil. You bake it in a hot oven for about 20 minutes.”

And you know what? It’s delicious. I especially like the way the oily, sugary mix caramellises on the crust. Sure, it’s an example of those Medieval flavour mixes of sweet, spice and savoury that us Brits don’t use so much these days and, sure, perhaps it’s slightly confusing quite when you might want to eat it. Is it a main course, is it a dessert, is it for afternoon tea, or even a breakfast snack? But frankly, it’s so simple and satisfying, you can eat it whenever you want. I scoffed most of mine at 5.15pm as the hangry hour was approaching.

Info
Punta Vendita Aziendale (direct-from-farm shop), Via Bernadino Passeri 8, 00154 Rome.
Open Tues, Wed, Fri and Sat 8.00-19.00,  Sun 8.00-14.00

Footnotes and stuff
1 ‘Cucina Romana’ by Sara Manuelli appears to be out of print. The copy I’m referring to was published in 2005 by Conran Octopus, ISBN 1 84091 407 6.
2 ‘The Food of Rome and Lazio’ by Oretta Zanini di Vita also appears to be out of print. The book I’m referring to is translatedby Maureen B Fant, and is listed on her website. First published 1993 by Alphabyte di Maureen Brown SAS, ISBN 88 86128 02 9. I’m not sure, but it may have been reprinted in 2003 by the University of California Press as ‘Popes, Peasants, and Shepherds: Recipes and Lore from Rome and Lazio’.
3 ‘La cucina di Roma e del Lazio’ (“The cooking/cuisine of Rome and Lazio”) by Marie Teresa di Marco and Marie Cécile Ferré is, so far, only available in Italian. Published 2012 by Guido Tommasi Editore-Datanova, ISBN 978 88 96621 844.
4 ‘Cooking Apicius: Roman Recipes for Today’ by Sally Grainger. More information here from the publisher, Prospect Books, along with a PDF download with ” the preliminary matter, the introduction, the list of recipes and the opening historical discussion of Cooking Apicius”.
5 An etto (plural: etti), or ettogrammo is a commonly used measure in Italy, especially for buying market produce. It’s a hectogram/hectogramme – that is 100g, 0.1kg, or about 3 and a half ounces.

Leave a comment

Filed under Discussion, Misc, Other food, Pizza, Recipes

Maritozzi con la panna recipe

Maritozzi con la panna

A while back, we went on a field trip and scoffed maritozzi con la panna at Regoli. They are reputedly Rome’s best. They are indeed delicious, albeit a bit OTT with the whipped cream (panna montata. Not to be confused with hannah montana).

Seeing as I made splits the other day, and splits and maritozzi con la panna are basically both variations on the enriched dough cream bun, it seemed fitting that I try and make maritozzi too. Me living in Rome, and them being a local speciality and all. My version isn’t quite so generous with the cream as Regoli’s, though how much you use is really up to you.

Maritozzi ingredientsLemon zest

My research took me to numerous recipes on Italian websites1. The basic gist really is an enriched dough, some with milk instead of water, some with oil or butter, all with egg and/or egg yolks.

My recipe is a kind of hybrid, though relatively authentic in that it contains the key flavourings of candied peel, citrus zest, raisins (or sultanas) and pine nuts. Some of the recipes I found use a biga, but I decided to use the sponge-and-dough technique. Here’s the nice active sponge:

Nice active sponge for maritozzi

For this recipe I agonised with professional-style recipe calculation 2, bakers’ percentages and scaling weights. Then I made a schoolboy error and left a key ingredient out of the dough. Then I burnt the buns.

So I made a second batch too – and tried to remember all the ingredients and tried to not burn them. (In my defence, my oven has fierce bottom heat, even when I use multiple sheets for some shielding, so it’s hard to get nice colour on top without the bottoms getting a little bruciato…)

This recipe makes 10.

Ingredient Bakers’ percentage Quantity (g) Notes
Sponge:
Strong white flour 10 43 Aka manitoba
Milk 47 224 Warmed
Yeast 5 22 Fresh. If using ADY, use 11g, instant, easyblend use 9g
Caster sugar 5 22
Dough:
Strong white flour 60 258 Aka manitoba
Plain flour 30 129 Aka all-purpose, or Grano tenero 00
Salt 1 4
Caster sugar 7 30
Butter 12 52 Melted and cooled. Or oil. See ‘Options and decisons’, below
Egg yolk 8 34 Separate a few eggs, beat the yolks then weigh off on electronic scales
Zest 1 4 Lemon, orange or mix
Pine nuts 8 34 Aka pinoli
Raisins or sultanas 8 34 Soaked in hot water for 10 minutes or so, squeezed out
Candied peel, chopped 8 34 Orange or citron or both

Method

1. Make up the sponge by combining the first four ingredients: the milk (warmed to about blood temp), yeast, sugar, flour. Whisk together.
2. Leave the sponge, covered, to ferment. You want it nice and bubbly. Time will depend on the warmth of your kitchen or chosen location. With all that yeast and sugar it won’t take too long – around 20 minutes.
3. When it’s nice and active, add the rest of the ingredients (except the pine nuts and fruit) and bring to a dough. Do by hand or with a mixer with dough hook. If the dough feels a bit dry and tight, add a little more tepid liquid – either water or milk.

Adding the fruit and pine nuts to maritozzi dough
4. When you’ve achieved a nice smooth dough, stretch out, then add the fruit and pine nuts. Fold it over and knead again.
5. Put the dough in a clean bowl and leave to prove again. Prove until doubled in size. Again, time will vary.

Dough, before 1st proveDough, after 1st prove
6. Gently deflate the dough, to regulate the structure. (This is called “knocking back” in Britain, but all that business with thumping it with your fist is far too violent – you don’t want to lose all the inflation.)
8. Form a ball and rest for 10 minutes.
9. Divide the dough into 10 pieces, each weighing 85g or thereabouts.
10. Form the pieces into balls, then allow them to rest again for 10 minutes.
11. Form the balls into cylinders by turning over (so the rougher base is upwards), flattening and rolling up. You can roll the ends to a tighter point if you want. You might want to also pinch the seam (on the underside) closed so it doesn’t open up again.

Shaping a finger roll 1: ballShaping a finger roll 2: ball, undersideShaping a finger roll 3: ball, squashed/rolled outShaping a finger roll 4: ball, squashed/rolled out and rolled upShaping a finger roll 5: cylinder, rounded endsShaping a finger roll 6: cylinder, pointed ends
12. Place on a lined baking sheet, and leave to prove again, until doubled in size and soft to the touch.
13. Preheat oven to 200C.
14. Bake until nicely browned on top, around 15 minutes. (Again, depends on your oven.)

Final prove, beforeFinal prove, after
15. While they’re baking, make a stock syrup with 50g sugar and 50g water, brought to the boil together. This is optional (see Options and decisions, below).
16. When the rolls are baked and still warm, brush with the syrup.

Fresh from ovenGlazed
17. Leave to cool entirely on a wire rack.
18. Whisk 500g whipping cream to stiff peaks. (You might need more, but healthy types might get upset if I put “whisk 1 litre” of cream…)
19. Split each roll long-ways and fill with cream, with piping bag.
20. You can also serve with a sprinkling of sieved icing sugar (see bel0w).

Maritozzo crumb - plenty of fruit and pine nuts

Options and decisions

The last two steps are involve some decisions, depending on you how you want to present your calorie bombs. Although some of the photos you’ll find online have the creamed piped with a star nozzle, many of the maritozzi I see in Rome have the cream smoothed off (with a palette knife presumably). I think I prefer the latter.

As for the icing sugar, this is why I said the stock syrup glaze was optional. If you’re going to sieve icing sugar all over (again, this is very popular for the presentation of cakes and pastries in Rome), the glaze could arguably be seen as useless. So you could either not bother with the glaze, or you could even brush the rolls with beaten egg, egg yolk or even milk (full-fat) before baking, to give them varying degrees of golden crust as they bake.

Maritozzo con la panna - and with icing sugar

As for the butter – if you want to be more wholeheartedly (southern) Italian with this recipe, replace the butter with good quality olive oil , which some of the recipes I’ve looked at use. Some also use sunflower oil, or similar.

One final option – you can also add some vanilla essence when making up the dough. Maybe a teaspoonful, around 6g.

Enjoy!

Footnotes

1. Here are some of the recipes I looked at online, all in Italian: Giallo Zafferano (Italy’s biggest online recipe resource); Alice (a cookery channel; this one uses a biga and some “qb”); Arturo (another cookery channel, related to Alice); Cookaround (a forum); PaperBlog (an online magazine); La Cuochina Sopraffina (a blog, though this one seems to be missing some vital info); Paciulina (another blog); also the book La Cucina di Roma e del Lazio by Maria Teresa di Marco and Marie Cécile Ferré.

2. This style of recipe calculation is very handy if you’re trying to accurately scale up quantities, and for doing costings. You start by adding up all the bakers’ percentages (ie, all the ingredients given as a percentage of the total flour used. Comprehensively explained here). In this case, that gives me 215. You then divide the total dough required by that figure to give you a “recipe factor”.

Here, the total dough I want for 10 buns each made with 90g of dough is 900g. Add a little extra (2%) for loss/wiggle room, giving a total desired dough weight of 918g. 918 divided by 215 gives a recipe factor of 4.3 (rounded).

Then, multiply the bakers’ percentage by the recipe factor to give the ingredient weight (which you can also round, obviously).  The total of these ingredient weights should be the total dough. As I rounded a few figures up, the total weight of ingredients here is 924g.

So If you wanted to do 30 buns instead, simply work out a new total dough weight, ie 90g x 30 = 2700g. Add 2% for loss, giving g. 2754 divided by 215 gives a recipe factor of 12.8 (rounded), etc.

14 Comments

Filed under Cakes (yeasted), Recipes

Splits, clotted cream and a Roman summer afternoon tea

Devon splits, Cornwall splits

Among the few things we crave but are just impossible to source in Rome are halloumi cheese and clotted cream. For those who don’t know, the latter is a nectar-like dairy product that comes from the Southwest of England. Fran’s from the southwest and I have strong connections, so we both have clotted cream in the blood. So to speak. It’s an essential component of a proper cream tea.

I’ve always used clotted cream with scones, but it’s also used with a less well known variation the cream tea: with splits. When I smuggled a massive tub of clotted cream back home from Blighty last week, I resolved to make splits, and do a bit of a comparison with scones.

A large - nearly empty - ot of Langage clotted cream

What is a split anyway? Well, it’s basically just a cream bun, made with a basic enriched dough, split and smeared with jam and clotted cream. (Messily smeared in our case – I’m a little ashamed we didn’t do it a bit more neatly, but then I’m no food stylist and we just wanted to scoff them!). As Rachel pointed out when we were doing just that yesterday, as it’s really not unlike a maritozzo con la panna. Though with slightly more demure amounts of cream. Sort of – clotted cream is cooked, so it’s denser and richer than whipped cream.

A split and a scone

The next question involves their origins. Are they Cornish splits? Can they be Devonshire splits? Or is the Devon cream tea always based on the split’s easier-to-make cousin the scone? I’ve always assumed splits are actually “Cornish splits”, but then I started encountering recipes for “Devonshire splits”. What you call them probably just depends your loyalties. The white cross on black or the white cross on dark green? (Something that’s almost entirely irrelevant to people outside the spatting ground of southwestern England.)

And is there a difference between a Devon and a Cornwall version? Discussing splits, and Elizabeth David’s recipe, here Nigel Slater suggests Devon splits are smaller, though the recipe I based mine on was called “Devonshire splits” – and they’re quite big.

Initial dough mixture for Cornish split, or Devon split - flour, sugar, butter, milk, yeast

And why do these two counties get their knickers in such a twist anyway? After all, surely pasties and cream teas are from the West Country, not from either county in particular? Hey, I just love the West Country in general; I’ve been going there all my life and my mother’s mother’s family is from border country in northeast Cornwall/northwest Devon. Although there are cultural differences between Devon and Cornwall, there are plenty of cultural similarities too: clotted cream for starters.

This delicious treat is, frankly, from the West Country in general and neither county in particular. Especially not now in our industrial age when clotted cream is no longer produced by local farms and dairies but instead comes from larger producers like Langage (Devon) and Rodda’s (Cornwall) – both of which are available in supermarkets in both counties and beyond.

Kneading Devonshire split dough

Anyway, I’ve made scones all my life and I even did a very scientific experiment to address the important question of whether cream or jam goes on first (includes recipe). This is my first go at splits though. They were very nice, but I’m not sure they’ll dethrone scones from my tea-time repertoire. For starters, scones are easier to make (just don’t overwork the dough!) and have a satisfying crunchy crust and crumby interior, which I found preferable to the more bread-like consistency of the splits.

Anyway. Here’s the recipe:

Makes 12 splits.

25g fresh yeast (aka lievito di birra)
300g full-fat milk
25g unsalted butter
500g strong (high protein) white bread flour (farina di Manitoba in Italy)
3g fine sea salt
25g caster sugar

Shaping balls of dough for Devonshire splits. Or Cornish splits

1. Warm the milk and butter, melting the latter and bring the liquid to around body temperature.
2. Crumble the yeast into the liquid, and give it a whisk.
3. Put the flour, salt and sugar in a large bowl and stir to combine. (If you want to use easyblend yeast, add 10g now instead).
4. Add the liquid to the flour mix, and bring together.
5. Turn out and make a dough, kneading until smooth.
6. Put the dough in a clean bowl, and cover with clingfilm/plastic wrap.
7. Leave to ferment and prove until doubled in size.
8. Turn out, gently deflate and divide into 12 pieces – they should each weigh around 68-70g.
9. Form the pieces into balls, keeping them covered with a cloth.
10. Place the balls on a baking sheet, and again, keep them covered.
11. Let them prove again, for about 20 minutes, until they’re soft to the touch. (Time will vary depending on the temperature.)
12. Preheat the oven to 200C.
13. Bake the balls for about 15 minutes. Again, time will vary depending on your oven. You want them to start browning nicely on top.
14. Remove from the oven and cool completely on a rack.
15. When cool, slice the buns on a diagonal. Into this split (hence the name) add jam of choice and clotted cream.
16. Serve dusted with icing sugar.
17. Eat, messily. Whether you’re nearly two or 42.

Balls of dough, pre-bake, for Devonshire splits. Or Cornish splits

I clearly lied in my last post about getting back to talking about Italian and Roman beer and baked goods didn’t I? Oh well – if it’s any consolation, we were sitting in a Roman garden, drinking prosecco, getting eaten by mosquitoes and being glowered at my our oddball neighbours when we ate these.

Freshly baked  Devonshire split buns

So it was a kind of English-Roman hybrid cream tea. But probably the best cream tea consumed in Rome for a while. I don’t make any bones about saying my scones are excellent, and good clotted cream is always awesome. Plus, well, Babington’s, the famous “English” tea room by the Spanish Steps, serve their cream with whipped cream not clotted cream – which is frankly just an abomination. No contest.

11 Comments

Filed under Breads, Cakes, Recipes, Uncategorized

Durum wheat sponge and dough bread

Baked and cut durum and Manitoba bread

After my recent, pleasingly successful experiment with a biga, I made a couple of loaves that seemed wonderful, but one turned out to be under-baked (shame on me), and the second just went weird after a few days. I think, like me, it can’t really handle the heat, as the Roman summer inches towards the trials of August, with  its high-30s (100 ish and more old money) temperatures, and thriving tiger mosquito population.

I made a multigrain seeded loaf that seemed great the first few slices, but didn’t like being taken to the park for a picnic in 35C temperatures (followed by a massive storm). The previously nice, firm crumb collapsed and went kind of fizzy. Again, it was as it if had been under-baked. And possibly even under-proved, though this is bizarre as it’d had a nice long prove, mostly in the fridge as the 25C kitchen was too warm.

To try and diagnose this mystery, I vowed I’d make a nice simple white loaf, just with strong white flour (or Manitoba as it’s known in Italy) and see how it coped with the heat.

Farina di grano duro and farina di Manitoba

Every time I open my flour bin, however, I see a pack of something that needs a bit of stock-rotation. In this case, I wanted to use up some of a bag of grano duro flour, that is durum wheat, (Triticum durum). It’s a type of flour that is more typically used for pasta, but I’ve baked with it before. I also had a bag of rice flour hanging around, so some of that went in too.

Also, following the biga experiment, I decided to do a sponge and dough method. Just to see if it coped better with the heat than the previous two loaves, that were made with the bulk fermentation method (BFM).

The BFM is your basic bread-making that involves creating a dough with all the flour, all the water, all the yeast, and processing that: first prove, shaping, second prove, bake. The sponge and dough method, on the other hand, involves using liquid (all or most of it) and part of the flour, with the yeast, then fermenting that more liquid mixture, called the sponge, before adding the rest of the flour and proceeding with a dough, proving, shaping and baking. Like a biga, a sponge is a type of pre-ferment.

Duro-Manitoba sponge

A note on the yeast
I use fresh yeast. It’s known as lievito di birra in Italy, or cake yeast in North America.

If you’ve only got active dried yeast (ADY), use 4g. If you’ve only got instant/easyblend yeast, use 3g. Add the latter directly to the part of the flour you’re mixing with the liquid to make the sponge.

A basic rule of thumb for conversion is x3: that is, 3g ADY = 9g fresh yeast. You need less instant yeast than ADY. But I wouldn’t agonise: as long as your least is alive and well and happy, it’ll do what it needs to do even with a few gram’s variation. The time it takes the dough to ferment and prove will also vary depending on the temperature of water you use, the temperature of your kitchen, etc.

Ingredients
200g grano duro/durum wheat flour
50g rice flour
250g strong white/Manitoba flour (00 or 0 grade)
350g water (tepid)
10g fresh yeast
10g fine sea salt

Dough, unkneaded

Method
1. Combine the water and yeast in a bowl. Whisk slightly to break up the yeast.
2. Combine all the flours in a bowl.
3. Put half of the flour mix in another bowl. Add the water/yeast mixture.
4. Stir together the flour and water/yeast to make a sponge.
5. Leave the sponge , covered, to ferment. I left mine for about 80 minutes in a warm kitchen. It should look nice and bubbly and active when it’s ready.
6. Add the salt to the remaining dry flour, mix it in, then add this to the sponge.
7. Bring the dough together in the bowl, turning it out when it’s mostly combined.
8. Knead the dough until smooth. You can do a longer knead once, or the Dan Lepard method of short kneads three times in half an hour.

Dough, kneaded
9. Form a ball of dough and place it in a clean bowl. I add a drop of veg oil to the bowl for nonstickiness.
10. Cover and leave to prove until doubled in size. Again, depends on temps etc, so check every now and then. It’ll probably be around one and a half hours if it’s in a warm place.

Dough, first prove
11. Turn out the dough, and form a ball.
12. Leave the ball to rest for 10 minutes.
13. Form a baton.
14. Leave the baton to prove again, ideally in a basket or banneton lined with floured cloth.

Dough, in proving basket
15. Pre-heat oven to 220C.
16. When the baton is doubled in size and soft to the touch, turn out onto a baking sheet.
17. Bake for around 25 minutes, then turn down the heat to 200C and bake for another 20 minutes, or until the loaf is well-browned and feels fairly light and ‘hollow’ when picked up.
18. Cool on a wire rack.

Dough, in proving basket, proved

Thus far, this bread has been behaving – and not giving me any insights into what went wrong with my previous loaf. If the crumb suddenly collapses and starts to ferment, I’ll report back.

Leave a comment

Filed under Breads, Recipes

Pine nut cheesecake, or cheesecake della nonna

Pine nut cheesecake, cheesecake della nonna

If you’re in a Roman restaurant and they offer you desert, it’s quite likely you’ll encounter torta della Nonna – that is “Grandma’s tart” or “Grandma’s cake”. I’m not sure about the labour laws, but all this pudding-making must keep granny pretty busy.

Sources vary, but torta della nonna is either a Florentine or a Ligurian dish. Though surely any nonna has her own torta? There are variations, but most commonly in Rome it’s a tart made with a sweet pastry crust and a filling based on custard and/or ricotta. Its defining feature is pine nuts, pinoli.

This post isn’t, however, about torta della nonna. As I had some leftover cookies that had been smashed on their journey to and from the park for a picnic on Sunday, I thought I’d make a cheesecake with a della nonna twist: ie, with the addition of pine nuts.

A note on the cookies
I made some cornmeal cookies – they were basically like a digestive, but with a slightly different crunch, and a few spices (cinnamon, ginger). They worked well, but you can use whatever biscuits you like: digestives are most typical for UK cheesecakes, US recipes use graham crackers. My friend Juli-from-Jersey said the cornmeal cookies reminded her of snickerdoodles, though they’re cookies with a name so ridiculous I can’t quite bring myself to discuss them.

I won’t include the cornmeal cookies recipe, but will say digestives are so easy to make you don’t need to reach for some plastic-wrapped stuff from a factory. I’ve included a simple recipe at the bottom of this post. If you do use this recipe, I’d add some cinnamon and ginger to the crumb base mix.

A note on the candied peel
Only use your own candied peel, or other hand-made stuff. Don’t use that yucky sticky stuff you get in tubs from the supermarket. Peel is easy to make. Honest. Just Google it, if you’ve not tried before. I’m still using some of my candied-vodka-infused-kumquats-from-the-garden-peel.

A note on cheeses
Often, cheesecake recipes will just say “cream cheese” in the ingredient list. It’s a bit vague. Though perhaps it doesn’t matter what cream cheese, as a baked cheesecake mixture seems pretty forgiving. Here I used mascarpone and robiola. The latter could be replaced with something like Philadelphia, if you really had to. You could also do, say, half-half mascarpone and ricotta. I might try that next time as you can get stupendous fresh ricotta here in Roma.

Pine nut cheesecake slice, cheesecake della nonna

Ingredients
Base:
40g hazelnuts
120g cookies/biscuits like digestives
60g butter

Cheesy bit:
250g mascarpone
200g robiola
2 eggs
Zest of 1 lemon
100g caster sugar
30g candied peel
60g pine nuts

To serve:
30g pine nuts
Icing sugar

Method
1. Pre-heat the oven to 180C.
2. Toast the hazelnuts until starting to brown.
3. Grind the hazelnuts in a food processor until fairly fine, then add the cookies and grind to a medium crumb.
4. Melt the butter in a pan, then combine with the hazelnuts and cookie crumbs.
5. Push the crumb mix into the bottom of a 20cm loose-bottomed cake tin.
6. Combine the cheeses, eggs, sugar, and zest, blending well by hand or with a handheld zizzer.
7. Finely chop the candied peel and add to the cheese mix, along with the pine nuts.
8. Pour the cheese mix onto the crumb base.
9. Bake for around 50-60 mins until the top is browning and even cracking slightly, and firm to the touch.
10. Remove the sides of the tin, and leave to cool completely.
11. When the cake is cool, toast the extra pine nuts and sprinkle on top, dusting the whole lot with icing sugar.
12. You could serve it with some whipped cream, for added deliciousness. We didn’t as it’s hard to get nice cream here in Roma, despite the cornucopia of other wonderful dairy products.

Extra! Free! Digestive biscuits recipe
90g butter
120g wholemeal flour
120g oatmeal
40g caster sugar
Pinch salt
Pinch baking soda
1 egg, beaten

1. Preheat oven to 200C.
2. Rub butter into flour, stir in the rest and bind with beaten egg.
3. Roll and cut out rounds.
4. Prick with a fork.
5. Put on baking sheet, sprinkle with oatmeal and bake in a hot oven till browned.

2 Comments

Filed under Biscuits, cookies, Cakes, Pies & tarts, Puddings & desserts, Recipes

Plum and almond muffins

Freshly baked plum and almond muffins

At the weekend, our next-door neighbour gave us a big tray of plums. We used the majority of them to make spiced plum ketchup (recipe at the bottom), but had some left over.

I don’t like plums. In fact, I don’t much like fruit generally… though I can eat it happily if it’s baked into something with evil refined sugar. Even better if it’s then served with vanilla ice-cream, gelato or cream (especially clotted cream: West Country caviar). So I was planning to use the plums to make some kind of torta di prugna (plum cake). I found some recipes, worked on them, headed for the kitchen and strapped on my apron – only to find the missus had left the bottom of my spring-form cake-tin at work. Gee, thanks wife.

Plums

So instead, I thought I could use some of the fancy muffin cases1 I bought from a kitchenware stall on Testaccio market that’s full of lovely wood, enamel and crockery stuff; all a bit old-fashionedy-vintage-style-hip, but delightful. These cases are very handsome, though they don’t quite sit right in my muffin tray. Hence, some of the muffins turned out a bit wonky. Plus, I would have liked the muffin top to have peeked out of the case a bit more (ahem), but hey, this was – as usual – a fairly experimental recipe I adapted from other recipes, so you learn by doing right?

Making a sweetened, stewed, sloppy semi-puree of plums

As for the plums, I much prefer dark purple ones, but our neighbour gave us a yellow variety, possibly a Mirabelle or similar. They were over-ripe, but that’s fine. I wasn’t aiming for chunks, just some flavour in the form of a sweetened, stewed, sloppy semi-puree.

Also, I think some crystallised ginger or preserved ginger would have been nice in this recipe but I didn’t have any. Not even sure I can get it in Roma, though I did tend to have a few jars malingering in the back of the fridge when I lived in the UK.

Flour, ground almonds, ground ginger, cardamom

Recipe ingredients

A dozen-ish good-sized plums
50g golden syrup (use sugar if not available)
100g caster sugar
100g butter
1 egg
40g yogurt (none of that low-fat nonsense)
220g self-raising flour2
80g ground almonds
1 tsp baking powder
1/2 tsp baking soda
1 t ground ginger (or more, if you really like ginger)
1/2 ground cardamom (again, more to taste if you really like cardamom)

Cardamom pods and seeds

Method

1. Preheat the oven to 180C.
2. Prepare a muffin tray and 12 (ish) cases.
3. Roughly chop and de-stone the plums.
4. Put the plum pieces in a pan with the golden syrup or sugar.
5. Good the plums for 10 minutes or so. It doesn’t matter if they break down.
6. Remove from the heat and allow to cool.
7. Cream together the butter and caster sugar. (Using a hand blender, or food mixer, or good old-fashioned spoon.)

Beat in the egg to plum muffin mix
8. Add the egg and beat. If all your ingredients are at room temp, it shouldn’t curdle. If it does, don’t worry, just add a little of the flour.
9. Add the yogurt and beat.
10. Add the plums and their syrupy juice.
11. Combine the flour, ground, almonds spices, raising agents. Sieve together. The ground almonds probably won’t all go through the sieve. I wouldn’t worry about this, the sieving is more to loosen up and combine the powders than really aerate it (that’s the raising agents’ job, when you bake).
12. Add the powder mix and combine.
13. It’ll be a pretty wet, light mix (the bicarb starts working subito). Spoon it into the muffin cases, to about three-quarters full.

Plum muffin mix, all combined
14. Sprinkle the tops with flaked almonds.
15. Bake for around 20-25 minutes, until nicely browned and firm to the touch.
16. Cool, in muffin cases, on a wire rack.

Baked plum muffins

Footnotes, etc

1 The muffin cases are a brand called House Doctor. They don’t seem to have a clear online presence, but they’re available in the UK from this outlet, based on Brighton, Sussex.

2 If you don’t have self-raising flour, just use plain or all-purpose flour. Add 1 teaspoon of baking powder to every 110g of flour. So instead of 220g self-raising flour here, the recipe would require 220g plain flour with 2 extra teaspoons of baking powder (along with the other 1 teaspoon of baking powder and half teaspoon of baking soda). And if you don’t have baking powder, but do have baking soda and cream of tartar (tartaric acid) you can make your own baking powder too. See this page in the BBC baking glossary.

If you work in cups, there are plenty of conversion tools online, like here and here, though they all seem to vary a little. Instead, I’d urge you – buy some electronic scales! They can be very affordable and make life so much easier.

Spicy plum ketchup

This is a great recipe, especially if you have a plum tree and often find yourself with a glut. It’s from my friend Nadia in New Zealand. Old Man Mountain, the farm where she used to live, had a great big old purple plum tree and we’d make a batch every year. It’s a pretty versatile recipe though – although it’s best with purple plums, you can use any. We had a Mirabelle in our garden in London, and we used Mirabelle again this time round. Plus, as it’s hard to get malt vinegar in Italy, we also used red wine vinegar this year. Seems to have worked okay.

This is for a small batch – enough for a about 1.2 litres. So double or triple or quadruple it if you like it and have more plums!

1.8kg plums
2 large onions
30g allspice
8g cayenne
900g white sugar
30g whole ginger, bruised
75g salt
570ml malt vinegar

1. Stone the plums.
2. Put all the ingredients in a large saucepan.
3. You can put all the spices in a bag, but I don’t bother – I just add them to the mix.
4. Simmer for three hours.
5. Put through a mouli legume if you’ve got one. Alternatively, push through a sieve. (And discard the bits.)
6. Put in sterilised bottles (we used wine bottles with screw-tops or those bottles with olde worlde style clip/stopper).

6 Comments

Filed under Cakes, Recipes

Almond and candied peel cookies

Almond and peel cookies

A few weeks ago, I made some cookies using almonds and candied peel (ideally homemade, or at least handmade). The flavour was great, but the cookie wasn’t quite right. So I thought I’d try similar flavourings again, but with a much more basic cookie recipe. It’s v simple.

So here it is.

125g butter
100g caster sugar
75g soft brown or demerara sugar
1 egg (with the white and yolk weighing about 50g)
1 t vanilla essence
1 t almond essence
100g plain flour
80g ground almonds
1/2 t baking powder
1 t cinnamon powder
50g candied peel, roughly chopped
50g plain almonds, roughly chopped

1. Preheat the oven to 190C.
2. Melt the butter, then combine with the sugar in a bowl.
3. Add the egg and essences and beat.
4. Sieve in the flour, ground almonds, cinnamon and baking powder. The ground almonds probably won’t go through the sieve entirely – don’t worry, just dunk the rest into the mix.
5. Add the chopped peel and nuts, and combine to form a fairly loose cookie dough.
6. Put desertspoonfuls on baking sheets lined with parchment.
7. Bake the cookies for around 10-12 minutes, until browning nicely.
8. Cool on a wire rack.
9. Enjoy.

1 Comment

Filed under Biscuits, cookies, Recipes

Biga 2: making a loaf

freshly cut biga loaf

After visiting Il Vecchio Forno in Pescasseroli, Abruzzo, and getting advice from the master baker, I had to try making bread using a biga.

Although I’ve experimented a lot with natural leavens (sourdough), sponge and dough techniques and long fermentations of the finished dough (such as overnight in the fridge), I’ve never actually tried to make bread based specifically on the biga technique, that is using a low-hydration Italian style pre-ferment. This is still experimental though, as I’ve not made a strict biga – I had a healthy batch of leaven around, so I’ve added some of that. Also, I didn’t have enough of one type of flour, so I’ve done a mixture.

The flour types I used were a 0 grano tenero, at 11.5% protein, and a 0 Manitoba at 15.5% protein, W360-400. For an explanation of Italian flour types, see here. For a description of what the heck “W” means in this context, see my previous post.

mixing the biga

Biga

500g flour (370g grano tenero, 130g Manitoba)
250g water (cold, you don’t need to rush the yeast)
5g fresh yeast
30g leaven (at 80% hydration)

biga, before fermentation

1 Dissolve the yeast and leaven in the cold water, giving it a whisk.
2 Add the liquid to the flour in a roomy bowl, and combine.
3 Turn out the mixture onto a lightly oiled surface and bring the dough together. It’ll be quite firm, as it’s only 50% (give or take) hydration at this point
4 Put the biga in a container with a lid.
5 I left mine at room temperature to ferment for half an hour then put it in the fridge… because a) it’s warm here, around 25C (77F) and b) because I had to go out (to a gig).
6 Leave the biga in the fridge for 10-14 hours, until it is soft and relatively lively. It won’t be lively like a liquid leaven as it’s effectively a fairly dry dough.

biga, after fermentation

Bread dough

200g more flour (Manitoba/strong white bread flour)
200g water
10g salt

pieces of biga

1 Take the biga out of the fridge. You can leave it as is, but one site I read suggested cutting into pieces, which seemed like a good idea. Why? Because it’ll warm up more evenly that way and it’ll be easier to combine into the final dough.
2 Cover the pieces and leave to come up to room temperature for an hour or so.
3 In a roomy bowl, combine 200g flour, 200g water and 10g salt, making a pasty mixture.
4 Add all the biga pieces, and mix well, with a spatula and your hands. Really get in there and squeeze it all together, to help form one uniform dough.

making a biga dough
5 Turn the mixture out of the bowl onto a lightly oiled surface and bring together the dough. At this point, it’s around 65% hydration, so it should be moist without being totally sticky and awkward to handle.
6 Form a ball and return to the roomy bowl (lightly oiled).

dough, ball
7 Cover (I used a shower cap), and leave to prove until it’s doubled in size and soft. Time will vary but it took 1 1/2 hours for me. My kitchen was warm, up to 26C (79F).

dough, end of first prove
8 Turn out the dough. It should weigh around 1.2kg, so you could make two smaller loaves, but I wanted to make one large-ish loaf. Form a ball, then leave to rest for about 10 minutes.
9 Form a baton, then place, seam-side up, in a proving basket lined with a floured cloth.

baton
10 Prove again. I left mine for half an hour in the warm kitchen, and it was nice and soft (morbido). I probably could have left it a bit longer – you want it soft and springy.

final prove
11 Turn the dough out onto a baking sheet lined with parchment (I sprinkled mine with coarse cornmeal). Slash the top in your preferred manner.

ready to bake
12 Put a dish of boiling water in the bottom of the oven to fill the oven with steam, preheated to 220C. My oven takes ages to come to temperature but you might have a new-fangled type that heats in 10 minutes. Lucky you.
13 Bake for 25 minutes, then turn the heat down to 200C and keep baking for another 20 minutes. I left mine another 10 minutes, trying to get some colour on top.

Results

All in all, this is one of the better loaves I’ve made recently. Despite our oven not really having any top heat to colour the crust, the rudimentary steam system (domestically, I prefer to use a mister spray, but I ain’t got one at the moment) gave the crust a reasonable crisp crunchiness. The crumb isn’t particularly open, but it’s soft.

Best of all, I got a decent oven spring! I’ve been struggling with the form of my loaves recently. I doubt this decent shape is the result of the biga per se, it may well be more because the dough was a lower hydration than other doughs I’ve made recently (more usually 70% hydration) and because the Manitoba is easier to handle and glutinous then the farro flours and whatnot I’ve been playing with.

I’m not sure my loaf is really a genuine rustic Italian style bread: with its fairly close and soft crumb, it’s more like a classic British bloomer. But hey, I’m happy with that for a first try.

Oh, and yes, from the cracking it was clearly a little underproved, but not radically so.

fresh from oven

Bakers’ percentages

If you’re not familiar with bakers’ percentages, they’re just a way of expressing the proportion of ingredients as a percentage of the flour – or more precisely a percentage of the flour weight. This blog provides a good explanation, if you’re in the mood for some maths.

So, the total ingredients here, including both the biga and the final dough are:

700g flour
450g water
30g leaven
5g yeast (fresh yeast, aka lievito di birra)
10g salt

However, if I break down the leaven, more accurately this means:
717g flour
463g water
5g yeast
10g salt

As bakers’ percentages this is:
100% flour
65% water
0.7% yeast
1.4% salt

Having said all that, I’m sure I’ll keep playing with this technique, and experiment more with quantities – playing with the qb, or quantobasta. This is the “how much is enough”, the quantities that, more intuitively, feel right. (Something that’s discussed by Rachel over here). For starters I think the biga I made was too low hydration, despite the maestro’s advice. So I’ll increase the water, or, if I’m using more of my high hydration leaven (to make a semi-biga, semi-madre), add more of that. Vediamo!

6 Comments

Filed under Breads, Recipes

Flapjacks

plate of flapjacks

Growing up in Britain, I was quite confused when I first heard the American English usage of “flapjack”. I ate a lot of flapjacks when I was a kid, and it was a staple of my university years, so the idea that the name could be used for anything other than a sweet slab of oaty goodness did not compute. Apparently the American usage of the word is for a pancake, something made with batter and fried in a pan. Wuh? What in blazes? What the flip?

I’ve experienced a lot of this low-level cultural confusion lately, having done three months in the kitchens of the American Academy in Rome. Some days I’d talk to a California colleague and they’d look at me totally blankly, following neither my accent nor my idiom. Other days, it seemed like everyone was doing comedy English accents, taking the piss. Anyway, I digress (as usual).

This is a flapjack. It’s made with rolled oats.

oats

We’re – finally – going hiking in the mountains this weekend, and when you’re hiking, you need energy food. Oats are perhaps the best straightfoward, real energy food you can get. Feed them to working horses and they’ll go and go. Eat porridge (gah – oatmeal!), muesli or granola for breakfast and you’re set till lunchtime. It’s all about the slow energy release from the complex carbohydrates. Oats are also great because the bran (the high fibre bit)  reduces low-density lipoprotein, or “bad cholesterol”. I should probably say “some research indicates” it reduces LDL or something, but I thought there was a pretty good scientific consensus these days. Oats are also high in protein – not the increasingly problematic proteins of starchy modern wheat, but a different type that’s reportedly akin to meat or egg protein.

Humble, but a real superfood.

So flapjacks are great. Except for the fact that, when making them, you undo a lot of the good work of the oat in its natural state by slathering it with butter and refined sugars, in the form of sugar and golden syrup.

Golden Syrup

The butter is essential for proper flapjacks, but what defines them is really the golden syrup. Ah, golden syrup. I believe this doesn’t exist many parts of the world, but in my British upbringing it was v important – notably for the quintessential winter steamed pudding known as treacle sponge. Which isn’t made with treacle (black, ie molasses) but is made with golden syrup (golden). It looks like honey, but is basically a viscous liquid sugar. Technically it’s an inverted sugar syrup. Felicity Cloake in The Guardian also dedicates one of her “How to make the perfect…” blogs to flapjacks. She discusses the whole crunchy vs chewy thing, so I’m not going to go into that. She also includes a link to this useful site, with an in-depth discussion of flapjacks.

Suffice to say, flapjacks are stupidly simple and unsophisticated, they’re packed with rolled oats, they’re very sweet, and they’ll help you get across mountains. I just hope it doesn’t thunder and lighting when we’re up there among the peaks of Abruzzo National Park, as that’d totally freak out Fran. And, as much as I’d dearly dearly love to see one of western Europe’s few (really tragically few – maybe a three dozen or) remaining brown bears, let’s just hope one doesn’t get too excited about the flapjacks, as that’s totally freak us both out. We should be alright; if they were made with honey, that’d be another story, as bears love honey right?

As for a recipe. Well, I made a lot of flapjacks when I was at universty, and played around with the recipe extensively. I’ve not made them for years though, and my recipe is tucked away somewhere, in another country, in a shed, in a box, in a knackered old blue scrapbook. So instead, I used Cloake’s, with a few minor tweaks that I’d probably tweak some more were I to make them again any time soon.

sugary fatty goodness

Preheat oven to 180C (160C fan).

Line a baking tin with baking parchment. Cloake suggests a 30x20cm tin, but I think these would be better thicker, so if you have a tin a size down from that, I’d recommend using it.

Melt 250g butter in a large pan, along with 70g of brown sugar (Demerara is traditional; I used more of a soft brown as sugar types are little different here in Italy to in the UK) and 150g golden syrup. (Guys – seriously, electronic scales, tare function, easy. Tablespooning golden syrup is messy and inaccurate. Not that accuracy really matters for a recipe like this. It’s not a fancy cake with exacting chemical reactions.)

When the mix is all melted, add 450g of rolled oats. You can use a mixture of jumbo and quick-cook porridge oats, whatever you fancy. Add a pinch of salt too, if you’ve used unsalted butter.

Bake for about 25 minutes until nice and golden brown. Mine are a bit underbaked but the darned oven in our rental flat has very aggressive bottom heat so I didn’t want to char the bottom trying to get a golden brown top. I’ve had a charred bottom before, and it’s not fun.

sugary fatty oaty goodness

3 Comments

Filed under Biscuits, cookies, Other food, Recipes