Category Archives: Baking

Baking – Daniel Etherington’s bread experiements

Hot cross buns, Easter 2014

Hot cross buns 2014

It’s Good Friday, and there’s a very interesting story in our local paper today. I’ve eaten hot cross buns on and off all my life but learned a few new facts from Kevin Gordon’s piece in the Sussex Express. These sweet, fruity buns, with their cross-shape commemorating the crucifixion of Jesus were traditionally baked “in preparation for the end of Lent on Easter Saturday.” Okay, that I knew, despite how much crass British supermarkets might start promoting them pretty much straight after Christmas these days.

Gordon continues though: “It was often a tradition that one bun would be saved until the following Easter for good luck. A hot cross bun hung up in your home would protect if from fire until the following year. It was thought that hot cross buns baked on Good Friday would never go mouldy.”

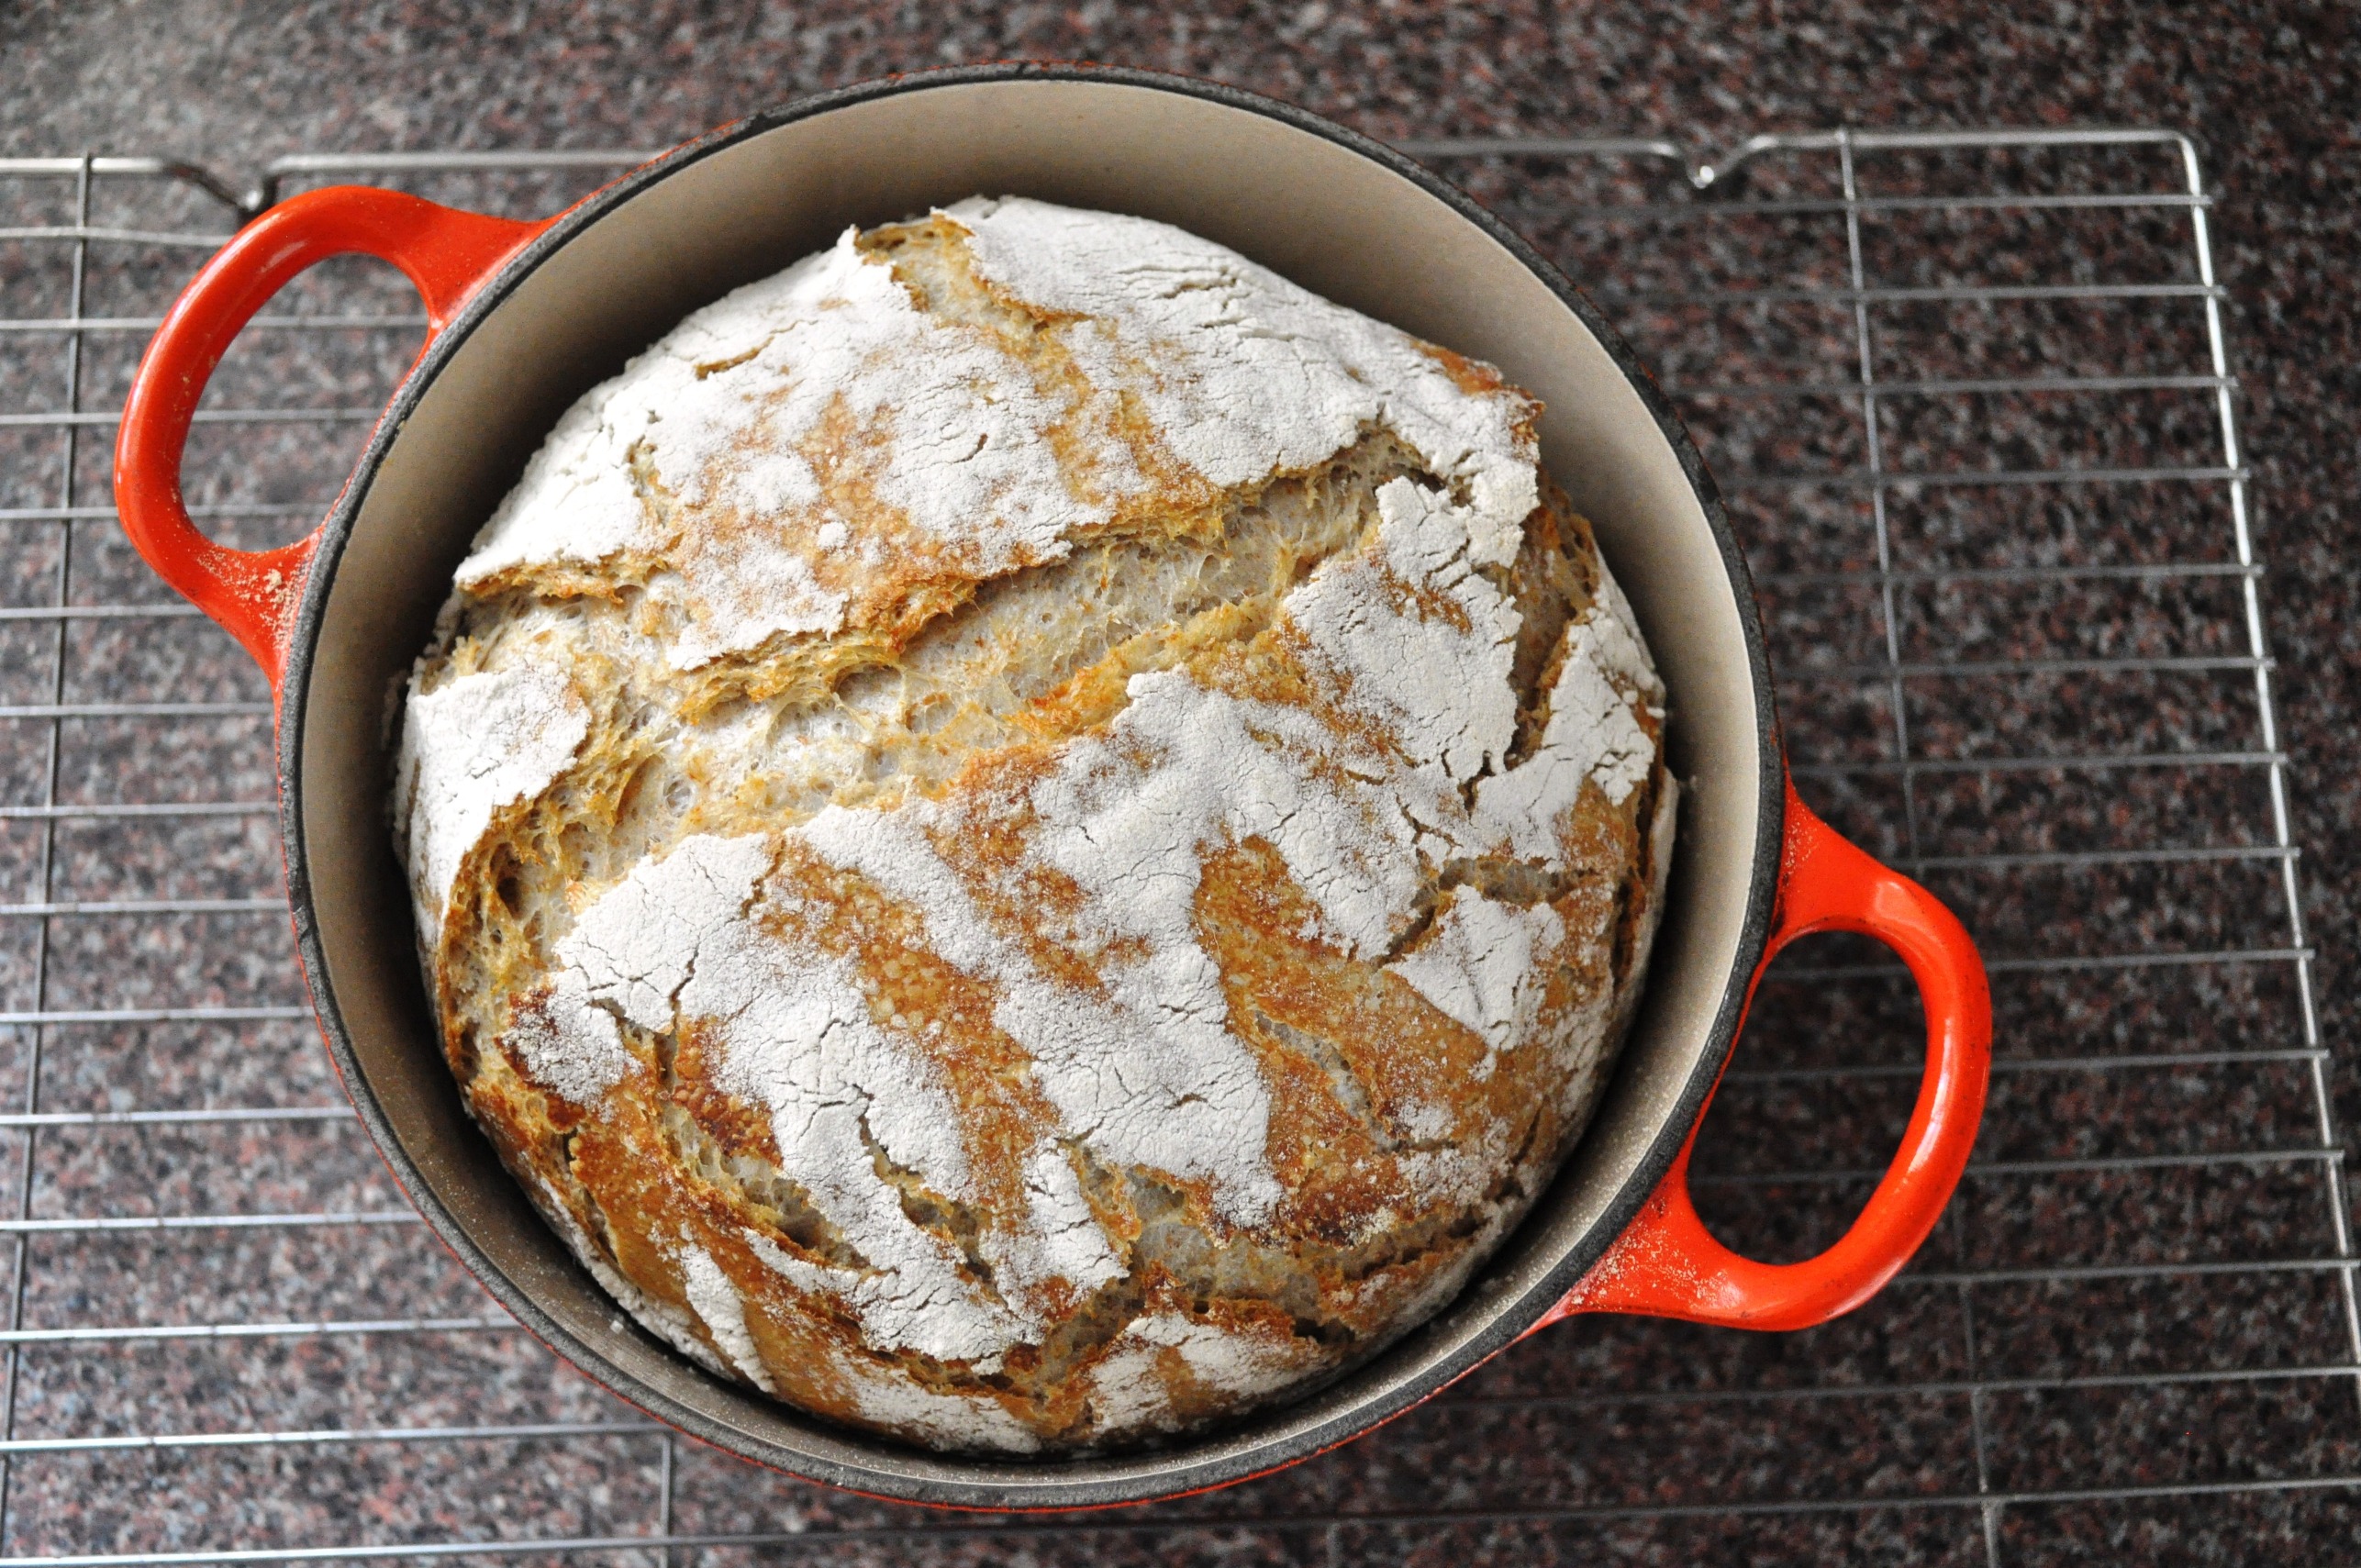
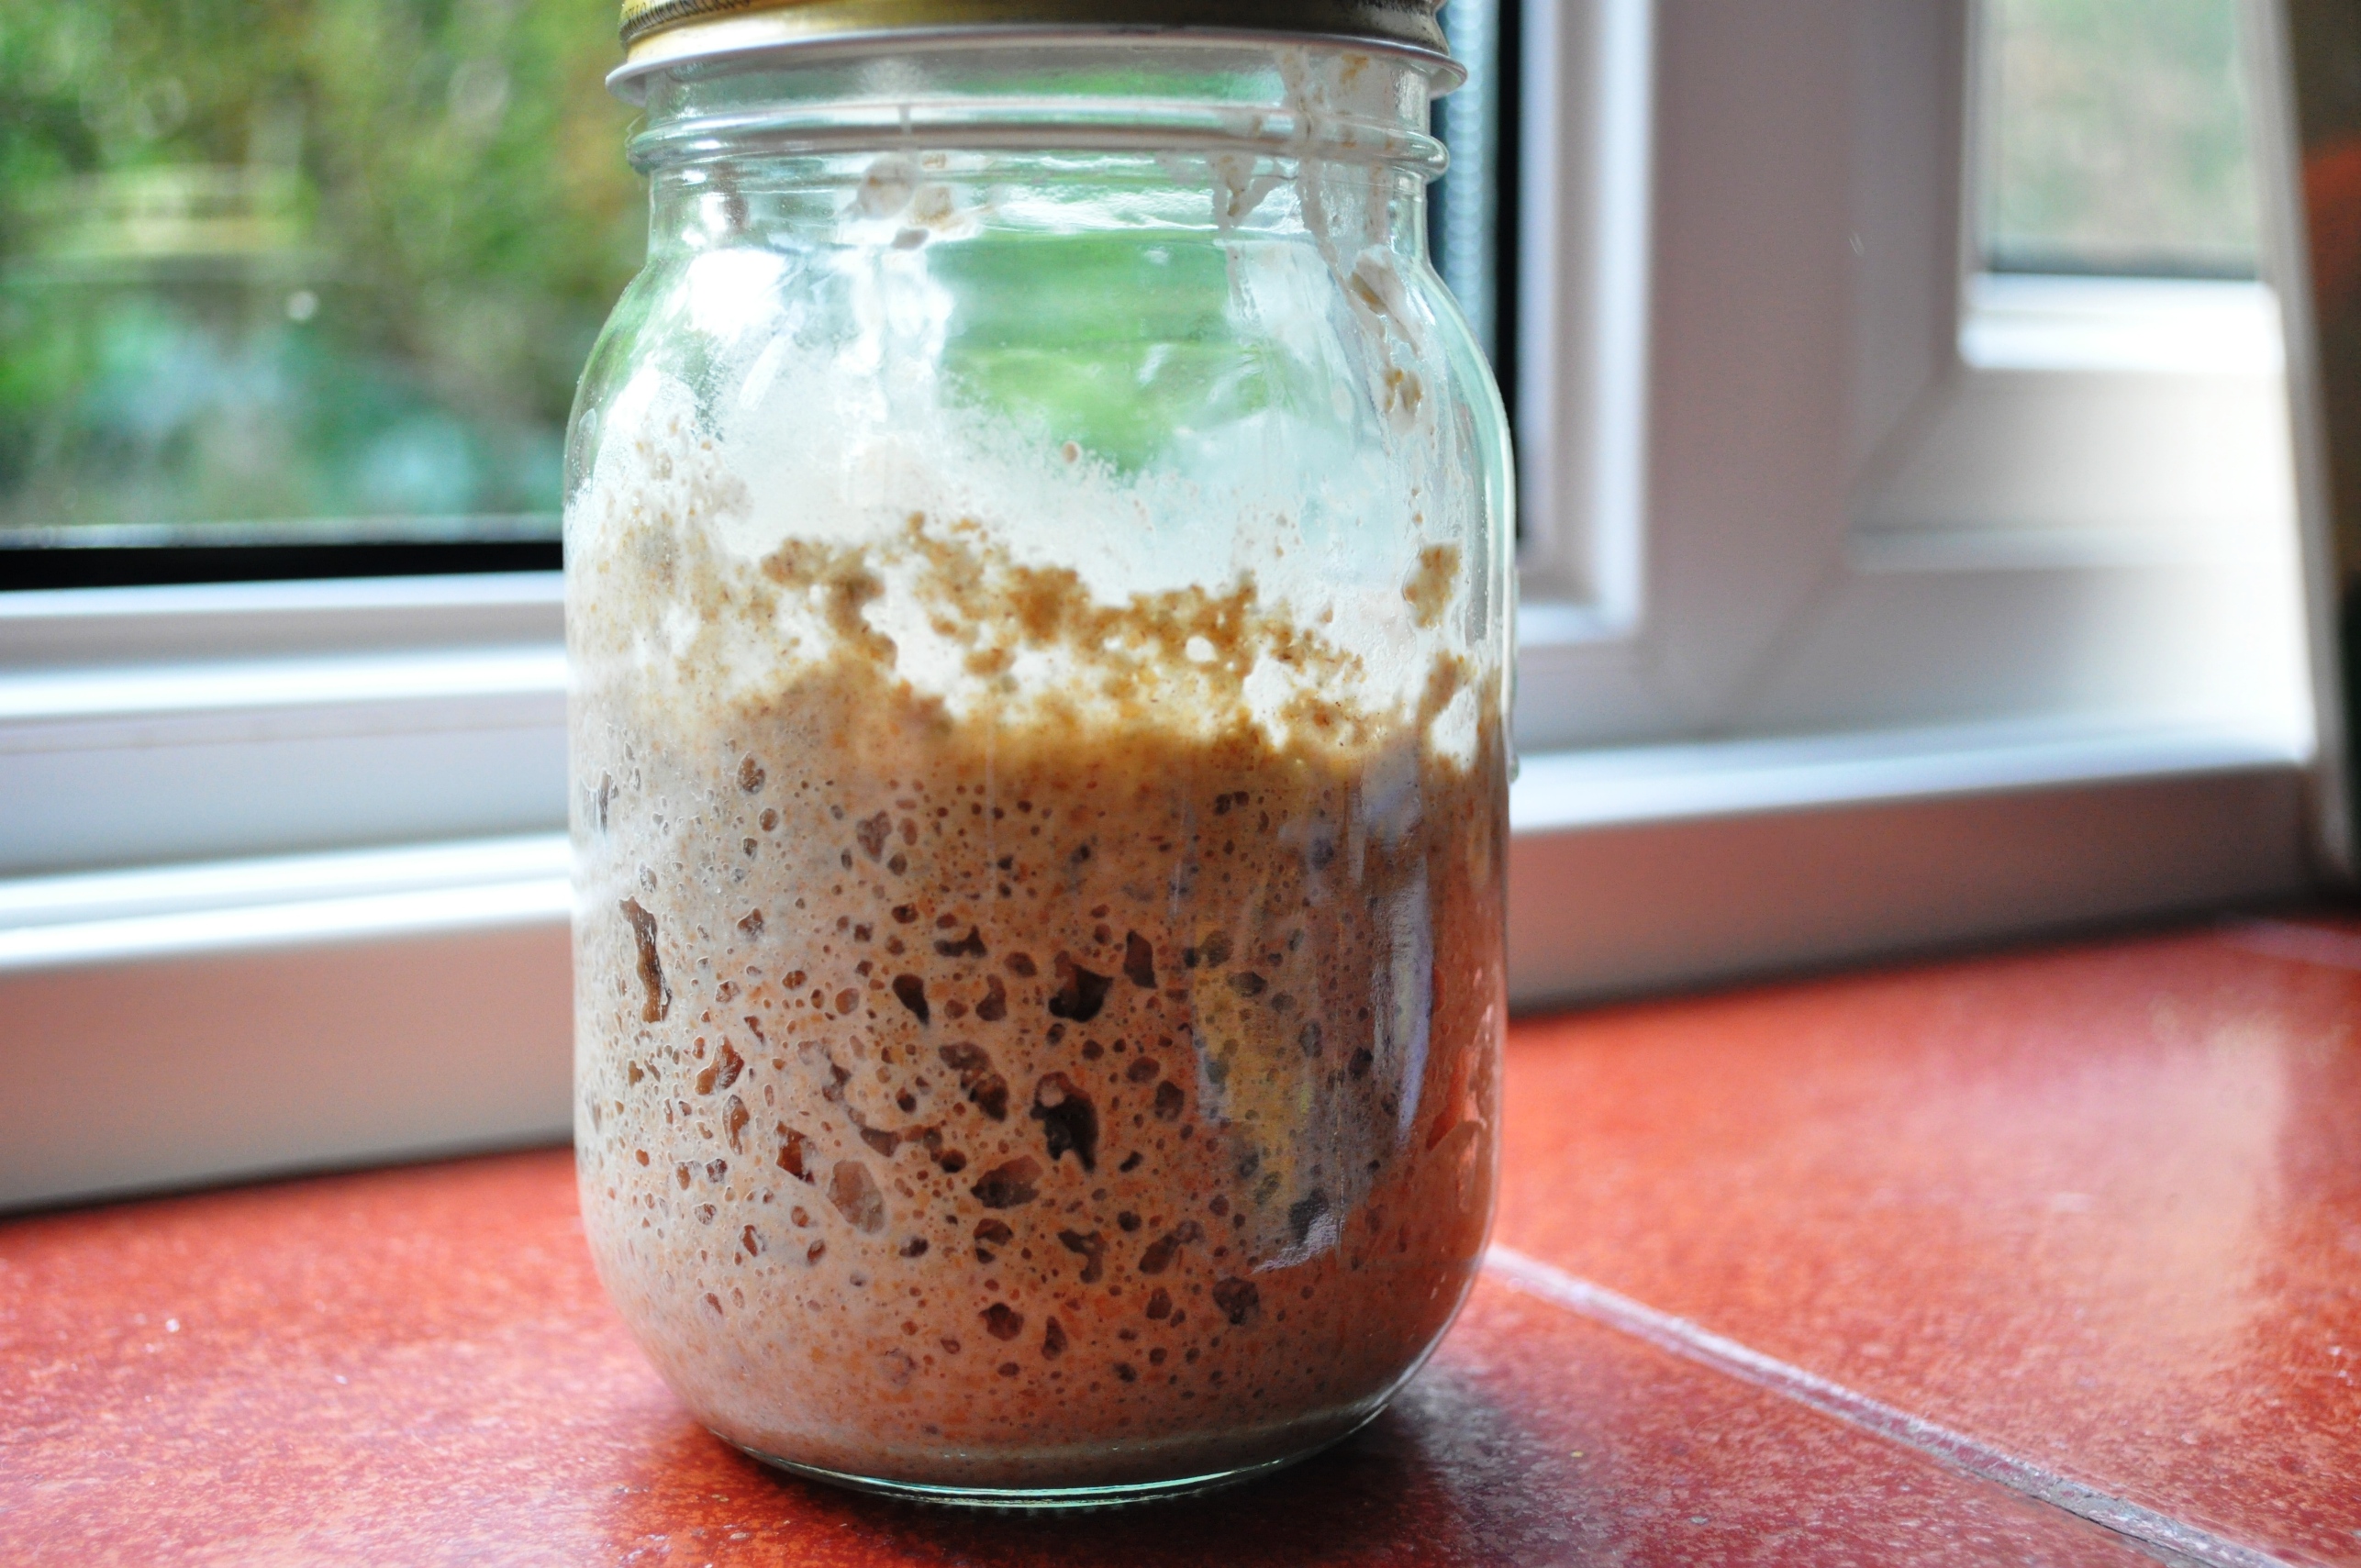
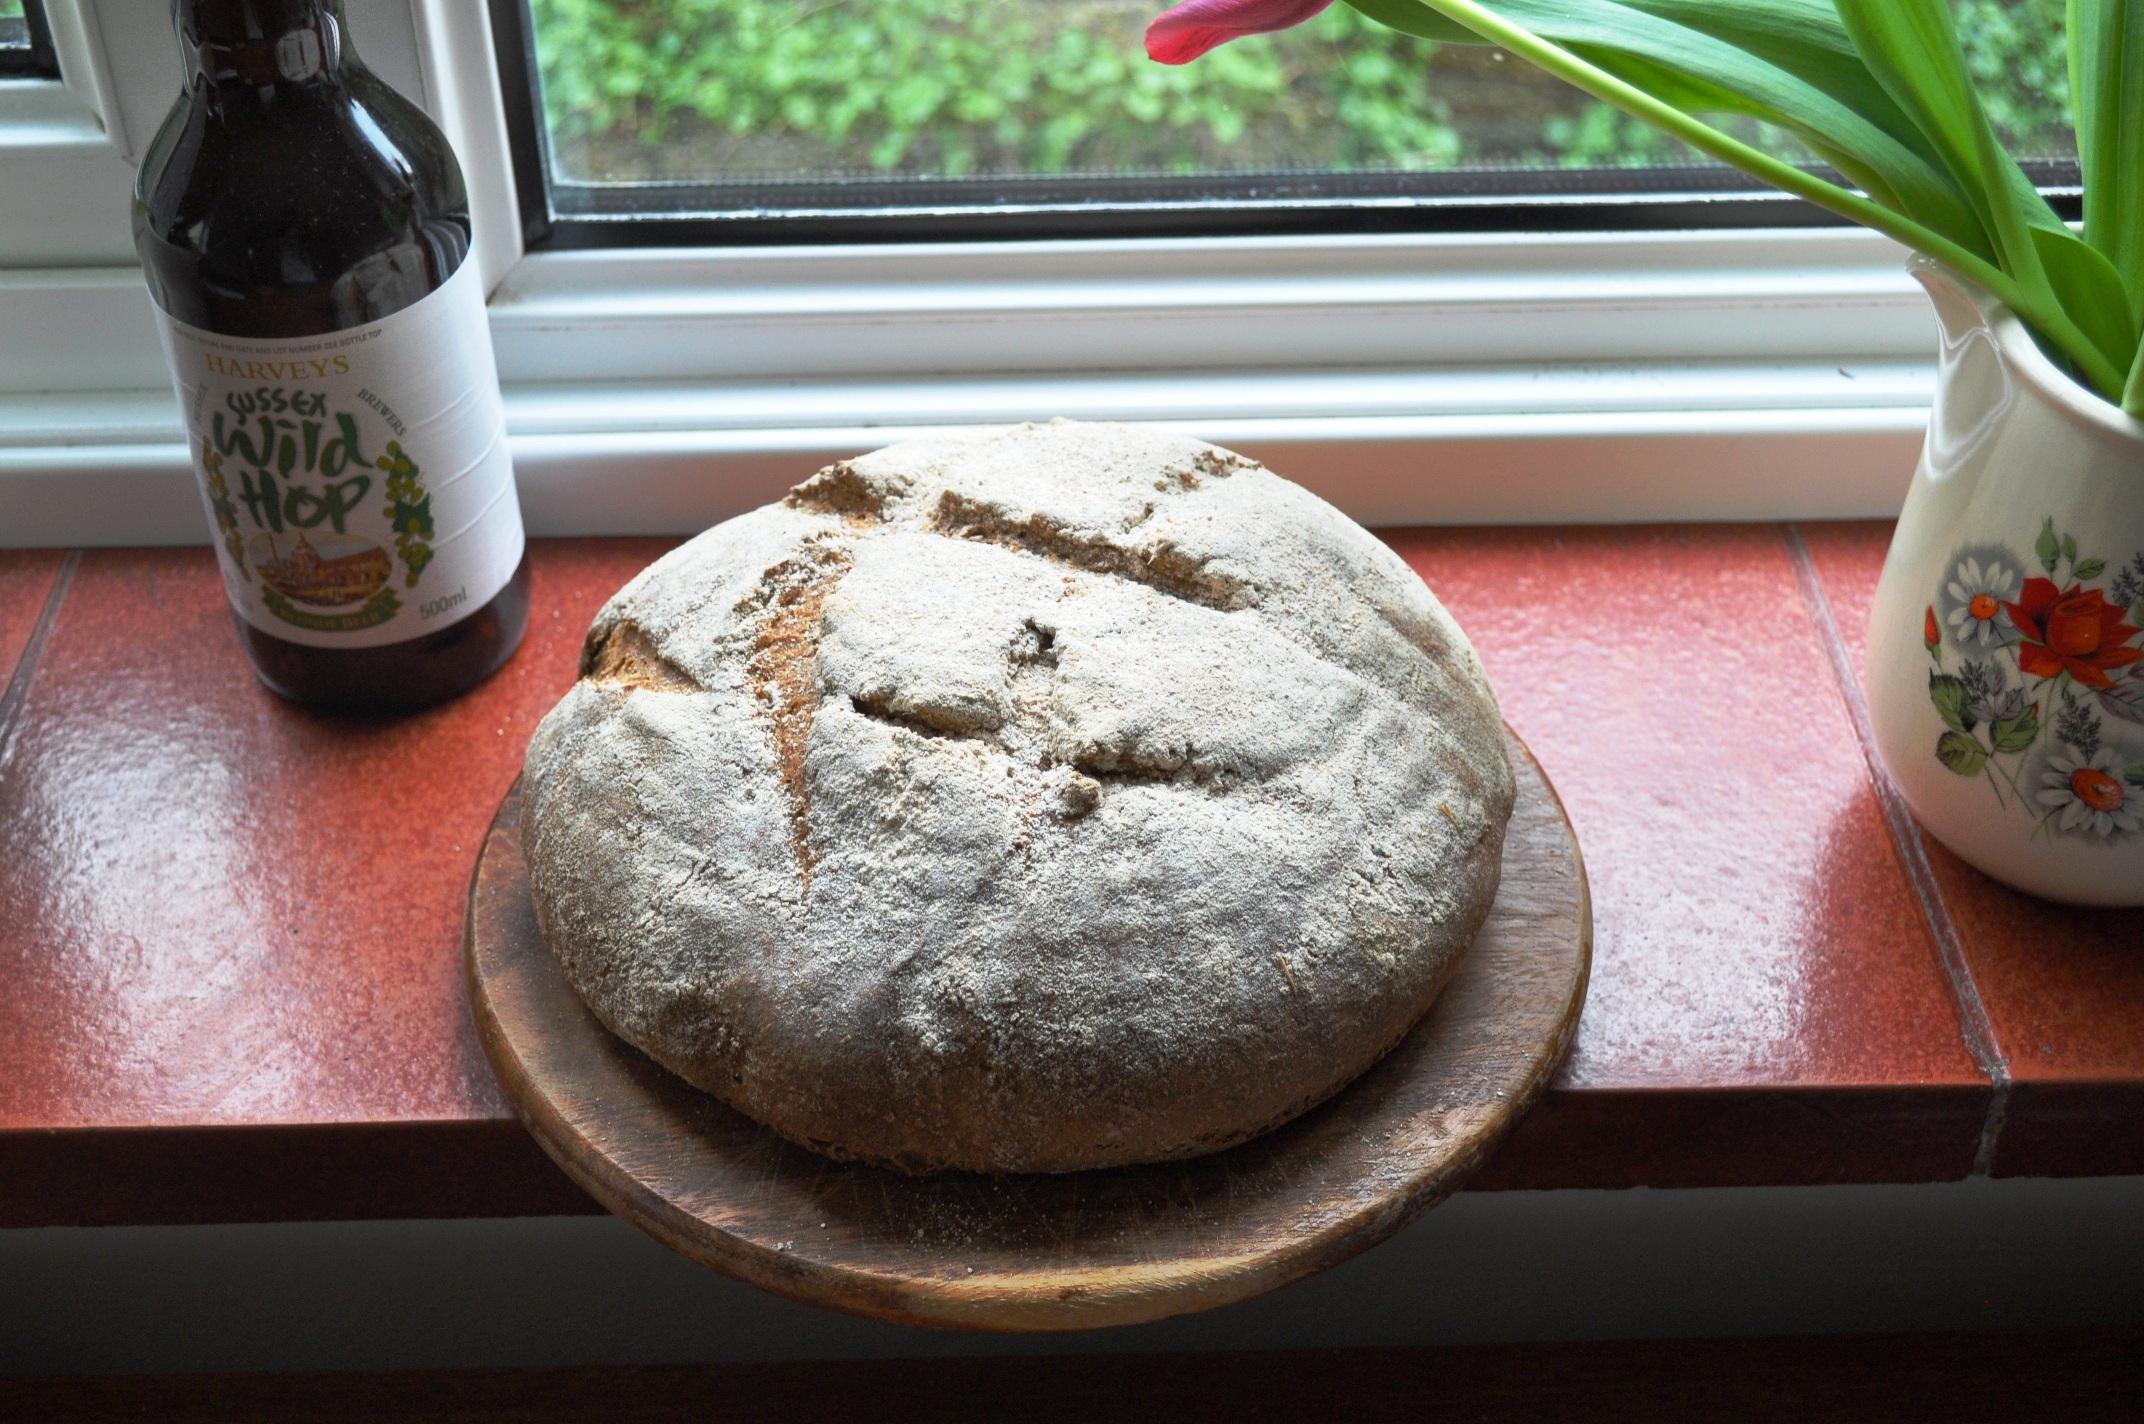
Note – this is quite a sticky dough, something that can intimidate less experienced bakers. I recommend you read my tips for handling sticky doughs here.

Makes 16

Sponge/pre-ferment:
140g strong white flour
18g fresh yeast (so about 9g ADY, 6g easy-blend yeast)
150g water

Dough:
320g strong white flour
6g salt
55g light soft brown sugar or light muscovado
55g butter, melted
1 egg, beaten [approx 58g beaten egg]
125g milk
3 t mixed spices – cinnamon, nutmeg, mace, allspice, ginger. Whatever you like
85g peel
85g currants, sultanas or raisins

For the crosses:
60g plain flour
40g water
10g veg oil
Pinch of baking powder

1. Combine the 140g flour, yeast and 150g of water to make a starter, sponge or pre-ferment. Leave to ferment overnight in a cool place or the fridge (but take it out in plenty of time the next morning). Alternatively, leave it in a warm place for a few hours.
2. When the sponge is nice and bubbly, get started on the rest. Mix flour together the flour and salt.
3. Melt the butter.
4. Warm the milk to about body temperature. You can infuse it with Earl Grey tea if you like. If you’re using tea bags, don’t forget to remove them!
5. Add the sponge to the flour and salt.
4. Mix together the melted butter, milk, sugar, beaten egg and spices then add this to the flour too.
5. Bring the mixture to a dough. Turn out the dough and knead for a few minutes. Once you’ve formed a ball, put it back in the bowl, cover and leave to rest for 10 minutes.
6. Stretch out the ball, add the fruit, then fold over the dough, and knead it again to mix in. Form another ball, then cover and leave to rest for another 10 minutes.
7. Give the dough another brief knead. Rest for another 10 minutes then do a final knead.
8. Put in a clean bowl, covered, and leave to prove until doubled in size – perhaps two-three hours, depending on your room temperature.
9. When it’s proved, weigh it. It should be about 1100g. If it’s not, either I’ve cocked up or you have.
10. Divide the dough into 16 equal pieces, weighing about 70g each. Or go larger, 13 at about 85g (a baker’s dozen).
11. Form the pieces into neat, tight balls.
12. Place the balls on baking sheets lined with parchment then cover and leave for a final prove. Again, this will maybe take two hours, depending on ambient temperature.
13. Preheat the oven to 200C.

Piping crosses

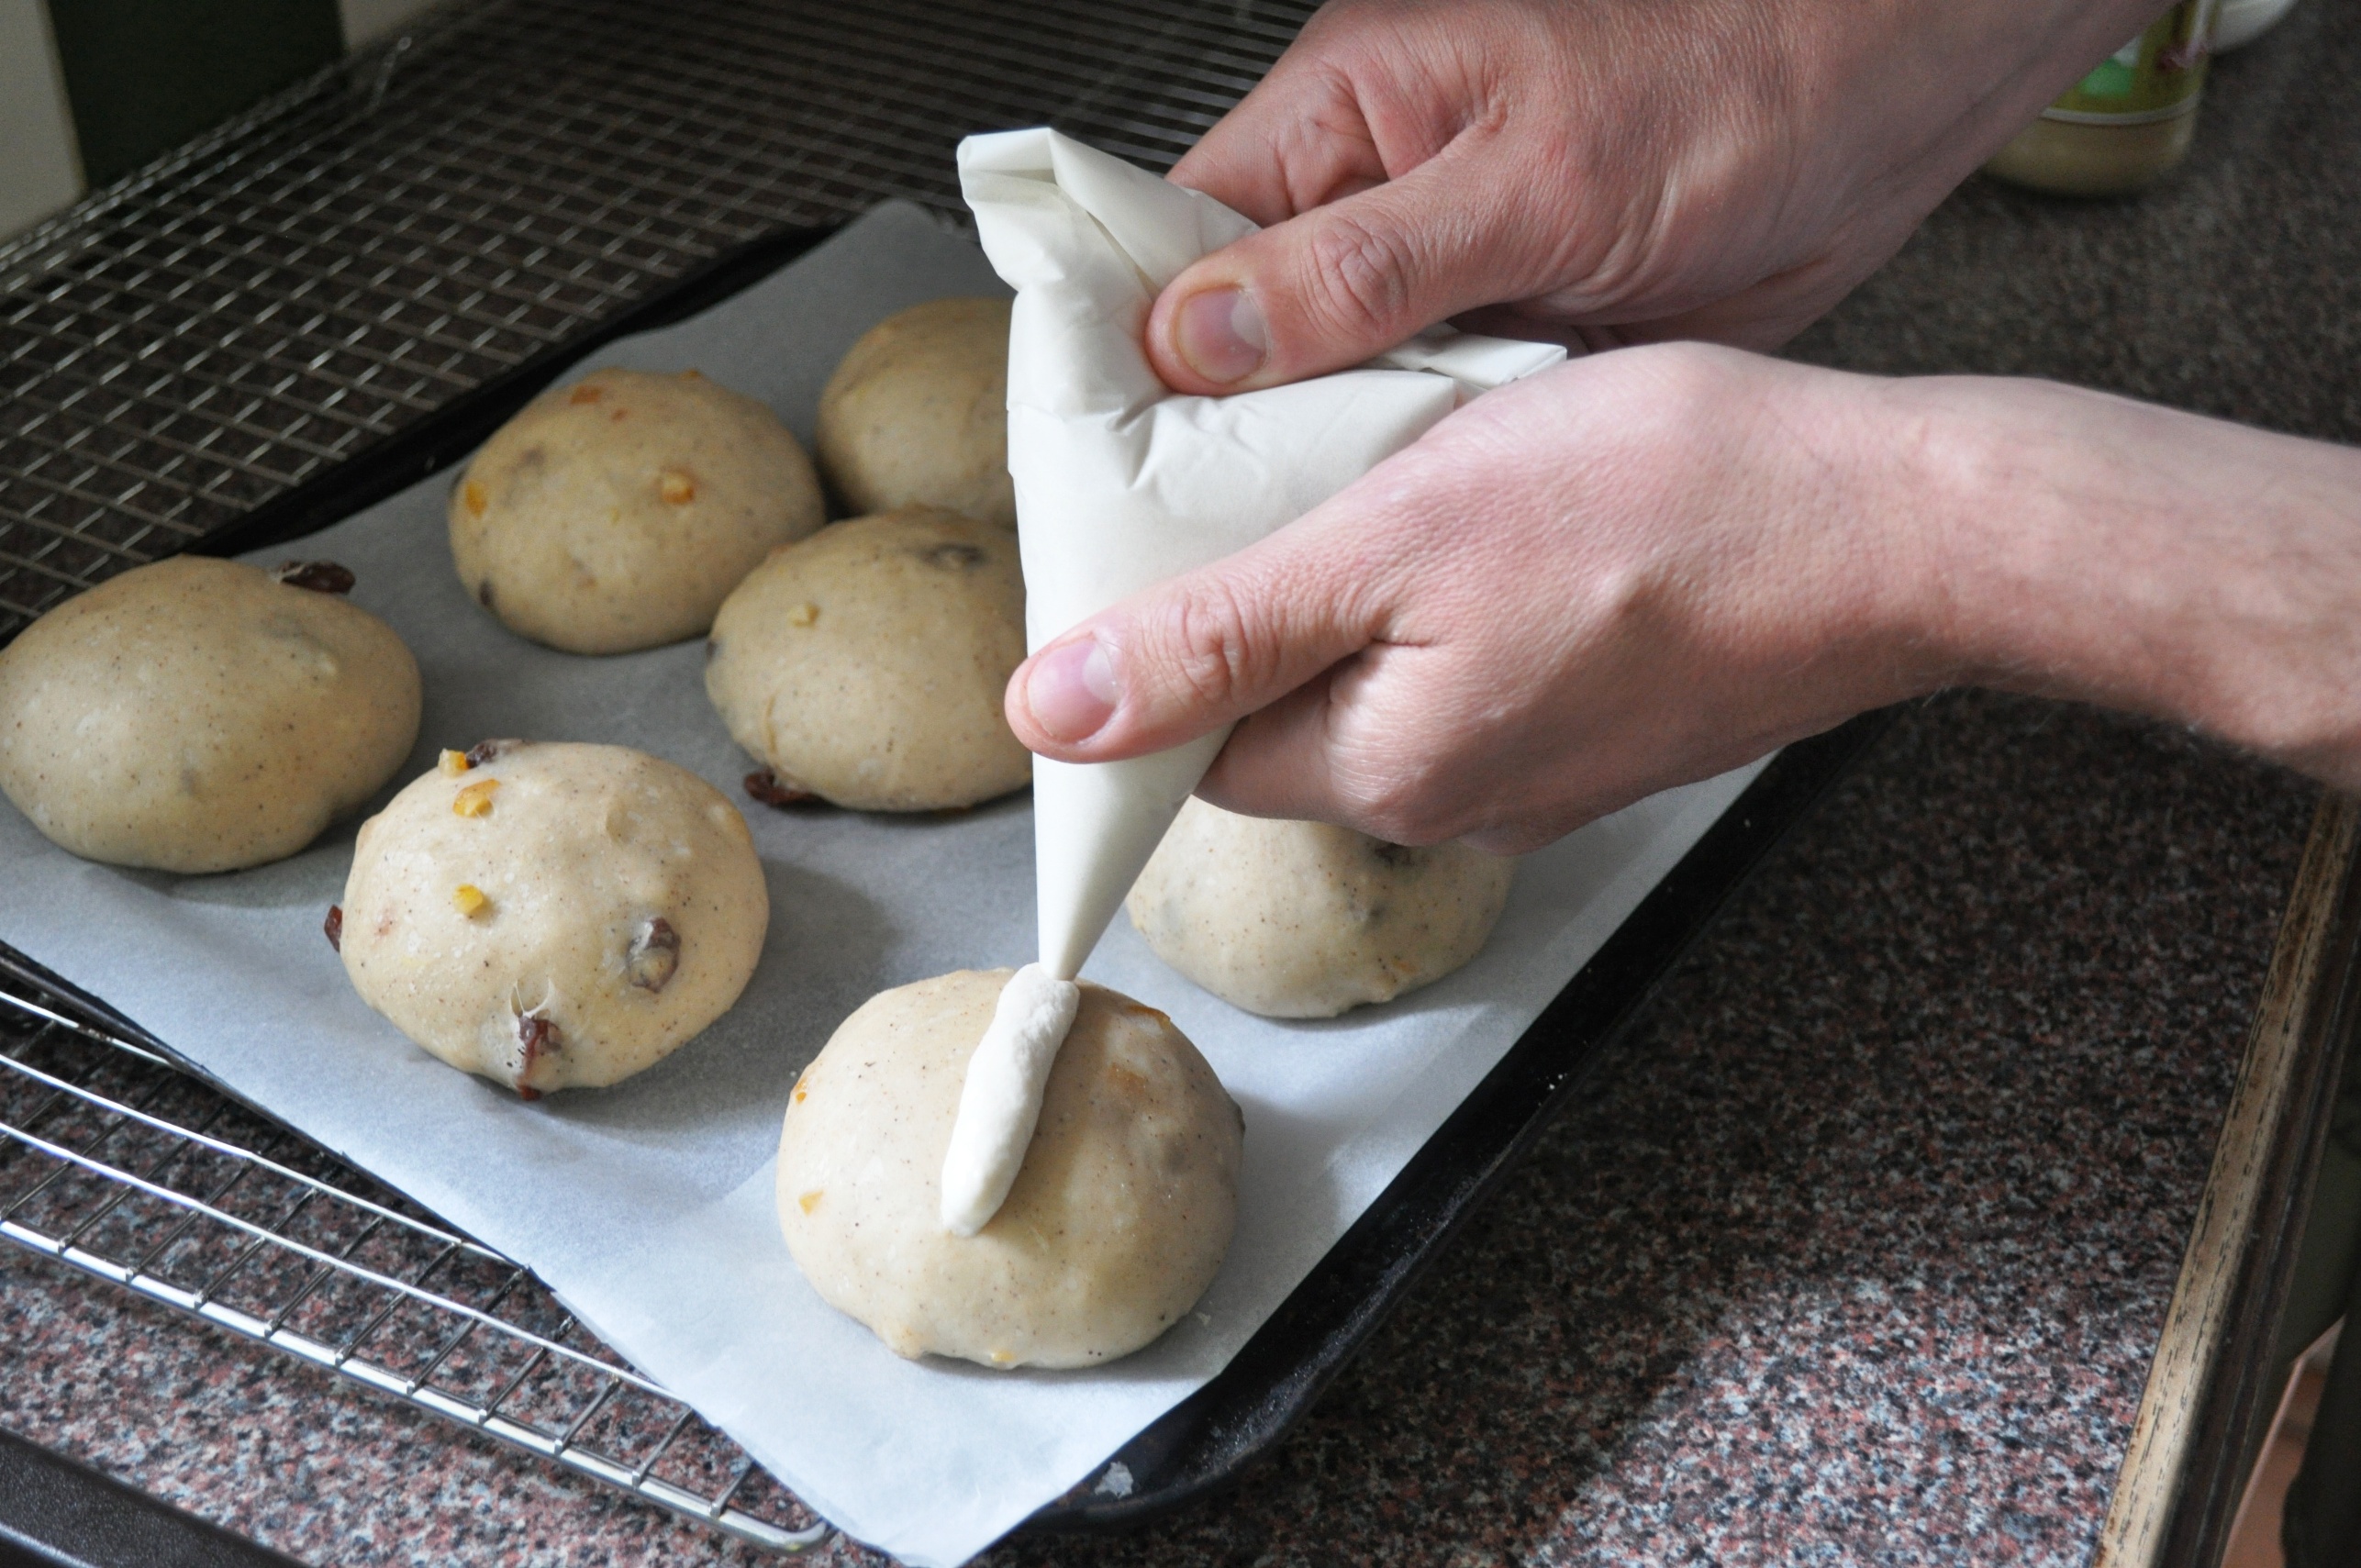
14. Mix the cross batter; you want a fairly thick gunk. When the buns are proved, pipe crosses onto them. Mine were a bit messy this time… Hey, it’s artisan, rustic…
15. Bake for 12-15 minutes, or until nicely browned – this will depend on your oven.
16. Optional: while still warm, glaze with stock syrup – made from half/half water and caster sugar, about 50g each, heated to dissolve.

Enjoy for a Good Friday afternoon tea, or similar. The in-laws have arrived and we scoffed several for afternoon tea. Not sure if any will survive long enough to test the theory about them never going mouldy.

Bakers’ percentages

Note – the total flour is 460g, 140 in the sponge, 320 more in the dough, that is 30% and 70%.

Ingredient Percentage Quantity (g)
Flour (sponge) 30% 140
Flour (dough) 70% 320
Water 33% 150
Milk 27% 125
Egg 13% 58
Yeast (fresh) 4% 18
Salt 1.5% 6
Sugar 12% 55
Spice 2.5% 12
Butter 12% 55
Peel 18.5% 85
Currants 18.5% 85
TOTAL 242 1109

2 Comments

Filed under Baking, Cakes (yeasted), Recipes

Real bread, red bread

Sliced, morning sun

The expression “the best thing since sliced bread” is profoundly ironic. Grain is packed with nutrients, but plastic wrapped sliced “bread” is generally made with flour that’s been ground with hot steel rollers, which damage and degrade the nutrients, and then baked with the Chorleywood Bread Process (CBP), a heinously misguided mechanisation of the bread-making process developed in England in the 1950s.

All that sliced, plastic-wrapped pseudo-bread they sell in supermarkets and cornershops is CBP product. It’s not bread. It’s an insult to bakers, to our baking heritage, to the farmers who husbanded grain over the centuries. It’s an insult to our constitutions.

And yet the CBP “is responsible for over 80% of the bread [sic] produced in the UK and is used in every corner of the world.” (From Campden BRI.)

One of the reasons the CBP was developed and became so dominant was because the British population grew so fast in the industrial revolution we couldn’t grow all our own grain, and became reliant on shipments, especially from parts of the then British empire, notably Canada, as well as the US. Since the late 19th century, British bakers also began to prefer using the harder, higher protein wheats grown in such places. Or perhaps prefer isn’t quite the right work. As clearly it was economics that made British bakers shift from using British wheat to using North American wheat. Discussing the sheep and arable farming on the English South Downs, Fizz Carr says, “As the new rail-roads across America linked the grain belt of the Mid-West with the eastern seaboard ports, grain started to flood into Britain and the price of wheat tumbled. The cost of shipping wheat between New York and Liverpool fell by half between 1830 and 1880, and by half again from 1880 to 1914…” 1

A story, or myth
I’d always been lead to believe that the CBP was developed as two world wars, and a dependence on shipped grain, had seriously compromised British food security. The scientists at the British Baking Industries Research Association at Chorleywood wanted to both mechanise the bread-making process, making it faster (perhaps their greatest folly, see below) and wanted to be able to ease reliance on higher protein foreign wheats. They wanted to make bread again from the soft, lower protein wheats we could grow in Britain.

Flour

Or at least, that was the story. It’s one that’s regularly trotted out, such as here, on the site of one of Britain’s biggest organic flour brands. But last weekend I bought a bag of flour from the market stall of Imbhams Farm Granary. It was their latest batch of wheat flour, called Surrey Red Strong Bread Flour. (It’s called red because of pigments in the bran.) It was grown in Surrey, about 50 miles from Lewes, stone-ground to retain the nutrients at a mill a mile from the fields and, notably, very high in protein.

Surrey strong info

The info sheet said 17%, James Halfhide of Imbhams quoted a figure slightly higher, and said it would be even higher if they sifted more of the bran out to make a lighter coloured, less wholegrain flour. For comparison, low protein plain or all-purpose flour might be 10-12%, strong bread flour about 13% plus.

It’s Barlow wheat, a hard spring wheat developed recently2 in North Dakota in the US, but James said it grew very well here, especially in the excellent 2013 season. Which quite shocked me, after years of hearing the story – nay myth – that British wheat means low protein.

Wholesomely wholegrain
Although I like and make all sorts of bread, as the Imbhams farm flour is so wholesomely branny – and wheat bran is a great source of fibre, fatty acids, iron and other minerals and vitamins – I wanted to make a 100% wholegrain bread. I also wanted to reduce the amount of yeast I usually use (10g to 500g of flour, or 2%, to about 6g to 500g of flour, or 1.2%) and do a longer fermentation – that all-important factor of bread production that the CBP neglects. Wheat needs long fermentation to be fully digestible – this whole rushed factor with CBP is the main reason so many people say they have dietary problems with wheat-based products these days.

Bread and butter

Wholegrain red wheat bread
500g Surrey Red strong bread flour or similar strong wholegrain wheat flour
350g tepid water
6g fresh yeast (so use about 3g instant/easyblend, 4g granular/ADY)
10g fine salt

This is all you need to make real bread – these four ingredients. Indeed, arguably, you don’t even need commercial yeast, you could just cultivate your own leaven with flour and water and wild yeasts.

1. Dissolve the yeast in the water.
2. Put the flour and salt in a large bowl.
3. Add the yeasty water.
4. Bring together a dough.
5. Knead briefly then form a ball and leave to rest in the bowl, covered with a shower cap or cloth.
6. After 10 minutes, knead briefly again.
7. Rest, covered for another 10 minutes then knead briefly again.
8. Repeat this once or twice more.
9. Put the ball of dough back in the bowl, cover and leave to prove in a cool place. I gave mine a turn (that is, stretched and folded it) after an hour or so, then put it in the fridge for about 10 hours.
10. Remove from the fridge, form a ball, then rest for another 10 minutes.
11. Form a baton shape and put in a tin.
12. Give it a final prove, until about doubled in size and ready to bake. This is where mine went a big wrong (see below).
13. Bake at 220C for about 15 minutes then turn down to 200C and bake for another 25 minutes.
14. Remove the loaf from the tin. Tap the bottom – you want it to sound hollow. If you get a bit of a dull thud, put it back in the oven for another 10 minutes without the tin.
15. Remove and leave to cool – to allow the interior to finish its baking process – on a wire racking.

So yes, I goofed slightly with the final prove, step 12. I left it a little long in the airing cupboard at about 24C, overproving it so that it deflated when I slashed the top and I didn’t get a nice oven-spring (that is, the final burst of yeast activity and dough growth when you put it in the oven).

Proved. Over proved

Deciding when the dough has proved enough and is ready to bake can be tricky. Many people say the to test is gently prod the dough and see if the indentation remains, but I’m not convinced by this, as it might indicate the dough is over-proved and the gluten structure is collapsing slightly. I think it’s better if your prod marks slow re-inflate. It’s not an exact science though and every dough is different, especially with different flours. There’s a good discussion here.

I might have been disappointed with the over-proving and lack of oven spring, but it’s still good stuff. Hearty and slightly nutty. It went very well with a tasty a soup (gurnard, smoked paprika – yum) I made for dinner last night and with Marmite for breakfast. And, compared to how sick, how utterly sullied, you might feel after eating a CBP product, I felt thoroughly brimming with nutrients after eating this.3


Footnotes
1. ‘Good Food and Drink in Sussex’, Fizz Carr, Snake River Press, 2008. It’s a nifty little book for those of us living in Sussex and interested in its food heritage. I wish she’d quoted her sources though, as I’m intrigued about these figures and this whole transformation of British agriculture in the late 19th and early 20th centuries.
2. So yes, it’s hardly a heritage variety of Triticum aestivum, bread wheat. But it’s locally grown, locally stoneground.
3. Yes, of course I’m imagining I can feel the nutrients going into my body, but it did just feel good and wholesome. I haven’t eaten CBP products of years, but remember feeling bloated and sluggish and sick and gastrically stuffed up when I did.

4 Comments

Filed under Baking, Breads, Recipes

Lardy Johns and the simple pleasures of pig fat-based baked goods

Johns on plate

Here’s another traditional Sussex product that doesn’t really seem to exist any longer. Much like the Sussex plum heavies I did a month ago I’ve never seen the superbly named Lardy Johns in bakeries, and there’s very little information about them online. Also much like plum heavies they sit on the fruit pastry-scone spectrum and utilise that more old-fashioned baking fat: lard.

This recipe is from ‘Sussex Recipe Book With a few excursions into Kent’, a collection of traditional recipes by Margaret Samuelson, published in 1937. Some are her own or her family, many are gathered from interviews, while others are from 18th and 19th century sources.

The book doesn’t provide the source for the Lardy Johns recipe, which is given in the following wonderfully abrupt format: “Quarter pound flour, 2oz lard, 3/4 teaspoonful baking powder, 2 teaspoons sugar and a sprinkling of currants. Rub all together in your hands, and add enough water to make a stiff paste. Cut the paste into squares and bake for about 10 minutes.”

Putting that into a modern recipe format:
120g plain flour
3/4 t baking powder
60g lard
12g sugar
25g currants
40g water – more or less

1. Sieve together the flour and baking powder.
2. Cut the lard into small pieces and rub into the flour.
3. Add the sugar. I used granulated, but caster would be fine while Demerara or other brown sugar would give a slightly richer flavour.
4. Add the currants.

Lardy mixture
5. Bring the dough together with water. It’s 40g, more or less – what Italian recipes would put as “QB” – quanto basta, “how much is enough”.
6. Roll the dough out about 12mm (half inch) thick.

Unbaked
7. Cut into squares of about 50mm (2 inches). This recipe produced six, so if you want more double it.
8. Bake in an oven preheated to 200C for about 10 minutes, until lightly browned.

Baked
9. Eat warm, or let them cool, split and eat like scones (skohn, skon) with jam.

Scone-style

These really are very basic. Ten minute jobs. Simple fare from an era before fancy fats and flavourings. But they are surprisingly good. Slightly sweet, with a texture that’s light, slightly crisp and shorter than you’d get with a crumblier scone, which is likely made with butter and/or buttermilk.

And discuss
In ‘English Bread and Yeast Cookery’, Elizabeth David says, “If you cannot lay hands on pure pork lard, don’t attempt lardy cakes.” Well, I’m not sure of the purity of the stuff I’m use. It’s certainly not pure in a moral sense, being a product of the heinous industrial meat industry, something I try as much as possible not to engage with. But as I said in the heavies post, it seems almost impossible to source lard of good provenance. I’ve asked one of the meat purveyors on our local farmers’ market if she could do me some lard, so hopefully that’ll come through.

My vegetarian younger self 10 or 20 years ago would be horrified, but I’m enjoying these lard baking experiments – never mind the fact that products like these are a big part of the English culinary heritage. David suggests lardy cakes were traditionally made when people didn’t have their own stove and would bulk bake once a week. She explains, “… all the lardy cakes, the yeast dumplings, the buns and small cakes … were made from any extra dough not used for bead.” She goes on to say, “For these lovely cakes and rolls, lard is essential to achieve the proper texture, richness and weight. There is no such thing as a really light lardy cake.”

This suggests the Lardy Johns recipe from Samuelson is fairly modern,  developed from the yeast dough recipes with the advent of baking powder – a 19th century invention. Interestingly, the more common surviving members of the English lardy cake family are yeasted. Central and southern English counties like Hampshire and Wiltshire are associated with lardy cake, and the Wikipedia entry says lardy cake is found in “in several southern counties of England”. David, however, also gives a recipe for a Northumbrian version that neatly defenestrates that anonymous Wikipedia contributor’s theory.

I would hazard that lard, and a bit of sugar, and a few currants, when combined with a basic dough, would have been used by poorer folk throughout Britain to make a treat through from the early modern era to the mid-20th century, when intensification of farming made butter more cheaply available. They’re modest treats, sure, but compared to the absurdity of the cupcake, and suchlike contemporary middle-class obsessions, they have an assertive honesty and simplicity.

1 Comment

Filed under Baking, Cakes, Cakes (yeasted)

Burger buns with a twist

Beanburger with carrot and cumin bun

Over the past few years, the UK street food scene has improved markedly. Artisan producers, in part inspired by the US street food scene, have started producing real food from food trucks – a world away from the mechanically separated burgers, listeria buffets and industrial crap that has dominated here for so long.

The other day I was in Brighton and went to the Street Diner, a Friday street food market in Brighthelm Gardens, Queen Street, BN1. It started up exactly a year ago and is now operating Saturdays too I believe.

As well as various Asian and Middle Eastern-inspired food stalls, there was enough pulled pork, brisket and burgers to satisfy my carnaholic wife Fran and brother-in-law Al. No street food scene is complete without burgers of course. As much as I adore the form factor of a burger in a bun, I’m not a carnaholic, so went for something Middle Eastern. But the next day, back in Brighton to meet Fran, I thought she might be craving burger, so did some investigation into Brighton’s best.

Burgers in Brighton
This seems to be such an important subject, there’s even an entire blog dedicated to it (here). So yes, we couldn’t possibly hope to get to the bottom of the Brighton burger scene straight away, so just plumped for Troll’s Pantry. They’re one of the most established of Brighton’s burger outfits, emphasising a use of local ingredients and operating out of the Hobgoblin pub. Which is all well and good, but on a Saturday evening, the latter wasn’t exactly a joy. It felt just like some dodgy student pub from my uni years in the 1990s, stuck in grubby aspect. And even though they have half a dozen or so handpumps, most of them were off. Don’t they have any actually trained to change cask on their busiest night?

The burgers themselves were excellent though. They’re served, US-style, in a plastic basket and a brioche-style bun. Chips – or fries, if you must – extra. I had a veggie one, Gaea’s Bounty, that was tasty, and Fran said her beef job, the Imperial Swine, was excellent.

“All beef comes from Sussex conservation project, where the English Longhorn cattle lead a wholly natural lifestyle,” says the blurb on their site. “The beef is aged for 35 days before being ground into 100% steak patties.” So that at least compensated for the lame pub. Pity Troll’s Pantry can’t find a better place to ally with.

Brioche for breakfast not burgers
Anyway. The brioche thing. It’s had me scratching my head since I first encountered it in Rome, in a venue doing US-inspired burgers. I just can’t quite reconcile the use of brioche buns for burgers.

For me, brioche is quintessentially a breakfast bread. Enriched with egg, dairy and sugar, it lends itself to eating with jam, Nutella (god forbid), coffee and hot chocolate. I don’t get how it’s considered an appropriate partner for the salty, savoury experience that is burger patty and chips.

So when I wanted to make some bean burgers at home, I didn’t want to make brioche buns. I’ll save that for a weekend breakfast, thanks.

Good old Dan Lepard had a good option, a recipe in Short and Sweet, the book that collects his wonderful recipes from the Guardian. His burger bun involves carrot and cumin. And onion. And paprika. In the dough. Yes. Quite odd, perhaps, but it worked well.

In fact, the buns are, like brioche, made with dough enriched with milk, butter and egg. But rather than taking the dough into sweet, breakfast-appropriate territory, Dan takes it into savoury, burger-appropriate territory. With the addition of veg and spices.

If the addition of carrot sounds strange, just think how it helps make for delicious moist cakes. Dan, meanwhile, says, “The grated carrot and corn flour keeps these buns bouncy, soft and moist, helped by the hot oven and a short baking time.”

The original recipe can be found recipe here. The version in Short and Sweet is slightly differnt. Here’s my version,a tad tweaked.

100g milk
120g boiling water
15g fresh yeast
50g unsalted butter, melted
1 egg
100g carrot, finely grated
50g onion (ie a small-medium one), finely grated
500g strong white bread flour
50g cornflour (that’s cornstarch in American)
12g fine sea salt
1 t ground cumin
1 t paprika (I used smoked)
Water and sesame seeds to finish

Ingredients

1. Combine the boiling water and milk in a jug. You don’t want it too hot – if you have a thermometer, no more than body temp, or 37C.
2. Once it’s at a suitable temperature, crumble in the yeast.
3. Whisk the butter and egg into the liquid too.
4. Combine the flour, cornflour, salt and spices in a large bowl.
5. Add the liquid to the powders and bring to a dough.
6. Knead for a few minutes to clear (that is, bring it all together nicely), then leave, covered, for 10 minutes.
7. Give the dough another short knead, then leave for another 10 minutes and repeat. Do this once more.

Dough before proving
8. Form a ball then leave to prove in a covered bowl in a draught-free spot.

Dough after proving
9. When the dough has doubled in size – how long this takes will depend on the temperature of where you leave it – take it out of the bowl.
10. Divide into six pieces. My dough weighed just over a kilo, so each ball weighed about 184g. You could make bigger or small balls depending on what you’re doing with the buns – are you making massive burgers or small ones?
11. Form the pieces into balls, put them on a baking sheet lined with parchment, and leave to prove up again.

Buns before baking
12. Preheat your oven to 220C (200C fan).
13. When the balls are plumped up – the original recipe says “until risen by half” – brush the tops with water and sprinkle with seeds.
14. Bake for about 25 minutes, until nicely browned.

Buns after baking
15. Leave to cool completely.

We had ours with some bean burgers. I like making bean burgers – you can basically just chuck beans and some stodge and whatever flavours and leftovers you have into a food processor. I used butterbeans, some soffritoed onion and garlic, some bread, a bit of mashed potato, some of the wild garlic and nettle pesto I made a massive batch of after a foraging walk on Sunday.

I’m not going to get into veggie vs meat argument here, as obviously a bean burger is a very different proposition to a real meat burger, lacking that juicy, bloody fattiness. But, like a meat patty, bean burgers can exploit the same satisfying format of condiments (in this case mustardy mayo) and additons (cheese, gerkins) all combined inside a bun. The chips here were actually just made from roasting raw potatoes.

3 Comments

Filed under Baking, Breads, Recipes

Le Creuset-baked sourdough

Sourdough baked in Le Creset, straight out of the oven

This is a technique I’ve been wanting to try for ages. Since last year, in fact, when still living in Rome. There, I encountered the blog of another ex-pat baking enthusiast, Krumkaker. She made several of her loaves in a casserole dish. It’s also a technique demonstrated by the ever-enthusiastic Vincent Talleu here.

I didn’t have my Le Creuset, or similar, with me while living in Rome, but now I’m home, I’ve found it. (Though we’ve lost a load of other baking kit in our double move. Particularly sad is the loss of an Eiffel Tower-shaped cake mould Fran bought in Paris with our dearly missed late friend Sara.)

Anyway. I’m not sure baking in a cast iron casserole, or Dutch oven, or Le Creuset, is a Scandinavian technique. It’s likely something that just evolved before Europeans had ovens, and would bake in pots, initially earthenware.

Cracks

On the road
The only other time I baked in a Dutch oven was in New Zealand, 1989, when I was on the road with my old friend Stephen McGrath, his Clydesdale horses and an elaborate caravan of wagons and carts. I made an enormous, heavy-duty loaf in a massive Dutch oven, baking it in the embers of our campfire.

Me driving wagon through Westport, New Zealand, 1989

The logic of baking in a casserole dish is that the cast iron is not only nice and hot – you preheat it – it also traps the moisture of the dough, effectively steaming the bread as it bakes.

Steam is how you get a crisp crust on bread, and can be difficult to create in a domestic oven. Professional baking ovens have steam injectors, but domestic techniques using misting sprays or trays of water are never quite as good. I can’t remember the qualities of my campfire loaf all those years ago (25!!!), but certainly this loaf has a lovely crust – though it wasn’t the crispest I’ve managed over the years in a domestic oven.

It also has a very satisfying shape, and the dish constrains any dough flow if I hadn’t moulded the ball well enough. (I hate it when I make a round free-form loaf, forming the dough into a ball, then it flows out into a discuss shape when it take it out of the proving basket; shaping nice tight balls can be surprisingly tricky.)

My leaven / sourdough starter, healthy again

Rude health
This loaf is also my first sourdough for a while. Although I’ve been making most of my own bread since we got back to England at Christmas, I’ve been neglecting my leaven somewhat.

Now about five years old, my leaven is well-travelled and much changed. It was born in London, then moved to Sussex, then it moved to Italy with us. There, it was fed on many and varied Italian flours – wheat, rye and various things referred to by the much misunderstood term farro.

Then it moved back to Britain. And I abandoned it for a few months. While we visited friends and family in the US and NZ, the sourdough lodged with my mother. Who’s a great cook, but not a bread-maker – she’s doesn’t make bread with easy yeast, let alone have any experience with sourdough.

So the past few months I’ve been nursing it back to health. I fed it rye, and local stoneground wheat flour, and filtered water. Finally I introduced some other leaven, from third generation baker Michael Hanson of The Hearth in Lewes. This could be seen as cheating, but I see it more like a kind of marriage. The yeasts and bacteria in my (puny) leaven mixing with those in Michael’s leaven. And after weeks of TLC, it’s finally back in rude health.

Mad science
As with much of my bread-making, this is kinda experimental, not a recipe as such.

I made a sponge with:
300g water
80g wholewheat leaven (at 100% hydration)
200g strong white bread flour
All mixed together, and left, covered with a shower cap – another technique I learned from Krumkaker.

I left it all day, for about seven hours, while I went off and worked in The Hearth.

In the evening, I made up a dough, with a further:
100g white bread flour
150g wholemeal wheat flour
10g salt.

I gave it a short knead, formed a ball, then let it rest for about 10 minutes. I then gave it another short knead, another 10 minute rest, and repeated this a few more times. I then left it an hour, at room temp (about 18C). I then gave it a fold then put it back in the bowl, covered it, and left it in the fridge overnight (4C).

Dough

In the morning, I gave it another fold, resting it at room temp for another hour, then formed a ball, rested it 10 minutes, tightened up the ball, then put it in a basked and gave it a final prove in the airing cupboard (about 24C).

Final prove

I then preheated the oven to 250C, with the Le Creuset inside. After about 20 minutes, with the oven at heat, I turned the well-floured dough out of the proving basket and dropped it into the hot dish – taking care not to roast my knuckles. I didn’t slash the top –  because I wanted to see how it cracked. Or because I forgot.

Before baking

The lid went back on and I baked it for about 25 minutes at 220C. I then took off the lid, dropped the temperature again to 200C, and baked for another 20 minutes or so.

Cut

The results were good. The crust is more chewy than crisp, the crumb soft and moist. We had some for dinner, when I did wood pigeon breasts with a pancetta, thyme and juniper berry red wine sauce. We didn’t eat all the meat, so Fran used the leftovers for a sandwich for work, with a smear of wild garlic sauce. I bet no one else had that posh flavour combo sarnie* for their work lunch today.

Sandwich


* Any US readers, “sarnie” is British English – possibly even English English – slang for sandwich.


27 Comments

Filed under Baking, Breads, Flour & grain, Recipes

Brazil nut, maple and white chocolate blondies

White chocolate maple Brazil nut blondies

If you’re a baking obsessive and have a bit of a sweet tooth, you’ll know that feeling when you just have to have something sweet and homemade in the house. Call it a sugar addiction, but I prefer to think of it as enthusiasm. (I’m not allowed to say I’m passionate about it though, as that’s Fran’s linguistic bugbear du jour.)

The other day, I was heading home, thinking, Damn, we’ve eaten all the last batch of cookies. I fancied something chocolately, and while some chocolate cookies are quick to knock out and conventional brownies are  easy to make (I normally use a no-nonsense Stephanie Alexander recipe I’ll post here one of these days), I thought I’d veer towards blondies instead.

For those who haven’t encountered them before, blondies are like brownies – a gooey, sweet, tray-bake – but are light in colour and flavoured more by the sugar (something rich like Demerara), and not by cocoa and dark chocolate.

White chocolate maple Brazil nut blondies

Here’s what I came up with.

75g unsalted butter
100g Demerara sugar
80g maple syrup
75g plain flour
1 t baking powder
2 eggs
1 t vanilla essence
100g brazil nuts
100g white chocolate

1. Preheat the oven 180C (160F fan).
2. Grease and line a square or rectangular baking tin. I used a 22cm square.
3. Melt together the butter and sugar, until the latter is starting to dissolve.
4. Add the maple syrup to the butter and sugar and remove from heat.
5. Sieve together the flour and baking powder.
6. Beat the sugar-butter mixture into the flour.
7. Beat the eggs and vanilla into the mixture.
8. Coarsely chop the nuts and white chocolate and stir into the mixture.
9. Pour the mixture into the baking tin and smooth.
10. Bake for about 20 minutes. As with brownies, you don’t want to over-bake blondies, you want them to retain some moisture and squidge. Exact cooking time will depend on your oven.


2 Comments

Filed under Baking, Cakes, Recipes

Wholesome, wholegrain Magister and einkorn bread

With Sussex Hops

One of the things I enjoyed in my bread-making experiments in Italy was trying different flours, many of them traditional or what’s called “heritage grains”. This is a slightly vague term, muddled up with food fads, but basically it just means grains that are older strains. In the case of wheat*, they can either be alternative varieties to common/bread wheat (Triticum aestivum), or local variables, cultivated over generations to suit a particular terroir.

When I was trying to get my head around the Italian names for grains and flours – particularly the vexed question of what’s meant by “farro” – I wrote a few posts (here and here), where I started learning about some of the different strains and varieties of wheat.

Key heritage wheats that have survived the 20th century’s industrialisation and intensification of agriculture are einkorn, emmer and spelt, or to use their scientific names: Triticum monococcum, Triticum dicoccum and Triticum spelta. As with a lot of taxonomy, things are constantly being revised or bickered about; spelt is interesting, as it’s either Triticum spelta, or classified as Triticum aestivum var spelta, ie a variety of common wheat.

Whole loaf

Olde English
Since coming home to England at Christmas, after our two years in Italy and two months travelling in the US and NZ, it’s taken me a while to get back into the bread-making.

This is partly as we have a rubbish oven, partly as I forgot to pick up my leaven from my mother, who had been looking after it, and partly because Lewes now has a couple of great places to buy real bread these days: Flint Owl and The Hearth, which also has the town’s only proper pizza, made by master baker Michael Hanson and pizzaiolo and in his wood-fired oven.

Yesterday, however, I dived back in to the bread-making. I’ve been buying flours, and some of it needed using – particularly the Dove’s Farm wholegrain einkorn I bought that had a “Best before” date of July 2013. Ooops. Best before dates are, as sane people know, just a guideline, but flour does get a bit stale and loses its verve.

Still, at least it’s flour with form. The packet says Dove’s, one of Britain’s bigger organic flour brands, has been growing it on their farm on the Wiltshire/Berkshire border since 2008, and that the einkorn itself “was the original wheat, developed over 20,000 years ago”, and that it’s “the earliest type of wheat grown & eaten by mankind.” As such it can be seen as the crop that symbolises the human transition from wandering hunter-gatherers to settled farmers. You could say it’s the foodstuff that represents the founding of human civilisation, in Eurasia at least.

Einkorn, Sussex

So that had to go in. As did some lovely Sussex Bread Flour from Inbhams Farm Granary. These guys are a small operation, based in Surrey, the county to the north of Sussex. They sell a range of British grains and flours, as well as home milling equipment. Their emphasise the importance of freshness in grain products. Ironic considering the potentially state of the einkorn flour I had.

Still, the Sussex Bread Flour is not only relatively fresh, and thoroughly local, it was also a nice variety – Magister wheat, which Imbhams describe as “an older two row** variety” that “is a strong (high protein) grain”. It’s a winter wheat, and a variety of Triticum aestivum. I asked about the flour, and James Halfhide of Inbham’s explained that “Magister is a modern 21st century grain introduced from Germany and a ‘2 row’ variety – so an ‘older style’ of grain not unlike spelt or naked barley. So you could say it will carry some older characteristics – one we liked was the flavour. More modern breeding has lead to the ‘4 row’ varieties so they look ‘square’ and usually shorter straw stems.”

Between the two flours, both wholemeal, it made for a seriously wholesome dough, with only minimal elasticity. The einkorn has a protein level of 10.6% and while the Magister might be higher protein (around 12.5%), it’s stoneground and very branny. The resulting loaf has a close, slightly crumbly crumb. Very tasty though. And great with my favourite peanut butter brand.

Being back home in southern England, with its ongoing wind-wracked soggy apocalypse, might be miserable in some senses compared to poncing around the NZ summer or living in Roma, but at least I can get my Whole Earth Crunchy Original – a delicious type of peanut butter made with the peanut skin left on and one of the few foodstuffs I was transporting back to Italy after trips to England.

Sorry, it’s just better than any of those US Peanut Butter & Co varieties I’ve tried, despite that brand’s success (and hip excursions into film and TV; I first spotted it on screen a year or so ago in Girls) and even better than Pic’s Really Good, which I enjoyed a lot in NZ, as it’s from Nelson, a town I’ve got a lot of affection for. Those skins in tandem with butter – yes, butter, I like animal fat with my peanut fat – and this wholesome bread made for a cracking elevenses snack on this filthy morning.

Whole Earth

Not really a recipe

For one medium loaf I used:
500g wholegrain einkorn flour
250g Sussex Bread Flour
525g water
12g fine salt
10g fresh yeast

I’m using these same flours to feed up my leaven, but that’s not really ready for baking yet, so fresh yeast it was.

I also used water from our Brita filter. The tap water here in Lewes is pretty hard, and full of god knows what chemicals. I’m not sure the Brita existing makes it as pleasing as water bubbling from the ground in a mountain meadow in spring time, but hey, it’s got to be slightly better.

I just crumbed the yeast into half flour, then added the water and made a sponge. Then I added the salt and the rest of the flour.

I gave the dough a few short kneads over about an hour, then formed a ball.

Then I left in a cold place (about 10C; cold crappy 1950s construction house, basically) for about eight hours.

I gave it a quick shape into a ball, then a final prove in a warm place (about 20C; old-school airing cupboard) for a couple of hours, until it had doubled in size.

Baked at 230C for 20 minutes, then another half an hour at 200C.

Wholesome, historic and local.

Magister einkorn cut

* “Wheat” isn’t just one member of the grass family (Poaceae or Gramineae), it’s several, including many strains that have had ooh, ten-plus millennia of crossing and selective breeding.
** As I understand it, when talking about grains as 2-row, 4-row, 6-row, it’s a reference to the number of rows of kernels on the ear.

7 Comments

Filed under Baking, Breads, Recipes

Converting plain to self-raising flour

SR flour

Catchy title eh?

A lot of UK recipes call for self-raising flour. Self-raising flour is nothing fancy – it’s just plain (all-purpose) flour with a chemical raising agent, baking powder, already in the mix.

Self-raising flour was invented by Bristol baker Henry Jones, who patented it in 1845. It played a role in phasing out the notoriously solid ship’s biscuits and replacing them with an alternative: chemically leavened “bread” baked fresh at sea or even on the battlefront. Apparently his work was championed by Florence Nightingale and I believe self-raising flour was used to bake “bread” in the Crimean War.

I’m not sure about “bread” made with SR flour – it’d be much more like soda bread or scone that real bread – but it’s useful stuff for cakes and the like. A lot of bakers, however, prefer to just use plain flour then add the raising agent separately. This makes sense, as the chemicals in raising agents can lose their potency making resulting cakes inconsistent. Or home bakers might just have run out.

If you don’t have an SR flour, it’s easy to convert plain and use that in its place. Though as with so many of these things, online information isn’t always in agreement. So I’m going to work it out for myself.

Varying sources say: add 1 teaspoon to 110g, or 2 teaspoons for 150g (1t to 75g), or 2 1/2 to 500g flour (that is, 1t to 200g), and, in that strange world without sane metric measures, another says 2 teaspoons to a cup.

Converting one US cup of flour into grams is open to disagreement too. Online sources give the flour weight as between 120g and 150g. I’ve got a cup measure – marked as 236.64ml, the customary US cup size* – and in a very scientific experiment involving filling it with flour, tapping it to settle it then smoothing off the top, I got 144g. Then I did it again and got 133g. This variable is due to how compacted the powder is, and is one of the reasons using weighing your ingredients is, frankly, more accurate. So anyway, let’s say 140g. So 2t to one cup is 2t to 140g (or 1t to 70g).

Cup measures

Then there’s the whole question of how many grams are in a teaspoon of a powder like baking powder. Again, sources differ online. But a teaspoon is 5cc/5ml (even in the US it’s basically the same, 4.92892159375ml**). Doing another quick, very scientific experiment, I filled my 5ml teaspoon measure with baking powder, smoothed it off, and weighed it. I did the same with baking soda. Both came in at just shy of 5g, so 5g is good enough for me.

Now, I work in decimal and percentage terms, having grown up with silly old ounces and whatnot but left them behind when I discovered the comparitive simplicity of metric measures. It’s so much easier when you’re converting and scaling recipes too.

The percentages you want of the above suggestions of teaspoons per grams would be based on the combined weight of the two ingredients, ie how many percent is 5g (1t) baking powder of the 115g of flour plus baking powder?

Here are all the abovementioned amounts in percentage calculations:
5g of 75g = 5 ÷ 75 x 100 = 6.7%
5g of 80g = 5 ÷ 80 x100 = 6.3g
5g of 115g = 5 ÷ 115 x 100 = 4.3%
5g of 205g = 5 ÷ 205 x 100 = 2.4%
(figures rounded)

Personally, I’m inclined to split the difference, and indeed some older notes of mine say 4%, and another person online breaking it down comes out with 4.5%. So averaging out the above figures, you get 4.9%. For the sake of ease, let’s say 5%.

So if a recipe calls for 250g of self-raising flour, and you only have plain, you need 5% of that 250g to be baking powder. That’s 12.5g of baking powder. So 12.5g BP added to 237.5g plain flour makes 250g stand-in self-raising flour. Even a digital scale, however, doesn’t usually do half grams, so let’s say 12g to 238g. And if you really want to short-cut it, just use 2 well-filled teaspoons to the 238g.

Thrilling!

Cup plain flour

* A US legal cup is 240ml, an Australian/NZ etc cup is 250ml.
** Technically a US teaspoon relates to another strange archaic measure – it’s 1/3 US fluid dram.

38 Comments

Filed under Baking, Flour & grain, Misc

Absurdly wholesome multigrain, multiseed bread

Multigrain, multiseed wholesome bread
I had a load of cooked farro grains left over, and needed some bread, so this came into being. It wasn’t an entirely happy experience. The dough was very moist and sticky, and I’ve really lost my moulding mojo recently, so there was a bit of a (one-man) scene in the kitchen. Then it didn’t really have much in the way of oven spring*, hence the slightly sad shape. BUT, and here’s the important thing, it tastes great.

It’s a ridiculously wholesome loaf that would make a spongey British “Granary” go and hang its head in shame. It’s firm, moist, with a good crust and eminently satisfying to bite. Great with cheese or for a peanut butter sarnie.

And yes, I might be a food blogger based Rome, but this isn’t a Roman bread. I made it up, in part inspired by Dan Lepard‘s Five-grain loaf (in The Handmade Loaf). As Mr Lepard spent a lot of time in Italy learning his trade, I suspect he took his inspiration for that loaf in part from Italian multicereali (multigrain) breads. So this is a distant cousin to, say, the wonderful multicereali that you can get from Roscioli, or the multicereali I got last week from the Testaccio Ex-Mattatoio farmers market, which the baker called Pane di brigante. He explained he called it that as his area, in the hills south of Rome, used to be full of brandits, brigands.

As I made it up on the fly, these quantities can’t pretend to be exact. You want a nice moisty dough, but don’t get yourself in a lather (like I did). If it feels too wet, add some more flour. And use whatever seeds you have to hand.

400g cooked spelt grains (Dry grain simmered in water until soft, then drained – reserving the cooking water. I used farro perlato.)

Mix in a large bowl:
300g white spelt flour. I used stoneground organic farina di farro bianco.
300g fine durum wheat flour. I used a stoneground organic farina di grano duro.
10g sea salt

Combine in another bowl:
15g fresh yeast, crumbled
100g leaven (100% hydration. I’ve done it with leavens fed on emmer, spelt or modern wheat)
50g honey
350g grain cooking water (tepid, not hot), made up with ordinary water if necessary

Combine in small bowl and add a little water (to soften):
20g linseed (broken up slighty with a pestle and mortar or in a coffee grinder)
20g  poppyseeds
20g  sunflower seeds
20g pumpkin seeds
20g sesame seeds

1 Make the dough by adding the ferment (yeast, water, leaven etc) to the flours and salt mix.
2 Mix well with a spatula or spoon, then turn out on to worksurface.
3 Knead until well combined.
4 Stretch the dough, add the grain and seeds.
5 Fold over the dough, then gently kneed again to combine the grain and seeds.
6 Adjust the dough if it’s too wet or indeed too dry by adding more flour or liquid accordingly.
7 Form into a ball, then leave to rest in a bowl covered with a moist tea towel.
8 After 10 minutes, give it another knead.
9 Rest another 10 minutes.
10 Give it another gentle knead.
11 Return to the bowl, cover and prove until doubled in volume.
12 Turn out the dough, and press it out to equalise the gas pockets. (We always called this “knocking back” in British baking, but that encourages unnecessary violence towards your tender dough.)
13 Weigh dough and divide into two equal portions, each around 850g.
14 Shape each portion into a ball, then leave to rest for 10 minutes, covered.
15 Shape as you like. I was planning batons, but after my tantrum I went with the easy option: tin loaves.
16 Preheat oven to 220C.
17 Prove again until ready to bake: the dough should be wobbly, plump and soft.
18 Brush with beaten egg, sprinkle with seeds. Cut along the length (my cut was pathetic).
19 Bake 20 minutes, then turn down the heat to 200C.
20 Remove from the tins then retun to the oven for another 10 minutes or so. (As the dough was damp, and contained the moist farro grains, I reasoned it could do with a little more time to bake through.)
21 Cool on a wire rack.
22 Enjoy.

(Part of the reason I’m pleased with this one is that it reminds me of the bread made by my friend and sometime cooking mentor Nadia, all the way over there in New Zealand. It looks quite similar to her bread, and even tastes similar despite the distance and different provenance of the ingredients. Arohanui to Nadia and all the Aotearoa whanau!)

Addendum
Making this again today, 6 February 2013, and noticed a few errors, now amended. I also thought it was about time I added bakers’ percentages. So here we go.

Note, the seeds are soaked in water to soften them slightly, but I think the amount is negligible so I’ve not factored it in.

Basic percentages (ie not factoring in the leaven composition)

Ingredient Weight Bakers’ percentage
Spelt grains 400g 67%
Flour 600g 100%
Salt 10g 1.7%
Fresh yeast 15g 2.5%
Leaven (at 100%) 100g 17%
Honey 50g 8.3%
Water 350g 58%
Linseeds 20g 3.3%
Poppyseeds 20g 3.3%
Sunflower seeds 20g 3.3%
Pumpkin seeds 20g 3.3%
Sesame seeds 20g 3.3%

Percentages factoring in the leaven composition (100g at 100%, ie add 50g to water weight, 50g to flour weight)

Ingredient Weight Bakers’ percentage
Spelt grains 400g 62%
Flour 650g 100%
Salt 10g 1.5%
Fresh yeast 15g 2.3%
Honey 50g 7.7%
Water 400g 62%
Linseeds 20g 3%
Poppyseeds 20g 3%
Sunflower seeds 20g 3%
Pumpkin seeds 20g 3%
Sesame seeds 20g 3%

It doesn’t seem like a very high hydration recipe, but bear in mind it contains a lot of cooked spelt grain: and this is very moist.


* Oven spring – the final burst of growth made by bread dough when it goes into the oven. It’s caused by the heat exciting the yeast, which gets all hyperactive, farts out more gas, causing the dough to rise rapidly. Then the yeast dies is killed, when it gets heated over around 60C. Boo hoo. And gets eaten. The horror! You can get better oven spring with steam (it moistens the dough, conducting the heat into it more efficiiently). However, getting reliable steam in a domestic oven is a bit hit and miss, despite what people suggest about pouring boiling water into trays anor using a mister-spray.

2 Comments

Filed under Baking, Breads, Recipes

Pane di San Martino

In the autumn of 2011, I noticed bags of a yellow-ish powder on a stall in the farmers’ market in the Ex-Mattatoio in Testaccio, Rome. It was farina di castagna – chestnut flour. That is, flour made from the dried and milled nuts of Castanea sativa, the sweet chestnut tree.

At the time, I experimented with it. A friend commented that there is in fact a traditional Italian bread made with chestnut flour, called pane di San Martino, or St Martin’s bread. The feast day of St Martin is 11 November, just around the time the year’s chestnut flour becomes available.

Anyway, I mentioned this bread to a teacher who I was doing a (food-focussed) conversation class with. She dug out a recipe. Well, she clearly Googled a recipe, as a quick Google myself soon found her source, which is here (in Italian).

After having gone through all that, I then completely failed to try the recipe. A year went by, autumn returned – and so too did the chestnuts, and chestnut flour. So last week I bought a new pack, and determined to revisit the pane di San Martino recipe.

Firstly, however, I had to translate it.

It talked in vague terms: “Prendere mezzo mestolo di farina di castagne e mezzo mestolo di farina di frumento…”, that is “Take half a ladle of chestnut flour and half a ladle of wheat flour…” But which ladle? I’m not a fan of the cup measure in recipes – especially as a US and an Australian cup, say, are different sizes. But what about an Italian ladle? I had two in my kitchen, one medium-small, one medium-large. Was either suitable? I plumped for using the medium-large one, and weighing the flours in grams. (If you’re interesting in scaling up recipes, using grams and kilos makes things a lot easier, in part as the maths are more manageable when you’re working with percentages and a measures based around factors of ten. Ounces smounces.)

Anyway, I translated and converted the recipe, but it still wasn’t quite right in terms of the liquid/dry quantities, so I also revised it while making the dough. Indeed, all flours have different absorbency, so you will have to have a feel for dough when you’re adding mixing the water and flours. This time, I used an organic, stoneground farro bianco – white spelt – flour from the renowned Marino Mulino. If you use a wholewheat flour it will require a more water than a white flour.

So. Pane di San Martino. My teacher gave me some notes that said this bread is found from Emilia-Romagna in north Italy to Salento, in Puglia, the heel. I’ve never seen it in Rome though. In fact, I’ll come clean and say I’ve never seen it anywhere, in the crumby flesh. So although my version is based on an Italian recipe, my version has no claim to authenticity. Which might upset an Italian baker, but shouldn’t be a problem if you stumble upon this recipe from other climes.

The recipe uses both a leaven (sourdough culture) and fresh yeast. This is a technique used by one of my favourite bakers, Dan Lepard, though it might upset some purists. OK, purists, that’s two warnings now.

Make a sponge with:
50g chestnut flour
50g of wheat or spelt flour
12g fresh yeast
50g wheat or spelt leaven/sourdough culture (100% hydration – that is, made with 50% water, 50% flour)
180g tepid water

Cover and leave to ferment for around two hours.

Make a dough with:
The pre-ferment
350g wheat or spelt flour
250g chestnut flour
300g water. Add more if the dough feels too tight.
20g olive oil
12g salt

Combine with a spoon or spatula. You want a moist dough. Don’t be afraid to add more water. When it’s a good consistency, knead to combine.

Cover and leave to rest for 10 minutes.

Add:
180g walnuts and knead gently to combine.

Cover and leave to rest for 10 minutes.

As the original recipe didn’t involve first and second proving periods, nor does this version. (I think I may work on this recipe though, and adjust the proving. Watch this space.)

Weigh the dough and divide in two. Form two balls, then leave these to prove in baskets or bowls lined with flour clothes.

Leave to rest for around two hours in a warm place away from draughts. Timing will vary depending on the temperature of where your prove the dough.

Preheat the oven to 220C.

Line a baking sheet with parchment. (I’m not using a stone at the moment, just a fierce domestic gas oven.)

When the dough feels springy and alive, almost jelly-like, you’re ready to bake.
Gently upturn the proving baskets/bowls onto the baking sheet.
Make cuts in the top – you can make slashes how you feel, as long as you use a sharp blade and don’t drag at the dough. (Slashes in a loaf used to be the owner’s signature when people used communal village bread ovens.)

Bake for 20 minutes, then reduce the temperature to 200C and bake for a further 20 minutes.

You want the loaf to have a nice colour, and sound hollow when you knock on the bottom. (This isn’t an exact science either but if it sounds hollow, that’s some indication the dough isn’t still soggy and doughy inside, instead it’s baked and dry.)

Leave to cool on a wire rack.

The resulting bread is sweet, almost cake-like, and pleasant for breakfast or afternoon tea, and makes good toast when it’s aged past its initial softness.

Addedum
The great travel writer Eric Newby had a strong connection to Italy – he hid in the Italian mountains during WWII, as described in his wonderful Love and War in the Apennines, and he and his wife – who he met during the war – returned there many times, eventually buying a house in the mountains in 1967. It was called I Castagni, “The Chestnuts”; on the theme of said foodstuff, in A Small Place in Italy he writes “This room extended the whole height of the building and had originally been constructed for the purpose of drying chestnuts. They were laid out and dried over a fire that had a chimney which extended up to the height of the roof. When they were dry they were ground up into a pale, brownish flour and used to make a rather sickly, sweetish sort of bread called castagnaccia which, until long after the last war, was a staple food in many parts of mountain Italy.”

Later on, he writes more about the importance of chestnut trees for “the principle necessities of life”, from building materials to food, specifically castagnaccia, “what had been a stabple food that most old contadini [peasants] now wanted to forget they had ever eaten, because of the memories it brought back of long years of poverty.” Interestingly, the suffix -accio / -accia often indicates a perjorative, so castagnaccia could be translated – very loosely – as “yucky chestnut bread”.

3 Comments

Filed under Baking, Breads, Recipes