Category Archives: Recipes

Strawberry tart

Strawberry tart

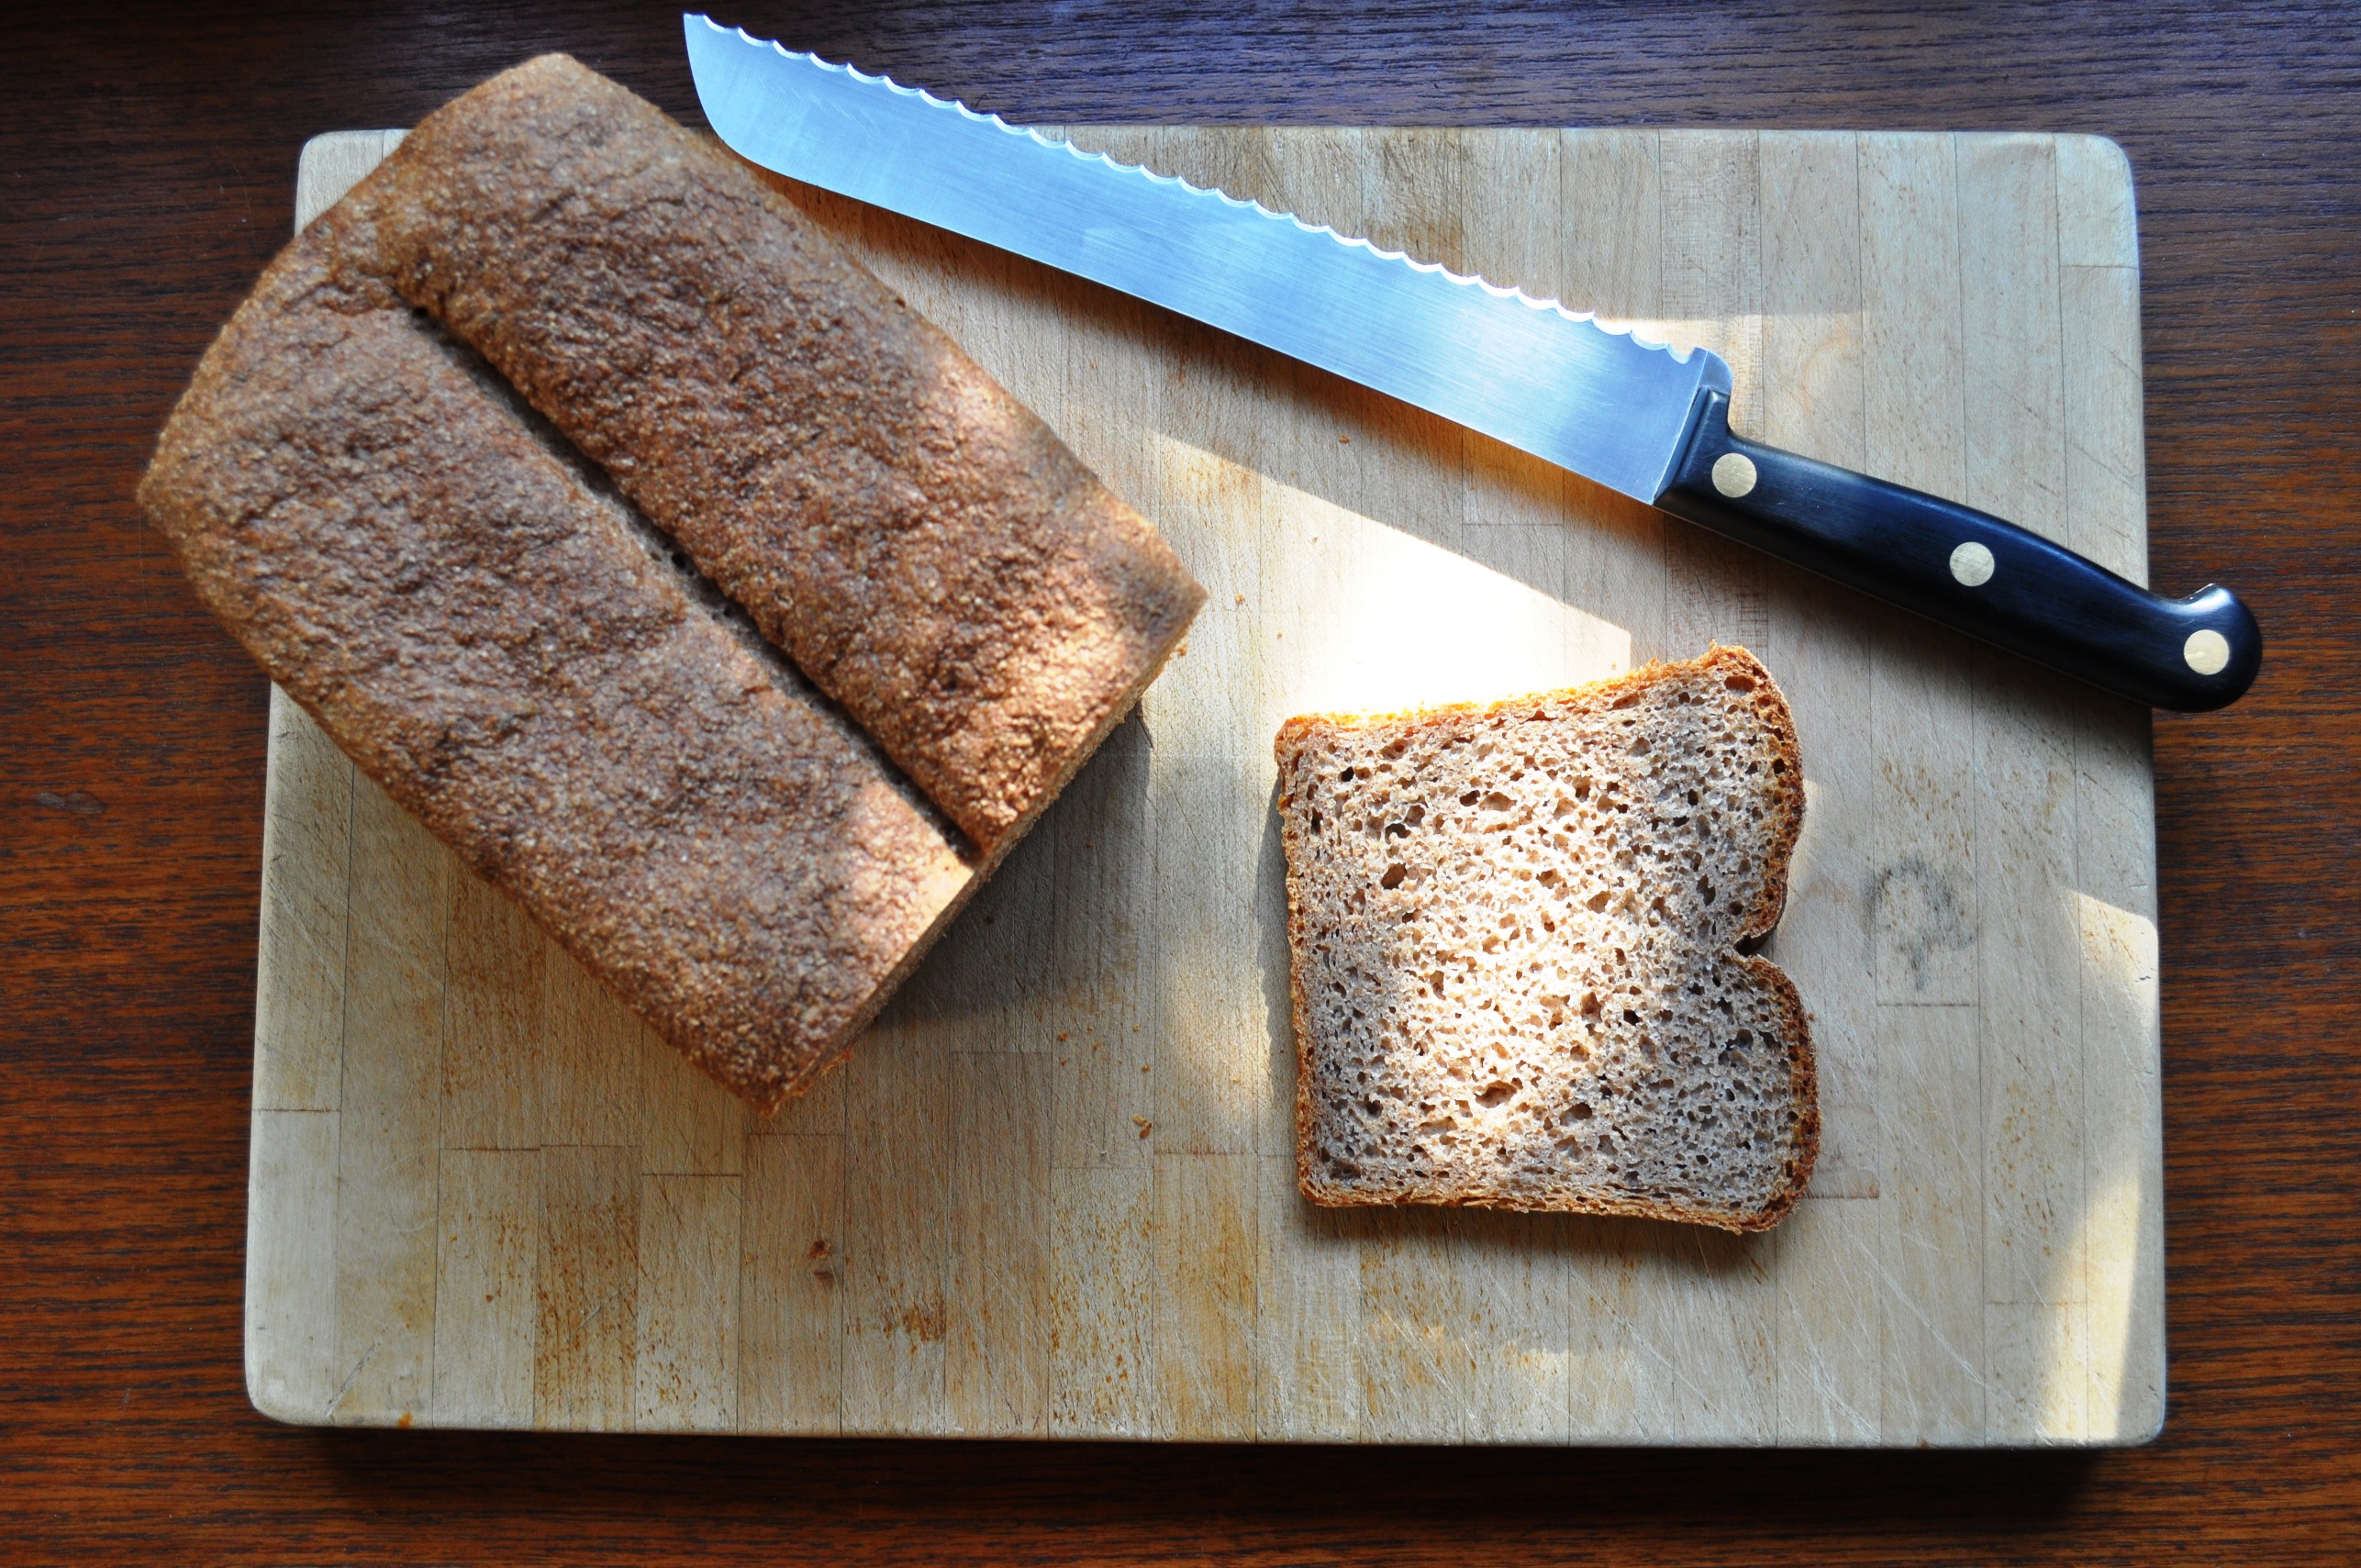
We’ve had some proper summer weather here in southern England the past few weeks. I’m quite shocked. It’s potentially looking like a good year for fruit too. All that rain in January-Febuary then a strangely hot and sunny spell in March might count for something in that department. Already our plum tree is sagging under the weight of ripening fruit, and out goseberry bush is starting to look ready to yield its sour green offerings.

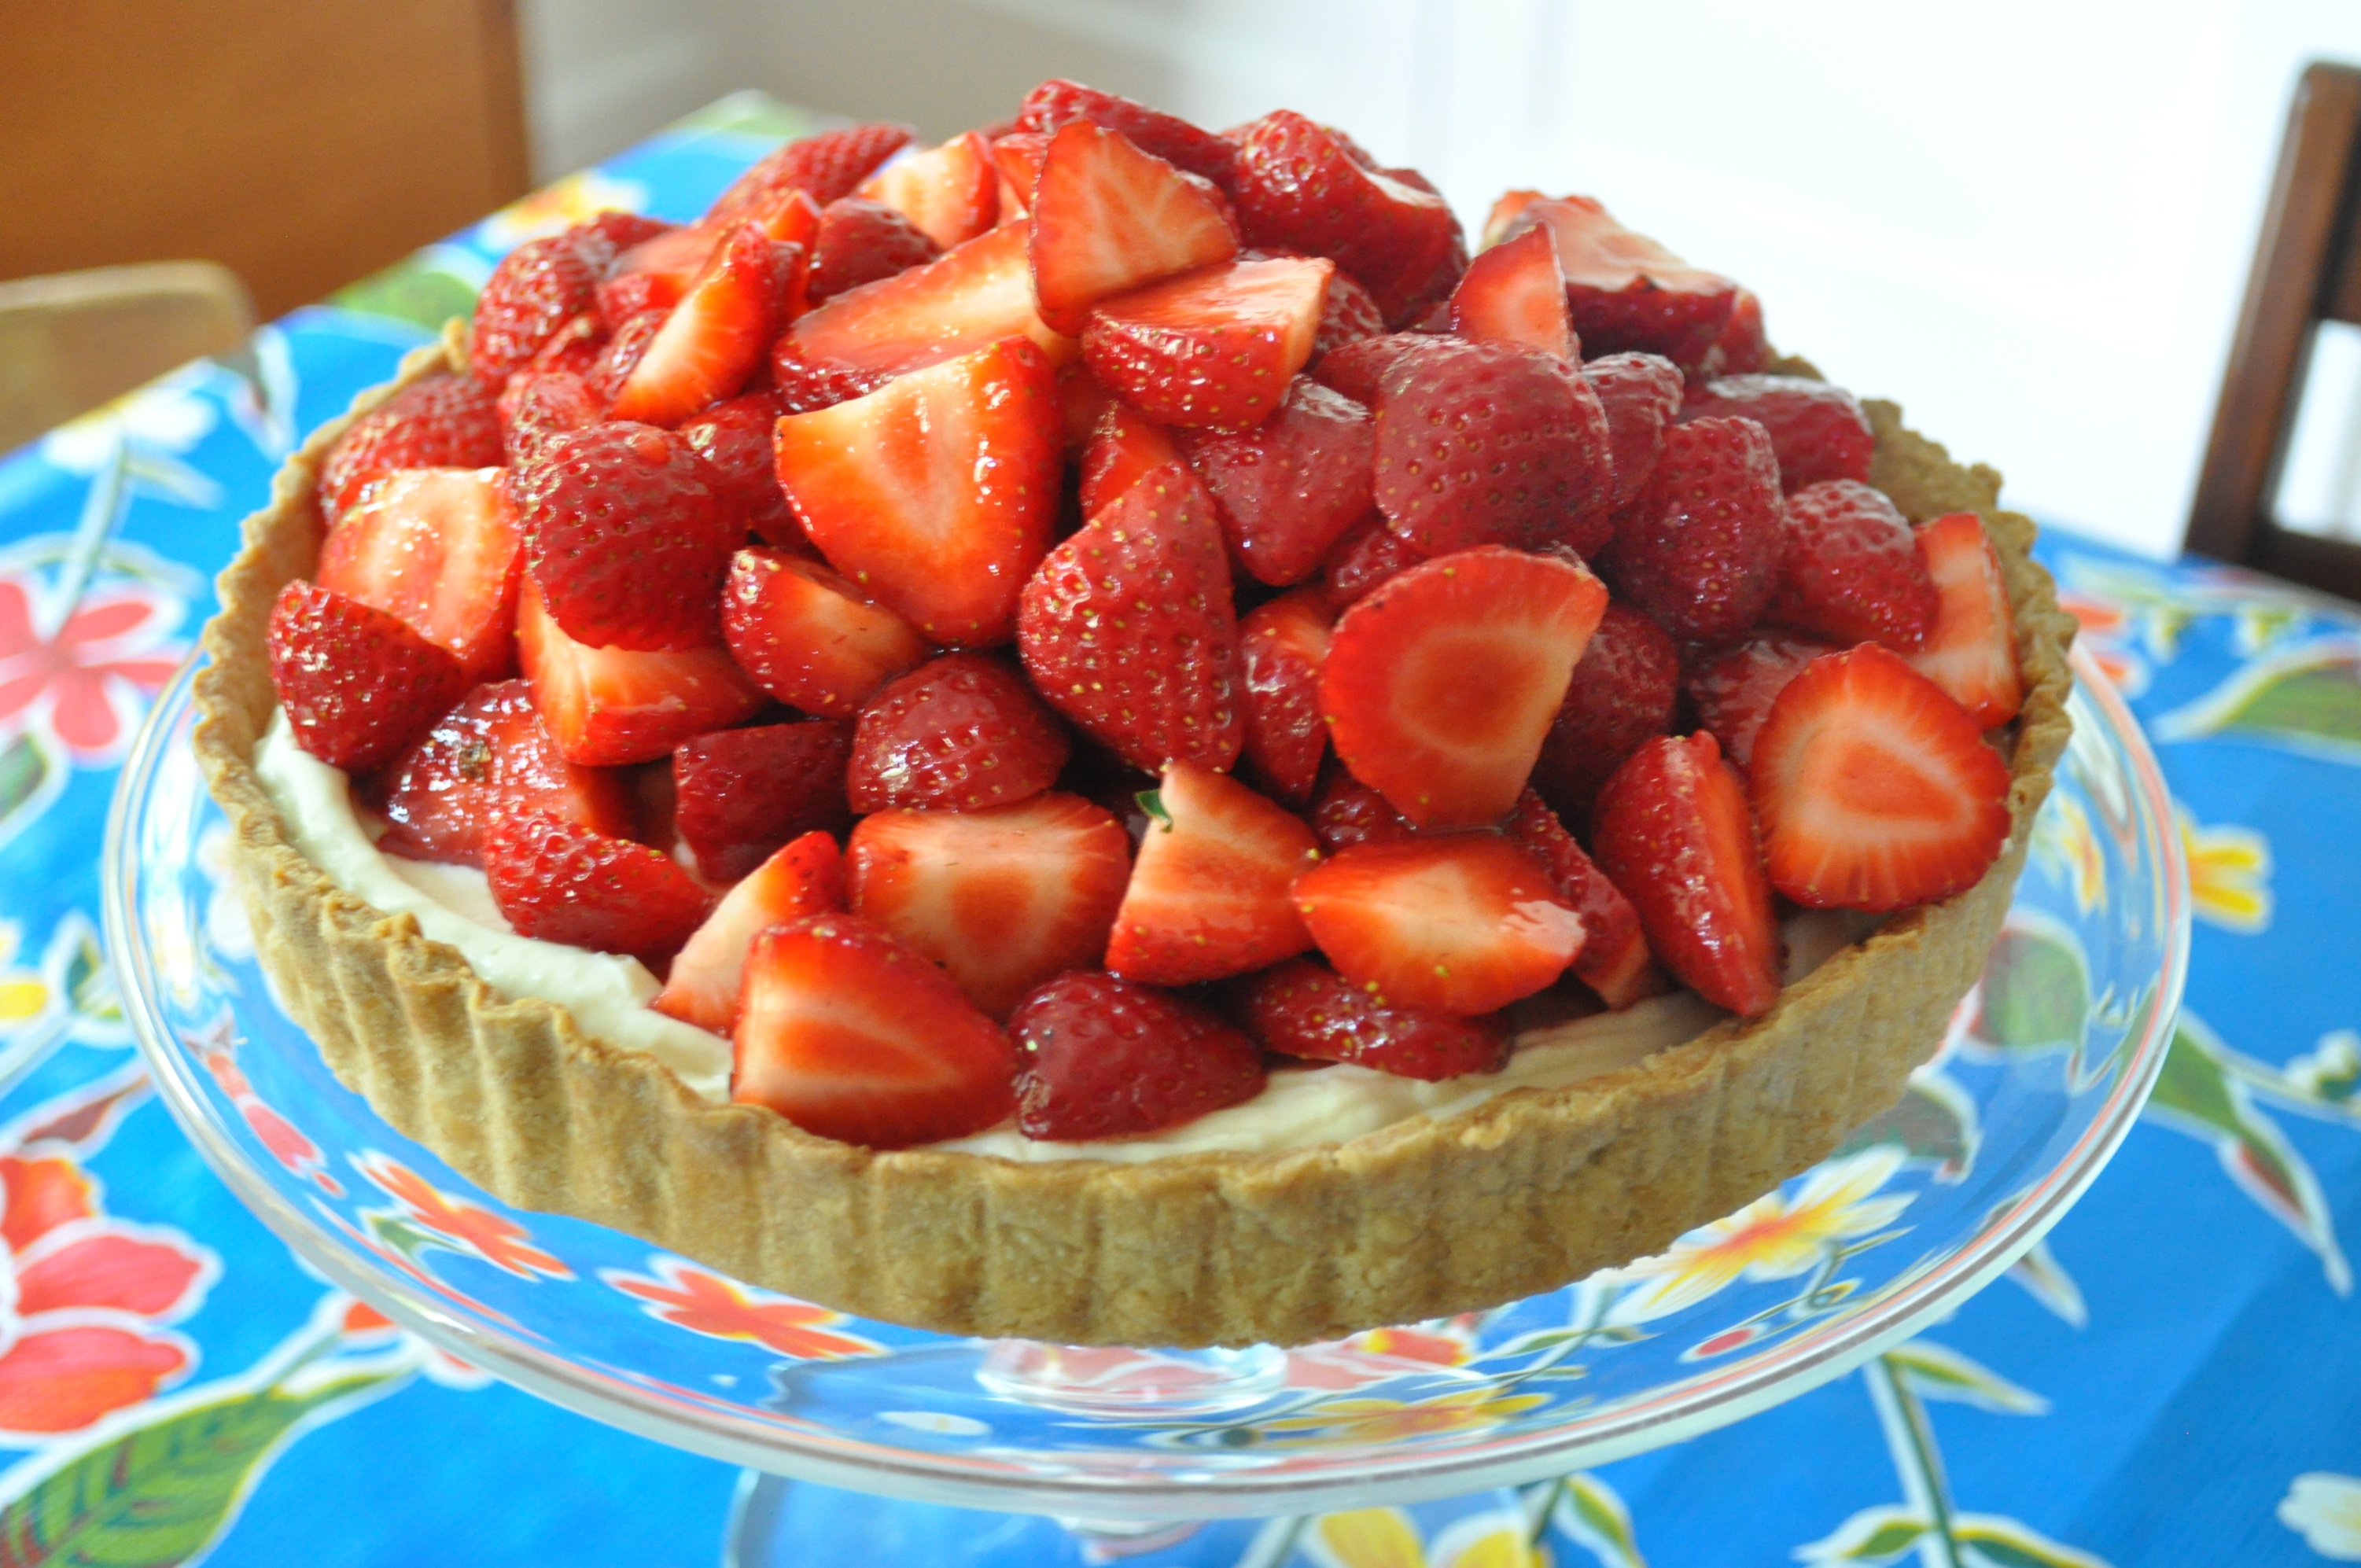
I was planning to use the goosebrrries, a fruit I ate a fair amount as a child but haven’t touched for years, if not decades, for a tart yesterday, when we had friends visiting for lunch, but decided they weren’t quite ripe (the bush is in a very shady spot). Instead, the farmers market had a stall loaded with (ripe) gooseberries, cherries, strawberries and tayberries. I hadn’t encountered the latter before, but they’re a common blackberry (Rubus fruticosus)/raspberry (Rubus idaeus) cross. We bought a punnet, but mostly we bought strawberries as I’d seen a handsome looking recipe in Dan Lepard’s ‘Short & Sweet’. Another version of his recipe is available here on the Guardian.

It involves a slightly unusual custard, or sort-of custard. I’m not sure it’s a strict definition but I always assumed custard referred to things made with a mixture of milk or cream and egg yolk. This one, however, is made with egg white. Which is a typically nifty Lepard trick, as you use yolk in the pastry, and can then use up the leftover white. You make a mixture of milk, cornflour, sugar and the egg white, cook it till thick, then cool this, later on combining it with crème fraîche. Lepard uses a similar process for another of his custards, though that one does use yolks, then is mixed with double cream. It’s very handy.

So anyway.

Strawberries
About 500g strawberries
A little caster sugar

Pastry
125g plain flour (all-purpose or cake flour)
25g icing sugar (confectioners sugar)
Pinch salt
75g unsalted butter, cold, cut in small cubes
1 egg yolk
A little cold water

Custard
130g milk
20g cornflour (corn starch)
1 egg white
50g caster sugar
1 tsp vanilla extract
250g crème fraîche

1. Cut the stalky bits off the strawberries then slice into two or three or four, depending on the size of the individual fruit.
2. Put the strawberries in a bowl, sprinkle with caster sugar, then leave in the fridge to macerate, stirring occasionally.
3. Make the pastry by sieving together the flour and icing sugar, adding the salt then the cubed butter. Rub together until the mixture resembles breadcrumbs (you could do this in a food processor), then add the egg yolk and water and bring together a dough. Don’t be tempted to add too much water. A tablespoon or so should be enough. You want the pastry crumbling not sticky.
4. Form the pastry into a disc then wrap in plastic and rest in the fridge.
5. Combine the milk, cornflour, egg white sugar and vanilla in a saucepan.
6. Whisking well, put over a low heat. Continue whisking, increasing the heat slightly, until the mixture thickens. It can get pretty thick, so don’t get too carried away. And watch it doesn’t burn.
7. Put the thick mixture into a bowl, cover with a plate and allow to cool. Then leave in the fridge until you need it.
8. Roll out the pastry and use it to line a 25cm-ish pie or flan tin.
9. Preheat the oven to 170C.
10. Bake the pastry case blind – that is, covering the pastry with a lining of parchment and filling it with baking beans. I used to use my childhood marbles, but I’ve lost them (ahem), so currently I’m just using kidney beans. Bake for about 15 minutes then remove the beans and parchment and keep baking until the case is golden.
11. Allow the pastry case to cool.
12. Put the thick custard mix in a large bowl and loosen it up with electric beaters.
13. Add the crème fraîche and keep beating until it’s all nicely blended.
14. Put the crème fraîche-custard in the cooled pastry case.
15. Arrange the macerated strawberries over the top.
16. Serve.

Strawberry tart 2

I was hoping we’d have a little of ours leftover but eight of us – five adults, three kids – demolished it in mere seconds. Well, a few minutes perhaps. All in all, it was a lovely end to a very satisfying lunch. For starters we did some fiore di zucca: battered, deep-fried zuccchine flowers, filled with mozzarella and a little anchovy. Then for the the main course we did honey-glazed roast chicken with lemon thyme and smoked paprika, a great Tom Kerridge recipe that can be found here; smashed new potatoes with mint; broad bean, pea and mint salad with Medita (our local version of feta, from High Weald Dairy); and a simple lettuce salad. The kids didn’t fuss about any of it – indeed, they demolished most of the mains in seconds too. Kids can really be the worst critics of food, so we were very chuffed with this result. Wish we’d taken a few photos.

All accompanied by local beer and incredible sunshine, and a post-prandial walk on Malling Down, part of the South Downs, an area that’s just received a special Biosphere status from Unesco alongside places like the Amazon and the Rockies, it was a wonderful day. Which compensated nicely for my disappointment about the 18th South Downs Beer & Cider Festival, which we’d attended the day before.

6 Comments

Filed under Baking, Pies & tarts, Puddings & desserts, Recipes

Peanut butter tahini swirl chocolate brownies

Plate
Peanut butter and tahini, two lovely, tasty oily pastes that can be great editions to baked goods. I love peanut butter, especially good stuff made without daft additives. It doesn’t need added sugar, it doesn’t need artificial sweeteners and it doesn’t need palm oil, soya oil, rapeseed oil, especially not hydrogenated oil.

Peanuts, simply ground up, make for a delicious and suprisingly nutritious product. Peanuts are actually legumes – more pea than nut – so are full of protein for starters. I remember learning about calories in biology at school (many many years ago) by weighing then burning then weighing a peanut. They’re essentially half fat, but much of that is unsaturated: 31% polyunsatuared, 46% monounsatured, 18% saturated*. Peanuts also contain fibre, antioxidants, vitamins thiamin (B1), niacin (B3), folate (B9) and others, and minerals magnesium, potassium, phosphorus, copper and manganese . Tahini, ground-up sesame seeeds, meanwhile contains essential fatty acids, copper and manganese.

Adding peanut butter and tahini to a brownie mix makes it especially gooey and delectable. I’d seen recipes online that used some one or the other, but as I had a jar of each, both running out, my version involved both, plus the tahini swirl. My version also involves both cocoa and chocolate, cut up into coarse chunks. If you’re making brownies, you can’t mess around with the chocolate – it has to be plentiful, rich and dark.

As for the peanut butter, I used my normal type, which is wholenut crunchy, with skins and all, no added sugar. Some brownie recipes might suggest you use a smooth type with all that sugar and extra oil but meh to that. The wholesome crunchy type adds depth of flavour and texture. I’ve also used some oats as they help keep it moist. And as I don’t have a problem with wheat – indeed, I love the stuff, especially well-husbanded grain ground into quality flour – I added some wheat flour too.

Pile of tahini brownies

This recipe is loosely adapted from Lick and Spoon, who adapted it from here, though the my tahini swirl is inspired by yet another recipe, here.

I’m not going to pretend these are “skinny” – there’s enough sugar in there for them to qualify as a properly sweet, calorific treat, an indulgent part of a balanced diet and relatively active lifestyle. They do at least contain a smattering of the abovementioned vitamins and minerals if you’re the type who likes to beat themselves up about their foods.

70g peanut butter
50g tahini
80g full-fat yoghurt
160g full-fat milk
1 egg
1 tsp vanilla essence
Pinch salt
1 tsp baking powder
50g plain flour
50g cocoa powder
50g oatmeal
130g light brown sugar
100g dark chocolate (60% cocoa mass or more), chopped into chunks

Tahini swirl
1 egg
60g tahini
20g caster sugar
1/2 t vanilla essence

1. Preheat oven to 180C.
2. Grease and line a square 20 x 20cm baking tin.
3. Sieve together flour, cocoa and baking powder.
4. Stir in the salt, oats, sugars and chocolate chips.
5. Beat together the peanut butter, yogurt, milk, egg.
6. Pour the wet mix into the dry, beating with hand blender.
7. Blend to a runny mixture.
8. Pour into the baking tin.
9. Beat together the tahini swirl ingredients until well combined and blended.
10. Drop blobs on top of choc mixture and swirl with tip of a knife.
11. Bake for 20-25 minutes.
12. Cool, cut and serve.

Tin

* ‘The Food Bible’, Judith Wills


8 Comments

Filed under Baking, Cakes, Recipes

Sweet Sussex stout chocolate muffins

Sweet Sussex and chocolate

Today, 16 June, is Sussex Day. It’s probably not a festival many people celebrate – especially as it was only invented in 2006. Though it is based on the saints day of St Richard, patron of Sussex, the land of the south Saxons. Richard de Wych was a 12th century bishop of Chichester, now the county town of West Sussex. I’m over here in Lewes, the county town of East Sussex. The historic county of Sussex, based on the ancient kingdom of the south Saxons, was divided into two modern, administrative counties in the 1860s. Chichester and Lewes are very different, notably because the former is a cathedral city of about 24,000 people, while Lewes only has about 14,000 people, and the only “cathedral” is Harveys brewery.

Later on today I plan to head down to Harveys and check out the new St Richard’s Ale, which they’re launching on Sussex Day, but in the meantime, here’s recipe made using another Harveys, county-themed ale: Sweet Sussex.

Ye olde stout vs porter
On the label and site, Harveys says Sweet Sussex is a “lush, sweet stout named after the county in which it is brewed.” It has an ABV of just 2.8%, which raises the interesting question of what truly defines a stout. Well, in linguistic terms “stout” originally meant proud, brave and courageous, but this segued into meaning physically strong, well built. As a description of people it evolved again to start meaning bulking, then fat, but in beer terms it stuck with strong. Specifically it was used to describe strong porter, the type of beer that emerged in London in the 18th century as a refreshing, nutritious, fortifying drink of hardworking porters

Dark brown or black ales, porters were made with well roasted malts, which lent them a sweet, charcoally flavour. Eventually, the term “stout porter” shifted again, with stout becoming its own town for a rich, dark ale – though not necessarily a strong one. Indeed, today, the terms stout and porter are fairly interchangeable.

Sussex Sweet may be called a stout, but it’s certainly not stout in the sense of strong. Indeed, it’s so weak, compared to those old historic stout porters which will have been 8% ABV or so, that it’s more defined by its sweetness. It’s almost like a kind of charcoal milkshake. And just the thought of thing that goes well with dark chocolate.

Muffin

Muffins vs cupcakes
I wanted to bake something chocolaty yesterday, but didn’t want something as rich as a full-on cake (like I made here with dark ale) or iced cupcakes, so I made some muffins instead. Like stout and porter, the terms muffin and cupcake have slightly blurred meanings, though broadly I’d say a muffin contained less sugar, less butter, and were broadly a tad healthier. A lot of muffins, of course, contain bran, or fruit, or are even savoury. These ones are only vaguely sweet, and have a hint of that charcoally flavour from the beer.

20g cocoa
230g self-raising flour
1 teaspoon baking powder
50g butter, melted and cooled slightly
70g sugar (I used caster, but you could use a dark muscovado say)
150g dark chocolate (at least 65% cocoa solids), coarsely chopped
2 eggs, lightly beaten
250g Sweet Sussex or other stout or porter, or a mixture of stout or porter and milk

1. Preheat the oven to 200C.

Light cacao
2. Sieve the cocoa, flour and baking powder into a bowl.
3. Stir in the sugar and chocolate chips.
4. Add the eggs, vanilla and beer, or beer and milk mix, along with the melted butter, to the flour mix.
5. Beat to combine.
6. Fill about a dozen muffin cases and bake for about 25 minutes.
7. Cool and enjoy, with a cuppa or perhaps with a stout. Or porter.

Muffins, baked

A note on the cocoa
There’s only a little bit of cocoa in here, but I was also using a very light-coloured type of cocoa powder, hence the results aren’t very dark. This cocoa powder I’m using is actually the Raw Chocolate Company’s Raw (organic, Fairtade, thoroughly right-on) Cacao Powder. See here for more info.

Cocoa? Cacao? Whaʼ? Don’t worry about the difference. There isn’t really one. The English word cocoa is basically a synonym for the cacao, with Theobroma cacao the scientific name for the tree that yields the beans that produce those all-important chocolate products, with “cacao” coming from the Mayan and Mesoamerican language word for the tree and “Theobroma” from the Greek for “food of the gods”. Beer and chocolate – both worthy of that name I’d say.

2 Comments

Filed under Ale, beer, Baking, Cakes, Recipes

Sourdough pizza and Hastings Brewery’s No 6 Hop Forward Pale Ale

Sourdough pizza with Hastings Brewery No 6 Pale Ale

Even though we ate tonnes on Saturday night, accompanied by various local beers and wines, I was making bread dough on Tuesday evening and thought, heck, why not make another pizza? One of the justifications was that on Saturday night one batch we did was slightly over-baked and the other slightly under-baked, so I wanted to keep on experimenting with our oven to try and get it right.

Anyone who’s made real pizza in a domestic oven will know it can be slightly challenging, largely because you simply can’t get the heat. My oven goes up to about 250C (480F) but a wood-fired pizza oven can get up to 450C (840F), enabling flash baking. You can improve things in a domestic oven by using a baking stone. Stones are excellent as you heat them in the oven first, so when the pizza is slid onto them, they’re already hot and help bake the dough through, quickly, as well as crisping up the base.

But I’ve not got one at the moment.

Currently, I’m just using a metal baking sheet, which goes into the oven cold. It’s not ideal, as, depending on the temperature variables in your oven, you can get a done, or potentially burnt, top, before the base is full baked. Even though I’m pleased with this recipe, the base wasn’t baked to perfection. That’s the challenge – for me and for you, as your oven will be different again.

Hastings Brewery No 6. With cat

Hopping forward
The other enjoyable factor about this pizza dinner – aside from being able to eat it outside on a warm English summer evening, 20C, no mosquitoes – was a great beer. I mentioned in my previous post I don’t think the light mild beer I was drinking was a good food pairing. This time round I chose a considerably more hoppy beer, and it worked well.

This was a Handmade No 6 Pale Ale bottled beer from Hastings Brewery, bought from the excellent Trafalgar Wines in Brighton, a booze shop with an excellent selection of beers. Apparently Hastings Brewery beers are their second-best selling now, after beers from The Kernel in London.

Hastings Brewery is a new discovery for me. I’m slowly working my way through all the local breweries. This one is 23 miles away from my home in Lewes. It started with founders Pete Mason and Brett Ross inspired “whilst litter picking after the Hastings Beer & Music Festival in July 2010.” Pete’s dad Andy got on board and by 2011 they’d bought “a larger – but still small – brewery”.

They’re an interesting outfit as not only do they do everything by hand on a small scale, with brews of 800 litres, they’re also make entirely vegan products. A lot of drinkers may not realise beer generally isn’t very vegetarian or vegan, but it’s often filtered with isinglass finings, which are fish bladders. Pete Mason is a vegan, as is their sales manager. Their beers are unfiltered. For some, this is appealing as filtering, arguably, can remove some of the flavour and mouthfeel.

The brewery’s label design and branding is great too. Their labels – all featuring a lion with fine mane and tongue sticking out1 – certainly stood out on the shelf at Trafalgar Wines.

Handmade

The 4.8% ABV beer, with its slightly unwieldy full name of ‘Hastings Handmade No 6 Hop Forward Pale Ale (Columbus)’, is very much a British take on a US craft beer. It’s defined by its use of Columbus, an American hop variety with a high alpha acid (around 15%), making it suitable for assertive bittering, 48 IBUs apparently. I suspect they’ve also used it for late-hopping (adding later in the boil, so it the oils aren’t totally broken down) or even dry hopping (adding during the conditioning stage so the oils remain largely intact) as the beer is highly aromatic: citrus, ginger, passion fruit, honey. The taste, while defined by massive bitterness, is also honeyed, with a salty, minerally aftertaste that verges on soapiness. [See below – actually they used a hopback.]

This beer really reminded us of our travels in the US, and while I have vague feelings of disloyalty to more traditional, malty, subtly hopped British beer styles when I drink something like this, I also love how British brewers are playing around with US styles. I love all the international cross-pollination of tastes and styles. The beer also went really well with our pizza, which I topped with mozzarella, thinly sliced pancetta from Beals Farm Charcuterie and a pecorino romano, for that added salty goodness.

I was hoping to add some asparagus but while I still saw plenty on the farmers’ markets a few days ago, guess what? Waitrose – nominally the less unethical British supermarket – only had asparagus from Peru! Southafeckingmerica!!! It’s asparagus season here – in England – right now, the end of the season sure, but still now. Now. In England. I’ve seen signs outside farms as I’ve cycled around Sussex, mere miles from that branch of Waitrose. Supermarket food economics is bonkers. Not to mention environmentally appalling.

Baked pizza

Sourdough pizza recipe
This makes one large-ish pizza, about 30cm (12 inch), but could cut up and manipulated differently. If you roll it flat, you’ll get a much more Roman-style pizza. If you open out the centre more and leave a wider, fatter edge, you’ll get a more Neapolitan-style pizza. The latter is called a cornicione and is the speciality of Michael Hanson at The Hearth in Lewes. Lewes, depressingly, has about four industrial chain pizza places; I’d say my pizza is better than all of theirs, easily, though still second-best in Lewes, after The Hearth.

This is a naturally leavened dough, so you want to make it the day before, to give it time to do a nice long fermentation.

250g strong white bread flour (or a mixture of strong, high protein flour and plain, all-purpose flour)
180g water
50g sourdough starter (100% hydration. I used a rye-based one, but wheat-based would be fine too)
15g olive oil (a good glug basically, QB)
5g salt

1. Whisk together the sourdough starter and water. It doesn’t matter if the water is cool, as it’s a long fermentation it doesn’t really need that boost of using body-temperature water. Try and use water that’s not too chlorinated or fluorinated. I filter my tap water with a Brita and the sourdough starter seems to prefer it.
2. Add the flour and salt and stir together well.
3. Add the olive oil and keep blending until well-combined.
4. Turn the dough out onto a work surface lightly greased with more olive oil and give it a short knead. It is a relatively wet dough. If you find it too sloppy, add a little more flour – but not too much or you’ll make a nasty dry dough.2
5. Put the dough back in the bowl, cleaned and oiled, and let it rest for 15 minutes before giving it another quick knead, stretching it and folding it over. Repeat this twice more, then put the dough back in the bowl, again, cleaned and oiled.
6. Cover the bowl with plastic wrap or a shower cap, and put it in the fridge and let it ferment slowly for about 24 hours.
7. Take the dough out of the fridge about an hour before you want to use it.
8. Form it into a ball on a floured work surface. Cover.
9. When you want to bake, preheat your oven to the highest setting.
10. Gently stretch out the dough. Don’t be too rough, or you’ll damage the structure that’d been developing during the fermentation period. How you open it up depends on what shape of pizza you’re making (see above).
11. Once you have opened up the dough to almost the desired shaped, gently transfer it to an oiled baking sheet, hanging it over your forearm and taking care not to poke your fingers through it.
12. Cover with your desired toppings. I did a pizza rossa – with tomato sauce – along with the abovementioned cheese and pancetta. Here’s the pizza before it went into the oven:

Unbaked pizza.
13. Bake in your preheated oven until it’s done. Yes, I know that’s vague, but it could be 10 minutes, it could be 25, with the oven turned down a little lower to make sure the middle of the base bakes and the top doesn’t char (too much).
14. Enjoy. Preferably al fresco with a quality, hoppy local beer.


Info
Hastings Brewery, 12 Moorhurst Road, Hastings TN38 9NB
hastingsbrewery.co.uk | info@hastingsbrewery.co.uk | 01424 572051


Trafalgar Wines, 23 Trafalgar St, Brighton BN1 4EQ
01273 683325


Footnotes
1 Some local ignorance – is the lion a Hastings thing? Maybe, as there are lions – or one lion and two half-lion/half-boat things – on the town’s crest.
2 The mixture is really 275g flour and 205g water, as the 50g of leaven at 100% hydration is 25g water, 25g flour. So this is a 74.5% hydration dough in bakers’ percentages. I’m using Stoates organic strong white bread flour; I find it quite absorbent, possibly as it’s stoneground and contains more bran. If you’re using a whiter, less branny flour that’s less absorbent, and

7 Comments

Filed under Ale, beer, Baking, British beer, Pizza, Recipes

Cornish saffron cake

Overhead

Last week, I spent several days down in north Devon, helping my father shift part of a 14 ton pile of gravel. It wasn’t our only activity though. I also counted 80 marsh orchids in their meadow; saw my first Leworthy lizard (was it lost? Surely it’s far too soggy there for a sun-loving reptile?), visited Holsworthy Ales and tried their new honeyed golden ale, Bizzy Buzzy (very pleasant on a sunny day, despite the infantile name and label); and I even saw my first ever British kingfisher, which shot underneath me when I was standing on a small footbridge over the river Deer. Plus, this being the Etherington family, I also did a lot of eating, include a requisite cream tea.

Scones and clotted cream

Normally, when visiting my folks in that part of the world we go for a meal at The Castle Restaurant, Bude, over the Devon border, on the Cornish coast. But sadly it closed down in October 2013 after a six-year run. It’s a real shame, as it was one of the only places serving real food in that area of north Devon/Cornwall. It’s also a wider shame there aren’t more real food places in that area, as it’s got an interesting food heritage. For example, Stratton, just inland from Bude on the way back to Holsworthy, used to be one of England’s key saffron-growing centres.

The saffron grown there would have been used in, among other things, Cornish saffron cake. This is an enriched bread, something like a yeasted cousin to English tea loaf (aka tea bread), though dyed (slightly) with the distinctive orange-yellow of saffron. In ‘English Food’, Jane Grigson says, “Saffron has always been expensive, even during the Middle Ages when it was at the height of European popularity for flavouring dishes, and even more for the colour it gave them. People liked their food to look gay, so that saffron… was found in every prosperous household.”

While in ‘English Bread and Yeast Cookery’, Elizabeth David says, “Among the most costly of spices used in early English cooking, and one which has survived – that is in our true native cooking – almost solely in yeast cakes and buns, is saffron. Originally treated as a colouring rather than a flavouring agent, it was used lavishly in sauces and for almost any category of dish, whether fruit, flesh, fowl or fish, sweet cream or savoury stew, whenever it was felt that a fine yellow colour would be appropriate.” She said its use died out through the 19th century – except in the West Country for buns and saffron cake. She suggests that when WWII deprivation forced people to replace saffron with annatto, they came to realise the former “was a very great deal more than just a colouring agent.”

Price spice
Saffron is the stigmas of Crocus sativus – Saffron crocus – which have to be harvested by hand. I imagine it’s backbreaking, slow work. The little pot I’ve got simply gives that frustratingly vague “Produce of more than one country”, which may mean India, Iran, Spain, Turkey, Morocco, Egypt, Spain, probably even China and perhaps even Greece, where the plant’s presumed wild ancestor (Crocus cartwrightianus) may have originated.

Grigson says, “It has been estimated it takes a quarter of a million flowers to produce one pound,” that is 454g. So if my little pot contained just 0.5g of stigmas, that’s still around 275 flowers (I think; maths isn’t my strong point). Sheesh. Or to look at it another way, if Waitrose Spanish saffron costs £3.99 for 0.4g, that’s £9.96 for 1g, for £9,975 for a kilo. The classic comparison is with gold, which at the time of writing costs about £24,000 per kilo (depending on carat).

Grigson also says the crocus was introduced to England in the 16th century and was still cultivated here until the practise died out at start of the 20th century. One enterprising grower did, however, start cultivating it in Essex again in 2001. His works out at £15 for 0.2g, or £75,000 a kilo. This is clearly a lot more than gold, but such high prices are a reflection the labour-intensiveness of a small scale operation in a first-world economy. I wonder if anyone grows it in Devon or Cornwall still? Or at least has Crocus sativus in their garden without realising the worth of its tiny red stigmas, despite how excruciatingly hard they are to extract.

For this recipe, I referred to the one in ‘English Food’ and another recipe from one of those little old-school ‘Favourite recipe’ books published by J Salmon Ltd (“Britain’s oldest post card and calendar publisher”). Despite the (somewhat haphazard) recipes, given with pounds and ounces only, and the cute watercolour wash illustrations, the books are a great repository of traditional British recipes. David also has a recipe, but I didn’t look at that till afterwards. In it she says one “valuable detail” she learned in her research was that “the little bits of saffron in the infusion which colours the cake are not strained out”. I hadn’t. They really help maintain the flavour, and just go to prove you didn’t use any old yellow colouring.

1 good pinch of saffron
A few tablespoons of boiling water
250g strong white bread flour
200g plain white flour
200g milk
7g instant yeast, or 20g fresh
100g butter
100g lard (or just use 200g butter)
1/2 t fine salt
60g caster sugar
1/2 t cinnamon
A few grates of fresh nutmeg
150g currants
50g candied peel

Saffron strands

1. In a small bowl, cover the saffron filaments with the boiling water and leave to infuse – for at least 5 hours, or overnight.

Saffron, infusing
2. Make a sponge or pre-ferment by mixing 150g strong white flour, the yeast and the milk, warmed to about body temperature. Don’t agonise about this. If it’s cooler, it’ll simply ferment slower. Just don’t get it too hot.
3. Let the sponge ferment until it’s nice and frothy.
4. In another, large mixing bowl combine the other 100g strong white bread flour and the 200g plain flour.
5. Cut the fats into cubes, then rub into the flour until it resembles breadcrumbs, more or less.
6. Add the salt, the sugar and the spices to the fatty floury mixture.

Ferment, flour mix and saffron infusion
7. Add the sponge along with the saffron and water to the floury mix.

Combine
8. Combine all the ingredients to form a dough. You want it moist; if it’s too dry, add a little more water or milk.
9. Give the dough a good knead, for 5 minutes or so, until it’s nice and smooth.
10. Stretch out the dough, add the dried fruit, then give it until gentle knead to distribute the fruit.
11. Form the dough into a ball and put back in the bowl, cleaned and oiled slightly.
12. Cover the bowl with a cloth or shower cap and leave to prove in a draught-free place until doubled in size. Time will vary depending on the temperature and the mood of your yeast.
13. Remove the dough and form it into a ball again, then rest this for another ten minutes or so.
14. Preheat your oven to 220C (200C fan oven).

Final prove
15. Form the dough into a baton and place this in a greased loaf tin. Cover it and leave to prove again, until it’s risen again and the dough re-inflates slightly when you push a finger into it.
16. Bake for about 20 minutes, then turn the oven down 20 degrees and keep baking for another 30 minutes. Watch it doesn’t colour too much – if it looks like it’s going to burn, cover it with foil.
17. Once baked, take it out of the tin and leave it to cool completely on a wire rack. (Or if you don’t mind a bit of indigestion, eat it while it’s still warm. Bakers don’t recommend this as a loaf that’s still warm is effectively still baking.)
18. Serve at tea time, generously buttered. It’s nice for breakfast or elevenses too.

Cut

Anyway, having done all that, I also subsequently noticed that David gives recipes for Cornish saffron cake and a Devonshire cake, a “variation” that can be made with one of my favourite foodstuffs – clotted cream. So I really ought to do that next time, considering my folks’ place is actually in Devon, and Fran, the missus, is a Devonshire girl. Although my mother’s mother was from a Cornish family (the Olivers of St Minver), and I developed a strong love of Cornwall after several childhood holidays, so I suppose I’m allowed to feel torn.

A note on the flour
I’ve just bought some supplies from Stoates in Dorset. Or “Stoate & Son / Established since 1832” as it says on their site, though I’ll overlook the grammatical strangeness as they’re producing quality stone-ground products using a proportion of locally grown grain. The site also says, “We take great care in selecting our wheat much of which is sourced locally but is always blended with a proportion of Canadian wheat to achieve an end product with consistent baking and eating qualities.”I contacted Stoates about the specific blend and Michael Stoate got back to me saying “The mix at present is about 65% local UK grain (Paragon spring wheat) and 35% Kazakhstan high protein wheat. This is giving a protein content of about 12.50% – 13.00%.”

Stoates flours

The Stoates white flours, being stone-ground and less heavily sieved retains more the bran than more industrially produced flours. It’s also not bleached. So it’s not so bright white, meaning my “white” loaves will never quite achieve that gleam like a Hollywood film star’s teeth. But they will be healthier and more wholesome.

6 Comments

Filed under Baking, Breads, Cakes (yeasted), Flour & grain, Recipes

Golspie loaf

Dan Lepard Golspie loaf

Over past several years, probably nearly a decade, my favourite bread book has been Dan Lepard’s ‘The Handmade Loaf’. A lot of the pics from this old Flickr set of mine are the results of recipes from the book. I had a lot of fun trying them, and the book was a real inspiration for me as I got more serious about baking. I thought I’d tried all the recipes, but looking through the book again the other day I found a few I’d missed. The Golspie loaf is one of them.

Dan explains it gets its name from a watermill in Suterhland, northern Scotland, which produces its own stoneground flours and meals. Before wheat became readily available, more common grains used for breadmaking in northern Britain were barley and oats. Traditionally, the round, flat bannock is made from oats or barley. The Golspie loaf is another disc-shaped loaf, with Dan’s recipe based on a barley or rye leaven (sourdough starter) and strong wholemeal flour. I’ve still got some of the Surrey wholewheat flour I used here, while my leaven has been mostly fed with rye lately. Dan’s recipe also used a little extra yeast, but mine’s wholly sourdough. I also added some oatmeal to the dough, as any addition of oats seems to result in a lovely most dough.

Dan Lepard Golspie loaf torn apart

350g leaven – mine was based on rye, but then fed on strong wholewheat flour and was 100% hydration (that is, made with equal proportions of water and flour)
210g water
6g salt
400g strong wholewheat flour
20g oatmeal (I used medium coarse)
Extra oatmeal to coat

1. Put the flour, 20g oatmeal and salt in a large bowl.
2. In a separate bowl, whisk together the leaven and water.
3. Pour the gloopy leaven and water mix into the flour and bring together a dough.
4. Cover and rest for 10 minutes, then give it a brief knead.
5. Cover and rest for 10 minutes, then give it another brief knead. Repeat this once or twice more.
6. Cover and leave the dough to prove. I did this in a cool cupboard over about 4 hours. You want it to prove up until it’s almost doubled in size. You can speed it up a bit in a warmer place, but a slower prove allows the flavour to develop more, and the yeast to work on the wheat proteins.
7. Lightly oil a 20cm springform cake tin and spinkle the inside with oatmeal.

Dough and tin
8. Form the dough into a ball, then flatten this into a disc.

In tin, before final prove
9. Put the disc of dough in the tin, and spread it to fill with your knuckles.
10. Sprinkle the top with further oatmeal.
11. Leave to prove up again. Again, how long this takes will depend on the warmth of the spot, and also the liveliness of your leaven.
12. Preheat oven to 220C (200C fan).

Before bake
13. When the dough is nicely risen, and reinflates slowly when prodded, cut two slices thrpough it in a cross shape, all the way to the bottom. (A metal scraper or cutter like this is very handy.)
14. Bake for 20 minutes, then turn the oven down by 20 degrees and bake for another 25 minutes. Baking times vary depending on your oven too but you want it nicely browned. If you have a fierce oven, check after about 30 minutes.
15. Turn out onto a wire rack and cool completely.

After bake

This is a real companionable bread – the cuts mean you can tear it easily into portions for sharing. Fran’s taken a quarter to work today with some of her salt beef, a project that’s been floating around in brine the past few weeks but was cooked up on Easter Sunday.

Salt beef sarnie

4 Comments

Filed under Baking, Breads, Recipes

Pasticcini di mandorle, soft almond biscuits

Sicilian almond pastries, biscuits

Alongside the renowned corporate outfit Cosa Nostra, Inc, the half-finished bridges, the bandy-legged hero cop (“Montalbano sono”) and its incredible history from Greeks and Phoenicians, to a Norman conquest around the same time as the 1066 one us English kids learned about at school, to said Mafia scrapping the nascent Italian state during unification, Sicily also is home to some of the world’s finest pastries and sweets. Or at least, I’m assuming it is – I’ve never been, but base my experience instead on Sicilian pasticcerie I frequented in Rome. Notable among them were Dagnino, an overpriced place near Termini station located in a wonderful 1950s arcade, and Sicilia e Duci on Via Marmorata in Testaccio.

The latter was a fairly regular stop for me as it was on my route home from Piramide and Porto San Paolo station, or from hanging out in Testaccio with Rachel and co. I’ve no idea if their wares are especially renowned, but they did it for me. In particular the various permutations of almond… thing. I never learned what they were called specifically, but looking now it seems such things made with a paste or dough of ground almonds are simply called Paste di mandorla sicialiane (Sicilian almond pastries) or Pasticcini siciliani alle mandorle (little Sicilian almonds pastries). So basically marzipan, and quite possibly a legacy of Arabic Sicilian food culture.

I can’t quite bring myself to call them cookies, as I’m English, but nor can I quite call them biscuits, as they’re not biscotti (“twice cooked”). If anyone Sicilian can tell me a more specific name, I’d love to hear it, as Google has failed me.

Plate, overhead

I believe more authentic (whatever the heck that means) recipes would use some bitter almonds, that is almonds of the strain Prunus dulcis var. amara (as opposed to sweet almonds, var. dulcis) that have a particularly distinctive flavour – and certain notoriety for containing traces of Prussic acid, aka hydrogen cyanide. But they’re not readily available in smalltown England, so I just went for normal almonds. In fact, I cheated – I should probably have freshly ground blanched almonds, but just used ground almonds instead.

Boy are they good. I’m eating one as I type, and it’s bringing back memories of indulging in a bagful from Sicilia e Duci.

They’ve got a chewy, slightly crisp crust, and a sweet, moist centre. Morbido is the Italian word. Moreish is another word. It’s probably one of those words that some conceited food writers say should be avoided, but, bollocks, I rarely, if ever, use it, so think I can get away with it here.

Makes 24*

290g ground almonds, or whole blanched almonds (see below).
110g granulated sugar
1/2 t vanilla essence
1/2 t almond essence
20g runny honey
2 egg whites (that is, about 64g)
Icing sugar

1. Preheat oven to 180C (160C fan oven).
2. If you’re using whole blanched almonds, put them in a food processor with 25g of the sugar. Grind to a coarse powder. If you’re using ground almonds, go to step 3. Do not pass Go, do not collect £200…
3. Combine all the ingredients in a bowl, working the mixture with your hands to combine. You want a soft, moist, slightly sandy paste
4. Form the dough into a ball.
5. Sieve icing sugar (aka confectioners’ sugar) onto your work surface.

Balls of almond paste
6. Weigh the ball of paste. It should be about 485g. Form the ball into a sausage, then cut off small portions, each weighing 20g (more or less).
7. Roll the pieces of paste into sausage shapes, about 10cm long and 1cm thick, coating them well with the sugar.

Shaping
8. Form these into shapes like the letter N, pinching the ends slightly.

Prebake
9. Place the shapes onto baking sheets lined with baking parchment, leaving a little space between them. They don’t expand much in the oven.

Baked
10. Bake for about 10 minutes until browning.
11. Sieve a bit more sugar over them.

Cooling

12. Scoff the lot.

Sugar shapes

* Recipe based on Biscotti alle mandorle amare found in ‘Biscotti: Recipes from the Kitchen of the American Academy in Rome’ by Mirella Misenti (an actual Sicilian) and Mona Talbot.

4 Comments

Filed under Baking, Recipes

Pizza cresciuta di Pasqua… Sort of.

Pizza cresciuta di Pasqua, sliced

You could say pizza cresciuta is an Easter (Pasqua*) equivalent of the traditional north Italian Christmas cake panettone. Pizza cresciuta is one the many distinctive Italian baked products I saw during our two years in Rome. I mentioned it last year in a round-up of Easter baked goods and baking, saying that the verb crescere means “to rise”, as in the word crescendo. I also mentioned that the word pizza means a lot more than just a topped dough disc in Italy. So this is a “risen pizza” (it’s also called pizza ricresciuta – “re-risen pizza”). I believe a cresciuta is also term for what we’d call a sponge or pre-ferment – yeast, water and some of the recipe’s flour mixed ahead of time to get the leavening going nicely. It’s a term that’s also applied, in Naples I think, for a yeasted batter. Anyone with more knowledge about this, please do comment!

In shape the pizza cresciuta di Pasqua I saw in Rome was more like a tall round cake – that is, like panettone. Except when it’s savoury. Looking at recipes online, most of them are an enriched dough with some spices, but there are even recipes online in Italian for cheesy versions.

As the ones I’d seen in Rome were always sweet, I wanted to try that this Easter. Though I’ll say now that this is one of those experiments that didn’t really quite exactly work. Blogging it anyway, as a record. If I do try to perfect it, I don’t think it’ll be until next Easter.

A lot of the recipes I found used spices – notably anise seed and cinnamon. Most of them also used some liquor, notably spiced or herbal liquers like Alchermes (aka Alkermes) and Strega. One recipe I saw even contained 100ml each of rum, vermouth, alchermes, cognac, and cointreau! But I thought this much strong liquor was sure to bugger things up with the yeast (I note now that that recipe uses “lievito paneangeli” – I think this is a kind of vanilla flavoured baking powder).

I couldn’t hope to get Alchermes and Strega, but was able to source a bottle of the latter from TwentyOne Wines in Brighton (thanks Philip, who opened up for me during his Easter holiday last week). I was also finally able to track down some aniseed – something I’ve not been able to source in smalltown Lewes, and really want for several other Italian recipes, notably aniseed-flavoured ciambelline al vino (ring biscuits often eaten with a digestivo after dinner).

So here’s my recipe. Tweaked slightly from the weekend’s effort, but to really work I think it’ll need more tweaking. If you do have a try yourself, or have a better recipe, again, please let me know.

Some ingredients

Liqueur
50g Strega
2 t aniseed

Sponge / pre-ferment, or cresciuta
100g strong white flour
100g water
10g fresh yeast

Dough
250g strong white flour
300g plain, all-purpose or type ‘0’ flour
6g salt
Zest of one lemon
Zest of one orange
1 t cinnamon
1/2 t nutmeg
5 medium eggs
2 t vanilla
300g caster sugar (seems a lot but vabé)
50g lard
50g butter

Aniseed in Strega

1. Put the aniseed in the liqeur and leave to macerate for at least 4 hours, preferably overnight.
2. Make a sponge with the yeast, the water and 100g of the the strong white flour.

Lively sponge
3. Leave the sponge to ferment, covered, in a cool, draft-free place overnight.
4. Lightly beat together the eggs, vanilla, zests, sugar, booze and other spices.
6. Melt together the lard and butter then allow to cool.
7. Add the melted fat to the egg and liqeur mix.
5. Put the rest of the flour in a large bowl, along with the salt, then add the wet mixture.

Slightly strange sticky pizza cresciuta dough action shot
6. Make a dough – a nice soft, wet, tricky-to-handle dough.
8. Give the dough three short kneads every 10 minutes over half an hour or so, forming a ball, returning it to the bowl and covering between each knead. (This is the very handy Dan Lepard method.)
9. After the final knead, put the ball back in the bowl, cover again, then leave to prove until doubled in size.
10. Form a ball and allow to rest for 10 minutes.
11. Tighten up the ball, then put it in a tall, deep tin (it could be an old food tin, which is what I did when I made panettone, though note – not one with plastic lining), or in a paper panettone case. I used the latter, which are available from Bakery Bits.
12. Leave to prove up again. Ideally you want it to double in size and feel nicely inflated. Hm. See discussion below.
13. Preheat the oven to 220C (200C fan oven).
14. Brush the top of the dough beaten egg. I didn’t bother as, frankly, my dough didn’t look great.
15. Bake the pizza for about 20 minutes, then turn down the oven by 20C.
16. Test to see if it’s done with a knock on the bottom. Hm. See discussion below.
17. Allow to cool completely on a wire rack.

Pizza cresciuta di Pasqua. Sort of.

Eat for your Easter Sunday breakfast. In Rome, the pizza cresciuta is eaten for Easter Sunday breakfast with corallina salami. We had this one for breakfast, even though I was disappointed with the results. And couldn’t get corallina.

I knew it was going wrong when the dough seemed sluggish for the final prove. There was some (very irregular) oven spring, but I knew it was going even wronger when I first took it out of the oven – it just felt hefty, not light like a panettone. I had the oven set too low originally, and it baked too slowly, and ended up both dense and thick-crusted.

Easter Sunday breakfast - Pizza cresciuta di Pasqua

The taste was interesting though, thanks to the Strega, which features saffron, mint and fennel among its many ingredients, and the aniseed. Though I do wonder about the Strega. Certainly yeast produces alcohol alongside CO2 when it’s active in the dough, but not too much alcohol, or the presence of strong alcohol retards the action. Scratching my head about this today, I found one comment at Delia Online (here) that says “Baker’s yeast is tolerant to alcohol to about 3%. That’s 3% C2H5OH [ethanol] by mass. Brandy is about 40% C2H5OH.” I’m not sure my 50g Strega could really retard the yeast quite so much, but clearly something was awry. My proving times were quite possibly problematic too. And  I suspect all that sugar might have been a factor in affecting the activity of the yeast too.

Anyway, next time I try it, I might adapt my attempt at panettone a few years ago, which was much more successful, and go easier on the strong liquor too. Fun experiment anyway even if the result is slighty heavy duty. We had a load more for Easter Monday breakfast earlier, and it was pretty good toasted.


* While the English word for Easter comes from the name of a pagan goddesses – the Anglo-Saxon Ēostre – the Italian word relates to the word Passover, which comes from Pesach and the Hebrew pesah and pasah.


4 Comments

Filed under Baking, Other food, Pizza, Recipes, Rome

Hot cross buns, Easter 2014

Hot cross buns 2014

It’s Good Friday, and there’s a very interesting story in our local paper today. I’ve eaten hot cross buns on and off all my life but learned a few new facts from Kevin Gordon’s piece in the Sussex Express. These sweet, fruity buns, with their cross-shape commemorating the crucifixion of Jesus were traditionally baked “in preparation for the end of Lent on Easter Saturday.” Okay, that I knew, despite how much crass British supermarkets might start promoting them pretty much straight after Christmas these days.

Gordon continues though: “It was often a tradition that one bun would be saved until the following Easter for good luck. A hot cross bun hung up in your home would protect if from fire until the following year. It was thought that hot cross buns baked on Good Friday would never go mouldy.”

Note – this is quite a sticky dough, something that can intimidate less experienced bakers. I recommend you read my tips for handling sticky doughs here.

Makes 16

Sponge/pre-ferment:
140g strong white flour
18g fresh yeast (so about 9g ADY, 6g easy-blend yeast)
150g water

Dough:
320g strong white flour
6g salt
55g light soft brown sugar or light muscovado
55g butter, melted
1 egg, beaten [approx 58g beaten egg]
125g milk
3 t mixed spices – cinnamon, nutmeg, mace, allspice, ginger. Whatever you like
85g peel
85g currants, sultanas or raisins

For the crosses:
60g plain flour
40g water
10g veg oil
Pinch of baking powder

1. Combine the 140g flour, yeast and 150g of water to make a starter, sponge or pre-ferment. Leave to ferment overnight in a cool place or the fridge (but take it out in plenty of time the next morning). Alternatively, leave it in a warm place for a few hours.
2. When the sponge is nice and bubbly, get started on the rest. Mix flour together the flour and salt.
3. Melt the butter.
4. Warm the milk to about body temperature. You can infuse it with Earl Grey tea if you like. If you’re using tea bags, don’t forget to remove them!
5. Add the sponge to the flour and salt.
4. Mix together the melted butter, milk, sugar, beaten egg and spices then add this to the flour too.
5. Bring the mixture to a dough. Turn out the dough and knead for a few minutes. Once you’ve formed a ball, put it back in the bowl, cover and leave to rest for 10 minutes.
6. Stretch out the ball, add the fruit, then fold over the dough, and knead it again to mix in. Form another ball, then cover and leave to rest for another 10 minutes.
7. Give the dough another brief knead. Rest for another 10 minutes then do a final knead.
8. Put in a clean bowl, covered, and leave to prove until doubled in size – perhaps two-three hours, depending on your room temperature.
9. When it’s proved, weigh it. It should be about 1100g. If it’s not, either I’ve cocked up or you have.
10. Divide the dough into 16 equal pieces, weighing about 70g each. Or go larger, 13 at about 85g (a baker’s dozen).
11. Form the pieces into neat, tight balls.
12. Place the balls on baking sheets lined with parchment then cover and leave for a final prove. Again, this will maybe take two hours, depending on ambient temperature.
13. Preheat the oven to 200C.

Piping crosses

14. Mix the cross batter; you want a fairly thick gunk. When the buns are proved, pipe crosses onto them. Mine were a bit messy this time… Hey, it’s artisan, rustic…
15. Bake for 12-15 minutes, or until nicely browned – this will depend on your oven.
16. Optional: while still warm, glaze with stock syrup – made from half/half water and caster sugar, about 50g each, heated to dissolve.

Enjoy for a Good Friday afternoon tea, or similar. The in-laws have arrived and we scoffed several for afternoon tea. Not sure if any will survive long enough to test the theory about them never going mouldy.

Bakers’ percentages

Note – the total flour is 460g, 140 in the sponge, 320 more in the dough, that is 30% and 70%.

Ingredient Percentage Quantity (g)
Flour (sponge) 30% 140
Flour (dough) 70% 320
Water 33% 150
Milk 27% 125
Egg 13% 58
Yeast (fresh) 4% 18
Salt 1.5% 6
Sugar 12% 55
Spice 2.5% 12
Butter 12% 55
Peel 18.5% 85
Currants 18.5% 85
TOTAL 242 1109

2 Comments

Filed under Baking, Cakes (yeasted), Recipes

Real bread, red bread

Sliced, morning sun

The expression “the best thing since sliced bread” is profoundly ironic. Grain is packed with nutrients, but plastic wrapped sliced “bread” is generally made with flour that’s been ground with hot steel rollers, which damage and degrade the nutrients, and then baked with the Chorleywood Bread Process (CBP), a heinously misguided mechanisation of the bread-making process developed in England in the 1950s.

All that sliced, plastic-wrapped pseudo-bread they sell in supermarkets and cornershops is CBP product. It’s not bread. It’s an insult to bakers, to our baking heritage, to the farmers who husbanded grain over the centuries. It’s an insult to our constitutions.

And yet the CBP “is responsible for over 80% of the bread [sic] produced in the UK and is used in every corner of the world.” (From Campden BRI.)

One of the reasons the CBP was developed and became so dominant was because the British population grew so fast in the industrial revolution we couldn’t grow all our own grain, and became reliant on shipments, especially from parts of the then British empire, notably Canada, as well as the US. Since the late 19th century, British bakers also began to prefer using the harder, higher protein wheats grown in such places. Or perhaps prefer isn’t quite the right work. As clearly it was economics that made British bakers shift from using British wheat to using North American wheat. Discussing the sheep and arable farming on the English South Downs, Fizz Carr says, “As the new rail-roads across America linked the grain belt of the Mid-West with the eastern seaboard ports, grain started to flood into Britain and the price of wheat tumbled. The cost of shipping wheat between New York and Liverpool fell by half between 1830 and 1880, and by half again from 1880 to 1914…” 1

A story, or myth
I’d always been lead to believe that the CBP was developed as two world wars, and a dependence on shipped grain, had seriously compromised British food security. The scientists at the British Baking Industries Research Association at Chorleywood wanted to both mechanise the bread-making process, making it faster (perhaps their greatest folly, see below) and wanted to be able to ease reliance on higher protein foreign wheats. They wanted to make bread again from the soft, lower protein wheats we could grow in Britain.

Flour

Or at least, that was the story. It’s one that’s regularly trotted out, such as here, on the site of one of Britain’s biggest organic flour brands. But last weekend I bought a bag of flour from the market stall of Imbhams Farm Granary. It was their latest batch of wheat flour, called Surrey Red Strong Bread Flour. (It’s called red because of pigments in the bran.) It was grown in Surrey, about 50 miles from Lewes, stone-ground to retain the nutrients at a mill a mile from the fields and, notably, very high in protein.

Surrey strong info

The info sheet said 17%, James Halfhide of Imbhams quoted a figure slightly higher, and said it would be even higher if they sifted more of the bran out to make a lighter coloured, less wholegrain flour. For comparison, low protein plain or all-purpose flour might be 10-12%, strong bread flour about 13% plus.

It’s Barlow wheat, a hard spring wheat developed recently2 in North Dakota in the US, but James said it grew very well here, especially in the excellent 2013 season. Which quite shocked me, after years of hearing the story – nay myth – that British wheat means low protein.

Wholesomely wholegrain
Although I like and make all sorts of bread, as the Imbhams farm flour is so wholesomely branny – and wheat bran is a great source of fibre, fatty acids, iron and other minerals and vitamins – I wanted to make a 100% wholegrain bread. I also wanted to reduce the amount of yeast I usually use (10g to 500g of flour, or 2%, to about 6g to 500g of flour, or 1.2%) and do a longer fermentation – that all-important factor of bread production that the CBP neglects. Wheat needs long fermentation to be fully digestible – this whole rushed factor with CBP is the main reason so many people say they have dietary problems with wheat-based products these days.

Bread and butter

Wholegrain red wheat bread
500g Surrey Red strong bread flour or similar strong wholegrain wheat flour
350g tepid water
6g fresh yeast (so use about 3g instant/easyblend, 4g granular/ADY)
10g fine salt

This is all you need to make real bread – these four ingredients. Indeed, arguably, you don’t even need commercial yeast, you could just cultivate your own leaven with flour and water and wild yeasts.

1. Dissolve the yeast in the water.
2. Put the flour and salt in a large bowl.
3. Add the yeasty water.
4. Bring together a dough.
5. Knead briefly then form a ball and leave to rest in the bowl, covered with a shower cap or cloth.
6. After 10 minutes, knead briefly again.
7. Rest, covered for another 10 minutes then knead briefly again.
8. Repeat this once or twice more.
9. Put the ball of dough back in the bowl, cover and leave to prove in a cool place. I gave mine a turn (that is, stretched and folded it) after an hour or so, then put it in the fridge for about 10 hours.
10. Remove from the fridge, form a ball, then rest for another 10 minutes.
11. Form a baton shape and put in a tin.
12. Give it a final prove, until about doubled in size and ready to bake. This is where mine went a big wrong (see below).
13. Bake at 220C for about 15 minutes then turn down to 200C and bake for another 25 minutes.
14. Remove the loaf from the tin. Tap the bottom – you want it to sound hollow. If you get a bit of a dull thud, put it back in the oven for another 10 minutes without the tin.
15. Remove and leave to cool – to allow the interior to finish its baking process – on a wire racking.

So yes, I goofed slightly with the final prove, step 12. I left it a little long in the airing cupboard at about 24C, overproving it so that it deflated when I slashed the top and I didn’t get a nice oven-spring (that is, the final burst of yeast activity and dough growth when you put it in the oven).

Proved. Over proved

Deciding when the dough has proved enough and is ready to bake can be tricky. Many people say the to test is gently prod the dough and see if the indentation remains, but I’m not convinced by this, as it might indicate the dough is over-proved and the gluten structure is collapsing slightly. I think it’s better if your prod marks slow re-inflate. It’s not an exact science though and every dough is different, especially with different flours. There’s a good discussion here.

I might have been disappointed with the over-proving and lack of oven spring, but it’s still good stuff. Hearty and slightly nutty. It went very well with a tasty a soup (gurnard, smoked paprika – yum) I made for dinner last night and with Marmite for breakfast. And, compared to how sick, how utterly sullied, you might feel after eating a CBP product, I felt thoroughly brimming with nutrients after eating this.3


Footnotes
1. ‘Good Food and Drink in Sussex’, Fizz Carr, Snake River Press, 2008. It’s a nifty little book for those of us living in Sussex and interested in its food heritage. I wish she’d quoted her sources though, as I’m intrigued about these figures and this whole transformation of British agriculture in the late 19th and early 20th centuries.
2. So yes, it’s hardly a heritage variety of Triticum aestivum, bread wheat. But it’s locally grown, locally stoneground.
3. Yes, of course I’m imagining I can feel the nutrients going into my body, but it did just feel good and wholesome. I haven’t eaten CBP products of years, but remember feeling bloated and sluggish and sick and gastrically stuffed up when I did.

4 Comments

Filed under Baking, Breads, Recipes